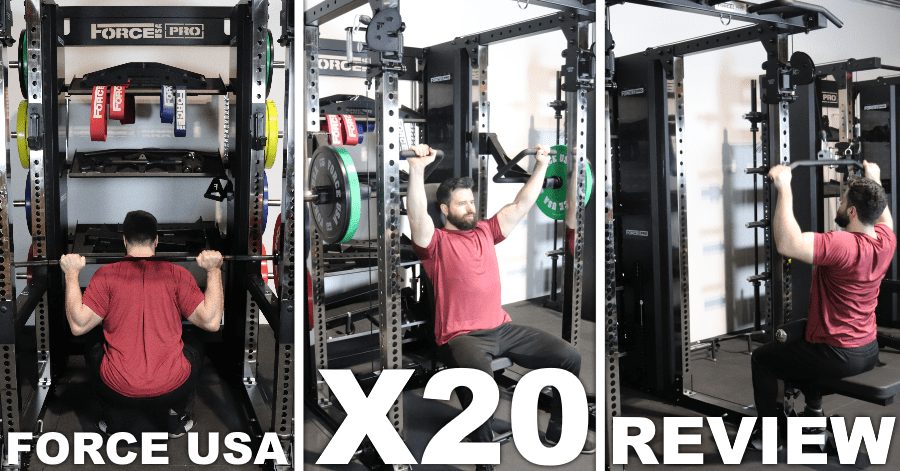
This Force USA X20 review will cover everything you need to know about this beefy new “multi-trainer” that features a power rack with an integrated cable system.
| Model | Pros & Cons | Rating |
|---|---|---|
Force USA X20 Multi-Trainer | Pros:
| Rated 4.8 out of 5 in Multi-Trainers |

Quickly, I’ll list out my favorite highlights of the Force USA X20 Pro Multi-Trainer, which I’ll refer to interchangeably as the X20 and X20 Pro throughout this review:
- Full power rack with heavy-duty 3”x3” 11-gauge steel uprights and 1” holes
- Functional trainer featuring dual 289 lb selectorized weight stacks with a 2:1 pulley ratio
- Multiple attachments/exercise stations: The base unit is a 6-in-1 multi-trainer, which can expand to a 9-in-1 multi-trainer with the optional upgrade kit
- The optional upgrade kit includes jammer arms, lat pulldown seat w/leg holder, storage shelves and more
- Relatively tall at 92”, which makes seated lat pulldowns accessible even for taller lifters
The X20 is very similar to the X15, which I’ve also tested. The X15 has a half rack instead of a power rack, which makes it more compact. I’ll compare both units more thoroughly later on.
Keep reading to find out if the Force USA X20 Pro is right for your training needs.
I’ll go in-depth on all the features and specs. I’ll tell you what I like and what can be improved.
I’ll also compare the Force USA X20 Pro Multi-Trainer to the popular Force USA G-Series All-In-One Trainers.
RELATED:
- Force USA X15 review
- Force USA G3, G6, G9, G10, G12, G15 & G20 review & comparison guide
- Force USA C20 review
Table of Contents
What Comes with the Force USA X20 Pro Multi-Trainer?
The Force USA X20 Pro Multi-Trainer is sold as a base unit. You can choose to purchase an optional upgrade kit to get more attachments.
I’ll tell you what’s included in the base unit and the optional upgrade kit so you can decide whether or not it makes sense to upgrade.
Force USA X20 Base Unit
The Force USA X20 base unit is a 6-in-1 gym. It comes standard with the following exercise stations:
- A full power rack (6-post fully enclosed rack, including a weight storage area in the rear, behind the weight stacks)
- Includes sandwich j-hooks, flip-down safety spotters, safety spotter arms, band pegs, barbell collars
- Functional trainer
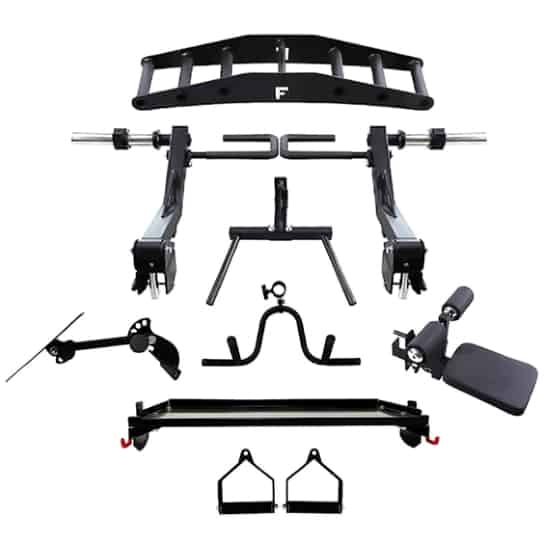
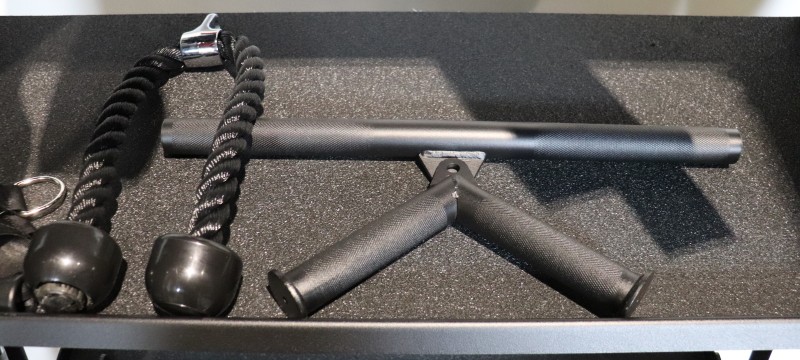
- Includes 2 x 289 lb selectorized weight stacks with a 2:1 pulley ratio, 2 exercise charts, 2 extension chains, 7 carabiners and 8 different cable handle attachments. The accessories include the following:
- Long Straight Bar
- Short Straight Bar
- Lat Pulldown Bar
- Triceps V-Bar
- Close Grip Row Handle
- Triceps Rope
- Nylon Stirrup Handles
- Ankle Cuff
- Includes 2 x 289 lb selectorized weight stacks with a 2:1 pulley ratio, 2 exercise charts, 2 extension chains, 7 carabiners and 8 different cable handle attachments. The accessories include the following:
- Low row station
- Includes a removable steel low row footplate attachment to do cable rows on the functional trainer. You can install it on either foot of the rack in front of the upright.
- Chin up station
- Includes both a multi-grip chin up bar and a straight chin up bar
- Landmine / Core trainer station
- Includes a removable landmine that you can install on either of the front feet. Also includes a t-bar row landmine handle.
- Suspension trainer station
- Includes a sturdy ring on the upper front crossmember where you can hang a suspension trainer or other equipment.
The X20 base unit also comes standard with the following storage features:
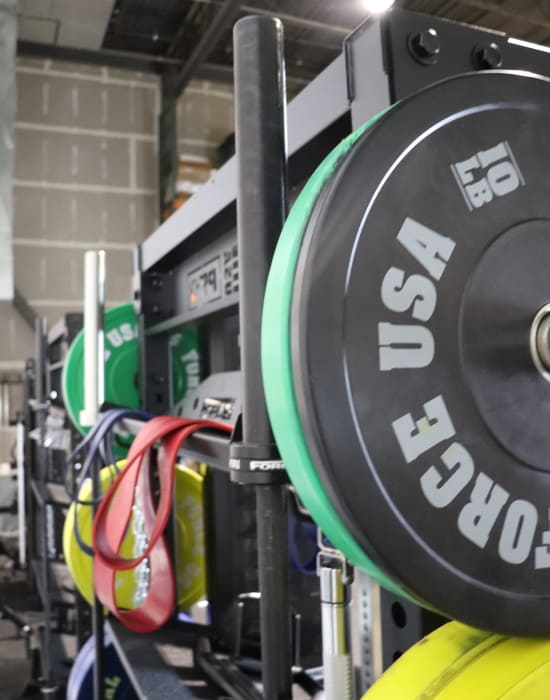
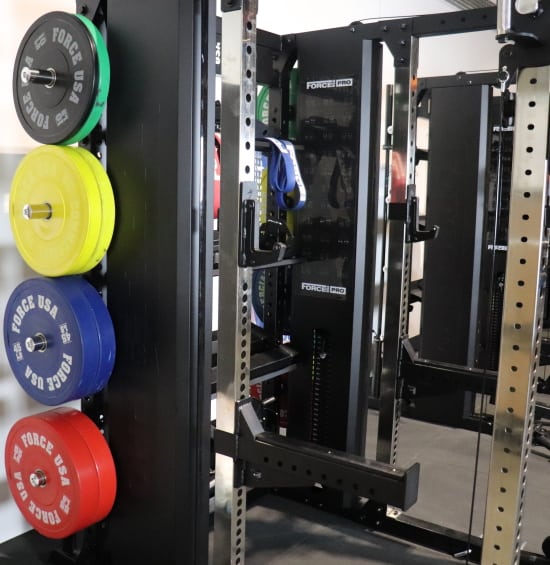
- Plate Holders
- Includes 8 weight plate storage pegs
- Barbell Storage
- Includes 2 vertical barbell storage sleeves on the rear of the unit, on top of the rack’s feet
Force USA X20 Optional Upgrade Kit
You can upgrade the X20 base unit from a 6-in-1 multi-trainer into a 9-in-1 multi-trainer by purchasing the optional upgrade kit. If you do this, you’ll gain access to these exercise stations:
- Lat pulldown station
- Includes a sturdy lat pulldown seat (with an adjustable leg holder pad) that attaches to either upright, allowing you to do seated pulldowns on the functional trainer
- Jammer Arms
- Includes a set of jammer arms that can attach to any of the rack holes so you mimic a variety of plate-loaded Hammer Strength-style machine exercises
- Dip station
- Includes a Matador (Y-dip) style dip bar that attaches on a single upright at whichever height you choose
There are a few supplemental accessories that come with the optional upgrade kit, including:
- Metal Stirrup Handles (cable attachment)
- Multi-Grip Lat Pulldown / Row Handle (cable attachment)
- Multi-Grip Landmine Handle (landmine handle attachment for t-bar rows)
The optional upgrade kit also comes with a couple of useful storage features:
- Storage Shelves
- Includes 4 storage shelves measuring 38”x16.5”. They install in the rear of the unit. Each shelf has 2 storage hooks on the back.
- TV mount
- Includes a TV mount that can hold a TV as large as 32” for your entertainment needs
Dimensions
I’ll include all of the relevant dimensions of the Force USA X20 below. Be sure to pay extra attention to the height and footprint dimensions to make sure the rack will fit in your space.
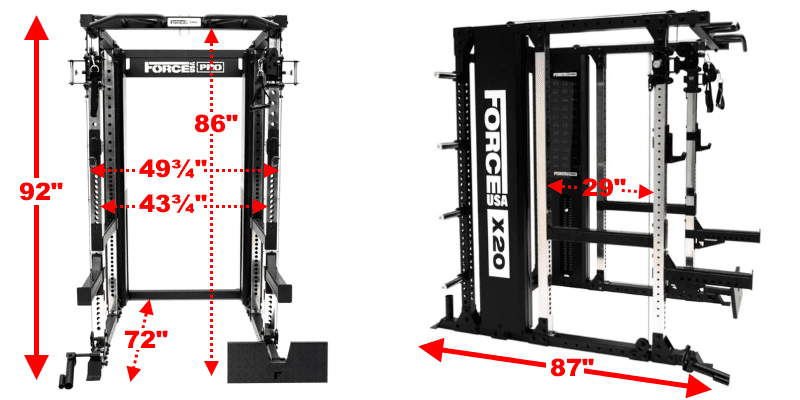
- External Rack Width (Outside Uprights): 49 ¾”
- Internal Rack Width (Between Uprights): 43 ¾”
- External Rack Depth (Outside Uprights): 35”
- Internal Rack Depth (Between Uprights): 29”
- Internal Working Depth (Lower Rear Frame Support to Front Feet): 72”
- External Rack Height: 92”
- Internal Rack Height: 86”
- Total Unit Footprint: 87” D x 49 ¾” W
- Unit Weight: Approx. 1500lb lbs (X20 base unit weighs 1600 lbs with all packaging materials, which are estimated to weigh around 100 lbs)
Minimum Space Requirements
The physical space that the Force USA X20 takes up only tells you so much. You also need to take into account the extra room you need to add/remove weights and perform exercises.
These are my minimum space recommendations for practical use:
- At least 1 foot of clearance on either side of your barbell. Most barbells are approximately 86 inches (7’2”) long, which means your space should be at least 9’2” wide.
- No clearance is required in the rear. You can position the rack feet right against the wall and still have enough space to use the plate storage and bar storage.
- 5 feet of clearance in front lets you do every barbell and cable exercise. You may need up to ~7-8 feet to do landmine exercises straight out in front of the rack, though you could always angle the landmine bar to the side if you have less room.
- 10” of clearance above the chin up bar to do chin ups without hitting your head. This means your ceilings should be at least 100.75” (8’4.75”) if you’re using the multi-grip chin up bar or 99.5” (8’3.5”) if you’re using the straight chin up bar. If your ceilings are shorter, you may be able to fit the unit but you won’t be able to do full ROM chin ups.
Force USA X20 Review: Features
Now, let’s get into the nitty-gritty details of this Force USA X20 review. In the sections below, I’ll give you my in-depth take on every feature. Let’s go!
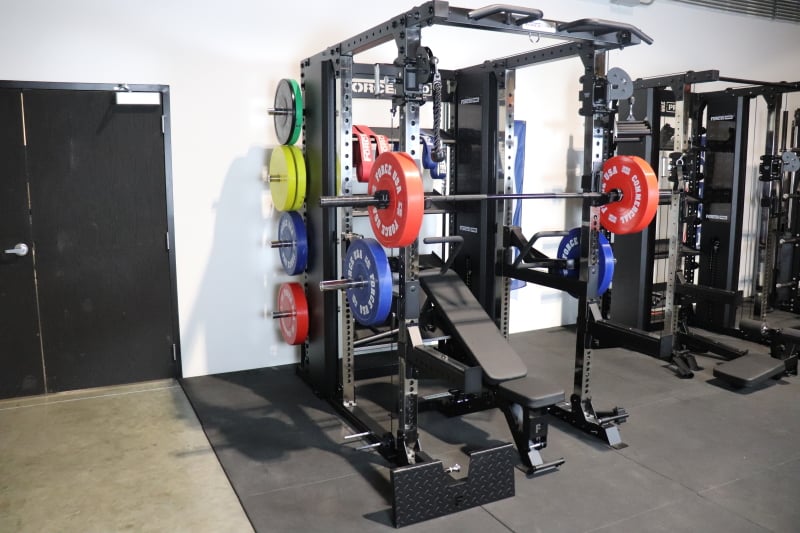
Space-Saving Design
The Force USA X20 Pro Multi-Trainer is a space-efficient multi-gym.
It’s not quite as compact as the Force USA G-Series All-In-One Trainers since those have more exercise stations packed into a smaller footprint. Plus, the G-Series units have a half rack instead of a larger power rack like the X20.
Even so, the fact remains that the X20 gives you all the capabilities of a power rack (including multiple attachments) and a functional trainer (including a low row and lat pulldown) in a similar footprint as a dedicated power rack.
Buy the Force USA X20 – Use KING5 for 5% OFF »
To replicate the functionality of the X20 with traditional, specialized equipment, you’d need at least the following pieces:
- A dedicated power rack
- A dedicated functional trainer
- A dedicated lat pulldown/low row machine
All of the above equipment would take up at least twice the floorspace as the Force USA X20.
A lot of people just don’t have that amount of extra space. Or if they do, they may prefer to use it for other equipment.
If you like the compactness of the X20, but it’s still a bit too big for your space, I recommend downsizing to the X15. It’ll save you about 30” of depth vs the X20.
High-Value Design
Let me be clear. The Force USA X20 Pro All-In-One Trainer is not a low-cost piece of equipment. However, it does offer a lot of value in the form of:
- A space-saving design that fits a power rack and functional trainer in a compact footprint
- Heavy–duty build quality with lots of thick and strong steel that can handle all you can throw at it
- Several versatile attachments that expand your exercise selection and give you access to all the popular movements
- Ease of use by having a rapid-change selectorized weight stack system instead of a plate-loaded system
So you pay a lot, but you also get a lot.
While it may be possible to save money by buying a separate power rack, functional trainer and lat pulldown/low row tower – especially if you go for more budget versions – you miss out on the #1 most valuable feature in my opinion: space savings…
…As any home gym owner knows, space is the most important thing in your gym.
Versatile Design
The Force USA X20 is a super versatile multi-trainer thanks to having:
- A power rack
- A functional trainer
- Multiple attachments (for both the power rack and functional trainer) that effectively create several more exercise stations.
If you purchase the base unit, you get a 6-in-1 gym that gives you access to an estimated 200 exercises. If you go for the optional upgrade kit as well, you get a 9-in-1 machine that gives you access to 225+ exercises!
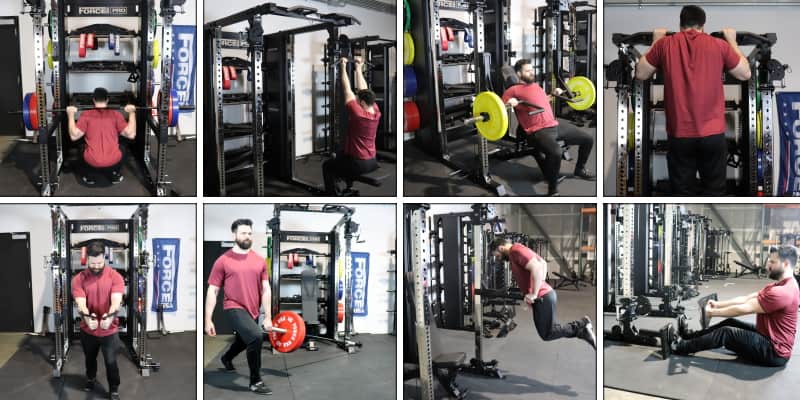
Here’s an overview of the exercise possibilities for each station:
- The power rack gives you access to 40+ barbell exercises. This includes any movement that requires a barbell and where having j-hooks or spotter arms would help with safety or convenience. This includes everything from squat and bench to curls and shrugs and everything in between.
- The functional trainer lets you do at least 75 cable exercises and probably many more than that. Each pulley has a whopping 34 height settings, so you can hit the precise angle you want on any unilateral or bilateral cable movement. Cable flyes, curls, pushdowns and lateral raises are some of my favorites, but that’s just scratching the surface.
- The lat pulldown station makes it possible to do 9+ lat pulldown variations including different combinations of grip width (narrow, medium, wide) and different hand positions (pronated, supinated and neutral). You can do all of these lat pulldown exercises on the base unit. However, it’s much more convenient if you get the upgrade kit so you have the lat pulldown seat attachment which attaches to the power rack upright and has an adjustable leg holder.
- The low row station gives you access to 9+ cable row variations including different grip width (narrow, medium, wide) and grip orientation (pronated, supinated and neutral) combinations. The footplate attachment ensures rock-solid stability and keeps you from sliding forward even when rowing heavy weight.
- The jammer arms, which are part of the optional upgrade kit, unlock access to 20+ lever-style machine exercises. These movements mimic the exercises you can do on the Hammer Strength machines you’ll find at any commercial gym.
- The multi-grip chin up station has a combination of straight, perpendicular and diagonal segments that allow for different grip widths and different grip positions (e.g. supinated, pronated, in-between). This configuration makes it possible to do at least 12 pull up variations. The straight chin up bar makes it possible to at least 5 basic pull up variations (i.e. any combo of supinated or pronated grip with a narrow, medium or wide grip).
- The core trainer station makes it possible to do 30+ landmine exercises. Most of these are core and shoulder movements, such as landmine rotations and landmine presses. Though, you can do many other movements, including t-bar row variations if you get the multi-grip landmine handle attachment that’s part of the upgrade kit.
- The suspension trainer station provides a sturdy and perfectly positioned point to attach a suspension training unit like the TRX, which you must buy separately elsewhere. This opens up 80+ suspension trainer exercises, which use your bodyweight for a different form of resistance training. Alternatively, you can use the suspension trainer to hold a heavy bag or to hang resistance bands for band-assisted dips.
- The dip station, available as part of the optional upgrade kit, gives you access to 2+ dip variations. The most obvious variations include wide and narrow grip dips, but there are many other less conventional dip variations possibilities.
Commercial Build Quality & Lifetime Structural Warranty
The Force USA X20 Pro All-In-One Trainer is built like a tank. It uses the commercial quality standard of 3”x3” 11-gauge steel tubing for all of the frame components including the:
- Uprights (power rack uprights and pate storage uprights)
- Crossmembers
- Feet
On top of that, it features a high quality, super smooth selectorized weight stack system.
And while there are a few design details I think could be improved (which I’ll cover later), this is indeed a commercial quality offering. Force USA even advertises it for use in commercial facilities.
That said, I don’t think it would be ideal for a Globo Gym setting because it’s designed for saving space in smaller environments. Plus, it has lots of different attachments that could go missing or be abused in high-traffic gyms.
However, there are several commercial applications where the Force USA X20 makes sense:
- Small commercial gyms
- Small athletic facilities
- Personal training studios
- Sports-focused physical therapy clinics
- Apartment or hotel gyms
- Cop or firefighter gyms
Of course, the #1 place I see the X20 being used is in home gyms. But the point is that it’s a sturdy piece of equipment regardless of if you’re using it at home or in a limited commercial setting.
Force USA backs the X20 with a lifetime structural warranty. It provides 2 years of warranty coverage on all cables and pulleys. There is a 90 wear and tear warranty for all the rack attachments.
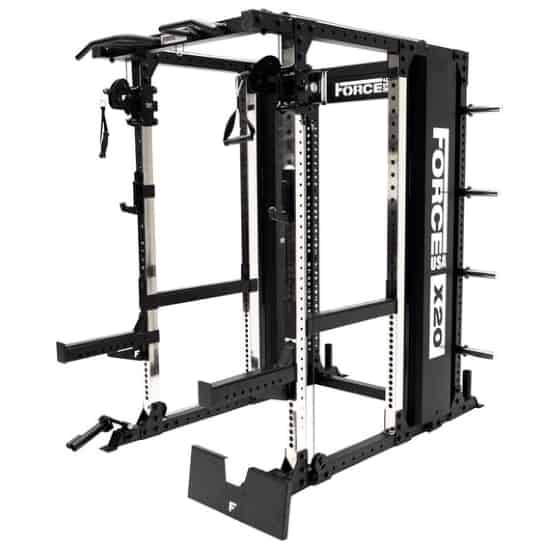
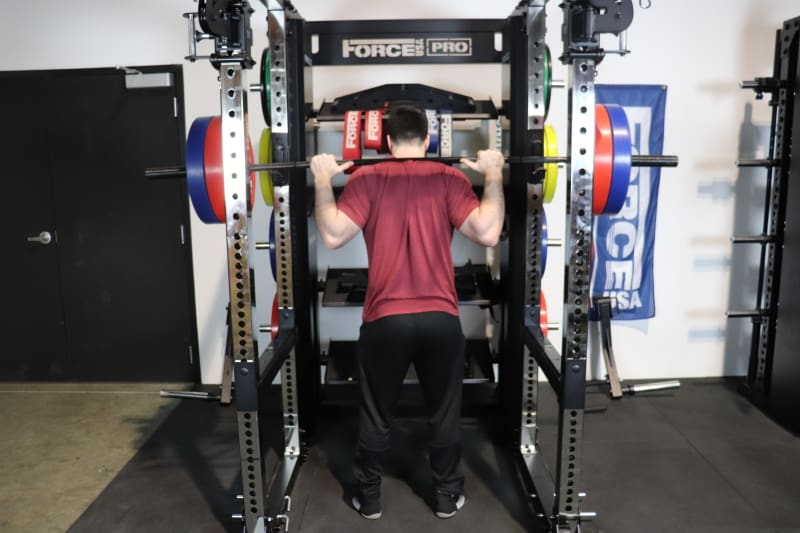
Power Rack
Buy the Force USA X20 – Use KING5 for 5% OFF »
The Force USA X20 has a power rack, which is a fully enclosed squat rack.
As mentioned already, this is the main difference separating it from the X15, which has a half rack, or an open squat rack.
The big advantage of a half rack vs a power rack is space savings. However, there are a few compelling advantages of a power rack over a half rack:
- It provides a little bit more safety because you have uprights in both the front and back, which will stop you in the unlikely event of tripping forward or backward during squats.
- You can have 2 exercise stations set up at the same time: One inside the power rack and one outside. For example, you could have the inside configured for bench press and the outside set up for lat pulldowns. This is great if you’re doing supersets, circuit training or just want to reduce the time between exercises. It also makes training with a partner more feasible.
- The power rack’s flip-down safety spotters are somewhat stronger than the half rack spotter arms because they’re connected between 2 sets of uprights. This is only a minor advantage since the half rack spotter arms can handle more weight than you need.
- At least in the case of the X20 vs the X15, the X20 power rack has band peg holes on the feet. Whereas, there are no band peg holes on the X15’s feet; the feet would need to extend further forward if this were to be a possibility. So this means you can add band resistance to barbell or jammer arm exercises on the X20, but not on the 15.
Here are a few of the many barbell exercises you can do on the Force USA X20 power rack:
- Flat Bench Press
- Incline Bench Press
- Close Grip Bench Press
- Overhead Press
- Push Press
- Squat
- Front Squat
- Split Squat
- Reverse Lunge
- Good Morning
- Rack Pull
- Rack Clean
- Shrug
- Power Shrug
- Biceps Curl
Just to be clear, you’ll need to have your own barbell, weight plates and flat or adjustable weight bench to use the power rack on the X20. These items are not included in the purchase.
Power Rack Frame
The entire frame on the Force USA X20 is constructed from 3”x3” 11-gauge steel tubing, including the uprights, feet and crossmembers. This is what makes the frame commercial grade. It’s the same as what you’ll find on high-end racks from big companies like Rogue, REP and others.
It has a hefty 992 lb weight capacity rating. In case you’re wondering why it’s not a nice round number like 1,000 lbs, it’s because the capacity was tested at 450kg and then converted to pounds.
I’m confident the true weight capacity rating is notably higher than the stated amount because the G-Series units have the same rating despite having smaller 2”x2” uprights and significantly less robust spotter arms.
Power Rack Dimensions
The external width of the power rack is 49.75”. This is the distance from the outside of the left upright to the outside of the right upright.
This is a bit wider than most 3”x3” power racks on the market. For example, 3”x3” racks from Rep and Sorinex racks have a 47” external width. The Titan Series racks are 48” wide. And the Rogue Monster racks have a 49” external width.
The main issue with external width is that you don’t want it to be too wide that you have trouble racking and unracking the barbell because the bar collars bump into the j-hooks…
…Usually, this becomes an issue around 49” of width at least when using standard j-hooks. The X20 is wider than this at 49.75”. Luckily, I didn’t have trouble racking and unracking the bar. This was because the X20 has sandwich j-hooks, which have a narrower racking surface relative to the width of the uprights. This gives you about an inch of clearance on the outside of each j-hook.
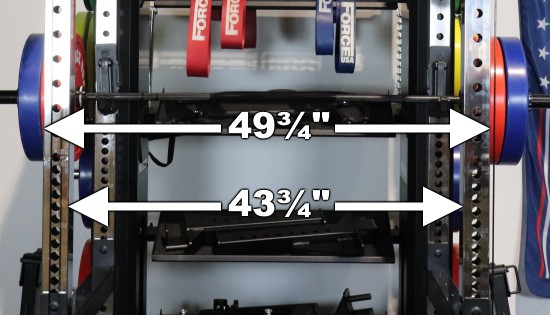
The internal width of the power rack is 43.75”. This is the distance from the inside of the left upright to the inside of the right upright.
With the internal width dimension, the main thing you want is to have enough space so you don’t pinch your pinkies if you need to use an extra-wide grip on squats, bench or other movements. In the case of the X20, 43.75” gives you plenty of space.
The internal depth of the X20 is 29”. This is the amount of open space between the front and rear uprights. It’s an important dimension because it tells you how much room you have to move around inside the power rack.
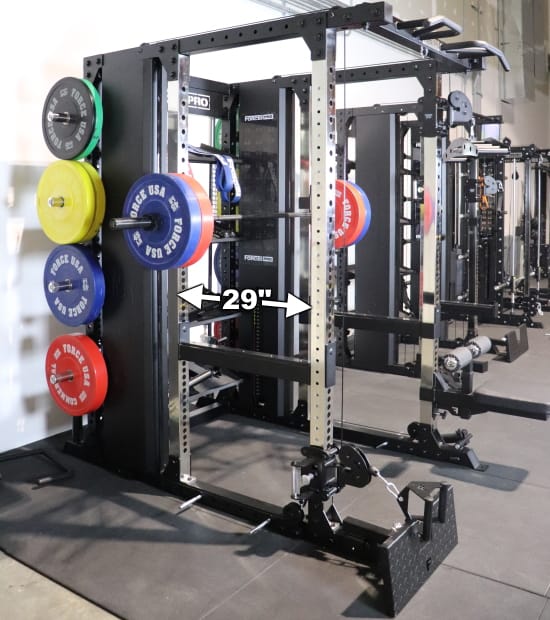
Generally, most power racks come in 3 different size ranges: shallow (24”), medium (30”) and deep (41”-43”). For most people, 30” is the best option.
Force USA tends to have some dimensions that are slightly different than the industry standards, which is why their internal depth is 29” instead of 30”. Regardless of the inch difference, this depth gives you plenty of room for all the major exercises. Yet, it conserves about a foot of space compared to extra deep power racks.
A bonus of having the 29” internal depth on the Force USA X20 is that it can work with strap safety spotters from third-party manufacturers with 30” deep 3”x3” 1” hole power racks. The extra inch of slack won’t make a practical difference. This is great because Force USA doesn’t currently have a strap safety option. They only have flip-down safeties, which are fine but can take a bit longer to adjust.
Strap safeties are faster to adjust. Plus, they have other benefits, such as being easier on your barbell and giving you more flexibility in how you position them (e.g. you can install one side higher so the bar rolls a certain way if you fail at the bottom of a rep).
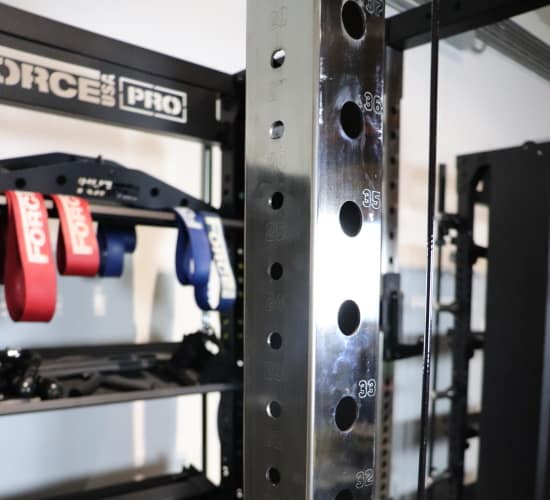
Power Rack Holes
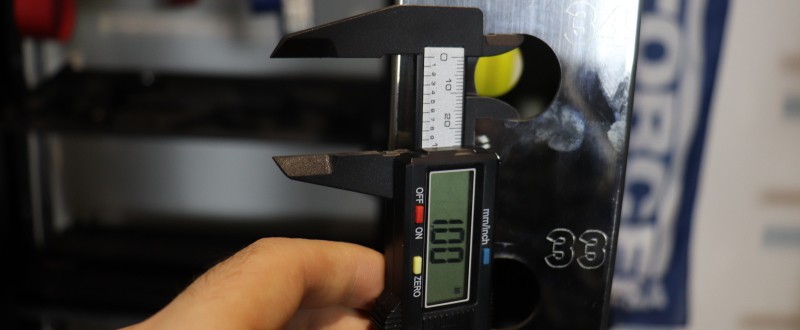
The Force USA X20 power rack holes measure 1” in diameter. This hole size allows for beefier attachments to be used compared to racks with ⅝” holes.
A 1” diameter is also used on the REP PR-5000 Series Racks, the Titan Series rack from Titan Fitness, all Rogue Monster Series racks and all Sorinex racks. When you consider the 1” hole size in the context of the 3”x3” uprights, this is good news because it means that you can use some of the attachments from other companies on the Force USA X20 if you want.
However, there are only certain types of attachments that will be compatible since the X20 has non-standard hole spacing and there are no attachment holes on the sides of the uprights. This limits you to third-party attachments that install on the front of the uprights and only require a single hole.
The holes on the X20 are spaced 2.75” (70mm) on the upper half of the uprights and 1.375” (35mm) on the lower half.
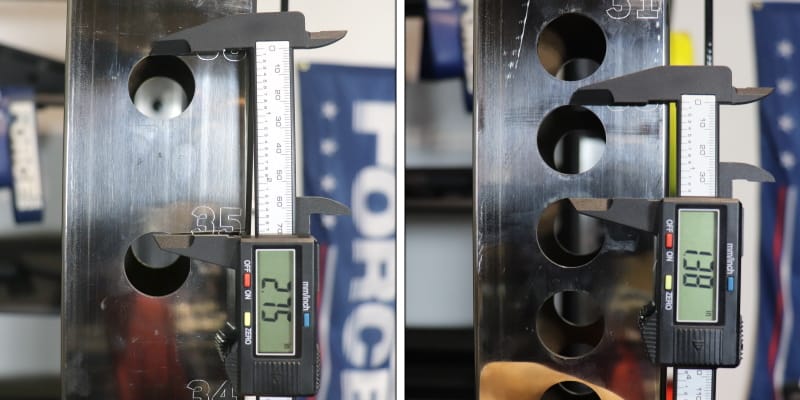
This is sort of like Westside hole spacing, but not quite. Usually, Westside hole spacing involves ⅝” holes spaced 2” apart in the upper portion and 1” apart below that.
So while the hole size and spacing are different from traditional Westside spacing, the concept is the same: You get greater precision for positioning your j-hooks and spotter arms on bench press, where smaller increments matter more. And you get less precise but still sufficient hole spacing when setting the j-hooks for squats where smaller increments don’t matter as much (though you still get high precision when setting the safety spotter arms height for squats, which is important since you want it at the perfect height if you fail at the bottom).
While the quasi-Westside hole spacing is helpful when you want to be as precise as possible, I would have preferred uniform 2” hole spacing throughout the entire uprights. There are a few reasons for this:
- All the other popular 3”x3” racks with 1” holes on the market also have 2” hole spacing. If the X20 matched this hole spacing, then it would be possible to use even more third-party attachments (i.e. attachments that require inserting into multiple holes).
- Generally, 2” hole spacing gives enough precision for most lifters in most scenarios. It may not be hyper-precise but it’s still precise.
- I found that the 1.375” hole spacing, when combined with the large 1” holes, made it difficult to adjust the flip-down safety spotters on the X20 power rack. Even with hole numbering, it took a few attempts to line up the spotters on the right hole on both uprights. If the hole spacing was 2” apart, I think this would be easier.
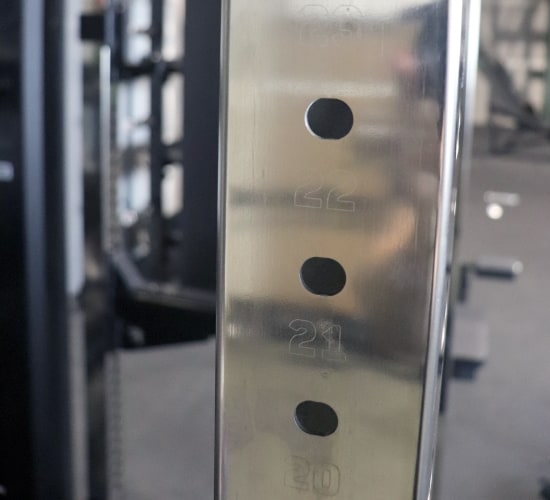
The X20 uses laser-etched hole numbering so you have an easy reference when figuring out which hole to install an attachment.
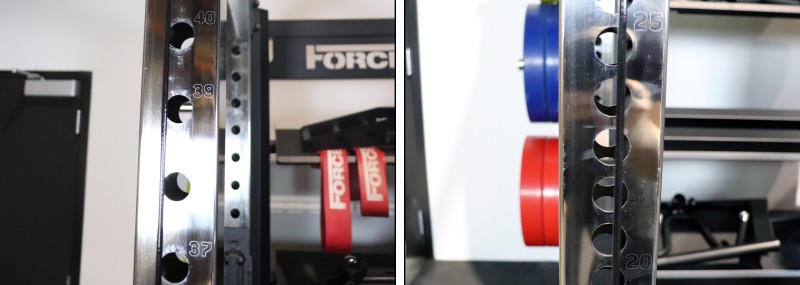
A number is displayed every 5 holes on the lower half of the uprights where the holes are spaced closer together. A number is displayed at every single hole on the upper half of the uprights where the holes are spaced further apart.
Overall, the laser-etched numbers are a nice and useful feature. However, it could’ve been improved in a couple of ways:
- If there were numbers next to each of the closer-spaced holes, instead of one number for every 5 holes. When the holes are so close together, it’s easier to get confused as to which hole you’re trying to set your j-hooks (or other attachments). In practice, this means taking a couple of extra seconds to count the holes up or down relative to the nearest number.
- If the numbers were laser cut all the way through.
Power Rack Attachments & Accessories
The following attachments and accessories come standard for the power rack:
- Sandwich j-hooks for racking and unracking the bar.
- Safety spotter arms to catch the bar in case you fail. These are used when you’re doing barbell work on the outside of the power rack.
- Flip-down spotters to catch the bar when you’re working inside the power rack.
- Band pegs to add band resistance to barbell exercises (or jammer arm exercises).
- Weight collars to keep the weight plates from sliding off your barbell.
There are other attachments that attach to the power rack uprights (e.g. jammer arms, dip station, lat pulldown seat), but I consider those to be separate exercise stations that I’ll discuss in later sections.
Below, I’ll talk a bit more about each of the power rack attachments and accessories listed above:
Sandwich J-Hooks
Buy the Force USA X20 – Use KING5 for 5% OFF »
The Force USA X20 Pro Multi-Trainer uses sandwich-style j-hooks. The “sandwich” term refers to the design where the protective insert is sandwiched between two sides of the frame. This makes this style of j-hook stronger and more functional than standard j-hooks.
Unlike standard j-hooks, the lip and underside of the j-hook are also protected by the protective insert. This helps protect your barbell in case you accidentally hit the front or bottom of the j-hook when racking.
Lastly, standard j-hooks take up the full width of the uprights. Whereas, sandwich j-hooks are narrower. So you can use a slightly wider grip if needed. Likewise, you have a little extra clearance on the outside so your barbell collars are less likely to bump into the j-hooks.
Overall, I’m a fan of the X20 sandwich j-hooks. They’re far superior to j-hooks used on the G-Series units (except the G20, which uses roller j-hooks), which aren’t quite to the level of the typical standard j-hook.
The X20 sandwich j-hooks use UHMW plastic for the protective insert. I’m happy they used UHMW because it’s strong, durable and will protect your bar’s knurling and finish better than anything else. It’s the industry standard for a reason.
The use of UHMW is a big step up from the removable rubber inserts on most of the Force USA G-Series j-hooks. It’s also an upgrade compared to the j-hooks on the Force USA MyRack power rack, which uses a less durable nylon plastic material.
Having roller j-hooks as an option would have been cool since they are available on the G20.
Of course, if you want roller j-hooks or any other style of j-hooks for your X20, you can buy them from a third-party manufacturer. Any j-hooks made for a 3”x3” rack with 1” holes should work just fine.
Spotter Arms
The spotter arms on the Force USA X20 are excellent. They’re beefy and look great. You can rest assured that these will safely catch the bar if you ever fail on a lift.
Each spotter arm measures 22 ⅜” long, as measured from the tip to where it meets the upright. This gives you more than enough room to walk out your squat when squatting in front of the rack and still have the spotters underneath the bar…
…If you read any of my G-Series reviews, you’ll know that one of my critiques of those spotter arms was that they were shorter, at just 15” for most of the units. This meant you had to make sure you didn’t step too far back from the uprights when squatting. Not having to think about that on the X20 is nice.
The spotter arms have a UHMW protective insert on top to protect your barbell from scratches and dents when your set it down or dump it when you fail. It has a sort of glossy surface to it, which looks cool.
UHMW is the industry standard for protective material used on spotter arms and j-hooks. One of my critiques of the G-Series spotter arms is that they use a rubber insert, which isn’t nearly as robust or durable as UHMW.
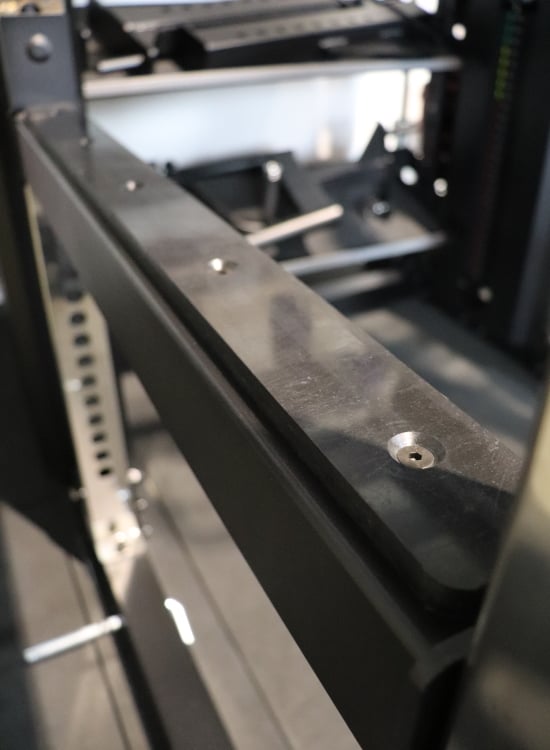
The UHMW insert is secured to the spotter arms with recessed screws. That is, the screws go below the protective surface. This ensures the screw heads don’t scratch your barbell.
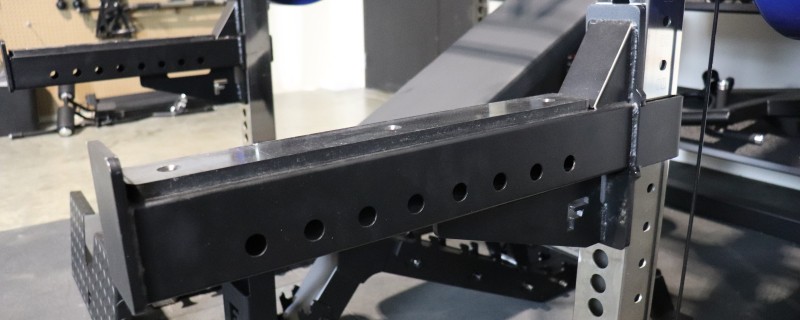
Each spotter arm has 8 band peg holes spaced evenly across its length. This can be handy if you’re trying to get creative with band resistance.
For example, you could use them to perform band-resisted pull ups if you also have a dip/pull up belt. First, you’d set the spotter arms as low as possible. Then, you’d connect a band from each spotter arm (via the band peg) to your belt.
The steel support on the underside of the spotter arm tube has the Force USA “F” logo icon laser-cut through it. This is a nice little detail that adds to the aesthetic.
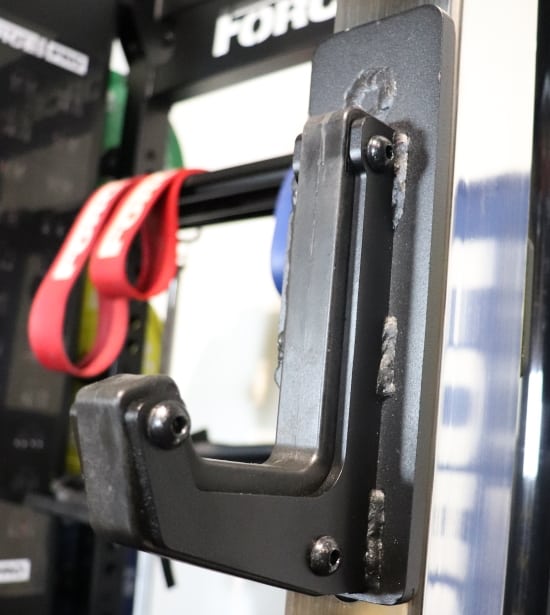
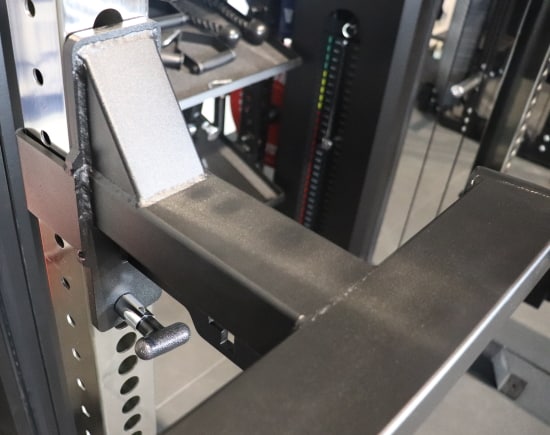
Flip-Down Safety Spotters
The flip-down spotters are very robust. They use the same 3”x3” 11-gauge steel as the rack frame and the spotter arms. Your mind will be at ease when you’re benching and squatting big weights with these underneath you.
The flip-down safeties are the one attachment that the X20 has that the X15 lacks. They only come with the X20 since they fit on a full power rack and not a half rack.
The flip-down spotters are designed to span the front and rear uprights. They’ll keep you safe when lifting inside the rack. Whereas, the spotter arms are meant for use on the front of the rack (though you can use them inside if you want).
They’re called “flip-down” spotters because of the way they’re installed:
- First, you tilt the spotter at an angle to insert each end of it into the front and rear upright at the same time.
- Once both pegs are in both uprights, you allow the spotter to flip down into place.
The flip-down spotters have the same UHMW plastic inserts as the safety spotter arms. These thick glossy inserts cover the entire length of each flip-down spotter. Each insert is secured by 5 recessed screws. UHMW is the industry standard because it does a great job of protecting your barbell from damage by acting as a buffer between metal-on-metal contact.
My only critique of the flip-down safety spotters isn’t actually with the spotters themselves. Rather, as I discussed earlier in the holes section, it’s more of an issue with the hole spacing. To recap, it can be tricky to get the spotters installed on the lower half of the uprights where the holes are closer together (1.375” apart). This is because you have to align both ends of the spotter with the same hole height on both uprights. It’s easy to align it with the wrong holes. That’s one of the reasons why slightly wider 2” hole spacing would’ve been better.
Now to be fair, it does get easier to install the flip-down spotters the more you use them. But you may get frustrated when adjusting them in your first several workouts. Just a heads up.
I wish Force USA included a strap safety spotter system instead or at least included one as part of the upgrade kit. That would have solved this installation hiccup altogether since strap safeties go on one side at a time.
Plus, I personally think strap safeties are generally the safest and most functional and versatile spotter system for power racks. Plus, they’re quieter when you drop the bar on them.
That said, I get that some people prefer having solid, non-flexible spotters.
The good news is that if you want a strap safety system, you can buy one from a third-party manufacturer. Any strap safety designed for 3”x3” racks with 1” holes and a 30” rack depth should work great with the X20 power rack. These REP PR-5000 straps will do the trick.
Band Pegs
The Force USA X20 has 7 upper band peg holes on each of the upper crossmembers and 6 lower band peg holes on each of the rack’s flat feet.
The X20 comes with a set of 4 band pegs for use in these band peg holes.
As a side note, the Force USA X15 half rack doesn’t come with any band pegs since it doesn’t have upper or lower band peg holes (though it does have band peg holes in its safety spotter arms).
If you’re unfamiliar with band pegs, their purpose is to be an anchor for connecting resistance bands to the barbell.
Using the lower band peg holes allows you to do band-resisted movements (e.g. band squats, band bench press and band deadlifts). This makes the bar feel heavier than the loaded bar weight at the top of the rep because that’s where the band resistance is greatest.
Using the upper band peg holes lets you do reverse band movements (e.g. reverse band squats, reverse band bench, reverse band deadlifts). This makes the bar feel lighter than the loaded bar weight at the bottom of the range of motion.
Generally, using the lower band pegs for band-resisted exercises is more popular than using the upper band pegs for reverse band movements. But having the option to do both is nice.
A less obvious but powerful band peg application is to use them to add band resistance to jammer arm exercises.
It’s a good tactic to amplify your muscle contraction or train your explosiveness on jammer arm movements, which are often used for hypertrophy or speed/explosiveness training.
There are plenty of lifters who will have no interest in using the band pegs. Serious powerlifters are most likely to want to use this feature. That said, I can see other types of lifters wanting to dabble with band resistance on jammer arm exercises.
If band peg holes are a must-have feature for you, then the X20 is the right pick for you because the X15 does NOT come with any due to its half rack design. Now, it would have been possible for the design to have some lower band pegs if the feet extended further forward on the X15. However, that would’ve increased the footprint. And one of the main benefits of the X15 is its compact size.
Weight Collars
The Force USA X20 comes with 8 spring clip barbell collars (4 pairs) to keep the weight from sliding off your barbell.
These are the most basic style of bar collars. They’ll get the job done, but I recommend buying an easier-to-use, stronger and more durable collar like the Lock-Jaw PROs – you don’t have to buy them now, but you’ll probably want to upgrade in the future.
Functional Trainer
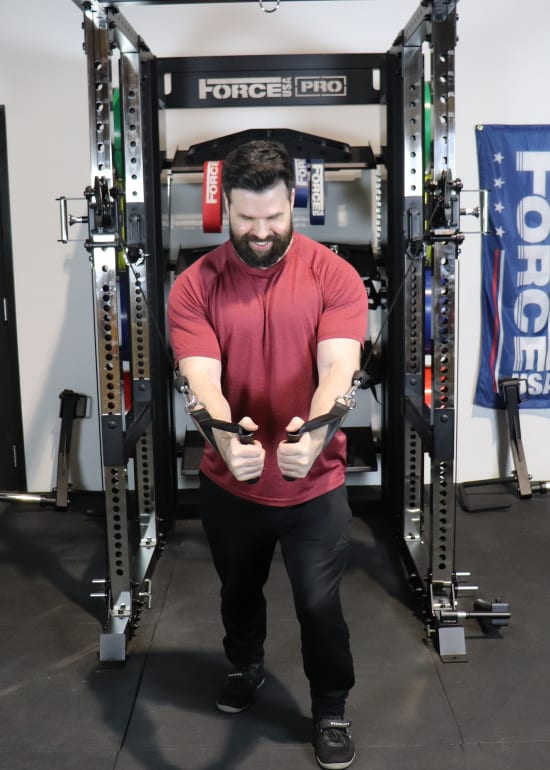
Buy the Force USA X20 – Use KING5 for 5% OFF »
The functional trainer is what makes the Force USA X20 Pro Multi-Trainer so special. Without it, it’s just another power rack.
Integrating a functional trainer into the rack design is what adds so much value in terms of training versatility and space savings.
The functional trainer uses dual selectorized weight stacks for resistance. There are no plate-loaded functional trainer options for the X-Series like there are in the G-Series.
Selectorized weight stacks are a premium feature that adds a lot of value in the form of convenience and efficiency. It takes just a second to adjust the resistance to whatever you choose. And it takes no effort. Just move the pin from one setting to another.
The quick-change nature of weight stacks makes drop sets, supersets and circuit training a breeze. Even if you don’t use any of those training strategies, it’s still nice to not have to do any extra work between your sets.
Compare the weight stack adjustment process to plate-loaded setups where it takes 10-20+ seconds to adjust the weight (depending on what you’re adding or removing). Not to mention the effort it to handle the weight plates.
Of course, there are downsides to a selectorized weight stack system:
- It’s more expensive than a plate-loaded system. It’s responsible for a decent chunk of the $4,249 price tag for the X20 base unit.
- The resistance only goes so high. You can typically load more weight on with a plate-loaded system.
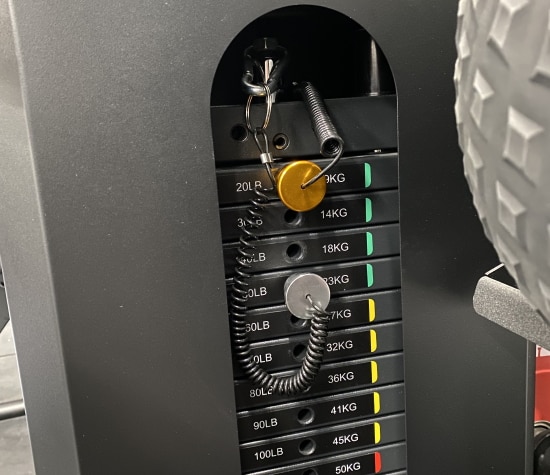
The functional trainer system uses a 2:1 pulley ratio. This means if you select 100 lbs, you feel 50 lbs of resistance.
Each weight stack weighs 289 lbs. And each selectorized plate weighs 10 lbs. With the 2:1 pulley ratio, this means the maximum resistance of each stack is 144.5 lbs and each increment is 5 lbs.
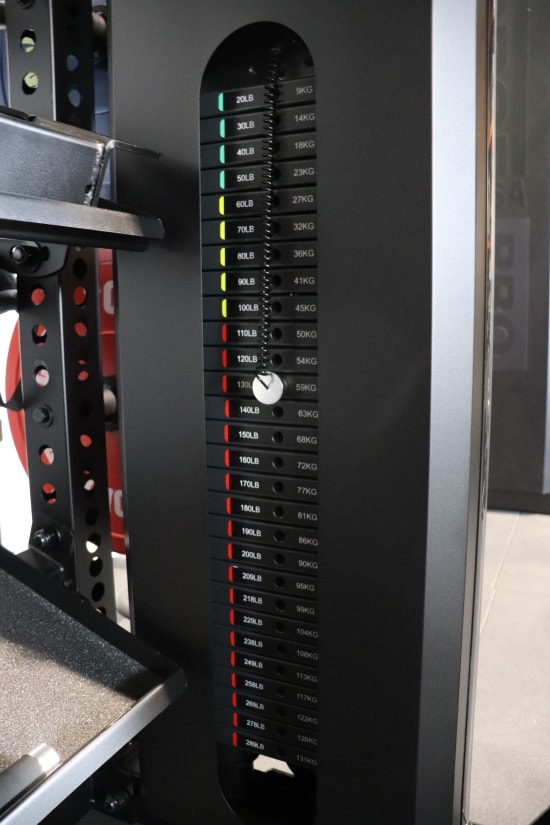
Having a max resistance will of 144.5 lbs per side is enough weight for most people. However, some stronger lifters may want to go heavier on movements like low rows and lat pulldowns.
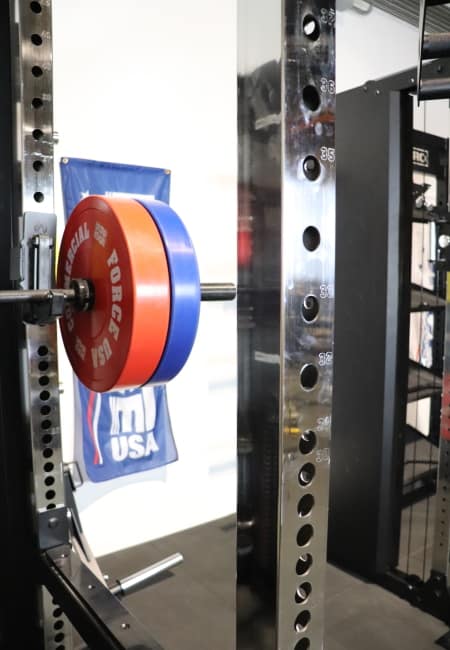
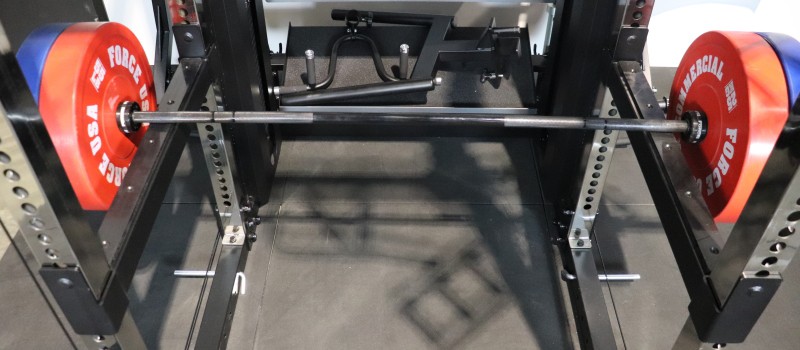
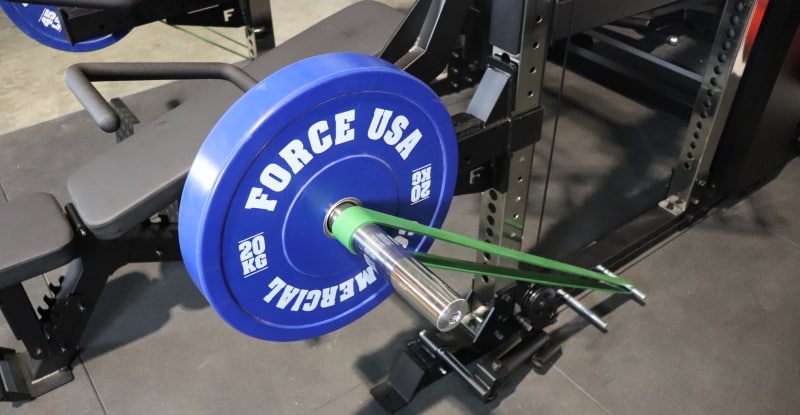
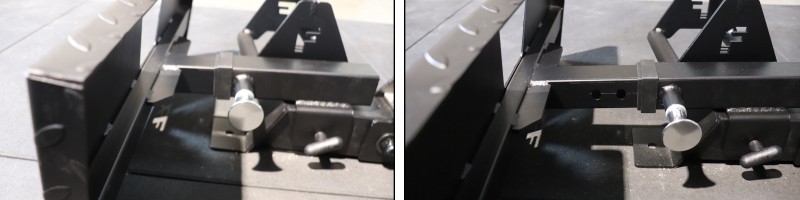
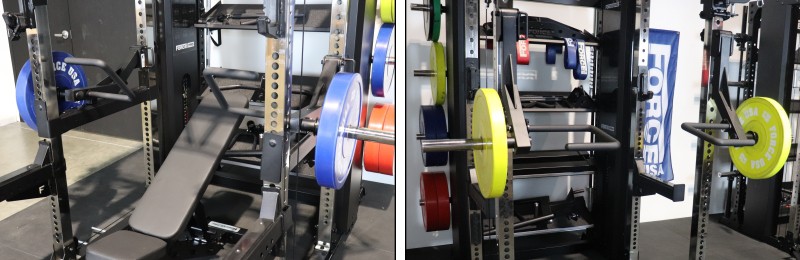
Force USA missed an opportunity to add integrated band pegs onto the weight stack like the ones on the G20. This would’ve been an easy way to add band resistance so you could increase the resistance beyond its max capacity.
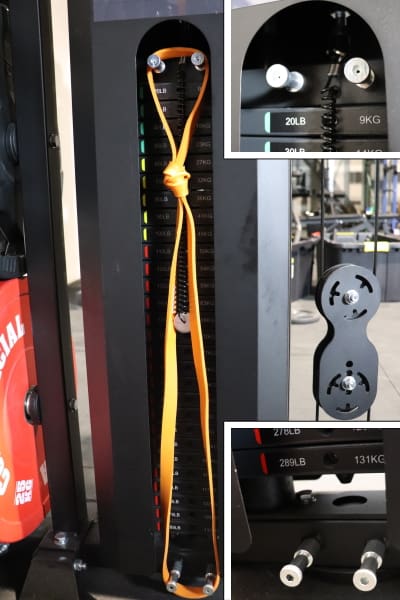
There are also no lower band peg holes under the weight stack on the rack feet (like on the G6) that would let you add band resistance to the stacks via full-sized band pegs.
Right: The X20, which has no band peg holes under its weight stacks.
My go-to trick for adding more weight to a weight stack is usually to use a weight stack adapter pin like the GymPin or BSE Stacked Weight Pin. You insert the pin into the weight stack and add the desired amount of weight plates onto its sleeve…
…While it is possible to use a weight stack adapter pin on the X20, there are some caveats:
- You would have to remove the weight stack panel guard or else the adapter pin will hit the top of the panel opening.
- If you were to use the adapter pin on the inside of the rack, you could not use the optional storage shelves. They would prevent you from putting weight plates on.
- If you were to use the adapter pin on the outside of the rack, you would have to temporarily remove your other plates from the weight storage pegs so they don’t get in the way.
A simpler solution, if you need to go extra heavy, would be to use both weight stacks at the same time. This would entail positioning yourself in the middle of the rack. For low rows, it would make sense to use the long straight bar that connects to both pulleys. For lat pulldowns, you could use this same attachment or opt for the individual d-handle stirrup handles.
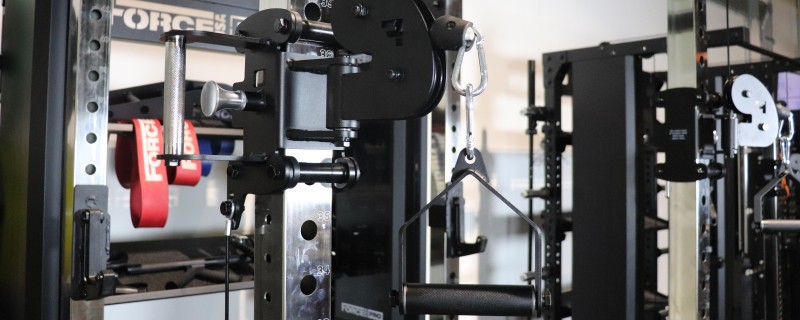
The functional trainer uses beefy “roller” pulley trolleys.
I’m a big fan of this design. It makes it much faster and smoother to adjust the pulley height than with traditional pulley trolleys like those used on the G-Series units. You can see how easy it is to adjust these in the video below:
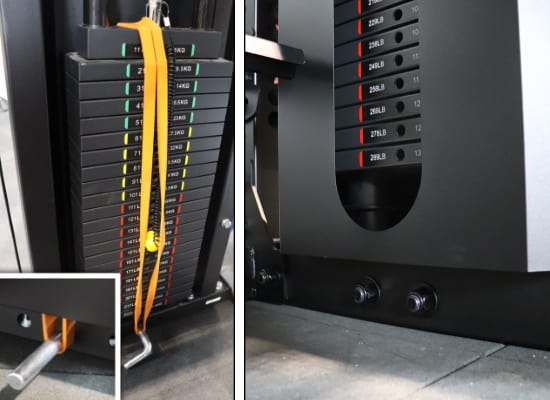
There are a whopping 34 height settings for the pulley trolley. They’re spaced close together at just 2” apart. This is more than enough settings to get the perfect height or angle you’re looking to hit for a given functional trainer exercise.
The pulley height settings are numbered with laser etching. The laser-etched numbers are quite faint. While this is better than having no numbering at all, it could’ve been improved by having deeper etching, or better yet, fully laser-cut numbers.
The cable action is super smooth whether you’re using no weight or the full stack. It feels just like a cable system you’d find at a commercial gym.
The maximum cable travel distance is 86”. This gives you plenty of clearance to do virtually any cable exercise, even ones where you may need to take a couple of steps in front of the rack.
The uprights, which are 49.75” wide from outside to outside, are far enough apart to give you a good stretch cable flyes. Even with my extra long 6’4”-6’5” wingspan, I never felt like the pulleys were too close.
Also, realize that the pulleys can freely rotate. So if you somehow needed more width, you could stand further in front of the rack, extend your arms out and the pulleys would rotate outwardly to as wide as ~52” apart.
There is one issue I noticed when testing the functional trainer. If you have certain cable attachments clipped on the pulley and you remove the selector pin, the top weight stack plate will lift off of the rest of the weight stack ever so slightly. This prevents you from re-inserting the pin back into the stack unless you press that top plate down with your hand.
It doesn’t happen for cable attachments that are light enough. But it doesn’t take a super heavy attachment to make it lift off.
While there’s a simple fix for this (just press down on the top weight with your finger), it certainly isn’t ideal.
Luckily, there’s a great workaround I thought of that makes it so you don’t have to manually press the top of the stack back into place each time you adjust the weight setting:
- Buy a second 10mm (⅜”) selector pin for each weight stack.
- Keep this second pin inserted in this first hole on the weight stack (i.e. the second plate with the 20 lb sticker) at all times. This will keep the top plate weighted down enough so it doesn’t lift off the stack when you adjust the weight setting with the original selector pin. FYI, you can keep both pins at the same time during use.
Cable Handle Attachments
Next, I’ll go over the 8 cable handle attachments that come standard with the Force USA X20 base unit as well as the 2 that come with the optional upgrade kit.
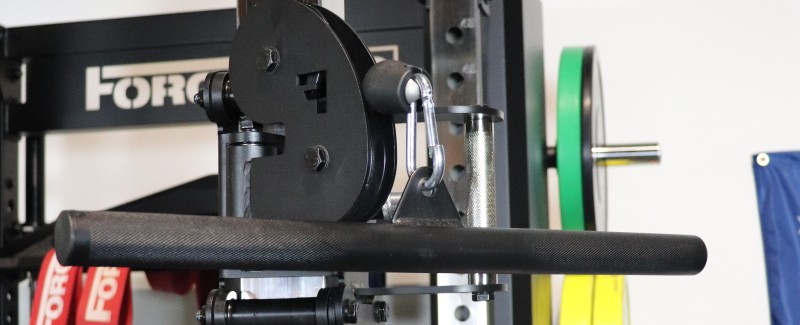
Long Straight Bar
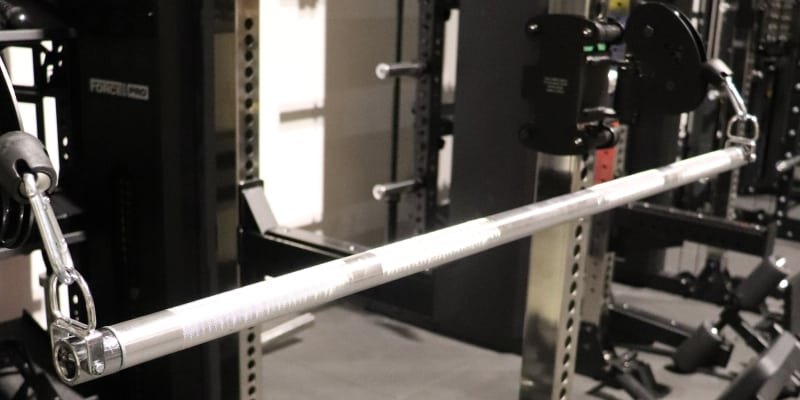
This straight bar attachment is designed to attach to both pulleys at the same time. It’s the perfect tool for using both weight stacks at the same time.
It’s made from aluminum and has a relatively thick handle diameter. The knurling is mild, which is sufficient for pushing exercises. However, if you’re using it for heavier pulling exercises, you may want to use straps for a better grip, especially considering the thicker diameter.
The handle rotates, which makes for a smooth motion.
Some of my favorite cable exercises with this attachment include:
- Jackhammer Pushdowns
- Standing Chest Press
- Standing Shoulder Press
- Back Squat
- Low Row (in the middle of the rack)
- Lat Pulldown (in the middle of the rack)
- Wood Chopper (attaching the bar to just one pulley)
Short Straight Bar
This is a short, straight handle with a black powder coat and mild knurling.
Unfortunately, the handle does not rotate around its axis. Movements like cable curls are still effective, but they just don’t feel as smooth as they would if the handle rotated freely.
This piece is best-suited for movements like:
- Triceps Pushdown
- Biceps Curl
- Close Grip Row
- Close Grip Underhand Row
- Close Grip Underhand Lat Pulldown
Lat Pulldown Bar
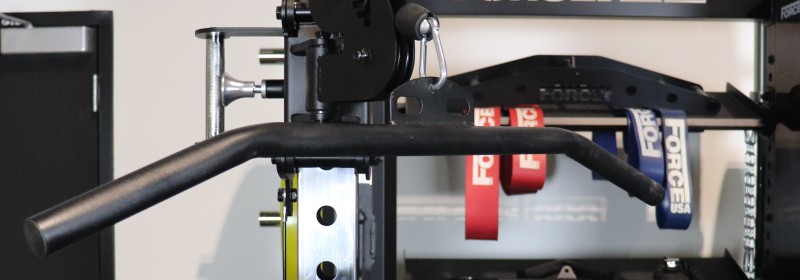
This is the classic style of lat pulldown bar. It has a long straight portion that angles downward at each end to allow for a more comfortable wrist position when doing wide grip pulldowns.
The bar itself is powder coated and lightly knurled. While I would’ve welcomed a more aggressive knurl for heavy sets, it provides sufficient grip for most sets.
The lat pulldown bar works well for movements like these:
- Close Grip Underhand Lat Pulldown
- Medium Grip Lat Pulldown
- Medium Grip Underhand Lat Pulldown
- Wide Grip Lat Pulldown
- Straight-Arm Pulldown
- Wide Grip Row
- Medium Grip Row
- Medium Grip Underhand Row
Triceps V-Bar
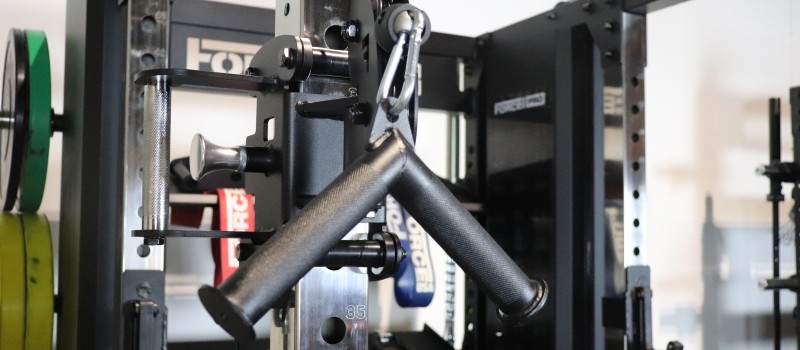
This v-shaped triceps attachment is powder coated and lightly knurled with flanges on the end to keep your hands from sliding off. It’s not a versatile attachment, but it does a great job with its primary function as a handle for triceps pushdowns.
It’s best to go with a v-bar attachment over a triceps rope attachment for pushdowns if you want to keep your hands apart in a fixed position. With a rope, you may find yourself moving your hands around more than you’d like because it’s flexible.
Beyond triceps pushdowns, the v-bar is a great tool for close grip straight arm pulldowns.
Close Grip Row Handle
The close grip row handle has a reinforced frame with a laser-cut Force USA “F” icon on both sides, which is a cool little detail.
The handle is powder coated and features a mild knurl. Despite not being more aggressively knurled, I didn’t experience any slippage even when using the whole stack.
Sometimes I feel like some close grip handles are too close, but that’s not the case with this one. The grips are spaced just right in my opinion.
This is one of my favorite handles even though it only has a couple of applications:
- Close Grip Row
- Close Grip Lat Pulldown
Triceps Rope
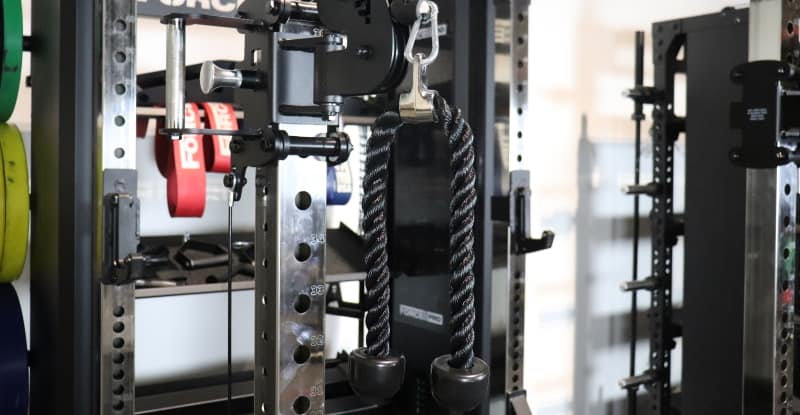
The triceps rope is a basic black double-ended cable rope attachment with large rubber nubs at the ends to keep your hands from sliding off.
It’s just like any triceps rope attachment you’d find at your local commercial gym. It works just as you’d hope.
The triceps rope is useful for more than just triceps movements. Here are my favorite exercises to use it for:
- Triceps Pushdown
- Hammer Curl
- Face Pull
- Upright Row
- Front Raise
- Straight-Arm Pulldown
- Pullover
- Kneeling Ab Crunch
- Wood Choppers
Nylon Stirrup Handles (2)
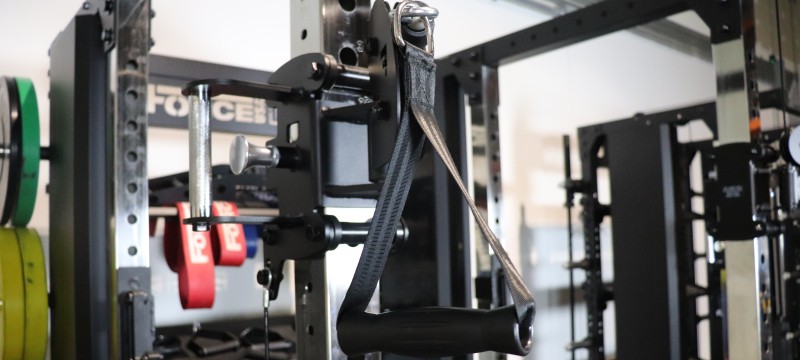
These are basic lightweight d-handle stirrups with a plastic grip over a flexible nylon strap.
These aren’t fancy but they work well. I almost always prefer d-handles like these where you can slide the grip over the strap. This lets you tilt or rotate your wrist as needed for a given exercise. This is helpful on lots of exercises, but especially on lateral raises and chest flyes.
These will be your go-to handles for bilateral cable exercises, including:
- Cable Fly/Crossover
- Reverse Fly
- Standing Chest Press
- Seated Chest Press
- Standing Shoulder Press
- Seated Shoulder Press
- Chest-Supported Row
Of course, you can also use them for unilateral exercises, too, such as:
- Concentration Curl
- Rotational Press
- One Arm Row
- One Arm Bent Over Lateral Raise
Ankle Cuff (1)
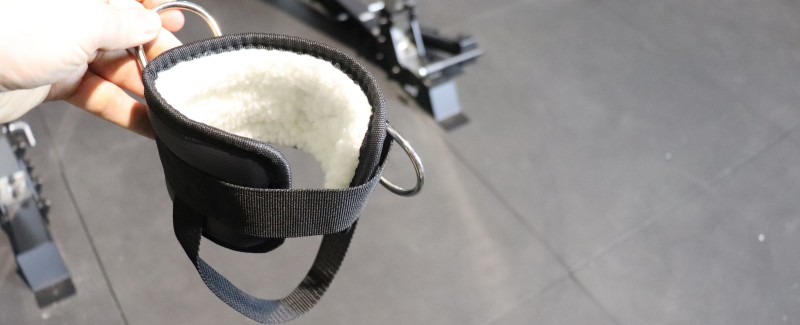
The ankle cuff has a loop strap on the bottom to go under your foot so that the cuff doesn’t slide up your ankle during the exercise. This is an important feature for both comfort and performance. And it’s something that not all ankle cuff attachments have.
It has 2 metal rings that let you attach it to the cable at different positions depending on the exercise. It also features a padded inner lining for comfort.
I just wish that they included two ankle cuff attachments instead of one. You’ll have to switch it from one ankle to the other between sets, which isn’t efficient.
The ankle cuff attachment is a great tool for isolation glute and leg cable exercises such as:
- Hip Extension
- Hip Adduction
- Hip Abduction
- Hip Flexion
- Knee Raise
- Glute Kickback
- Standing Hamstring Curl
- Lying Hamstring Curl
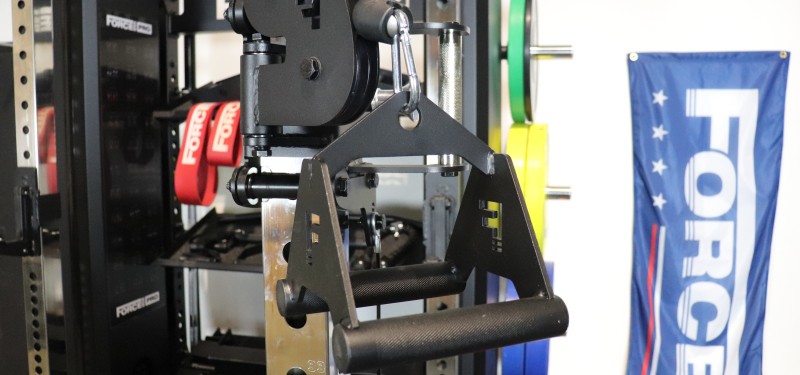
Multi-Grip Lat Pulldown / Row Handle (Optional)
The multi-grip lat pulldown / row handle is probably my favorite attachment for the X20. However, it only comes with the optional upgrade kit.
This powder coated attachment has a robust frame with 3 sets of parallel grips that let you use a narrow, medium or wide neutral grip. Each of the grips knurled. While it’s not aggressively knurled, it provides sufficient in most scenarios.
There is a large laser-cut “Force USA” logo in the middle of the frame on both sides. It’s a nice aesthetic touch.
If I had to nitpick, the only improvement I’d like to see would be to have the outer frame be more “scooped in” toward the middle so that you could pull it closer to your body before it touches you. But overall, this handle works great.
It’s ideal for all of these exercises:
- Narrow Neutral Grip Lat Pulldown
- Medium Neutral Grip Lat Pulldown
- Wide Neutral Grip Lat Pulldown
- Narrow Neutral Grip Row
- Medium Neutral Grip Row
- Wide Neutral Grip Row
One technique I like to use with it is a burnout technique: Start out using the outer grip and go to failure. Then switch to middle grip and go to failure. And finally, use the narrow grip until failure. Trust me, you’ll have a crazy pump after this!
Metal Stirrup Handles (Optional)
These handles come with the optional upgrade kit. They feature a beefy powder coated steel frame with rotating steel grips that are lightly knurled.
These aren’t as versatile as the basic nylon d-handles that come standard with the base unit.
For example, I do not recommend using these for cable flyes or cable presses since the steel frame will press into your forearm. That’s not a good feeling. Similarly, you can’t tweak the handle angle/position like you can on the nylon handles, so they’re not ideal for exercises like lateral raises.
However, these metal d-handles still have their place. I think there best-suited for cable exercises like these:
- One Arm Row
- One Arm Pulldown
- Bilateral Chest Supported Row
- Bilateral Lat Pulldown
- Concentration Curl
- Unilateral Underhand Triceps Extension
Miscellaneous Cable Accessories
The functional trainer also comes with a few small accessories, including:
- Carabiners (7): These are used to clip the cable handle attachments to the pulleys or the extension chains. It never hurts to have extra carabiners.
- Extension Chains (2): You can connect one of these chains between the pulley and your attachment of choice if you need more space between yourself and the cable column. For example, this is useful when doing lying hamstring curls so that your foot doesn’t hit the pulley or cable column.
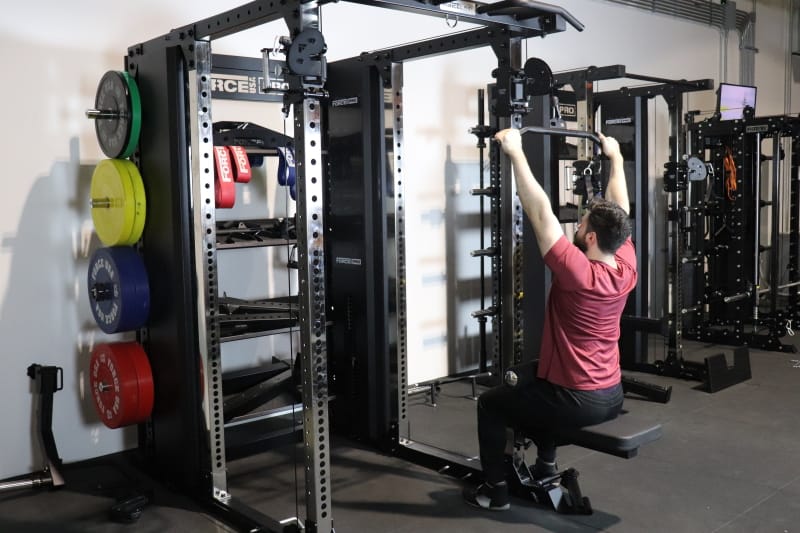
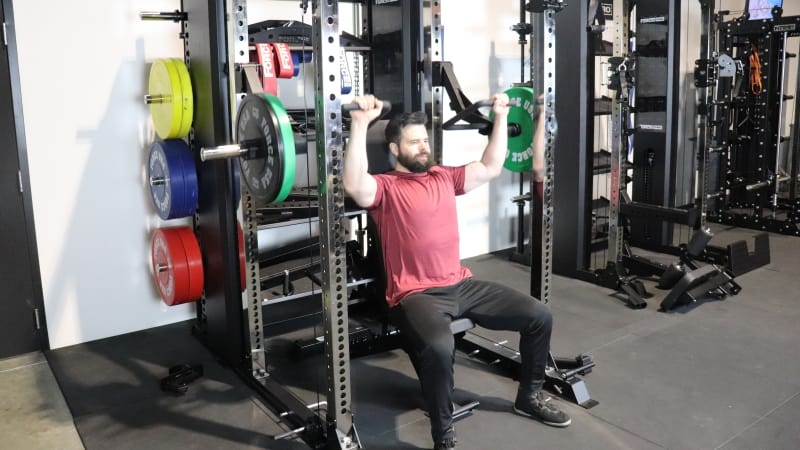
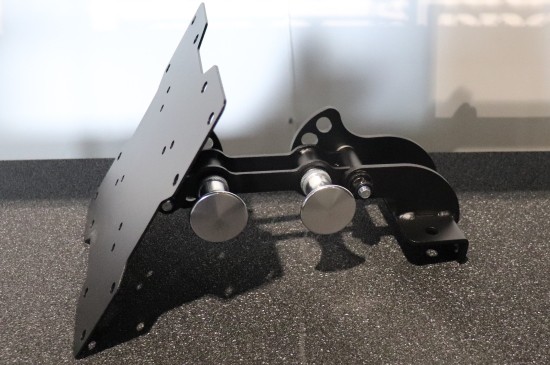
Lat Pulldown Station (Optional)
Buy the Force USA X20 – Use KING5 for 5% OFF »
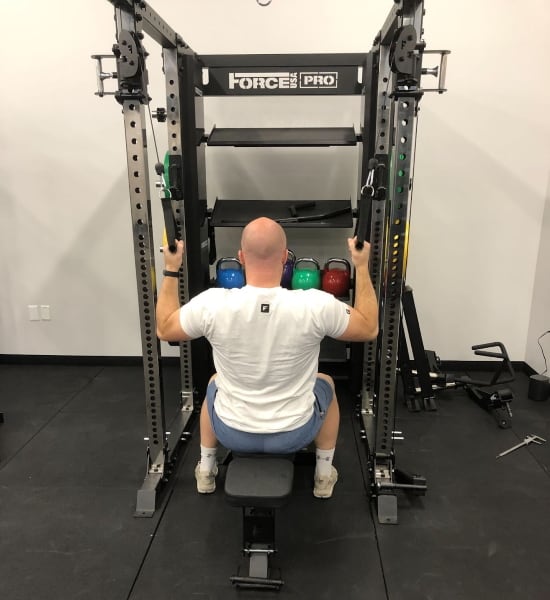
The lat pulldown station is an excellent, well-executed feature.
This exercise station consists of a dedicated lat pulldown seat with an adjustable knee holder pad that attaches to either of the front uprights. This lets you do lat pulldowns while seated securely with your thighs firmly locked down.
Note that the lat pulldown seat is part of the optional upgrade kit. And while you can still do lat pulldowns on the functional trainer without the upgrade, the seat makes it so much more efficient, effective and convenient.
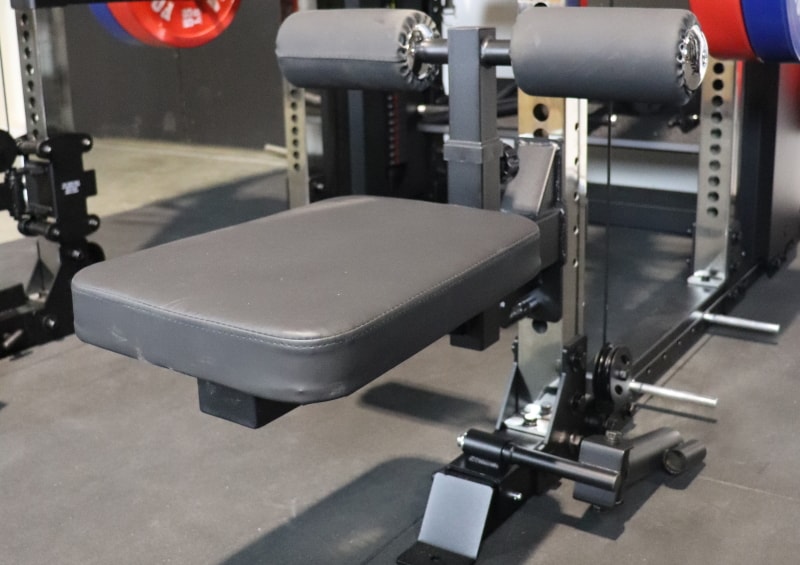
Lat pulldown seat is well-constructed with a 3”x3” frame and a large seat with quality upholstery.
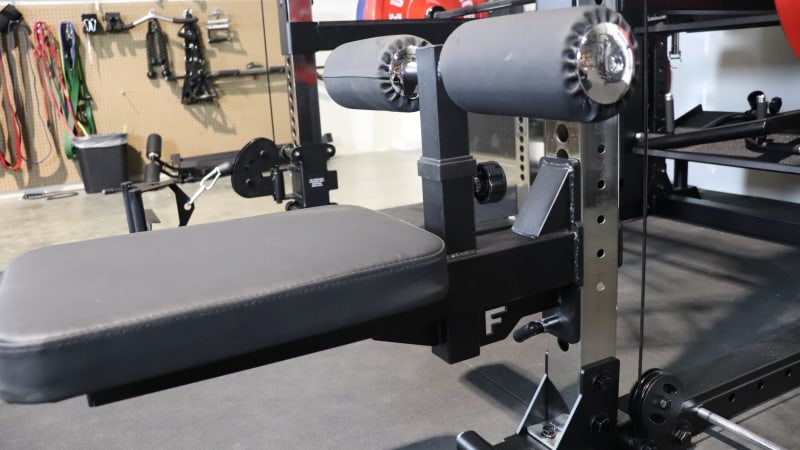
The knee holder roller pads are firm yet comfortable and have the same upholstery material as the seat pad that will protect the foam over time. The rollers have end caps on both ends to keep everything together and protected.
The connection of the seat to the upright is secure. This is thanks to the seat’s frame attaching along 7-8” of the upright with 2 different pins, including the main attachment pin at the top as well as a secondary pop-pin at the bottom.
This eliminates any rattling or shifting during use. Additionally, I noticed no “sway” or sinking down of the seat from my body’s momentum when pulling down and leaning back. Compare this to the Force USA G3’s lat pulldown seat where I noticed the seat sinking on every rep.
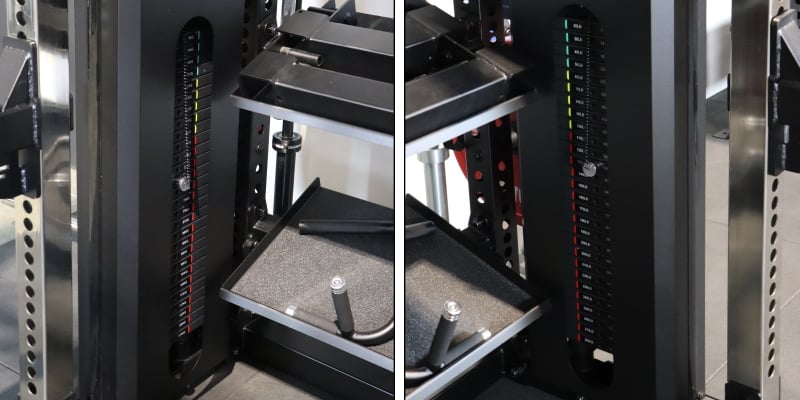
The adjustable knee holder part of the seat has 5 height settings. It has enough range to hold your legs down whether you have toothpicks or tree trunks for legs. It uses a threaded knob as the adjustment mechanism. You have to unscrew it all the way to adjust the height setting. This takes longer than a regular pop-pin mechanism. However, once in, it’s rock solid. There’s absolutely no wiggling. So you lose speed but gain security.
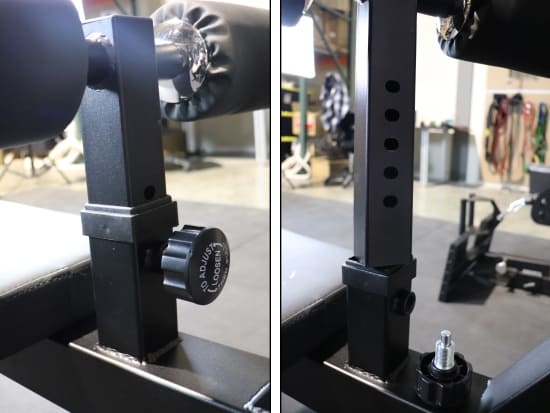
Right: Knee holder piece removed to show all 5 height settings.
There’s a Force USA “F” logo icon that’s laser-cut through part of the bottom frame. This is a subtle, eye-pleasing way to display the branding.
Since the seat installs on the uprights, you can install it at different heights. The lowest possible height setting is 17.5” from the floor to the top of the seat pad. You can increase it in 1.375” increments from there. Obviously, you can only go so high before your feet would be off the floor. 😀
The seat height sweet spot for me was anywhere from the lowest height setting (17.5”) to 2 holes above it. I’m 5’11” with a ~6’4” wingspan. This gave me enough room to do full range of motion lat pulldowns with a comfortable footing beneath me.
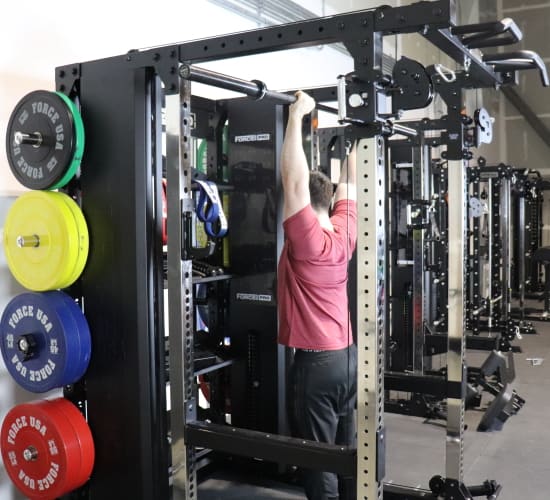
Chin Up Station
The Force USA X20 Pro Multi-Trainer comes with 2 styles of chin up bars:
- Multi-Grip Chin Up Bar
- Straight Chin Up Bar
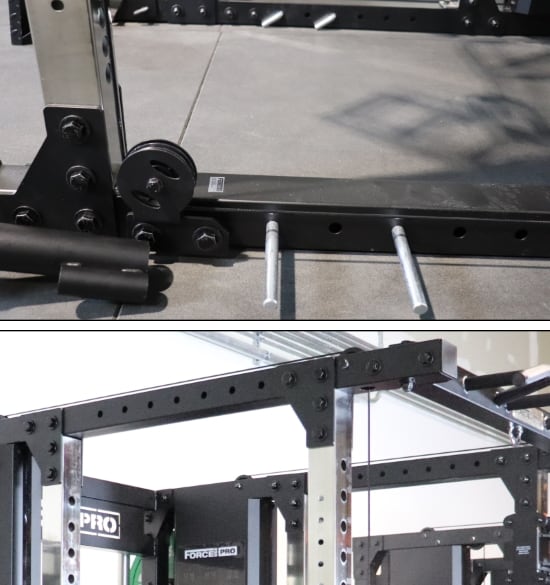
You have room to install both chin up bars on the X20 if you want. To do this, you’d install the multi-grip bar in the front with the straight bar behind it.
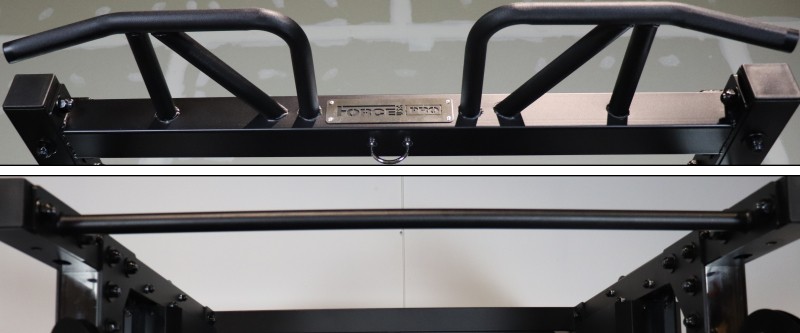
Bottom: The straight chin up bar on the X15.
The multi-grip chin up bar is similar to the multi-grip bars on most of the Force USA G-Series units. It consists of:
- 4 parallel bar segments to allow for close and medium width neutral grip chin ups
- 2 diagonal bar segments to allow for semi-supinated and semi-pronated pull ups
- 2 straight bar segments to allow for medium grip pull ups and chin ups
- 2 angled-down bar segments to allow for wide grip pull ups
All of these segments are 32mm thick and have light knurling to improve grip.
The straight chin up bar is also 32mm thick. It has no knurling, but at least the powder coating helps provide some grippiness. Still, you may want to use some lifting chalk for your more difficult sets if you choose to install this bar.
While the straight chin up bar isn’t quite as versatile as the multi-grip bar, you do can several different pull up variations such as:
- Wide Grip Pull Up
- Medium Grip Pull Up
- Medium Grip Chin Up
- Narrow Grip Chin Up
- Kipping Pull Up
- Muscle Up
Note, however, that if you install just the straight chin up bar, you won’t have access to the Suspension Trainer Station. That part is built into the multi-grip bar only.
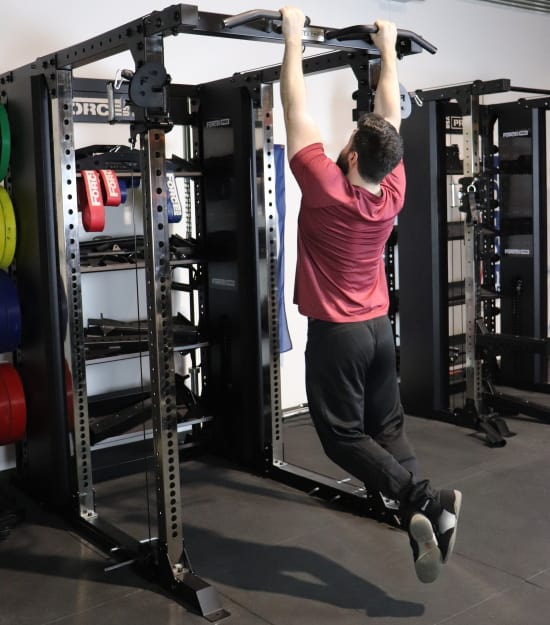
Ceiling Clearance Needed for Chin Ups
The multi-grip chin up bar is 90.75” tall and the straight chin up bar is slightly shorter at 89.5”.
You need a minimum of 10” of ceiling clearance above the chin up bar height to do full range of motion chin ups without hitting your head at the top.
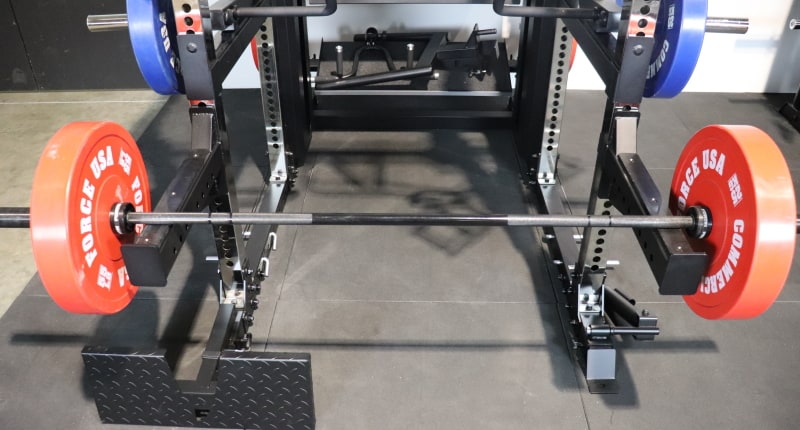
Low Row Station
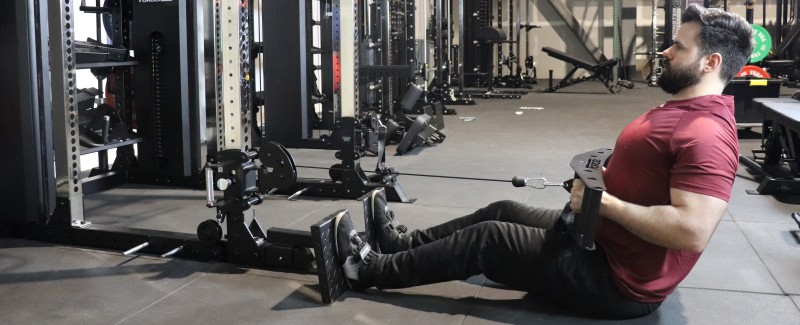
Buy the Force USA X20 – Use KING5 for 5% OFF »
The low row station consists of a 25.5” x 10” steel footplate attachment that makes it as efficient as possible to do any type of cable low row exercise variation.
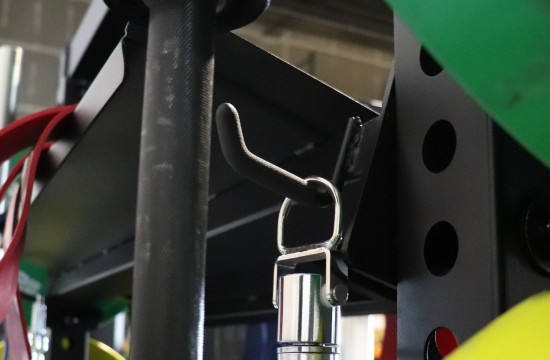
It attaches to the front of the left or right rack foot. You can install or remove it easily just by inserting or removing a single pin.
Once installed, low rows are performed on the cable column in front of the footplate.
The footplate features a diamond steel grip pattern stamped into it to keep your feet from shifting or slipping during exercise.
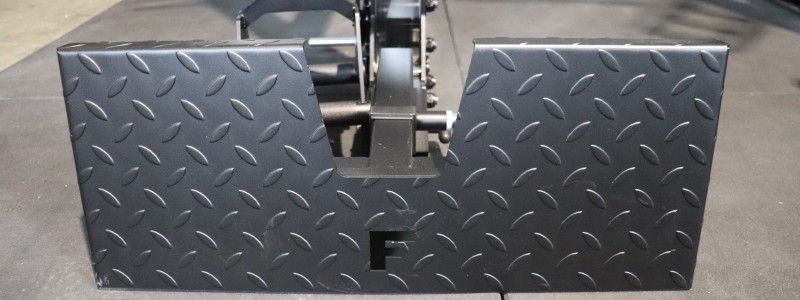
It will wobble a bit if you manually move it with your hand. Importantly, though it remains stable during use when you’re pressing against it, which is what you want in such an attachment. Keeping your feet, and therefore, the rest of your body stable during cable rows ensures your energy and attention are focused on your back muscles.
The footplate is not completely vertical. It’s angled ever-so-slightly backward at about a 10 or maybe 15-degree angle. You can’t adjust the angle like you can on the footplates that come with the G10 and G15 all-in-ones. However, I find the built-in angle to be comfortable.
One unique feature is that you can use a pop-pin mechanism to extend or retract the footplate. This is useful because it lets you get closer to or further from the pulley depending on your limb length and flexibility.
I’m a fan of the cut-out segment in the top center of the footplate. It’s the perfect place to rest the cable attachment, keeping it just in reach.
Lastly, there is a small laser-cut Force USA “F” icon at the bottom center of the footplate. It matches the laser-cut decals on various other parts of the unit, which is a nice-looking way to display the branding.
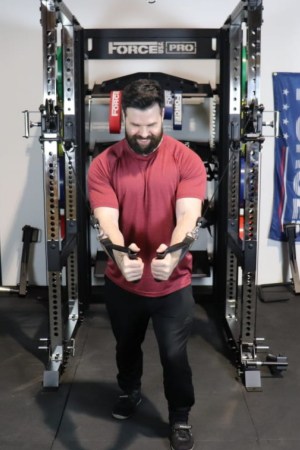
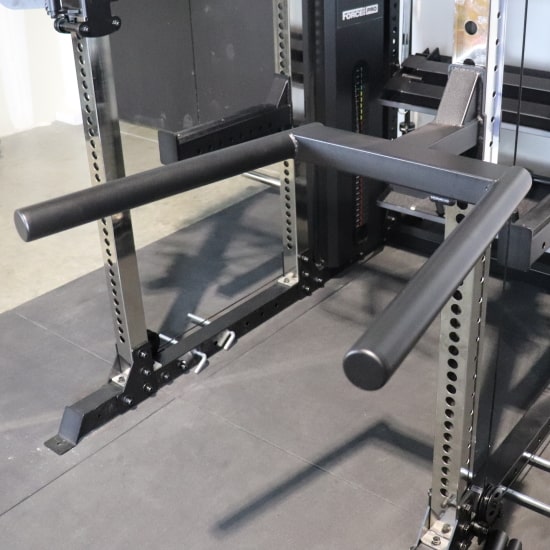
Dip Station
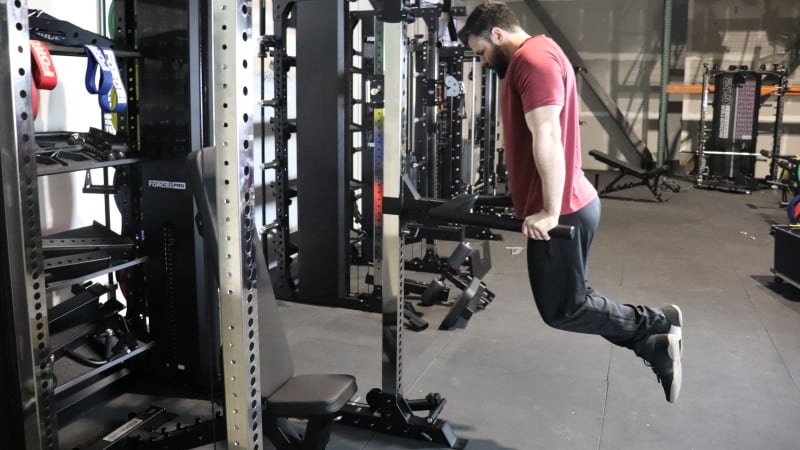
The dip station consists of a Matador-style dip handle attachment. This is also known as a Y dip bar due to it resembling the shape of the letter ‘Y’.
You can attach the dip handle to the front of any of the uprights, at whichever height you choose.
There are no knurling or rubber handles on this dip bar. Rather, it is powder coated, which not only protects it from scratches and rust but also adds a bit of grip to it. In my opinion, that’s all the grip you need for a dip bar since it’s designed for dips, which is a pushing exercise; not a pulling exercise.
The handle diameter is 50mm (~2”) thick, which is typical of this style of dip attachment. It feels good in the hand. You can’t wrap your hand all the way around, but you can still get a solid grip. Importantly, it’s not too thin that it feels like it’s digging into your palm, which can happen on skinnier dip bars, especially if you’re doing heavy weighted dips.
The grip width tapers from 23” at the widest point to 17” at the narrowest point. This is a broad enough range that anyone can find the best width for your body size and/or training goal.
Generally, a wider grip is more conducive to chest-focused dips and a narrower grip is better for triceps-focused dips.
I like that this dip attachment has a long “neck” (i.e. the part between the 2 handles and where it connects to the upright). This allows you to lean forward without worrying about bumping your head into the rack upright when doing dips with a wide or medium grip.
However, even with the long neck, you’ll want to do dips facing away from the rack if you want to use the narrow grip to ensure you don’t hit your head.
Suspension Trainer Station
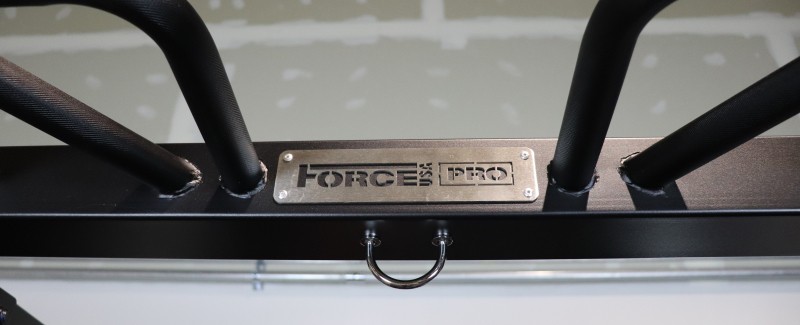
The Suspension Trainer Station consists of a U-bolt mounted to the center of the multi-grip chin up bar.
If you opt to install only the straight chin up bar on your X20, then you will not have the suspension trainer ring. So be sure to weigh this factor when deciding which of the two chin up stations you want to install – Or you can have the best of both worlds if you install both chin up bars.
The suspension trainer ring gives you the perfect place to hang a suspension trainer unit like the TRX. A suspension trainer is a great tool for using your bodyweight in creative ways to do resistance training. If you’re used to traditional resistance training (i.e. weights, cables), integrating some suspension trainer exercises can be fun and challenging.
Here are some of my favorite suspension trainer exercises:
- Suspension Trainer Inverted Row
- Suspension Trainer Single-Arm Row
- Suspension Trainer Push Up
- Suspension Trainer Feet-Elevated Push Up
- Suspension Trainer Fly
- Suspension Trainer Reverse Fly
- Suspension Trainer Curl
- Suspension Trainer Triceps Extension
- Suspension Trainer Bulgarian Spit Squat
- Suspension Trainer Hamstring Curl
- Suspension Trainer Hip Thrust
- Suspension Trainer Assisted Pistols
The suspension trainer ring is very strong so it can easily support all of your bodyweight, even if you’re on the heavy side.
Since the ring is located front and center on the rack, you have plenty of room to workout on your suspension trainer. There’s room behind you (outside of the rack), in front of you (inside the rack) and enough room on either side (between the uprights).
You can also use the suspension trainer station for other uses, including:
- Hanging a heavy bag to do cardio in the form of boxing
- Looping a resistance band to do band-assisted chin ups (among other creative resistance band exercise applications)
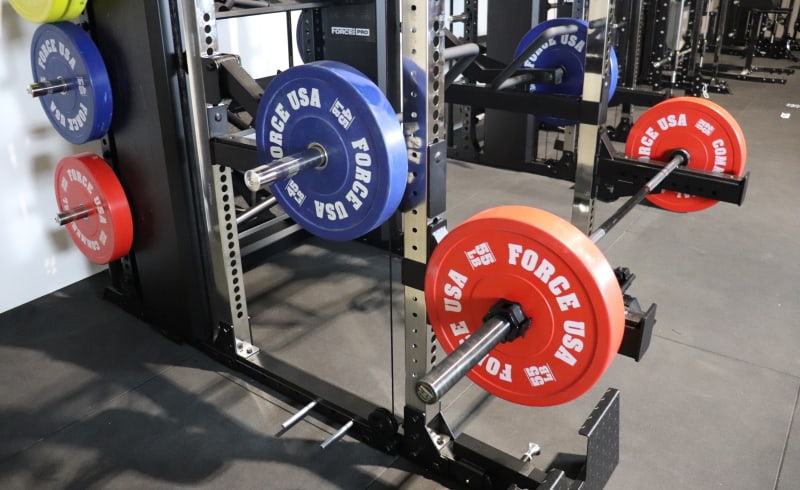
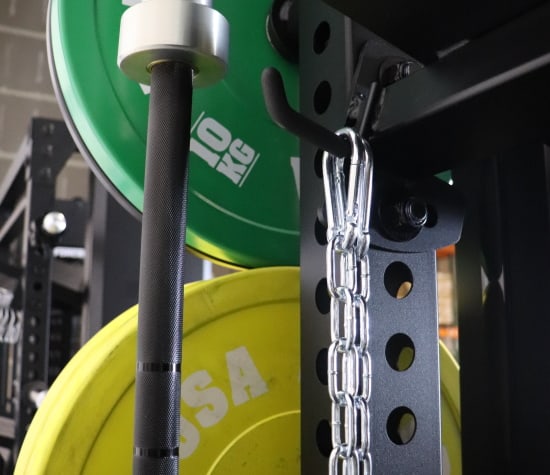
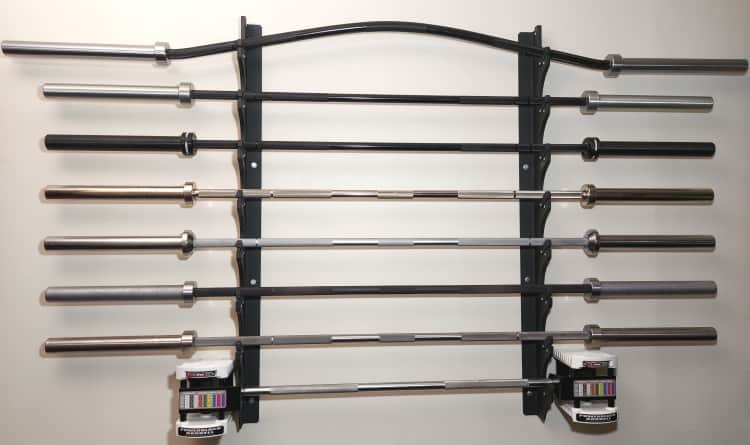
Barbell Storage
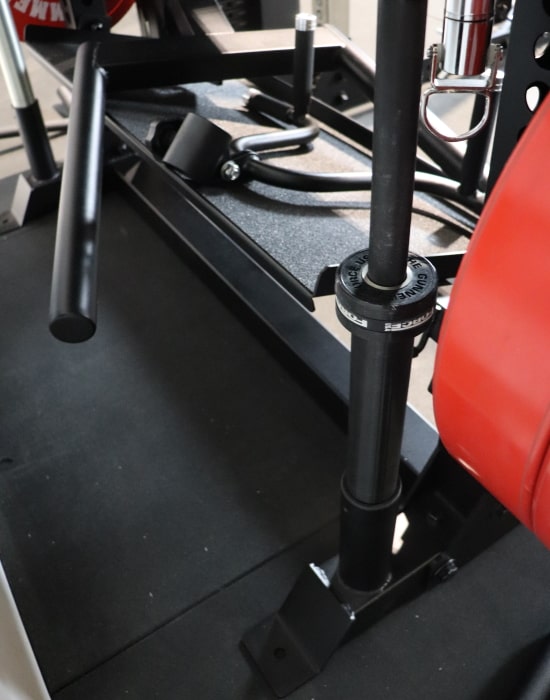
The Force USA X20 Pro Multi-Trainer comes with 2 barbell storage sleeves built onto the back of the unit. There is one sleeve on each of the rack’s feet, located behind the weight storage area.
These sleeves allow you to store up to 2 barbells vertically. It helps keep your gym organized and out of the way when not in use.
Having space for 2 bars is sufficient for most people since most home gym lifters don’t have more than that. However, if you’re a bar collector like myself, you should invest in a wall-mounted gunrack-style barbell storage rack.
The opening of each bar storage sleeve is 10.5” off the floor. This means your ceiling height should be 10.5” greater than the length of your barbell to use the bar storage feature. Assuming your barbells are the usual length of ~86.5”, that means your ceilings should be at least 96” (8’0”) tall. You might need a hair more than that to have some wiggle room.
If your ceilings are too short, then you’ll need a different way to store your bar(s). You can go with the gunrack-style barbell storage rack I mentioned earlier or a wall-mounted vertical storage hook system where you hang the bars from the top.
Note that there’s no protective lining inside the bar storage sleeves to prevent scuffing the bar finish. So if you’re sensitive about keeping your bars as pretty as possible, that’s one more reason to invest in a gunrack-style barbell rack with UHMW plastic on the holders.
However, I know most people don’t care about a small scratch here or there. So the built-in storage sleeves will do the trick.
Weight Plate Storage
The Force USA X20 has a weight plate storage area on the back of the rack.
The rack has a total of 8 weight plate holder pegs. Each storage peg has 8” of loadable length. All in all, this gives you plenty of room to store a complete weight set even if you have thick bumper plates. If you have thinner iron plates, you’ll have room left over.
You install the storage pegs on the black powder coated uprights located behind the weight stacks. These uprights have a 4-way hole configuration using 1” holes with 2” spacing.

The pegs are meant to install on the sides of the uprights. That’s where I recommend installing them for most people.
However, you could put them on the back of the uprights if you wanted to. But that would block you from using the barbell storage sleeves and you’d need some extra clearance in the back to ensure you’d have enough room to add and remove plates…
…Some people may want to install the storage pegs on the back instead of the side so they can use a weight stack adapter pin (e.g. GymPin) to add Olympic plates to the outside of the weight stack to go beyond the max resistance. If you have the storage pegs on the side, then the plates get in the way of this. By putting the pegs on the back, your stored plates would be out of the way. Please note, however, that for this setup to work, you’d also have to remove the outer weight stack panels so that you could access the weight stack from the outside.
The storage peg material is the same as on most of the G-Series units. It has a metal casting over plastic with a steel rod in the core. The peg is connected to a “stem” that gives it a few inches of space so that it clears the weight stack panel that sticks out past the uprights.

These pegs work fine but I’d prefer if they were a basic powder coated steel shell peg. That would be a simpler and more robust design. I’ve said as much in my G-Series reviews.
The only other thing I’ll critique is that the “stem” of the pegs could use a plastic washer to prevent metal-on-metal contact where it touches the upright. I could see these uprights getting scratched if you move the storage pegs frequently.
As a side note, you can technically use the rear frame uprights to install other attachments like the dip bar. Of course, if you do that, you’d need to have enough space in the rear of the rack to exercise; you couldn’t have the rack against a wall. Additionally, you may not be able to use the weight storage pegs since they could get in the way depending on which attachment you were using.
Exercise Charts
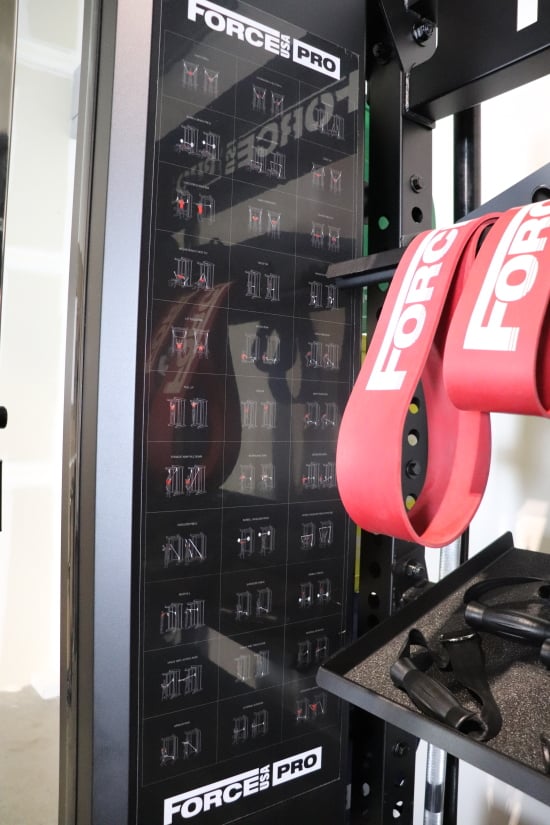
The Force USA X20 has 2 exercise charts that demonstrate how to do certain exercises. There is one chart above each of the weight stacks.
Each exercise chart shows 33 exercises for a total of 66 exercises. Most of the exercises shown are cable movements.
The purpose of these charts is for easy reference of common exercises. It’s a useful feature for novices.
Experienced lifters will already know all of these movements and how to do them. The only time it may add value for experienced lifters is if they’re mixing up their workout on the fly and need a quick idea for an exercise.
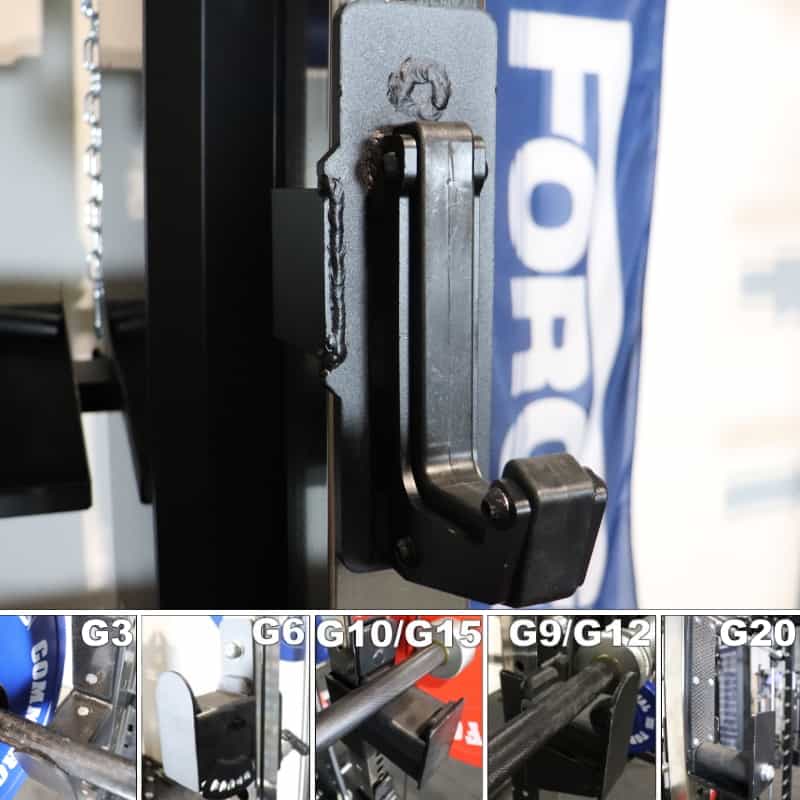
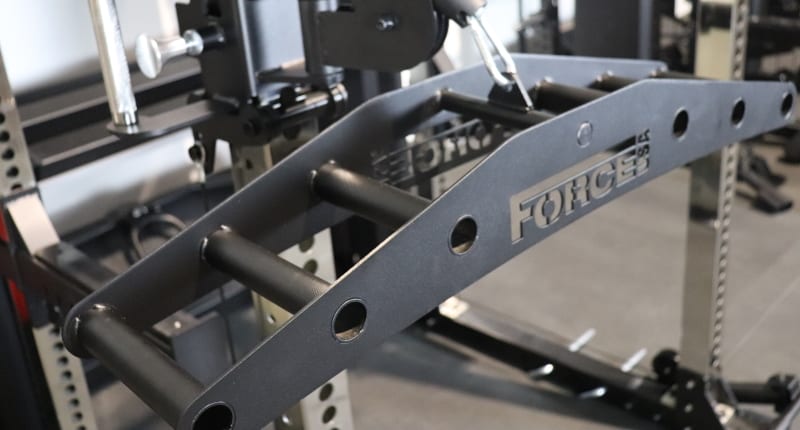
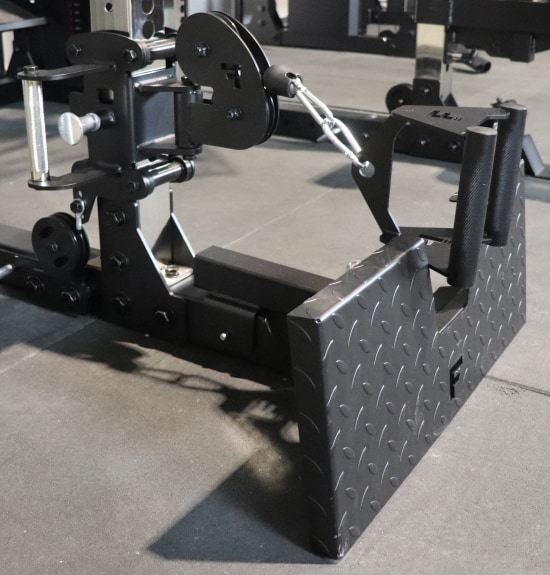
Jammer Arms (Optional)
Buy the Force USA X20 – Use KING5 for 5% OFF »
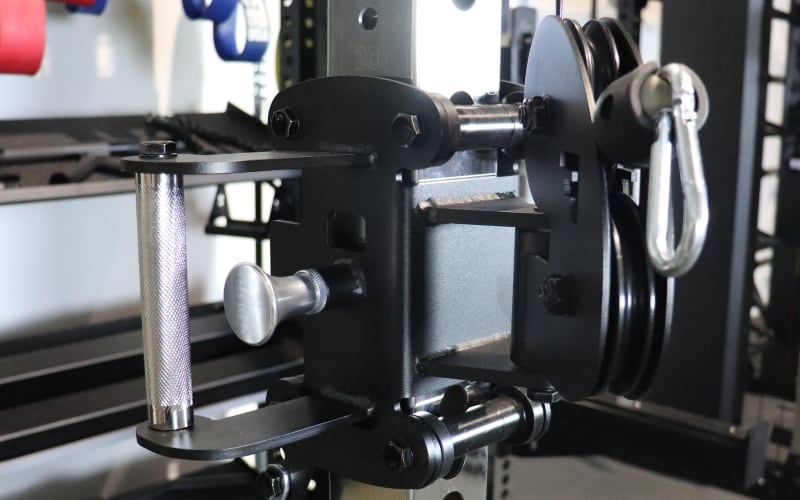
The jammer arms are probably my favorite attachment for the Force USA X20 Pro Multi-Trainer.
These lever attachments attach to the power rack uprights at any height you choose. Each jammer arm has a 1” threaded pin at the top that you insert all the way through the upright. You secure it with a threaded fastener on the other side of the upright. There’s also a second shorter pin that inserts in a lower hole for added security.
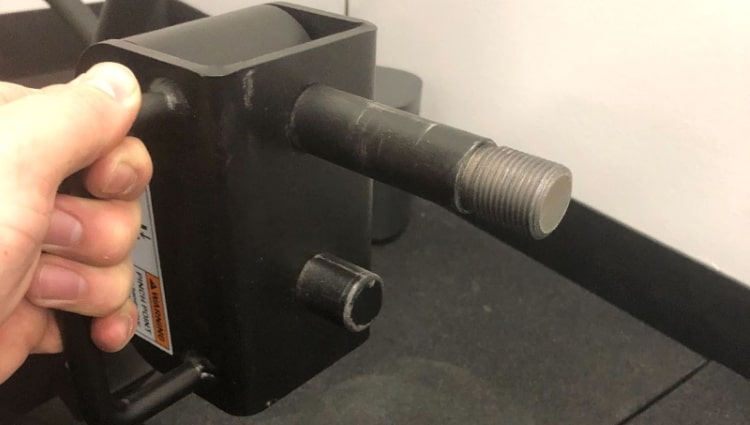
Each jammer arm has a weight holder peg for adding weight and multi-grip handles to lift the arm.
The purpose of jammer arms is to mimic the popular plate-loaded machines at commercial gyms. Think about Hammer Strength machines that you’ve surely used if you’ve ever lifted in a commercial gym setting.
This style of exercise is great for hypertrophy training (building muscle) and training explosiveness. This is because you are swinging a lever through a fixed path; you don’t have to worry about stabilizing the weight or keeping it from moving from side to side.
Instead, you can focus on squeezing the target muscles in the case of hypertrophy training. Or you can concentrate on maximizing speed/acceleration for explosiveness training.
When it comes to getting the most out of jammer arms, it’s all about setting them up properly:
- Different exercises require you to install them at different heights on the uprights. For example, you install the jammer arms low for shrugs and high for shoulder press.
- Some exercises are most effective if you utilize the spotter arms to prop the jammer arms up. This lets you start the exercise with the arms extended straight out so you can get under the weight. For example, you would do this for flat bench press.
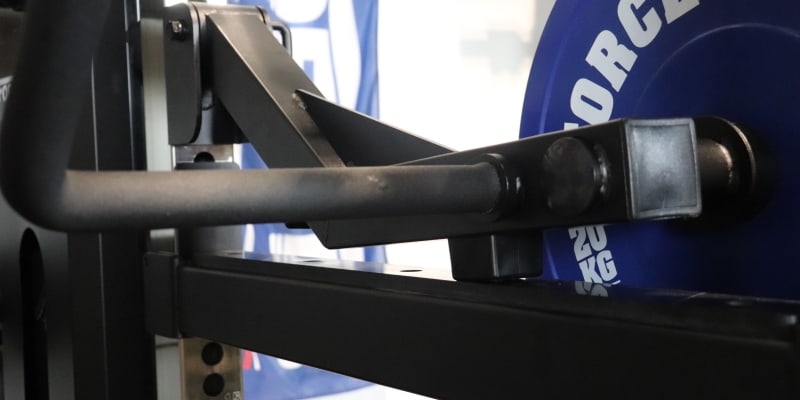
Related to that last point about propping up the jammer arms on the spotters – I’d like to note that this capability is by design. It’s made possible by the bend in the middle, which makes it possible to lay the lower half of the jammer arm flat on the spotter arm such that it’s parallel to the floor. When it’s in this position, it is resting on the rubber stopper, which protects both the jammer arm and the spotter arm.
The weight holder pegs on the jammer arm have 12.5” of loadable length. This is typical of most other jammer arms on the market. I don’t see anyone needing more space than that unless you’re a strong lifter who’s doing shrugs or deadlifts with super thick crumb bumper plates.
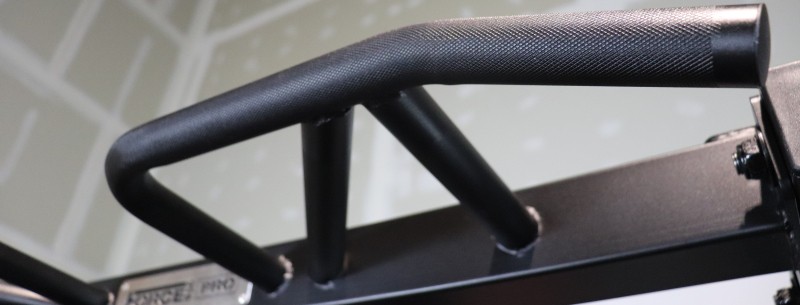
The handles are large and U-shaped and have a grippy rubber coating. The diameter is 32mm thick, which feels comfortable for both push and pull exercises.

The U-shape gives each handle a neutral grip segment and two straight grip segments.
The two straight grip segments give you different leverage options. The one that’s directly connected to the jammer arm makes the weight feel heavier. The furthest one makes the weight feel lighter.
There’s a lot you can do with the jammer arms. Here are some of my favorite exercises:
- Jammer Arm Chest Press
- Jammer Arm Incline Bench Press
- Jammer Arm Shrug
- Jammer Arm Chest-Supported Row
- Jammer Arm One-Arm Row
- Jammer Arm Split Squat
- Jammer Arm Romanian Deadlift
- Jammer Arm Shoulder Press
- Jammer Arm One-Arm Push Press
The only not-so-good thing about the jammer arms is that they take a while to adjust. Here’s the process to adjust the position of the jammer arms (assuming they’re already attached):
- Remove any plates that are already on.
- Unscrew the fastener.
- Move the jammer arm to the desired height.
- Secure the fastener.
- Install the spotter arm underneath the jammer arm at the correct height (only if you need the arm to be propped up)
- Load the desired amount of weight.
- Repeat all steps for the other jammer arm.
To be fair, the adjustment time is something people complain about with any type of jammer arm from any company.
The only thing that could make adjustments faster would be if the jammer arms were on a trolley (like the ones Rogue makes). However, that wouldn’t be possible with the X20 design since they already have the pulley trolley for the functional trainer on the uprights. You can’t have 2 sets of trolleys on the same uprights.
In any case, I think the jammer arms are well worth it even with the longer setup time.
I recommend writing down the hole number settings that you use for all of your most common jammer arm exercises. This way, you can quickly reference your notes to know exactly which height setting to use. This will save a ton of time because you’ll set them up at the perfect height on your first try, every time.
Landmine
The Force USA X20 base unit comes with a landmine attachment.
The landmine is a basic but effective attachment. It does exactly what you need it to do with no bells and whistles.
It consists of the landmine sleeve portion which accepts one end of your barbell. The sleeve is connected via a hinge to a rod. The rod is connected to a bracket that anchors the attachment to the front of the rack’s foot. The rod rotates around its own axis and the hinge goes pivots side-to-side.
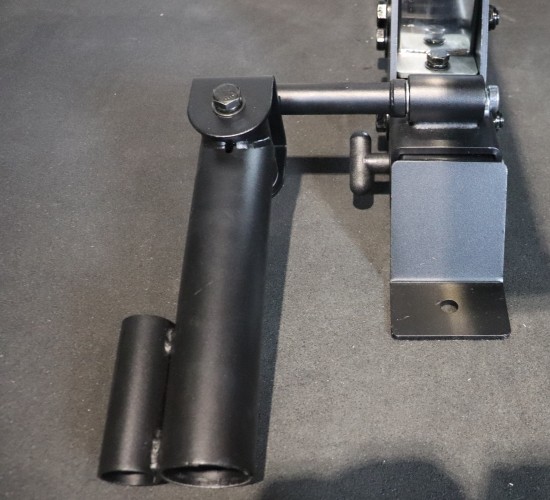
This combo of rotation and side-to-side motion allows you to lift the far end of the barbell in any direction: up, down, left, right or all around.
You can attach the landmine to either the left or right foot of the rack. To install it, simply place the landmine bracket over the rack foot, line up the holes and slide a pin through. To remove it, just take the pin out and store the landmine out of the way. It’s the same process as with the low row footplate attachment.
While the landmine attachment looks very similar to the one that comes with the Force USA G10 and G15, it’s a bit different. Notably, it doesn’t have the issue where the rod can jiggle its way out if you have the attachment oriented a certain way. The landmine will always stay secure on the X20 regardless of how you configure the position.
Force USA refers to the X20 landmine attachment as the “Core Trainer station.” While the landmine is excellent for core-specific movements. It’s more versatile than that. It’s invaluable for shoulder exercises as well as variations of more traditional compound exercises.
Here are several landmine exercises that show the breadth of options you have with this attachment:
- Landmine Press
- Landmine Push Press
- Landmine Rotation
- Landmine Lunge
- Landmine Floor Press
- Landmine Rear Delt Row
- Landmine One Arm Row
- Landmine RDL
- Landmine Hack Squat
- Landmine Overhead Squat
T-Bar Row Handle (Optional)
My personal favorite landmine exercise is the landmine t-bar row. However, to do this movement, you’ll need a t-bar row landmine handle.
One such handle is included in the optional upgrade kit. Obviously, you shouldn’t buy the upgrade kit just to get this t-bar row handle. However, if you’re getting the upgrade kit anyway, you won’t need to buy one from a third party.
The t-bar row attachment is a multi-grip landmine handle that gives you:
- A set of neutral grip handles for neutral grip (palms together) t-bar rows
- A set of standard grip handles for pronated (overhand) and supinated (underhand) t-bar rows
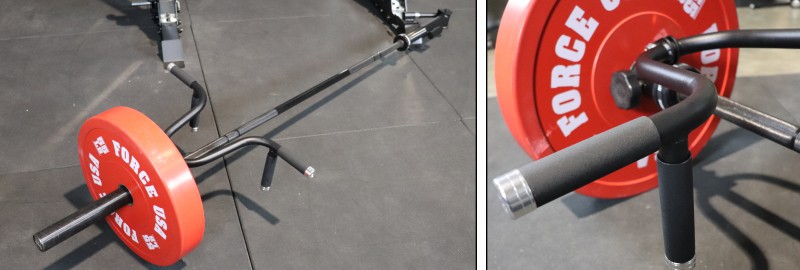
It’s not a fancy landmine handle attachment but it feels good to use.
All of the handles are rubberized for comfort and grip. And both sets of handles are spaced a good distance apart: a bit narrower for neutral grip handles and a bit wider for the standard grip handles.
I also like that it has a hinge that lets the handle swing up or down so you can adjust your starting position and pull the weight to exactly where you want on your torso.
If you’re looking for a t-bar row landmine handle attachment with all the bells and whistles, I recommend reading my review on the Ironmaster Ultimate Row Handle.
Storage Shelves (Optional)
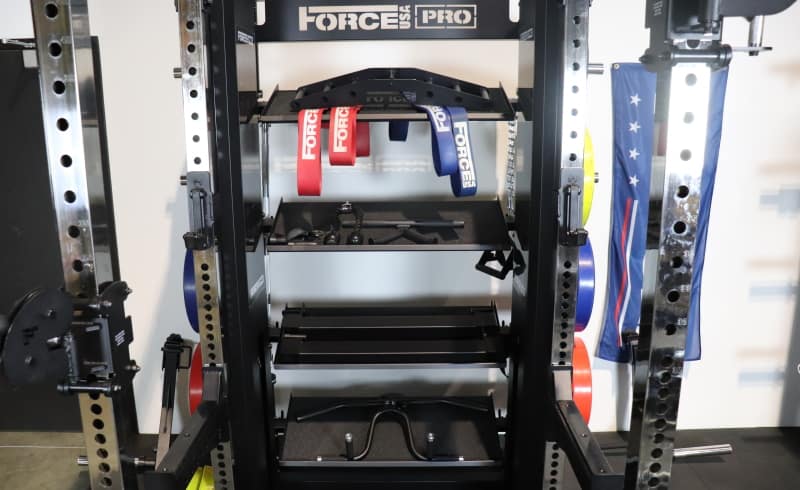
A set of 4 large, heavy-duty storage shelves are available for the Force USA X20 as part of the optional upgrade kit.
I consider these shelves to be high-value attachments. They help you make the most of your space by adding a storage area within the existing power rack footprint for all of your miscellaneous gym accessories, attachments or other equipment.
Most people in the market for a multi-trainer have limited space to begin with. So the shelves are appealing because it expands on the space-saving benefits of the base unit.
Each shelf is a heavy steel panel measuring 38” x 16.5”, which provides a spacious area to organize your gear.
There is a lip on the front and sides of the shelves to prevent any stored items from falling off.
Each shelf has a grippy rubber lining to prevent your gear from sliding around. This is particularly useful if you have the shelves angled forward. I inspected the lining and it showed no signs of peeling.
There are 2 storage hooks on the back of each shelf (1 per side). With 4 shelves, this gives you 8 storage hooks total. These hooks are perfect for storing anything that can be hung, such as cable handle accessories.
The shelves are installed with nuts and bolts into the holes rear frame uprights, located behind the weight stacks.
You can put them at any height you choose. You also have the option to install the shelves at 3 different angles: flat, angled forward or angled slightly more forward. I prefer either of the forward-angled positions. It makes your stored items easier to access, especially on the higher shelves.
While I think most people would want to use the shelves, I can see scenarios where they might not be desirable. For example, these aren’t for you if you want to enter and exit through the back of the power rack.
Likewise, if you already have a standalone storage shelf system, then these shelves are redundant.
TV Mount (Optional)
You can attach a TV to the Force USA X20 with the TV mount that comes with the optional upgrade kit.
It can support up to a 32” display. It uses the VESA hole pattern, which virtually every TV model is compatible with.
The TV mount attaches to the rear crossmember, which ensures the TV won’t get in the way of any exercises. Yet it’s still in a good viewing location so you can have your entertainment in front of you during your training session.
You can change the height and angle of the display by manipulating the 2 pop-pin adjustment joints which each have 3 settings.
Missing Features
The Force USA X20 Pro Multi-Trainer is feature-rich especially when you include the attachments you get in the upgrade kit.
However, these racks don’t have certain features that some people might be looking for especially if they’re comparing them to the Force USA G-Series all-in-one gyms:
No Smith machine
The X20 doesn’t have a Smith machine like the G-Series all-in-one trainers do. This is what puts the X-Series in the “multi-trainer” category rather than the “all-in-one gym” category.
No leg press
Since there’s no Smith machine, there’s nowhere to put a leg press attachment.
No monolift
I think a monolift attachment would work well for the X20. After all, even the G20 has one. I asked the team at Force USA about this and they said they’d consider making one if there’s enough demand for it. So let them know if that’s something you’d like to see.
In the meantime, if you really want a monolift attachment, this Titan monolift attachment should do the trick – with the caveat that you couldn’t insert the hitch pin because of the non-standard hole spacing on the X20.
No strap safeties
I talked about this earlier in this Force USA X20 review, but I think strap safeties would have been a great attachment to have – either in place of the flip-down safeties or as an optional upgrade.
Strap safeties are more versatile in my opinion and are faster to adjust. Luckily, you can buy a set from a third party if you want some. I recommend getting the REP PR-5000 strap safeties – be sure to get the 5000 Series set with the 30” length.
Force USA Training App
For some individuals, the myriad exercise options available with the Force USA X20 can be overwhelming.
The Force USA Training App aims to make things easier by showing all of the X20’s capabilities and putting them in the context of a workout program tailored for your goals.
I’ve personally tested the app and was pretty impressed. It’s designed well and solves the issue of some users feeling like they’re not getting the most out of their multi-trainer.
Here’s an overview of the app’s standout features:
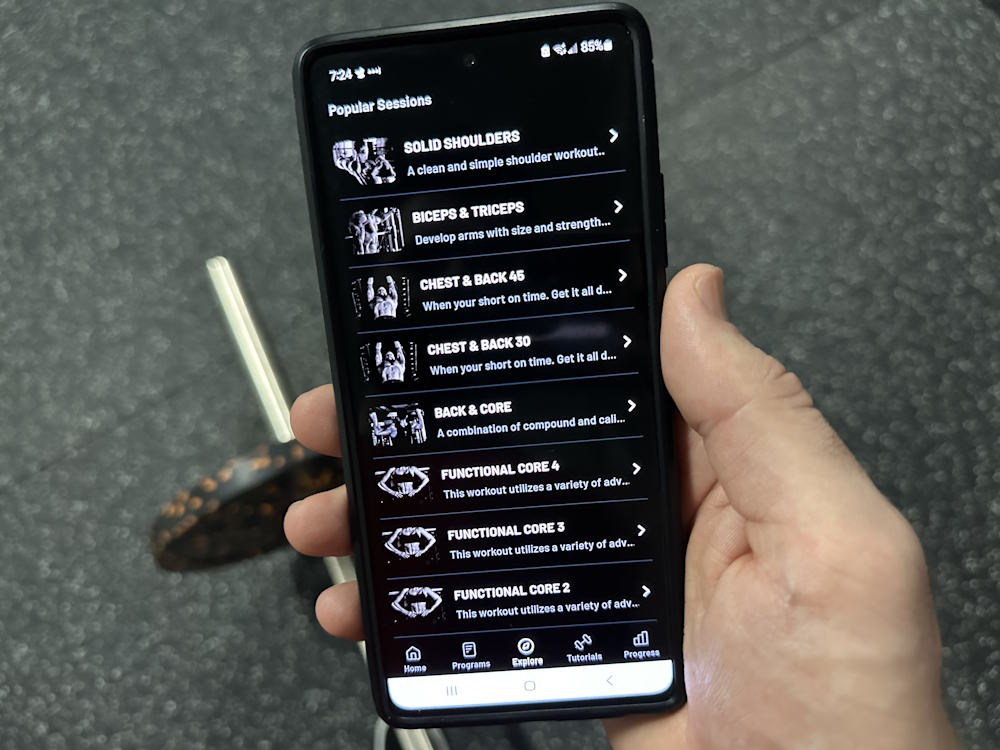
- Workout Library: The app has a bunch of different pre-designed workout plans to choose from. They’re organized by training goal and experience level, ensuring anyone can find a program suited for them.
- Exercise Library: Within the app, you can sift through short video exercise demos of a ton of different exercises that the X20 supports. This is good if you’re just looking for exercise ideas or if your workout calls for a specific movement that you’re not familiar with.
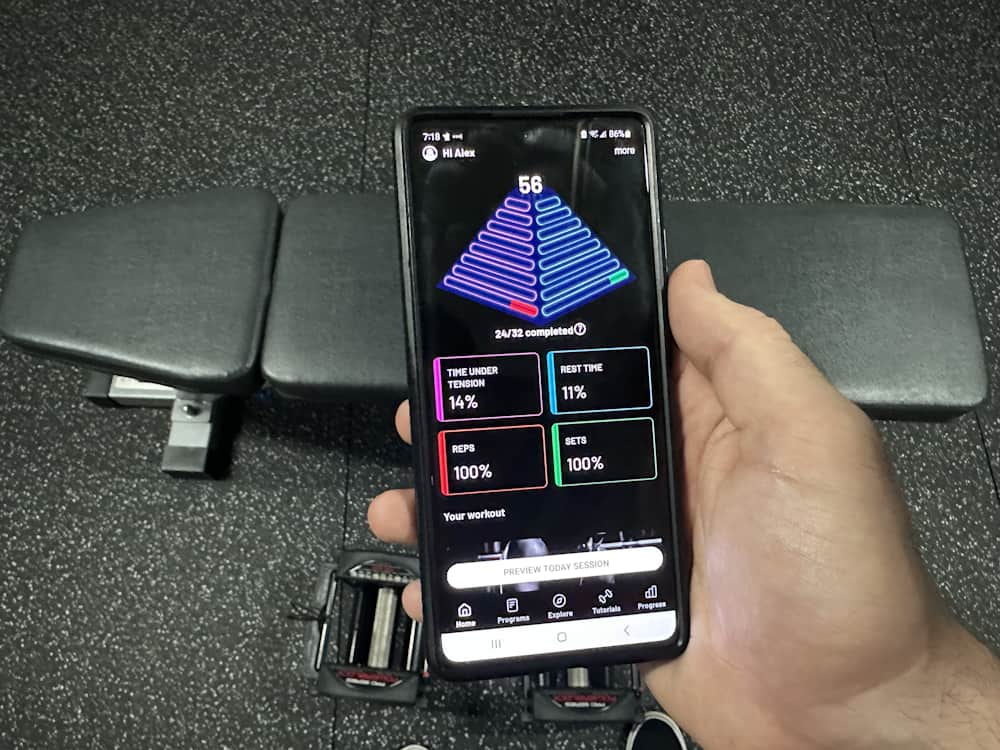
- Progress Tracking: The app logs every workout, assuming you save it when finished. You can go to the progress tab to see your bests on the big 3 movements. Also, the “Program Pyramid”, featured on the home screen, graphically shows your performance and adherence to your current chosen program.
- Intuitive User Interface: In spite of its feature-rich architecture, the app boasts an uncluttered, easy-to-navigate design. This makes it more likely you’ll actually stick to using the app and ultimately get more out of your training sessions.
- Guided Workout Flow: The app guides you, set by set, through your entire workout session. Simply tap next when you’re finished with your set and when you’re finished resting. When needed, you can modify your weights and reps for any given set.
- Rest Timer: This is an integral part of the guided workout flow. The timer starts after you tap the button to complete your sets. It runs for a pre-determined duration and then warns you when the time is up. This keeps you focused and efficient.
One downside is that the app doesn’t let you input your own custom workout routine. So if you want to do a personalized routine or any program not in their library, it’s not the best tool. However, you could still get use out of the exercise library.
Shipping
The Force USA X20 Pro Multi-Trainer is available in many countries throughout the globe. However, it is usually sold through different retailers depending on the country.
In the sections below, I’ll tell you where to get yours depending on where you live, along with any relevant shipping details.
But first, I’ll tell you some shipping information and tips that apply to everyone, regardless of where you buy from:
- The X20 ships via LTL freight for curbside delivery. This means a third-party freight carrier will coordinate with you for a delivery time. They will leave the shipment in your driveway but won’t bring it into your home.
- Be sure to inspect the delivery for any obvious damage before signing.
- The X20 base unit is packaged inside 3 wooden crates and ships on a single pallet. Its total shipping weight is 1600 lbs.
- The optional upgrade kit comes in a single wooden crate. Its total shipping weight is ~300 lbs. It may be stacked on the same pallet as the base unit or a second pallet may be used if you also order additional items (e.g. plates, bars, flooring).
US Shipping
The only place to buy the Force USA X20 in America is through ForceUSA.com. They ship to the 48 contiguous states. If you’re in Hawaii or Alaska, I’m sorry but you’re out of luck.
The shipping cost is $349 for the base unit regardless of the destination. If you also get the optional upgrade kit, there is no additional shipping charge. If you were to buy just the optional upgrade kit without the base unit, then the shipping cost would be $99.
When you use my 5% off coupon code KING5, most of the shipping cost is wiped out with the extra 5% that you save.
International Shipping
Shipping to Australia
If you’re in Australia, I recommend using GymAndFitness.com.au to buy the Force USA X20. Gym And Fitness is the largest retailer of Force USA equipment in the country.
I negotiated a discount code with them as well. The same KING5 discount code that I have for my US readers will also save Australian readers 5% when ordering through Gym And Fitness.
Shipping costs vary based on:
- The weight of the shipment: The X20 base unit will cost a certain amount to ship. If you also order the upgrade kit, shipping will increase accordingly. You’ll pay marginally more if you decide to buy other equipment like a bar and plates.
- The region of Australia you’re shipping to: The regions from least expensive to most expensive shipping costs rank as follows: QLD, ACT, NSW, SA, VIC, NT, TAS.
I calculated different order configurations for different shipping destinations to get an idea of the range of shipping costs. On the low end, if you order just the X20 (no upgrade kit) and ship to Queensland, shipping costs around $260 give or take. On the high end, if you order the X20 with the upgrade kit and ship it to Tasmania, shipping costs will be around $1,000.
Please note that these figures are based on current shipping rates. The costs will fluctuate up or down depending on the market for shipping services at the time that you order.
IMPORTANT: You can get FREE shipping if you join the Gym and Fitness loyalty program. However, this offer is not available to those in the Northern Territory, Western Australia and Tasmania.
Shipping to Canada
The same guys who run ForceUSA.com recently expanded into the Canadian market. They created a Canadian website:
ForceUSA.ca is the only place Canadians can order the Force USA X20 as well as any other Force USA equipment. My KING5 coupon code also works on this site.
Shipping costs vary depending on where in Canada you’re shipping to. The shipping costs are a bit higher than for the US.
The good news is that the shipping price appears to stay the same if you add more items to your order. So if you think you want the upgrade kit, definitely buy it now so you don’t have to pay a lot to ship it later. Likewise, if you need any other equipment, include it in your order now.
Shipping to the Middle East
If you’re in the Gulf region, I recommend buying your Force USA X20 through either Garner Fitness Supplies (Garner.ae) or Alqudra Sports Equipment (Alqudra.sa).
You can use my code KING5 on both Garner.ae and Alqudra.sa for 5% off your order.
Both stores are owned by the same company but are based in different countries.
Garner Fitness Supplies is located in Dubai and ships to the UAE, Kuwait, Bahrain, Oman, Qatar and Saudi Arabia. Alqudra Sports Equipment is based in Saudi Arabia and ships to Saudi Arabia, Kuwait, Bahrain, Oman and the UAE.
Shipping rates vary based on the retailer and your destination. You’ll typically get the best rate by ordering from whichever retailer is closest to you.
Who Is the Force USA X20 Best for?
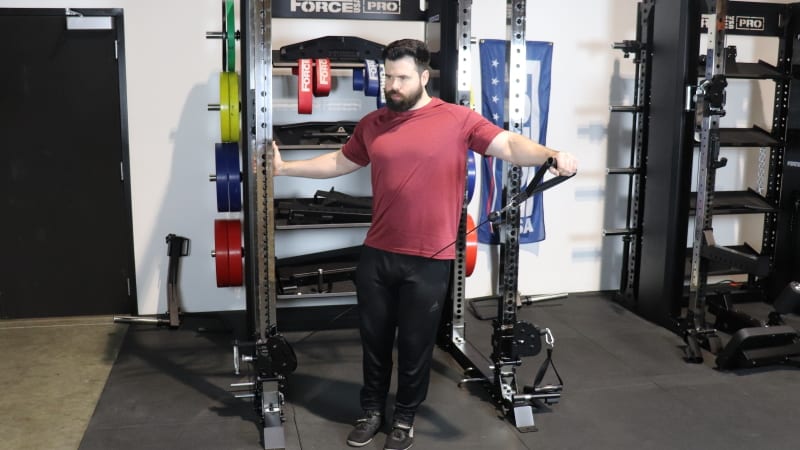
Buy the Force USA X20 – Use KING5 for 5% OFF »
The Force USA X20 Pro Multi-Trainer doesn’t make sense for everyone. But it does make a whole lot of sense for several different types of people.
I’ll lay out the best use cases for this multi-trainer unit:
- Lifters who want a full power rack with an integrated functional trainer. Neither the X15 nor the G-Series gives you this; they all have a half rack.
- Serious home gym lifters who want to maximize their space AND who do both powerlifting and bodybuilding style training. The X20 maximizes space by having a dual cable system and a full power rack all in the same footprint. The beefy 3”x3” 11-gauge rack makes this unit ideal when doing heavy powerlifting movements. Meanwhile, the functional trainer (including lat pulldown and low row stations) caters to bodybuilding-style training where cable work is essential for targeting specific muscle groups at any angle with constant tension.
- Lifters who want an all-in-one gym without a Smith machine. If you like the Force USA G-Series units, but don’t want or need the Smith machine, the X20 is perfect for you.
- Personal trainers who train athletes and sports-centric physical therapists with small studios or clinics. If you train athletes for performance and/or rehab in a room with limited square footage, the X20 gives you all the major training tools you need in a single (relatively) compact footprint.
- Strength coaches that run a small athletic facility for a school or other organization. The 3”x3” 11-gauge uprights provide the strength needed for strong athletes. The space-saving integrated cable design would help to conserve space in a limited space. For larger strength facilities, however, it wouldn’t make sense. In those cases, you’d have a bunch of dedicated racks and separate cable systems.
- Small commercial gyms. This type of multi-trainer is perfect for gyms in smaller towns where you have a limited number of members training.
- Other niche commercial applications such as apartment/hotel gyms or cop/firefighter gyms. These gyms are in smaller rooms so the space-efficient design would help conserve space while providing a place for both cable and barbell work. The beefy frame will allow it to tolerate a low to moderate flow of daily users that are expected in these gyms.
Who Shouldn’t Buy the Force USA X20?
Not everyone should buy the Force USA X20. Here are the situations where I don’t recommend it:
- Home gym owners with plenty of extra space. The X20 makes the most sense if you’re trying to conserve space while still having a full power rack and a cable system. However, if you have plenty of room to spare, you can get dedicated equipment instead. Each piece will be specialized, plus it’ll make switching between exercise stations faster and more convenient. In this scenario, I’d recommend getting a dedicated full power rack like the REP PR-5000, a functional trainer like the REP FT-5000 and a lat pulldown/low row machine like the Titan Selectorized Lat Tower or the Titan Plate-Loaded Lat Tower.
- Lifters who want a multi-trainer/all-in-one with a Smith machine. The X20 notably does not have a built-in Smith machine. If this is a must-have feature for you, I’d recommend going with the Force USA G20 All-In-One Trainer instead. It’s the tallest, beefiest and most feature-rich G-Series model. It currently doesn’t have jammer arms, but some are in development and will be available soon.
- Lifters who can’t afford the hefty price tag. If you’re on a tighter budget, your best bet is to go with a lower-cost G-Series all-in-one unit. Your best bet is a plate-loaded unit like the G9 or G3, which are the least expensive. If you want a selectorized unit, then the G6 is the lowest cost option.
- Anyone who absolutely wants a rack with standard hole spacing and holes on the sides of the uprights. If you want standard 2” hole spacing on all sides of the uprights so you can buy more power rack attachments, your best bet is to go with the new REP Ares system, which attaches to a REP PR-5000 power rack that you must also buy (note: you can also use it with the REP PR-4000, which has ⅝” holes with Westside hole spacing).
Force USA X20 vs G-series
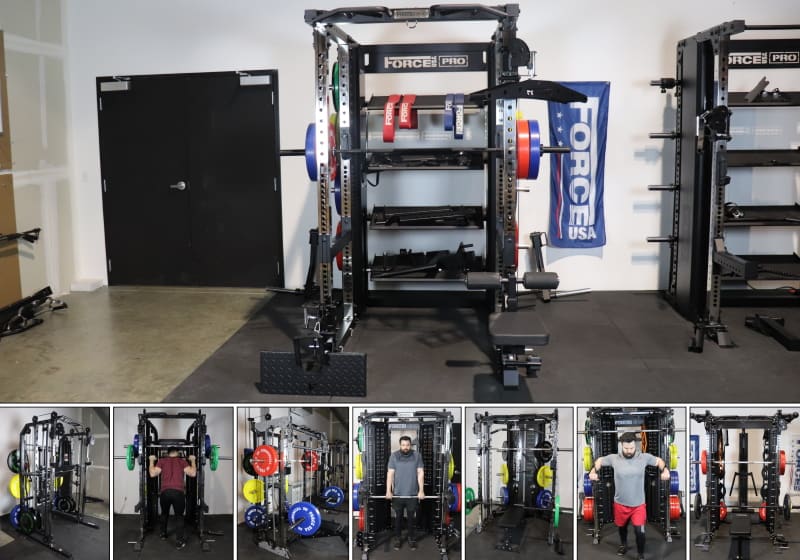
I know many people considering the X20 are also considering the Force USA G-Series units.
Here are the key differences between the X20 and all the G-Series units:
- All G-Series units have a Smith machine (with accompanying leg press attachment). The X20 does not have a Smith machine.
- All G-Series units have a half rack for the squat rack station. The X20 has a power rack.
- All G-Series units use 2”x2” uprights. The X20 has 3”x3” uprights.
- There are selectorized G-Series models (G6, G12, G15, G20) and plate-loaded G-Series models (G3, G9, G10). There X20 is only available as a selectorized unit.
Here’s my advice on when to choose one over the other;
- Go with one of the G-Series units if you want a Smith machine and/or leg press.
- Go with one of the lower-priced G-Series units (G3, G6, G9) if you’re on a budget.
- Go with the X20 if you don’t want a Smith machine.
- Go with the X20 if you want a full power rack.
- Go with the X20 if you want a stronger, beefier rack and frame.
If you want to know more about the differences between the various G-Series models, I recommend you read my article comparing the Force USA G3 vs G6 vs G9 vs G10 vs G12 vs G15 vs G20.
You can also read my individual G-Series reviews here:
- Force USA G3 review
- Force USA G6 review
- Force USA G9 review
- Force USA G10 review (coming soon)
- Force USA G12 review
- Force USA G15 review
- Force USA G20 review
Force USA X20 vs X15
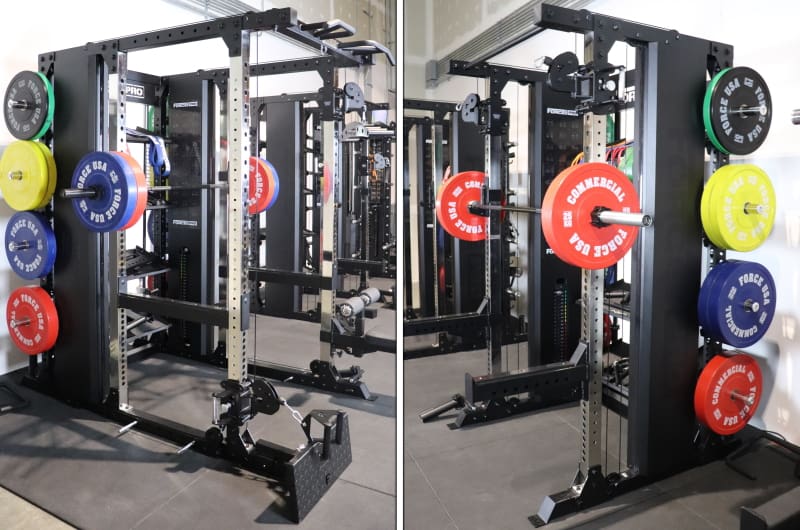
To get the X20 or to get the X15 – that is the question!
The answer to that question comes down to whether you want a half rack or a power rack…
…And that preference depends on 3 factors: training style, budget and space constraints. I’ll discuss each below:
Training Style
Do you have a stronger focus on heavy powerlifting movements – specifically, a lot of near-max and max work on bench and squat (i.e. 90-100% of your one-rep max)?
If so, that’s a point in favor of the X20 since it is a bit safer by being a fully enclosed rack. You can still lift safely in the X15’s half rack, but the full power rack on the X20 provides more peace of mind.
If you want to do band-resisted squats and bench press, then the X20 is your only option. The X15 lacks band peg holes.
If you don’t do a ton of max/near-max lifting and don’t need to do any band work, then the X15 is all you need. Whether you want the larger X20 is up to you.
Budget
Both units are pricey, with the X15 coming in at $3,999 and the X20 costing just a bit more at $4,249.
The $250 difference is pretty small considering you get an extra pair of uprights and crossmembers. So if you want the full rack instead of the half, the price difference shouldn’t be stopping you.
Space Constraints
How much extra space do you have in your gym?
If space is already tight or you have plans to use your extra space for other equipment, then it might be wise to get the X15. It saves you 30” of depth compared to the X20. That’s a significant amount of floor space if you don’t have a lot of room to work with.
However, if you’ve got enough room, then go for the X20 if that’s what you want.
Overall Rating
Force USA X20 Pro Multi-Trainer

The Force USA X20 Pro Multi-Gym is ideal for lifters who use both powerlifting and bodybuilding styles of training. It integrates a selectorized functional trainer and full-sized power rack into a single 6-post setup with multiple attachments available, giving it a (relatively) compact footprint with tons of exercise capabilities.
Product Brand: Force USA
4.8
Conclusion
I sincerely hope my Force USA X20 review has helped you decide if the X20 is the best multi-trainer for you.
If you’ve determined it’s the right choice, click the link below to get yours:
Buy Now – Force USA X20 All-In-One Trainer »
And don’t forget to use code KING5 for 5% off your entire order.
P.S. Australian and Canadian readers – Remember that you can also use my KING5 discount code for 5% off at GymAndFitness.com.au and ForceUSA.ca.

Excellent review, as usual. Great effort and dedication.
Thanks Sergio!
What are your thoughts on build quality compared to Rep Fitness?
I am looking to buy either the X20 or the Rep PR-5000 with Ares)
I move a lot being Active Duty and want to know what will hold up over time. Thank you for detailed review!