You won’t find a more detailed Force USA G15 review anywhere else but here!
I’ll tell you everything you need to know (and more) about the Force USA G15 All-In-One Trainer to decide if it’s right for you.
| Model | Pros & Cons | Rating |
|---|---|---|
Force USA G15 All-In-One Trainer | Pros:
| Rated 4.8 out of 5 in All-In-Ones |
If you’re interested in the Force USA G15, then you probably also know about the Force USA G10. These two units are nearly identical, with one major difference…
…The G15’s functional trainer uses a selectorized weight stack. Whereas, the G10’s functional trainer uses a plate-loaded weight carriage on the G10. This key difference has implications on the user experience, prices and depth dimensions of the two units.
Before I dive into the details of this Force USA G15 review, I’ll highlight the key features that separate the G15 (and G10) from most of the other Force USA G-Series units:
- The functional trainer has a patent-pending dual pulley system that lets you switch between a 2:1 AND 4:1 pulley ratio. This super useful feature is exclusive to the G15 and G10.
- Jammer arms are available as an optional upgrade. These were the most requested feature from G-Series customers. I’m a big fan and love the versatility they add to an already-versatile setup. No other units have this option, though one is also being planned for the G20.
- The power rack uprights have uniform 1″ hole spacing for extremely precise positioning of the j-hooks and spotter arms. Only the G10 and G20 have the same hole spacing. It’s a step beyond the Westside hole spacing (1″ in the bench zone, 2″ above and/or below) on the G3. And it’s a leap beyond the uniform 3.75″ hole spacing on the G6, G9 and G12.
- Storage shelves are available as an upgrade. These give you a lot of space to conveniently store and organize your gym accessories and gear.
I’ve got a whole lot more to say about the Force USA G15 All-In-One Trainer. In the following sections, I’ll get into the nitty-gritty of specs, features and attachments, including what I like and what could be improved. Plus, I’ll compare the G15 to the other G-Series units.
RELATED POSTS:
- Force USA G3 in-depth review
- Force USA G6 in-depth review
- Force USA G9 in-depth review
- Force USA G10 in-depth review
- Force USA G12 in-depth review
- Force USA G20 in-depth review
- Force USA G3, G6, G9, G10, G12, G15 & G20 review & comparison guide
This Force USA G15 review will be very long so you may want to navigate with the table of contents:
Table of Contents
What Comes with the Force USA G15?
The Force USA G15 All-In-One Trainer has a base unit as well as an optional upgrade kit.
Below, I’ll go over each of the attachments and exercise stations on the G15 base unit first. Then I’ll discuss what’s included with the upgrade kit.
G15 Base Unit
The Force USA G15 base unit is an 8-in-1 all-in-one gym that comes standard with the following training stations:
- Power Rack
- Includes a pair of j-hooks and spotter arms that install on the 2″ x 2″ uprights with 1″ hole spacing.
- Functional Trainer
- Includes two selectorized weight stacks for resistance, located within the rear/sides of the frame.
- Features an interchangeable 2:1 and 4:1 pulley ratio.
- Comes standard with the following cable attachments:
- Lat Pulldown Bar
- Nylon Stirrup Handles (2)
- Adjustable Nylon Stirrup Handles (2)
- Triceps Rope
- Triceps V-Bar
- Short Straight Bar
- Long Straight Bar
- EZ Curl Bar
- Close Grip Row Handle
- Smith Machine
- Includes a counterbalanced Smith machine bar with an adjustable-height safety catch system and a spring-loaded stopper at the bottom.
- Low Row Station
- Includes a removable steel footplate that attaches in front of the left side of the functional trainer.
- Chin Up Station
- Includes one multi-grip chin up bar on the front of the unit.
- Lat Pulldown Station
- Includes an adjustable knee holder pad that can attach to either of the uprights, to secure your legs for doing pulldowns on the functional trainer.
- Dip Station
- Includes two separate handles that attach to both of the power rack uprights.
- Suspension Trainer Station
- Includes a U-bolt connected to the top of the rack frame, from which you can securely hang a suspension trainer.
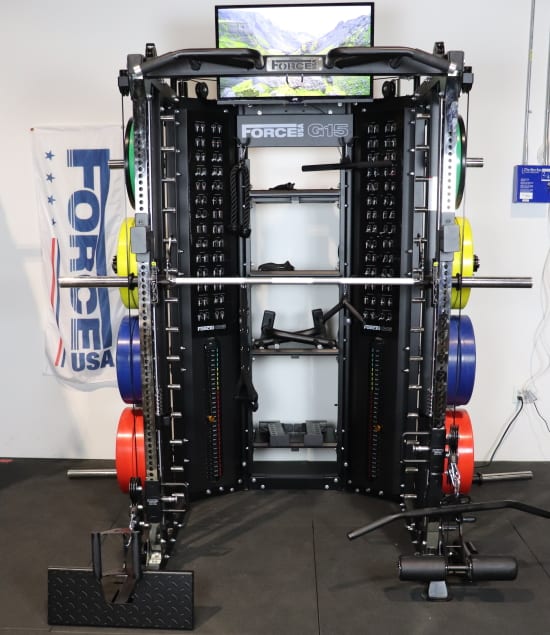
In addition to the different exercise stations and cable accessories, the base unit also comes with a few other items:
- Plate Holders (8)
- Storage Hooks (4)
- Storage Hangers (4)
- Barbell Storage (2)
- Barbell Collars (10)
- Exercise Charts (2)
- Band Pegs (4)
- Extension Chains (4)
- Carabiners (6)
G15 Optional Upgrade Kit
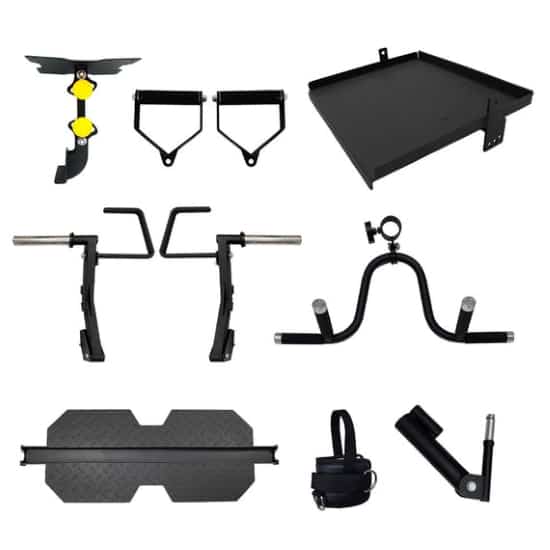
You can convert your Force USA G15 base unit from an 8-in-1 machine into an 11-in-1 machine with the optional G15 upgrade kit.
You get these 3 exercise stations with the kit:
- Jammer Arms
- Includes a pair of jammer arms which you can install at any height on the power rack to mimic Hammer Strength machine-style movements.
- Vertical Leg Press
- Includes a leg press plate that attaches to the Smith machine bar.
- Core Trainer
- Includes a rotating landmine unit + t-bar row handle.
You also get these add-ons:
- Storage Shelves (4)
- TV Mount
Lastly, you get a couple more cable accessories to use on the functional trainer:
- Ankle Cuff (1)
- Metal Stirrup Handles (2)
Optional Leg Curl/Extension Attachment
Transform your G10 from an 11-in-1 machine (assuming you also have the upgrade kit) to a 12-in-1 machine with the purchase of the leg curl/extension attachment, available for sale at $149.
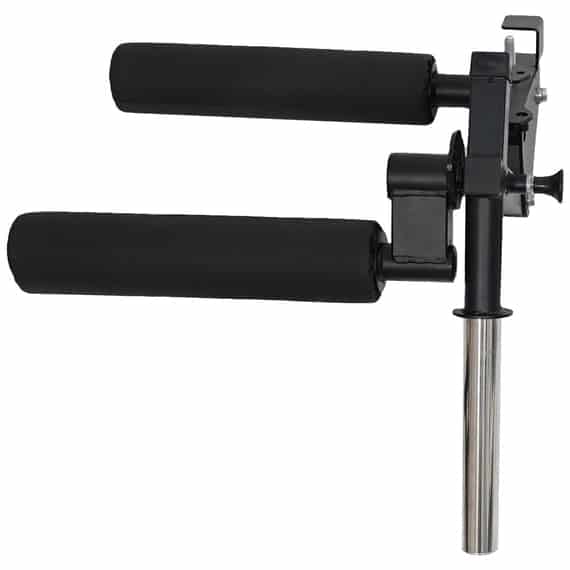
Use this plate-loaded leg attachment to transform your power rack into an isolation leg workout station. Perform leg curls, leg extensions, and even hip thrusts with a compact and removable piece of equipment.
Dimensions
Before you get too far down the path towards buying the Force USA G15 All-In-One Trainer, you need to first confirm it will fit in your space and that you’ll have enough room to use it.
In the sections below, I’ll lay out all of its dimensions. Plus, I’ll tell you how much room beyond those dimensions you need to comfortably use it.
Force USA G15 Dimensions
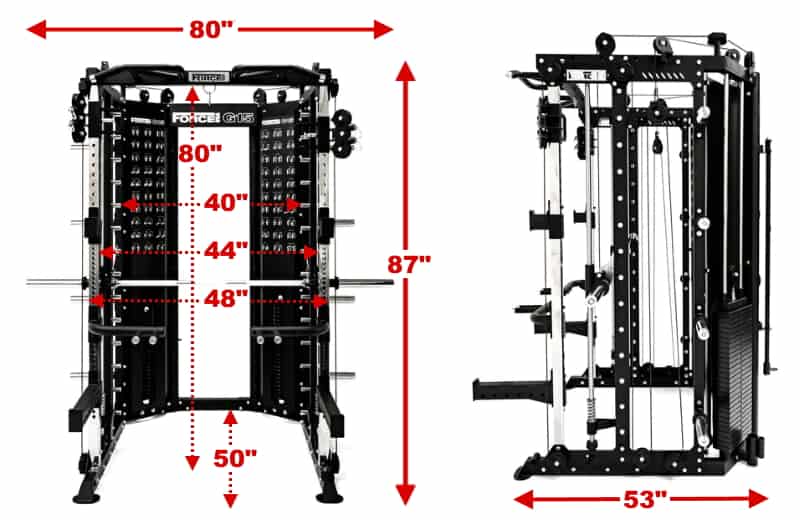
- External Width: 80″ (6’8″)
- External Width (Outside Uprights): 48″ (4’0″)
- External Depth: 53″ (4’2″)
- External Height: 87″ (7’3″)
- Internal Width (Between Uprights): 44″ (3’8″)
- Internal Width (Smith Machine Area): 40″ (3’4″)
- Internal Depth: 50″ (4’2″)
- Internal Height: 80″ (6’8″)
- Unit Weight: 1150 lbs
Minimum Space Needed for Practical Use
Knowing the dimensions of the G15 doesn’t tell you the whole story as to whether you’ll have enough space for it in your home gym.
You need to consider the extra space needed to:
- Exercise in, on and around the machine
- Add and remove plates
Here are my recommended clearances for practical use:
- 1 foot off each side of your free weight barbell. Most barbells are 86.5″ (7’2.5″) long. So you should ideally have a space that’s at least 110.5″ (9’2.5″) wide.
- 5 feet in the front to do nearly all power rack and cable exercises, including seated low rows with the low row footplate attachment. You’ll need more space for landmine exercises; around 7-8 feet in front of the rack.
- 6″ of clearance off the back if you plan to use the optional storage shelves. If you don’t plan on using the shelves, you can position the unit flush against the wall.
- A minimum ceiling height of 7’8″. This is 5″ above the total height of the unit and 10″ above the height of the pull up bar.
Force USA G15 Review: Features
In the following sections of my Force USA G15 review, I’ll analyze each major feature in great detail.
Space-Efficient Design
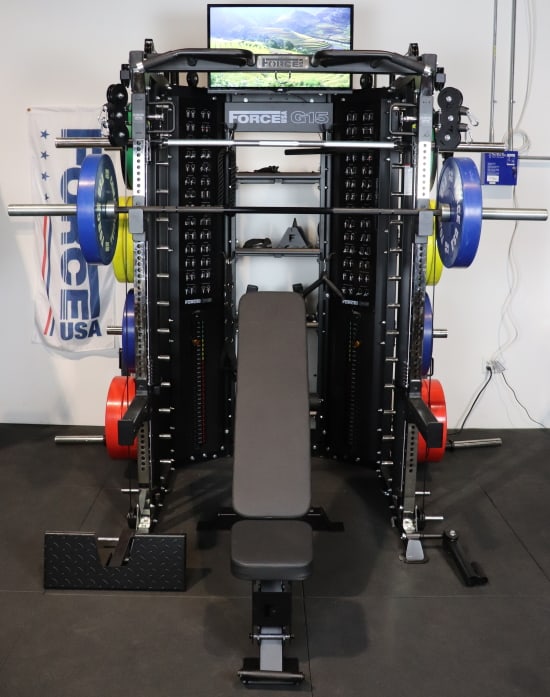
The Force USA G15 All-In-One Trainer isn’t tiny in absolute size. But when you consider how many exercise stations are contained within it, you realize just how compact this all-in-one trainer is.
The Force USA G15 is more compact than its plate-loaded counterpart, the G10. This is because it has selectorized weight stacks inside the rack, rather than a weight carriage off the back of the frame.
The G15 gets you an 8-in-1 (or 11-in-1 with the upgrade) machine in about the same footprint as a deep 4-post power rack (e.g. the Rogue RML-490 rack has a 53″ x 53″ footprint).
Of course, you get way more utility out of the G15 than a similarly-sized dedicated power rack.
The space-efficient design is what makes this all-in-one trainer such an attractive piece of gym equipment for certain types of lifters. It is the perfect solution for home gym owners with limited space who still want most of the strength training capabilities that a commercial gym offers.
Buy the Force USA G15 – Use KING5 for 5% OFF »
Now, it would be unfair to say that having the G15 is the same as having a dedicated piece of equipment for each of its exercise stations – as you’d have in a commercial gym. When you pack so many exercise stations into a compact footprint, you give up certain things.
Some of those trade-offs include:
- Setup time when transitioning from one exercise station to another can take longer if you have to install/uninstall attachments.
- Certain exercises may be harder to get into position for. An example of this is the leg press station. You have to get underneath the bar while laying on the floor or a bench. Compare this to simply reclining on a 45-degree leg press machine.
- You may wish you had a bit more room for certain exercises. For example, on the Smith machine seated incline press (at least when using high incline settings), you can’t fit an adjustable bench in the upright position deep enough inside the rack the normal way (i.e. where you’d be facing out of the rack). Instead, you have to flip the bench around so you’re facing the back of the rack to have enough room.
That being said, for most people considering an all-in-one trainer, the minor loss in efficiency and ease of use is well worth the benefits you gain from a compact, feature-packed design.
You’d need A LOT of extra room to fill your gym area with a dedicated piece of equipment to match the exercise stations on the G15. Not only that, but you’d need more money too, which I’ll talk about next.
Cost Saving Design
The Force USA G15 All-In-One Trainer is not only space-efficient, but it’s cost-effective as well.
This machine is not inexpensive, obviously – the G15 base unit retails for $5,499.
However, it delivers A TON of value since you get so many different exercise stations in a single machine.
You can save money buying this all-in-one gym compared to the alternative of buying several specialized machines to get the same exercise capabilities.
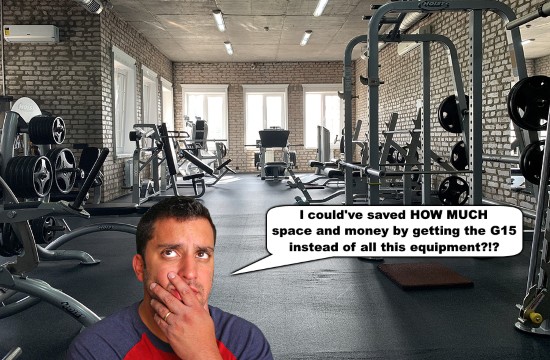
At least, that’s the case if you were buying all the specialized machines brand new. However, if you were to shop around for used equipment on Facebook Marketplace, OfferUp and Craigslist, then you could potentially get all the dedicated equipment for less than the cost of the G15.
However, not only does that take a lot of time and effort, but it also requires being in a populated area with a big enough market and having a truck to pick up the large equipment.
Of course, to even consider buying the G15 vs hunting for deals on specialized machines, you need to have a large enough space in the first place. Most people in the all-in-one gym market don’t have that luxury.
Versatile Design
Versatility is the name of the game when it comes to all-in-one gyms. You want a design that packs in a ton of training capabilities within its limited footprint. This way, you have no shortage of exercise variety.
The Force USA G15 All-In-One Trainer is an excellent example of a versatile all-in-one gym design.
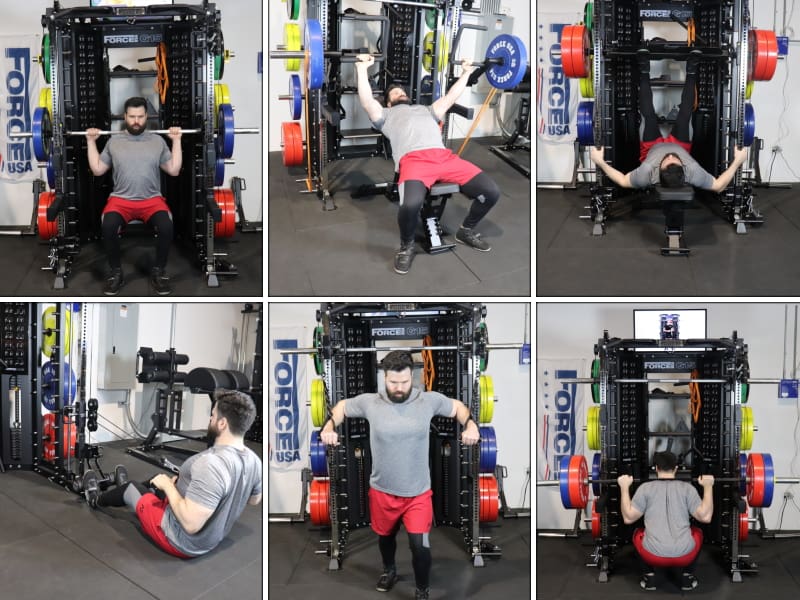
It gives you the ability to do hundreds of different exercises and that’s just on the 8 exercise stations that come standard with the base unit.
You expand the exercise selection considerably when you buy the optional upgrade kit. It gives you an additional 3 exercise stations. The most notable one is the jammer arms.
To recap, the G15 base unit is an 8-in-1 machine that expands to an 11-in-1 machine when you get the upgrade kit.
Compared to the other G-Series units, it has fewer exercise stations than average in terms of ones that come standard with the base unit. However, it has more stations than all others except the G20 when you include the optional exercise station. Here’s how the others stack up:
- G3: A 5-in-1 machine that can be upgraded to a 7-in-1 machine with optional attachments.
- G6: A 9-in-1 machine with no optional upgrades available.
- G9: A 10-in-1 machine with no optional upgrades available.
- G10: An 8-in-1 machine that can be upgraded to an 11-in-1 machine with optional attachments.
- G12: A 9-in-1 machine with no optional upgrades available.
- G20: A 11-in-1 machine that can be upgraded to a 14-in-1 machine with optional attachments.
The G15 with the optional upgrade kit is arguably the most versatile of all the G-Series units because it has jammer arms. No G-Series unit other than the G10 has jammer arms. The G20 will have a jammer arm option in the future; when that happens, the G20 will be the most versatile unit in my opinion.
To demonstrate the versatility of the Force USA G15, here’s a breakdown of the base unit’s exercise capabilities:
- The power rack, or technically “half rack”, lets you do practically every free weight barbell exercises you could do in a full-sized dedicated power rack. In total, this means you have access to 40+ barbell movements with this exercise station.
- The functional trainer is the central feature of any all-in-one gym. It’s arguably the most versatile exercise station, which gives you the ability to do 75+ cable exercises. With an adjustable pulley on each upright, 22 height settings and 11 cable accessories (9 standard, 2 optional), you can do any movement you can think of through whichever plane of motion you want.
- The functional trainer’s capabilities include several lat pulldown variations. You can convert the functional trainer into a lat pulldown station when you use the included lat pulldown leg holder to lock your thighs in place while seated on the floor or on a bench.
- The functional trainer also makes several low row exercises possible when used in conjunction with the low row footplate attachment.
- You have access to 30+ Smith machine exercises. The Smith machine station is a fixed-track barbell. As such, you can do a version of most free weight barbell exercises on this station. Plus, there are some exercises that you can only do on a Smith machine.
- The multi-grip chin up station gives you the ability to do a minimum of 12 pull up variations. This chin up bar includes straight segments, perpendicular segments and angled segments, which makes it possible to use different grip positions (pronated, supinated, neutral) and grip widths (narrow, medium, wide).
- The dip station lets you do 2+ dip variations, including wide grip dips and close grip dips. If you get creative, you can do several more dip variations on the dip station.
- You get access to 80 suspension trainer exercises when you attach your suspension trainer (sold separately) to the built-in suspension trainer ring. This is also a convenient and sturdy place to hang a heavy bag if you have one.
If you buy the optional upgrade kit for the G15, you’ll get 3 more exercise stations that will give you the following exercise capabilities:
- The jammer arms unlock 20+ jammer arm exercise possibilities. These adjustable height attachments let you do nearly any exercise you can do on the plate-loaded lever-style machines found in commercial gyms (e.g. Hammer Strength machines).
- The vertical leg press station gives you access to 3 leg press variations: narrow, medium and wide stance leg press. While the leg press doesn’t provide a ton of exercises, it’s nonetheless highly effective if you’re looking to build up your leg and glute muscles.
- You can do 30+ landmine exercises on the landmine/core trainer station. Most of these exercises are focused on training the shoulders and/or core stability. However, the included handle gives you access to some powerful landmine row variations.
Build Quality & Warranty
The Force USA G15 All-In-One Trainer is a heavy-duty unit, featuring thick 11-gauge steel on the power rack uprights. It has a 992 lb weight capacity rating, making it more than strong enough for virtually any lifter.
The only other G-Series units with 11-gauge uprights are G10 and G20. All other units have slightly thinner yet adequate 12-gauge uprights.
The G15 is quite hefty, tipping the scales at 1150 lbs. A lot of this weight comes from the dual selectorized weight stacks on the functional trainer. Suffice to say, you won’t have to worry about it shifting around on you.
The build quality is robust for home gym use. It’s NOT meant for big box commercial gyms, which would put it through too heavy of usage. Beyond that, all-in-ones aren’t designed for a big box gym setting, where there’s plenty of specialized equipment.
That said, the G15 is well-suited to handle the rigors of certain limited commercial applications, including:
- Personal training studios
- Physical therapy clinics
- Small rec center gyms with limited space and low membership
- Boxing/MMA gyms that want a small corner dedicated to strength training
- Office gyms
- Hotel and apartment gyms
I also recommend the G20, G12, G10 and G9 for these scenarios. However, the G15 is arguably more accessible in some of these use cases. This is because it has interchangeable pulley ratios, which makes it a good fit for both novice and experienced clientele. The novice users would benefit greatly from the 4:1 ratio so they can use extra light weight and progress in small increments.
In terms of warranty coverage, the G15 is backed by the same lifetime structural warranty as all other G-Series units. This covers the most important part of the unit: The structure aka the frame components and the hardware holding it together. It protects you against any failures in this structural portion that occur from normal use.
The cables and pulleys are covered under a separate 2-year warranty and there’s a 90-day wear and tear warranty on all rack accessories.
Buy the Force USA G15 – Use KING5 for 5% OFF »
Power Rack
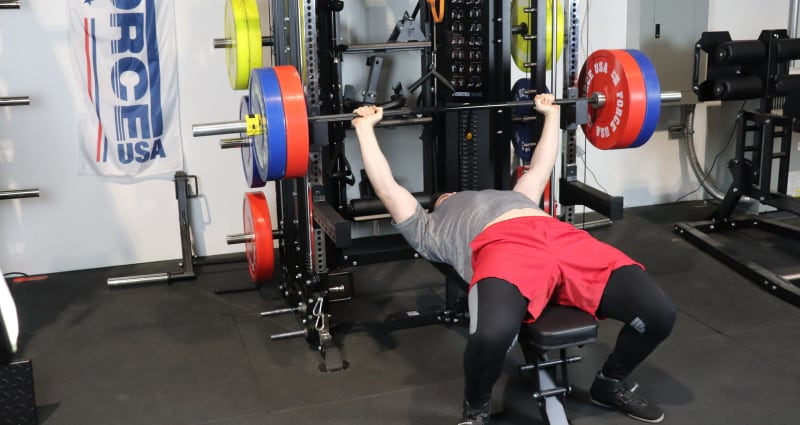
The Force USA G15’s “power rack” station is really a half rack since it has just 2 uprights instead of 4 and is not a fully enclosed cage. However, ForceUSA.com refers to this exercise station as a power rack, so I’ll use that same terminology throughout this Force USA G15 review for consistency.
Half racks and power racks have the same functionality in terms of exercise capabilities. They’re both designed for safely performing free weight barbell exercises.
While a power rack provides a bit more safety by being fully enclosed, the major benefit of a half rack is that it takes up much less space, which is an essential feature for an all-in-one gym.
There are several dozen barbell exercises you can do on the Force USA G15 power rack station. I’ll list some examples below:
- Back Squat
- Front Squat
- Zercher Squat
- Overhead Squat
- Bulgarian Split Squat
- Reverse Lunge
- Flat Bench Press
- Close Grip Bench Press
- Incline Bench Press
- Floor Press
- Close Grip Bench Press
- Overhead Press
- Push Press
- Seated Press
- Z-Press
- RDL
- Rack Pull
- Good Morning
- Yates Row
- Shrug
- Biceps Curl
- Upright Row
- And many more!
For all of these exercises, you’ll need a barbell and weight plates, which aren’t included. Some of them also require a flat or adjustable weight bench, which also isn’t included. If you don’t already have these items, you’ll need to make room in your budget and remember to purchase them separately.
Now, let’s review the key specs and dimensions for the G15 power rack.
The rack is rated for 992 lbs. It’s such an odd number since it’s converted from the kilogram rating of 450 kg, which is a nice round number. But essentially you match the industry standard of a 1000 lb capacity rating for any non-budget rack. In short, unless you’re an elite competitive powerlifter, you won’t come anywhere close to needing a higher capacity.
The uprights on the G15 are 2″x2″ and made of 11-gauge steel, just like on the G10 and G20.
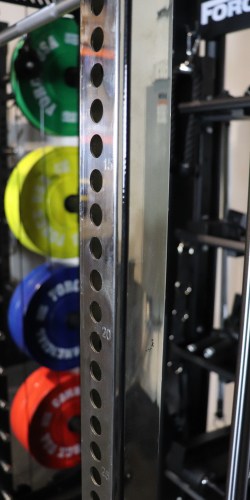
Compare this to the G3, G6, G9 and G12, which also have 2″x2″ uprights but use thinner 12-gauge steel.
I’d guess that the true weight capacity of the G15 may be a bit higher than 992 lbs because its uprights use thicker steel than the G3, G6, G9 and G12, which have the same capacity rating. Whatever the case, the rack can handle more than you can throw at it.
The Force USA G15 power rack has an internal width of 44″. That’s the distance between the insides of each of the 2 power rack uprights. This puts it right in the same ballpark as most dedicated power racks, which generally range from 41-44″ for their internal width.
Internal width is important because it tells you if you have the right amount of space to do barbell exercises without issues. Too narrow and you have to be careful not to pinch your fingers when re-racking the bar. That’s won’t be an issue on the G15.
The Force USA G15 and G3 have the same 44″ internal width as the G10. That’s just a tad narrower than the G20, which comes in at 44.5″. The G6 is notably narrower at 41″. The G9 and G12, on the other hand, are much wider, with 48″ of internal width.
The Force USA G15 has a 48″ external width measurement. That’s the distance between the outsides of the power rack uprights.
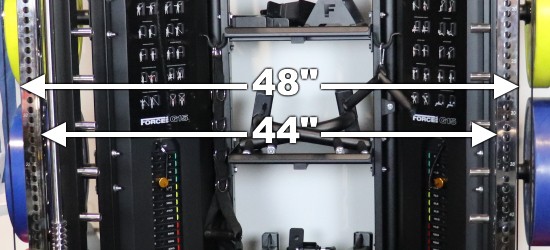
Most dedicated power racks on the market have an external width measurement between 47-49″. Even though the G15 is toward the end of this range, it’s still an acceptable width.
You don’t want too much external width, as that can make racking and unracking your barbell more difficult. You run the risk of bumping your barbell sleeves into the j-hooks.
This is one complaint some people have when using Rogue Monster Series power racks, which have a 49″ external width. REP Fitness capitalized on this and made their PR-5000 power rack narrower with a 47″ external width. However, people still love their Rogue racks and squat and bench heavy every day. So even though it may not be ideal, 49″ works. And with the G15, you get an extra inch of breathing room.
The Force USA G15 shares the same 48″ external width that the G10 and G3 have. The G20 is slightly wider at 48.5″. The G6 is narrower, with a 45″ external width. The G9 and G12 both have a super wide external width of 52″; however, they use different j-hooks and spotter arms that are indented 1.5″ to the inside on each side, which makes the internal width 49″ for practical purposes.
The Force USA G15 power rack comes with a pair of j-hooks for racking and unracking the bar for all types of barbell movements.
It also comes with a pair of safety spotter arms. The main purpose of these is to catch the barbell in case you fail at the bottom of a rep or have to drop the barbell. It’s a must-use safety feature when lifting heavy to ensure you don’t get stuck under the bar.
The final power rack attachment that comes standard is the dip station which consists of 2 separate handles.
The final noteworthy feature of the G15 power rack is the hole spacing. It has uniform 1″ hole spacing. You can install any of the included rack attachments in any of these closely-spaced holes.
I’ll give you some more details on hole spacing, j-hooks and spotter arms in the following sub-sections. I’ll talk more about the dip station in a later section of this Force USA G15 review.
Non-Traditional Westside Hole Spacing
The Force USA G15 All-In-One Trainer has “non-traditional” Westside hole spacing. Before I discuss what that is, I must first go over traditional Westside hole spacing:
Traditional Westside hole spacing refers to ⅝” diameter holes with 1″ hole spacing in the middle section of the uprights and 2″ hole spacing above and below.
The 1″ hole spacing is used in the middle because that’s where you bench press. An inch can make the difference between an “okay” vs an ideal position for the j-hooks and spotter arms.
The 2″ hole spacing is used above and below the 1″ region because you don’t need as much precision for exercises in the top and bottom of the rack (e.g. squats, rack pulls).
However, the G15 has ⅝” holes spaced 1″ apart. There is no 2″ hole spacing. I consider this to be a non-traditional type of Westside hole spacing, which is better in my opinion.
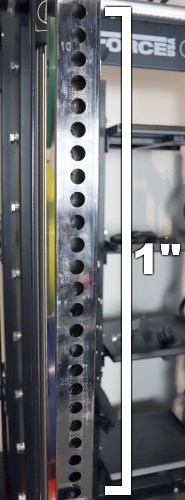
Having greater precision in the upper and lower portions is a bonus.
The G10 and G20 have the same uniform 1″ hole spacing as the G15.
The Force USA G3 has a slightly different kind of non-traditional Westside hole spacing; it has 2″ spacing in the upper region, with 1″ spacing in the middle and lower regions.
The G6, G9 and G12, on the other hand, do NOT have any type of Westside hole spacing. Rather, they have uniform 3.75″ hole spacing. This is fine for general-purpose strength training. However, if you’re into powerlifting-style training, you’ll probably prefer the greater precision that comes from Westside hole spacing.
The G15 power rack has 60 holes on each of its uprights, as does the G10. This is more than any other G-Series rack, except the G20 which has 65 holes. Despite the G15’s short rack height, it can fit so many holes because of the close 1″ hole spacing.
The G12, G9 and G6 all have 16 holes, and the G3 has 50 holes.
All 60 holes on the G15 power rack are accessible for installing the j-hooks. The G20 and G6 likewise have all of their holes accessible.
However, the G12, G9 and G3 all have at least some of their uppermost holes that can’t be used by the j-hooks. With these units, you need to have the pulleys above the j-hooks (otherwise the cable will be in the way). And when the pulleys are in the highest position, the uppermost power rack holes are blocked.
Tall lifters benefit from the G15 having the uppermost holes accessible because they can max out the j-hook height for squats.
J-Hooks
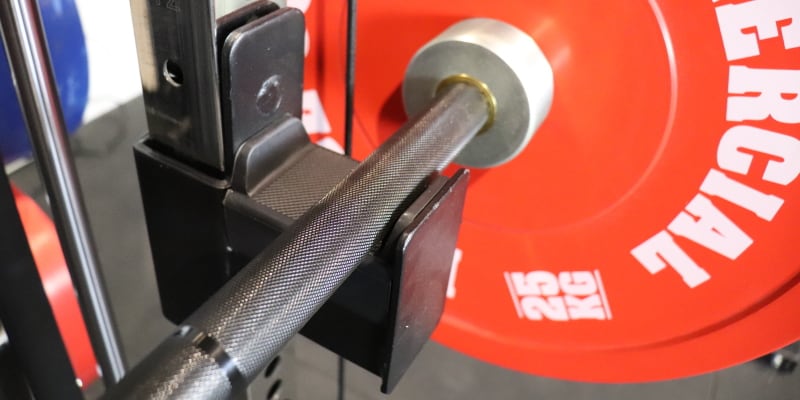
The Force USA G15 power rack comes with a pair of j-hooks for racking and unracking the barbell on squats, bench and many other movements.
These use the same basic j-hook design as the G12, G10, G9 and G6 j-hooks.
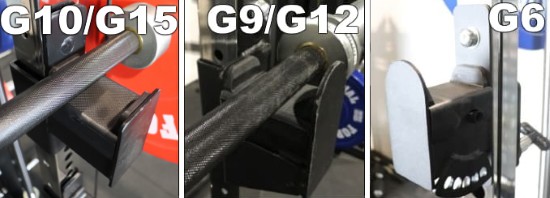
These don’t have the best design, but they get the job done. They feature a protective rubber insert on the bottom surface that can be popped out. I’d prefer this to be UHMW plastic and for it to be permanently attached.
The back portion of the j-hook is short and there’s no protective insert. I’d prefer the back to be taller with a UHMW insert, as that would protect both your barbell and your uprights better against metal-on-metal contact.
While there’s room for improvement, this j-hook design still carries out its essential function just fine: to safely hold a heavy barbell when racking or unracking it.
The j-hook designs on both the G3 and G20 are better.
The G3’s j-hooks are slightly better because they have a protective insert on the back and the bottom surfaces, and both inserts are permanently affixed. However, the back is still short.
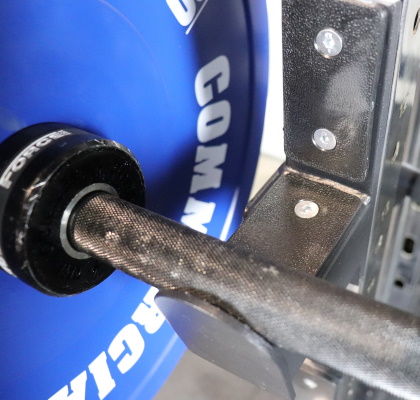
The G20 by far has the best j-hook design. First off, it’s a roller j-hook, which lets you effortlessly center your barbell. It also has a very tall 7″ back portion that has a protective insert permanently attached.
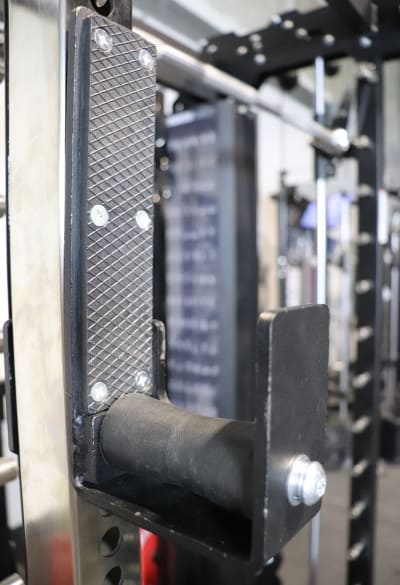
The highest j-hook setting is 70″ (5’10″) as measured from the floor to where the barbell sits. This means the tallest you could be and still be able to squat comfortably is 7’0″ or so, though someone that tall would run into other issues because their head would hit the top of the rack!
Despite the Force USA G15 being the shortest G-Series unit in absolute height – tied with the G10 – the 70″ max bar height in the j-hooks is higher than all other models. There are a few reasons for this, including:
- The holes go high up on the uprights
- The uppermost holes are all accessible (on some of the other units, the pulleys must be above the j-hooks. And even if the pulleys are at their highest setting, they still block the top holes.)
- On the G20, the j-hooks are much taller, so they hang down several inches lower.
In comparison, the max bar height in the j-hooks for the other models is as follows:
- G3 = 66″ (5’6″)
- G6 = 69″ (5’9″)
- G9 = 60″ (5’0″)
- G10 = 70″ (5’10″)
- G12 = 60″ (5’0″)
- G20 = 67″ (5’7″)
Even on the G9 and G12, which have the shortest max barbell height, anyone up to 6’4″-6’5″ can squat without issues.
If you’re an inch or two taller than that, any of the other units besides the G9 and G12 should suffice. However, if you’re more than a couple of inches taller than that, you’ll probably feel more comfortable in the G20 for exercises inside the rack and on the chin up bar.
Spotter Arms
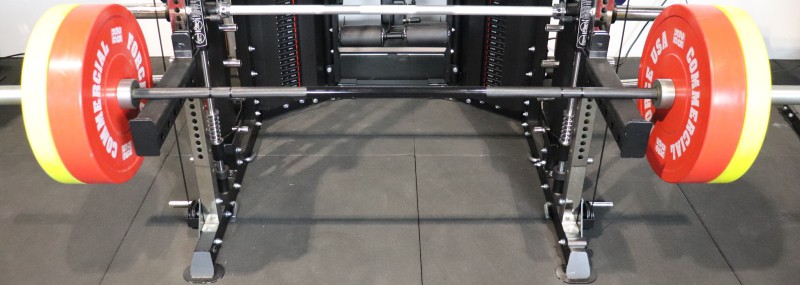
The Force USA G15 power rack comes standard with a pair of safety spotter arms for catching the barbell in case you fail at the bottom of an exercise.
There’s nothing particularly special about the spotter arms.
They get the job done in terms of being strong enough to stop the weight when dropped and keep you safe. That’s the #1 thing you want in a pair of spotter arms.
The spotter arms are 15″ long just like the ones on the G20, G12, G10, G9 and G6. Only the G3 spotter arms are longer at 17.5″.
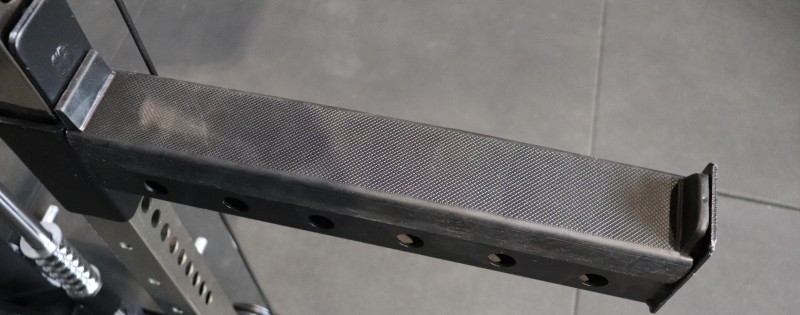
As I’ve mentioned in my other reviews, I would have preferred a longer spotter arm. Most spotter arms for dedicated power racks are 20-24″ long.
Sometimes it would be nice to have the extra length so you could be further away from the uprights when performing your exercises. That said, the 15″ length is still workable; you can still be over the spotter arms and not too close to the uprights.
The spotter arms have a rubber insert that protects your barbell from damage when dropping or setting the bar down. It’s the same type of material used in the j-hooks.
As with the j-hooks, I’d prefer if the protective insert on the spotter arms was UHMW plastic and that it was permanently affixed instead of being able to pop out. While the rubber insert should be durable enough for long-term use, the UHMW just provides a more robust level of protection.
One nice thing I’d like to point out about the G15 spotter arms is that they have band peg holes.
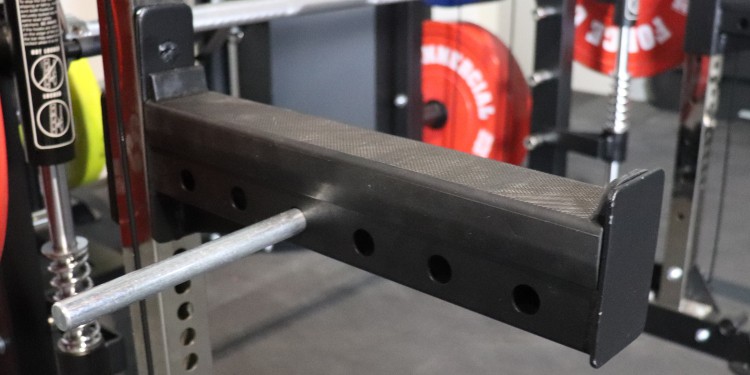
The band peg holes may come in handy for some creative exercise variation that you’re trying out. For example, you could use them to connect a resistance band across the spotter arms to act as a leg holder if you wanted to do lat pulldowns in the center of the functional trainer.
Only the G3, G10 and G20 also have band peg holes in the spotter arms. The G6, G9 and G12 spotter arms lack this feature.
The lowest possible spotter arm height you can achieve is 12″ from the floor to where the bar rests. This puts you just slightly higher than where the barbell would be if it were on the floor with 45 lb plates on.
Using such a low setting could be useful for low rack pulls. And remember, you can increase the height in 1 inch increments from there to do progressively higher rack pulls.
Included Barbell Collars
The Force USA G15 All-In-One Trainer comes with 3 pairs of plastic Olympic lock collars and 2 pairs of metal Olympic spring collars. Collars are essential in any gym to keep your plates secure during barbell exercises.
The plastic Olympic lock collars are the nicer style of collars since they’re more secure and easier to put on the bar. The other G-Series models, except the G10, include just one pair of these, so having a couple of extra pairs is a nice bonus.
The metal spring collars are okay. They get the job done, but they don’t last as long since they can warp over time and lose their ability to stay on tightly.
Functional Trainer
Buy the Force USA G15 – Use KING5 for 5% OFF »
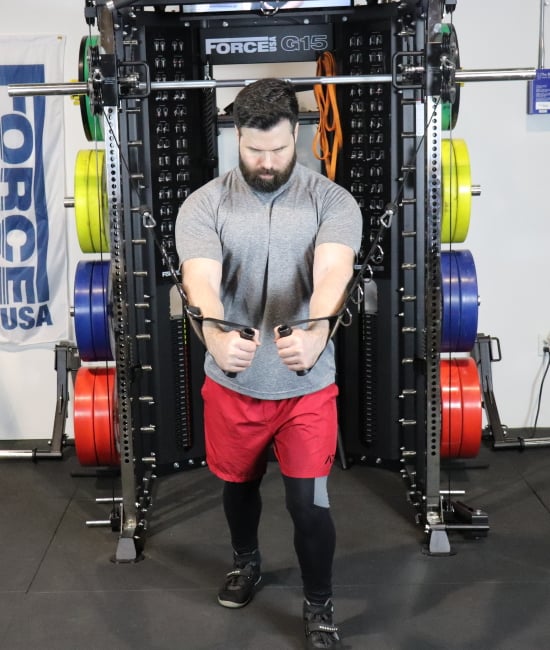
I see the functional trainer as the core feature of the Force USA G15 All-In-One Trainer. It provides the greatest amount of versatility and every other station is built around it.
The functional trainer includes two adjustable height pulley trolleys: one on each upright. These are the same uprights used for the power rack. However, the holes for the functional trainer settings are on the insides of the uprights, rather than the front/back.
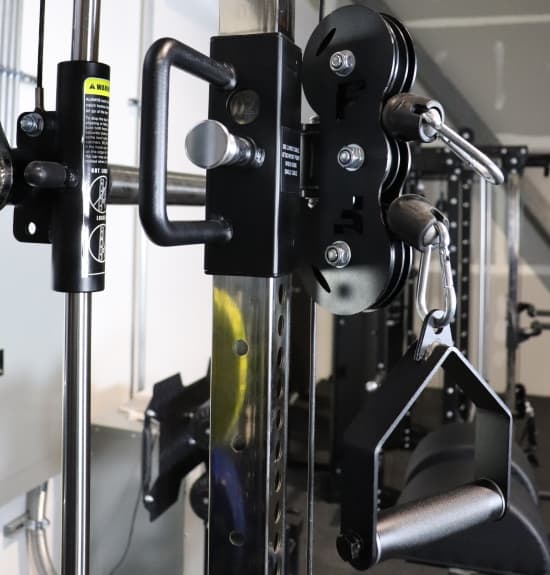
The Force USA G15 has 22 pulley height settings, all of which are laser-etched onto the uprights. This is more height settings than all of the other G-Series units except the G10 and G3, both of which also have 22 settings.
The high number of settings on the G15 is noteworthy since it is a shorter unit compared to, say, the G6 and G20. This is possible because the height settings are spaced just 3″ apart, which is closer than on the other units.

In comparison, the G20 and G6 both have 19 height settings, the G12 and G9 each have 16, and the G3 and G10 both have 22 as I already mentioned.
The most noteworthy feature of the G15 is its interchangeable 2:1 and 4:1 pulley ratio. This sets it apart from all other G-Series units except the G10, which shares this feature.
If you don’t already know, the pulley ratio of a cable machine refers to the ratio of how much weight is loaded on to how much resistance you feel during exercise.
Example: Let’s say you select 100 lbs on a weight stack. A 2:1 ratio means the resistance you feel when lifting is 50 lbs. A 4:1 ratio means the resistance is 25 lbs.
With the G15, you can switch between a 2:1 and 4:1 ratio depending on if you want a heavier or lighter weight or larger or smaller weight increments.
This is a pretty revolutionary feature. Force USA has a patent pending for this design so no other functional trainer on the market can do this.
So how does it work? Let me explain the mechanism:
There are 2 sets of cables connected from the weight stack to the pulley trolley. So the pulley trolley has 2 separate cables coming out of it with 3 pulley wheels separating them. In comparison, a regular pulley trolley would have 1 cable coming out with 2 pulley wheels.
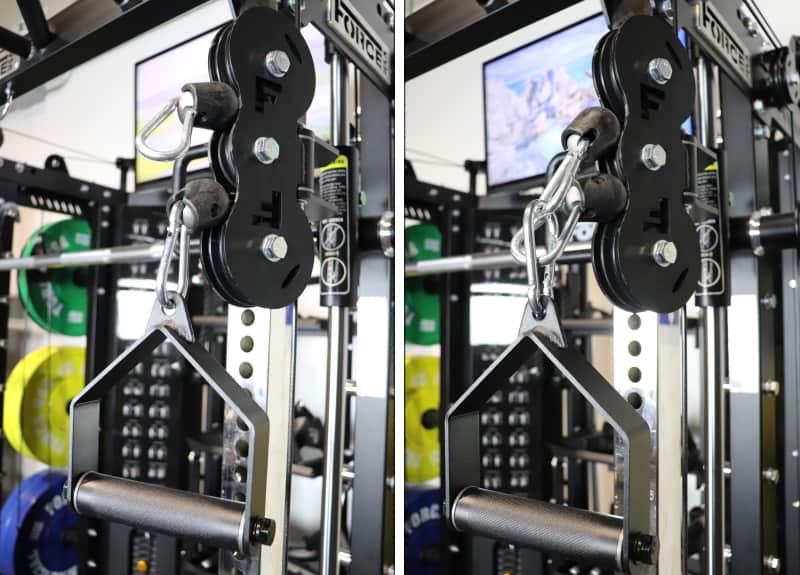
Each of the cables has a 4:1 ratio by itself. However, you can attach a cable accessory to both cables to turn it into a 2:1 ratio.
Overall, this mechanism works great and I’m impressed with the design and the utility it unlocks.
There are just a couple of quirks to be aware of:
- For the 4:1 ratio, you should attach the cable attachment to the lower clip when you’re doing exercises where you’re moving the cable downwards (e.g. triceps pushdown). You should attach it to the upper clip when you’re doing exercises where you’re moving the cable upwards (e.g. cable curl). If you don’t do this, the cable in use will rub against the cable that’s not in use.
- For the 2:1 ratio, it’s much easier to attach the cable attachment using a third carabiner clip that clips onto the 2 built-in carabiners on each cable. Otherwise, it can be a pain to connect the attachment directly to the 2 cable carabiners.
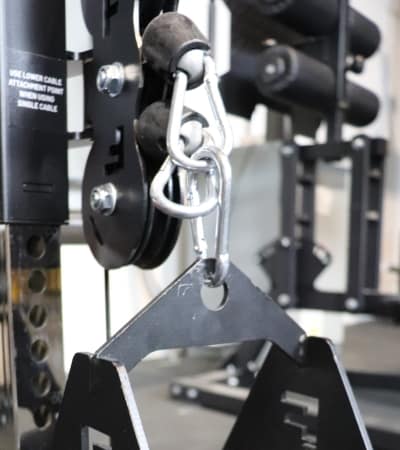
This interchangeable design addresses some of the feedback from users of some of the other G-Series units, where sometimes people wanted smaller weight increments. This is especially the case for guys who bought their G-Series unit not just for themselves but also for their families, including their children and spouse who aren’t as strong.
Even if you’re relatively strong and will be the only person training on the G15, the 4:1 ratio is still very useful when you’re trying to make smaller incremental progress on isolation exercises like lateral raises.
For example, when you’re using the 4:1 ratio on the G15, each weight stack setting is just 2.5 lbs. Increments of 2.5 lbs on lateral raises are very useful since you’re not using heavy weight to begin with.
For comparison’s sake, here are the pulley ratios of the other G-Series units:
- G3: 2:1 ratio
- G6: 2:1 ratio
- G9: 2:1 when using one side at a time; 1:1 ratio when using both sides together (read my comment here for more info)
- G10: Interchangeable 2:1 and 4:1 ratio just like on the G15
- G12: 1:1 ratio
- G20: 1:1 ratio
The G15 is a selectorized weight stack system. It has 2 separate weight stacks, each weighing 289 lbs.
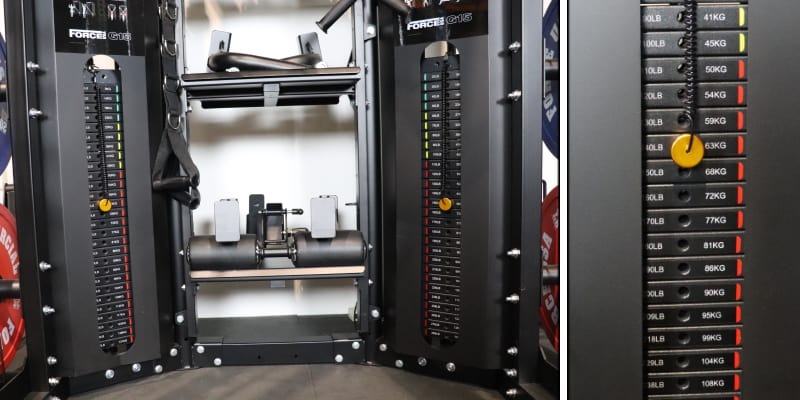
With the 2:1 ratio, your max weight per stack is 144.5 lbs. That’s enough resistance for most people.
However, some stronger lifters will want more weight on heavier movements like low rows and lat pulldowns. Luckily, there’s one really good “hack” for adding much more weight to the weight stacks, which I’ll discuss later.
Changing the weight is rapid and convenient on a selectorized system like the Force USA G15 – You simply move the selector pin to whichever weight setting you want. However, the downside is this adds a lot to the cost.
The G15’s selectorized system is what makes it different from the G10, which has a plate-loaded system. Otherwise, the units are virtually the same.
When it comes to deciding between the G10 or G15, the choice comes down to your budget vs how much you value rapid weight change on the functional trainer. The G15 costs $2,500 more than the G10 because of the quick-change selectorized system. While that’s a big chunk of change, the added convenience and efficiency are worth it for some lifters.
I’ll talk more about deciding between the Force USA G15 vs G10 later on.
The cable motion is very smooth on the G15. The smoothness is comparable to what you’d find on cable machines in a commercial gym setting.
One thing I want to mention that I noticed when testing the G15 was that sometimes the weight of the attached cable accessory would lift the top weight plate on the stack ever so slightly, such that you couldn’t slide the selector pin in the hole. I would have to press down on that top weight stack plate to align the holes for the pin to go in.
However, I think this came down to how it was originally installed. I loosened the threaded connector bolt that connects the cable at the top of the frame, above the weight stack. I let it out just enough to give it some extra space, but not enough that it was unsafe.
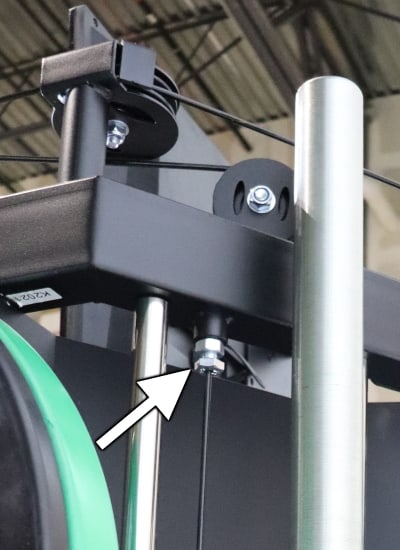
This allowed the holes to line up better when I attached a cable accessory to the pulley. Keep this tip in mind if you experience this issue after assembling your G15.
One feature I would have liked to have seen on the G15 functional trainer is integrated band pegs on the weight stack like the G20 has.
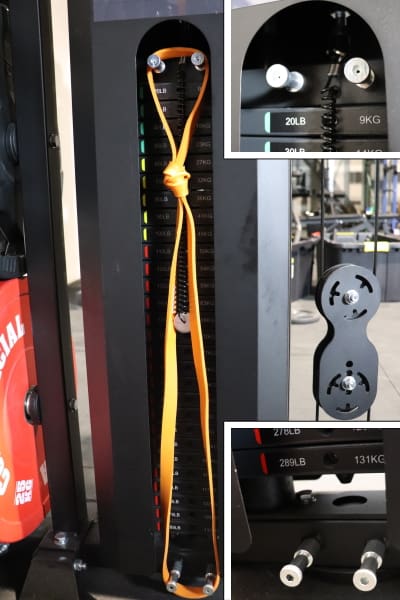
This would let you easily add band resistance to the weight stacks. This would be particularly helpful if you wanted to increase the resistance beyond the max weight setting. It would also be useful for making an exercise more challenging at the top of the motion.
An even easier design choice would have been to have a single band peg hole under the weight stack, in the frame of the unit – just like on the G6. This would give you an anchor point to attach a resistance band to a band peg and stretch it over the top of the weight stack.
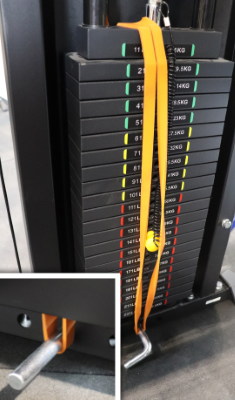
I suppose if you have the DIY spirit and know what you’re doing, you could use a step drill bit to drill out your own band peg hole under the weight stacks.
Luckily, there is still a way to add band resistance to the G15 weight stacks without any DIY intervention. It’s not the most elegant solution, but it will work.
You’ll need to first tie two bands together to have enough length. Then wrap one band end around the barbell holder in the back. Next, loop the other end over the top of the stack, and then under the bottom of the stack before anchoring it to the barbell holder.
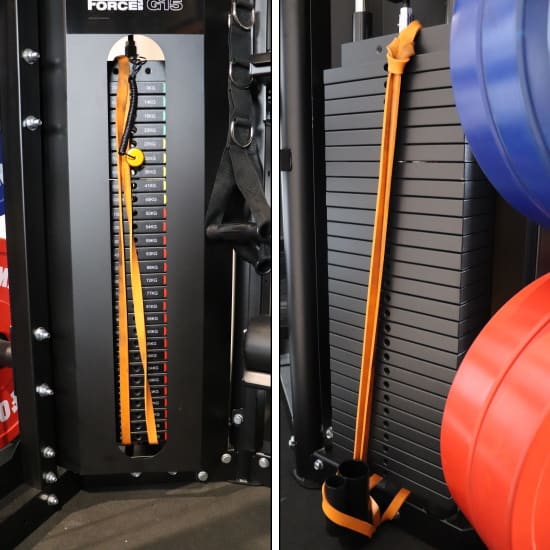
However, if your main goal is to increase the resistance of the G15 weight stacks beyond the max weight of 144.5 lbs (when using the 2:1 ratio), then there is a better solution than bands.
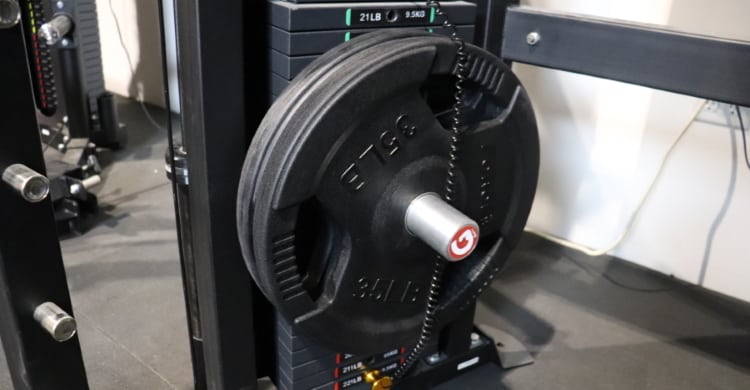
You can buy a weight stack adapter pin like the Gym Pin or BSE Stacked Weight Pin.
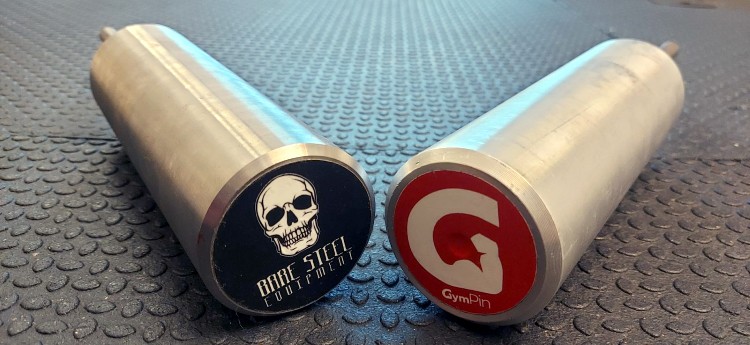
You can use one of these on the rear side of the weight stack:
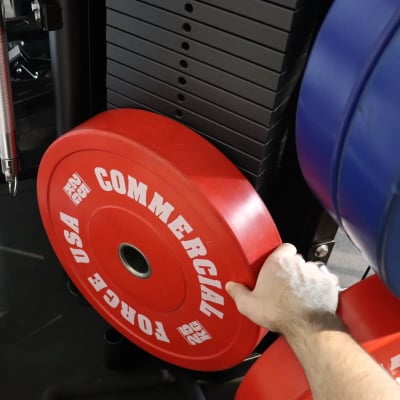
The setup is simple:
- Select the entire weight stack by inserting the selector pin in the bottom of the stack.
- Insert the weight stack adapter pin around the middle of the stack (on the rear side).
- Add the desired amount of Olympic plates to it.
If you go this route, order the 10mm version of either the Gym Pin or the BSE pin.
Even if you add a lot more weight to the weight stack, the functional trainer will be able to hold up since the cable has a 2000 lb weight rating.
Now, I’ll go over some practical measurements regarding the highest and lowest pulley height settings for the G15 functional trainer. All measurements listed are from the floor to where the cable comes out of the pulley:
- Lowest setting: 10.5″
- Highest setting: 72.5″
This range of height, combined with the 22 settings in between, gives you the ability to hit whatever angle you want, including high to low, low to high, straight out and every angle in between.
The G15 has a cable travel distance of 60″ (5’0″) when using the 2:1 ratio. The cable travel distance doubles to 120″ (10’0″) when using the 4:1 ratio. The distance doesn’t change if you’re using one cable at a time or both.
The cable travel distance when using the 2:1 ratio is plenty for any typical cable exercise. The extra long 4:1 ratio cable distance opens up the possibility to do some less common cable movements that involve walking, such as cable lunges and cable sled pulls.
For comparison, here’s the cable travel for the other G-Series units:
- G3: 145″
- G6: 60″
- G9: 51.5″ when using both cables at once; 103″ when using one cable at a time.
- G10: 60″ when using the 2:1 ratio; 120″ when using the 4:1 ratio (same as the G15)
- G12: 53″
- G20: 106″
Cable Accessories
The Force USA G15 All-In-One Trainer has 9 cable accessories that come standard and 2 optional cable accessories that come with the upgrade kit. This is more than most of the other units.
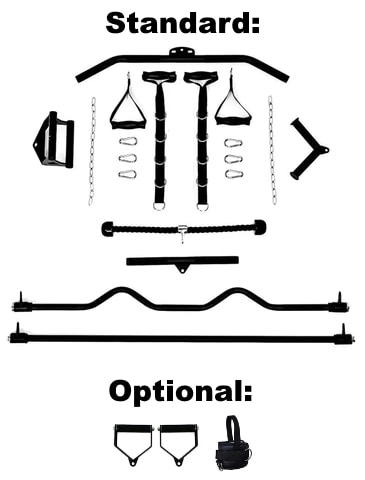
Here is how the other G-Series units compare in their cable accessory offerings:
- G3: 7 cable accessories
- G6: 9 cable accessories
- G9: 5 cable accessories
- G10: 11 cable accessories (9 standard, 2 optional)
- G12: 5 cable accessories
- G20: 11 cable accessories
In the sections below, I’ll go over each of the G15 cable attachments. Note that these are all the same attachments that come with the G10.
EZ Curl Bar

The EZ curl bar attachment is a dual cable attachment, meaning it attaches to both sides of the functional trainer at the same time.
It’s essentially the same as the EZ curl attachment that comes with the G3.
It’s black, relatively skinny and lightweight. The surface is smooth unlike the EZ curl bar on the G3, which is knurled. I would have preferred some light knurling on this one, but you get at least a little bit of grip from the powder coating.
The bar can rotate freely around its axis, which is important for ensuring a smooth motion on curls and triceps extensions, which are the most common exercises for this piece. There are other exercise possibilities for this such as upright rows and possibly some other row variations.
Overall, this attachment feels good during use.
Long Straight Bar
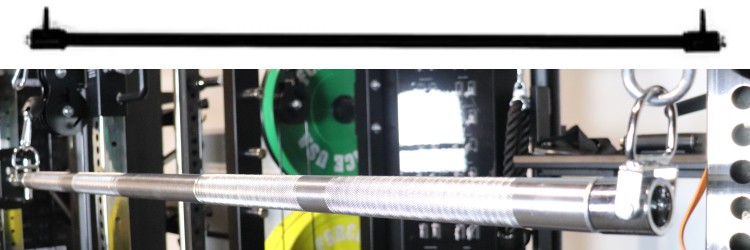
Bottom: This is a different version of the long straight bar that I used while testing the G15.
The long straight bar is a straight version of the EZ curl bar attachment: it’s black, relatively skinny, rotates on its axis and attaches to both sides of the functional trainer.
It’s similar to the long straight bar that comes with G3, except the G3 bar has a center hook that allows it to be hung on a single pulley.
I like the long straight bar attachment mostly for pressing exercises like standing chest press and standing shoulder press. However, my favorite move for it is an exercise called jackhammer pushdowns, which involves leaning your torso over top of it and pushing down. It gives you a similar effect as dips and hammers the lower chest.
You could technically use it to do lat pulldowns or rows in the center of the machine, but the thick grip on the bar makes that less practical.
Short Straight Bar
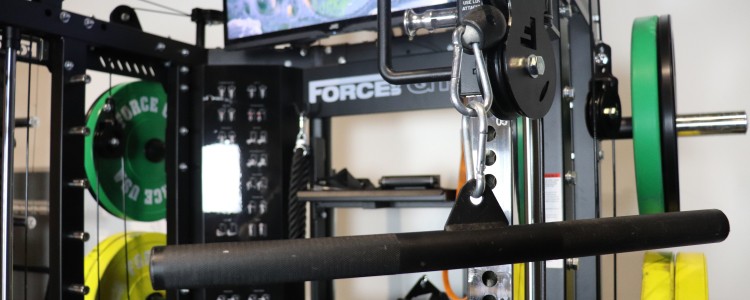
The short straight bar is a decent tool for cable curls, triceps pushdowns, close grip pulldowns, forearm curls and a few other movements.
It’s a short, black powder coated bar with a knurled surface. It’s identical to the one that comes on with the G20.
It’s much better than the G3 version, which has no knurling. And I do prefer the knurling on this one compared to the G6 short straight bar, which has a rubberized grip.
However, the G6 version is better overall since it rotates. The lack of rotation in this attachment can make a lot of the movements typically done with this type of attachment feel less natural.
There’s no version of this attachment that comes with the G9 or G12.
Lat Pulldown Bar

The lat pulldown bar is a black powder coated bar with light knurling. As is typical for lat pulldown bars, the ends are angled down for a more natural wrist position when using the wide grip portion.
This appears to be the same lat pulldown bar that comes with the G20. I like it better than the ones that come with the G12, G9 and G6 because it is knurled instead of having rubberized grips. Though, I’d have preferred a somewhat more aggressive knurl if I had the say. The G3 has no lat pulldown bar unless you count its long straight bar.
This is your obvious choice when doing lat pulldowns, whether that’s wide grip or medium grip (supinated or pronated). For close grip pulldowns, I prefer the close grip row handle.
It’s also a great choice for wide grip rows, medium grip rows (supinated or pronated) and straight arm pulldowns.
Triceps V-Bar
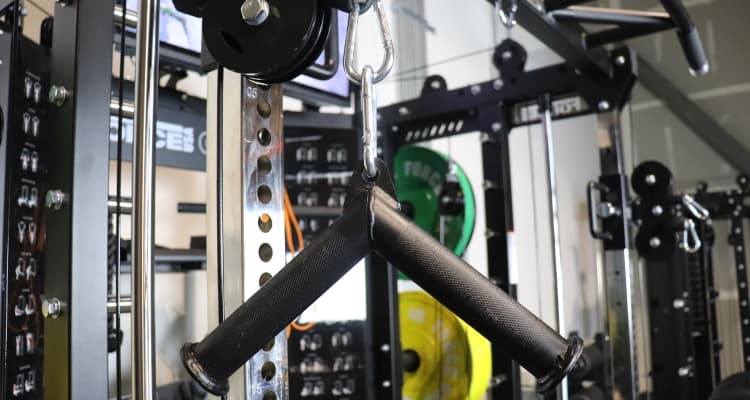
The triceps v-bar has the same black powder coating and light knurling as most of the other G15 cable accessories.
This is probably the least versatile attachment that comes with the G15, but it is excellent for one exercise: triceps pushdowns. Though, you can surely find other creative ways to use it if you so wish.
This is the same as the v-bar attachment that comes with the G10 and G20. The only other unit that comes with a v-bar is the G6, which has rubberized grips.
Close Grip Row Handle
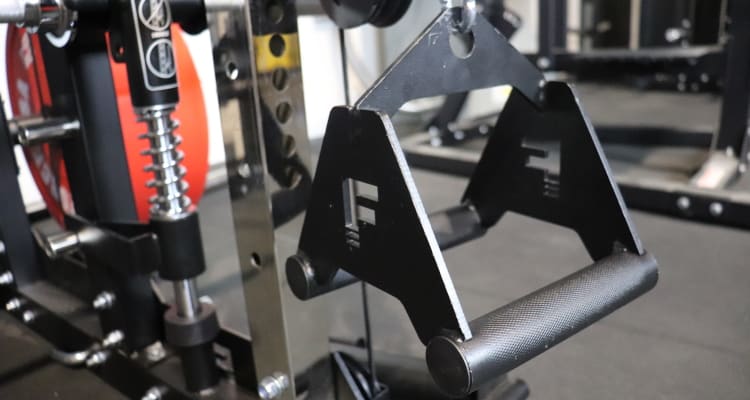
The close grip row handle is designed for a narrow, neutral grip position. It has a sturdy frame with the Force USA “F” laser cut into both sides, which is a nice aesthetic touch.
This attachment should be your go-to choice for close grip rows and close grip lat pulldowns. It feels great on these movements.
The only improvement would be a deeper knurl pattern, but even the light knurling it has is sufficient for all but the heaviest sets. The powder coating probably helps to supplement the grip quality.
It’s the same as the G20 close grip handle. And I prefer it to both the G3 version (chrome, knurled) and the G6 version (chrome, rubberized grips). The G9 and G12 have no such handle.
Triceps Rope
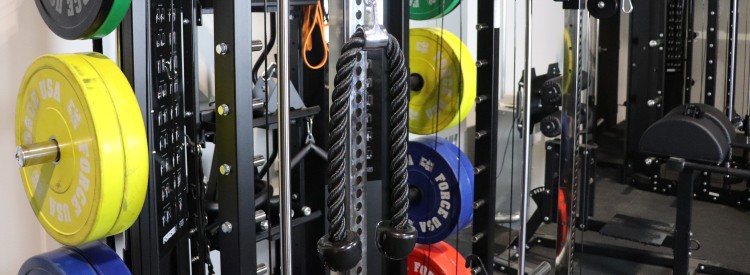
This looks and performs just like any standard black, double-ended triceps rope you’d find at your local gym.
It appears to be identical to the triceps ropes that come standard on all of the other G-Series units.
This is a must-have for triceps extensions. It’s also the ideal tool for cable exercises like hammer curls, face pulls, pull-throughs, lying pullovers and crunches, among others.
Nylon Stirrup Handles (2)
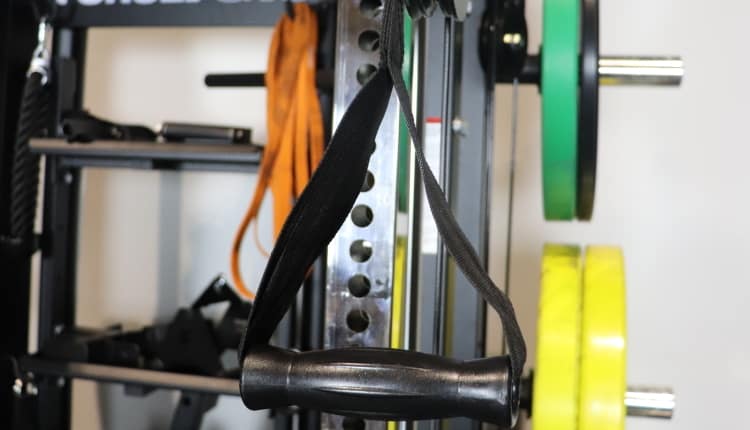
These are a very basic stirrup/D-handle. They feature a hollow plastic handle over the nylon fabric strap.
Despite their simple design, they’re surprisingly useful. The hollow handle over the flexible fabric allows you to adjust the orientation of your wrist to that which is most natural for a given motion.
The flexible fabric keeps you comfortable on any exercises where the attachment rubs against or presses into your forearm.
These are the same as G20’s nylon stirrup handles. They’re similar to those found on the G9 and G12. The ones on the G6 aren’t as versatile because they’re metal. The G3 only has an adjustable-length version.
You’ll find them to be a solid choice for any number of cable exercises such as crossovers, chest press, shoulder press, lateral raises, bent over lateral raises, single arm row variations and many more.
Adjustable Nylon Stirrup Handles (2)
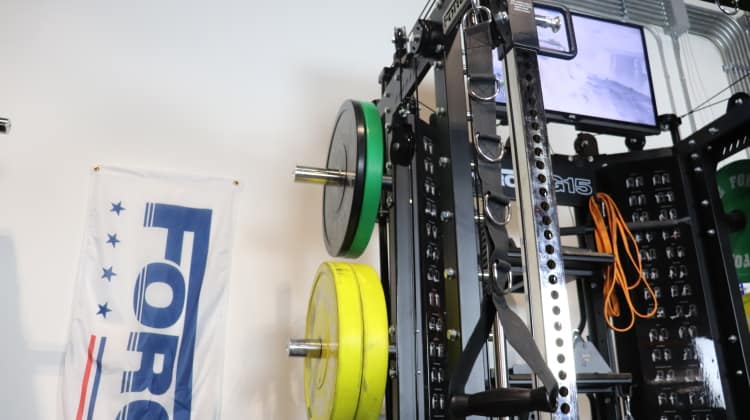
These are just like the nylon stirrup handles described above, except they have an adjustable length.
It has an extended strap with 5 metal rings along its length so you can attach it closer to or further from the pulley.
This attachment is particularly useful when you want to start an exercise further away from the uprights.
There’s a cable attachment just like this one that comes with the G20 and G3.
Metal Stirrup Handles (Optional)
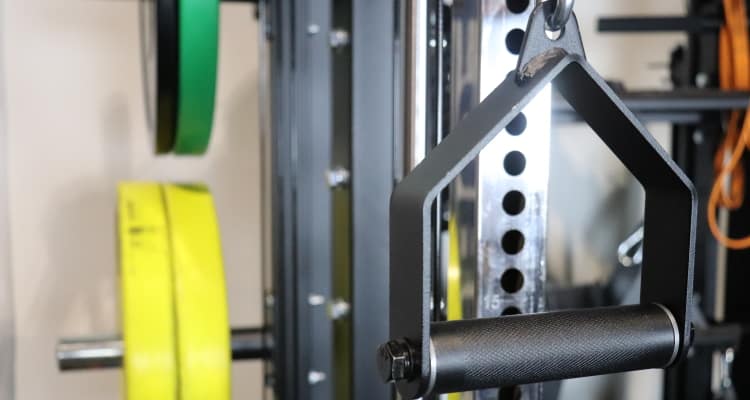
The metal stirrup handles come as part of the optional upgrade kit.
They are solidly built, with a steel frame and steel grip that’s lightly knurled. Everything is powder coated in black. The grip itself can rotate within the handle.
They’re a good choice for any exercise that requires a stirrup/D-handle attachment, where you don’t need any flexibility. For example, they are not the ideal choice for cable crossovers, as the metal will press into your forearms as you bring your hands together.
I like them best for cable exercises like one arm rows, single arm concentration curls, single arm lat pulldowns and bilateral lat pulldowns (performed between the 2 cable columns).
The G20 comes standard with a pair of metal stirrups just like these. The G6 also has a pair of metal stirrups but they’re chrome with a less robust frame and a rubberized grip.
Ankle Cuff (1) (Optional)
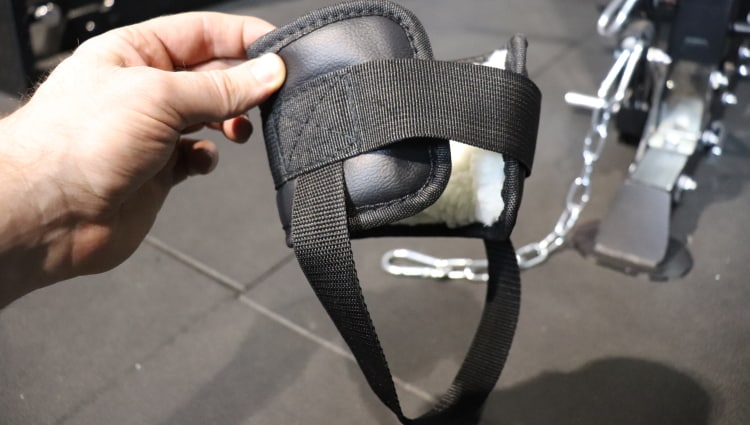
The ankle cuff is another cable accessory that comes with the optional upgrade kit.
Unlike many ankle attachments, this one doesn’t just wrap around your ankle. It also has a loop that goes under your heel for a much more secure fit that prevents the cuff from choking or riding up your ankle.
The cuff itself has a padded inner lining for a more comfortable fit.
This is great to have for cable movements like hip abductions, hip adductions, hip extensions, hip flexions and donkey kicks.
None of the other G-Series units (besides the G10) come with an ankle cuff attachment.
Carabiners (6)
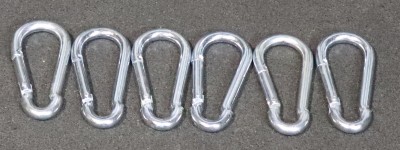
The G15 comes with 6 carabiners, or spring snap clips. You can use these to connect the cable accessories to the pulleys or to connect multiple chains if the need arises.
Extension Chains (4)
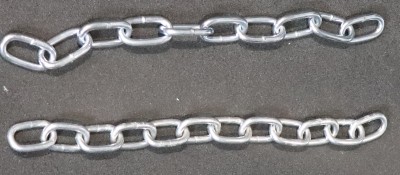
The G15 comes with 4 extension chains. These come in handy when you’re doing exercises that require having more distance between you and the pulley.
For example, if you’re doing low rows and can’t quite reach the handle because of a lack of flexibility, you can use the chain to get the extra distance you need.
Smith Machine
Buy the Force USA G15 – Use KING5 for 5% OFF »
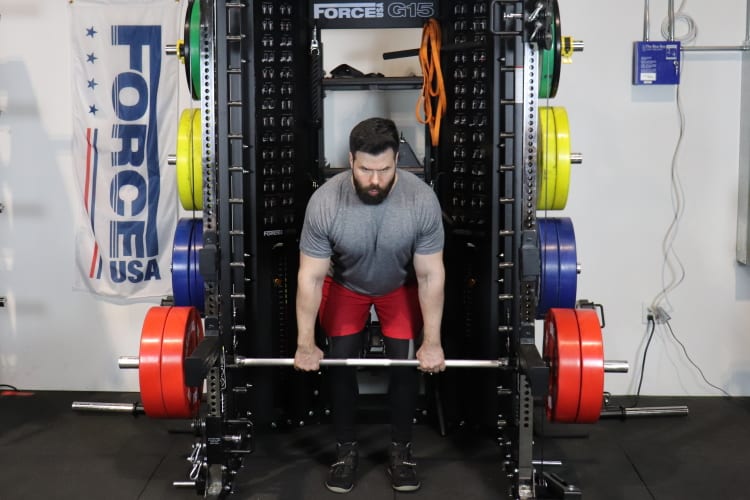
The Smith machine is the station with a built-in barbell that slides up and down a fixed track. This gives you the ability to do a machine version of most free weight barbell exercises.
There are 14 steel pegs along the track that allow you to rack the bar at whichever height your want.
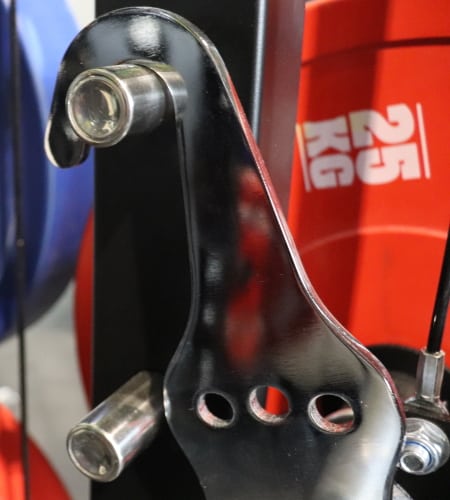
These pegs are also part of the safety spotting system. You hook the safety catch onto the peg at whichever height you want. Once set, the Smith bar can’t go any lower. It’s important to set the safeties on any exercise where you could potentially get stuck under the Smith bar if you were to fail.
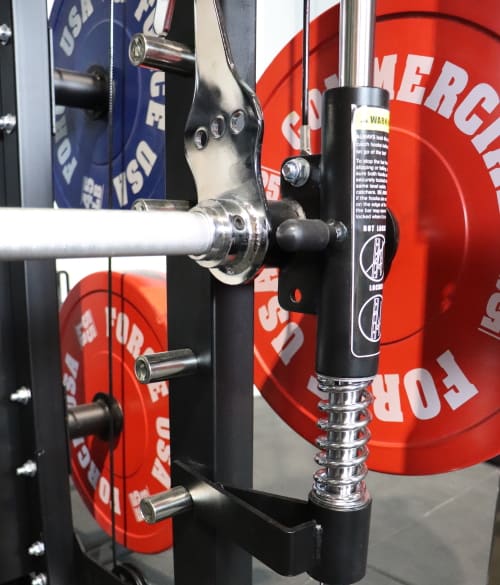
Contrary to broscience dogma, the Smith machine is NOT a useless or “sissy” machine. You just have to use it correctly and be smart with your exercise selection.
Sure, the fixed track is a negative for certain exercises or training goals because it takes away your stabilizer muscles and forces you into a fixed vertical plane of motion.
However, in many other cases, the fixed plane is a major advantage, because it allows you to focus on just the target muscles, giving you improved activation and a better mind-muscle connection. It is an excellent tool for hypertrophy that you shouldn’t ignore.
While everyone can benefit from Smith machine exercises, it’s well-known that the Smith machine is much more popular amongst female lifters. I think this stems from the Smith machine being particularly effective for many leg and glute training exercises. The fixed track makes it much easier to get a good pump on these muscles.
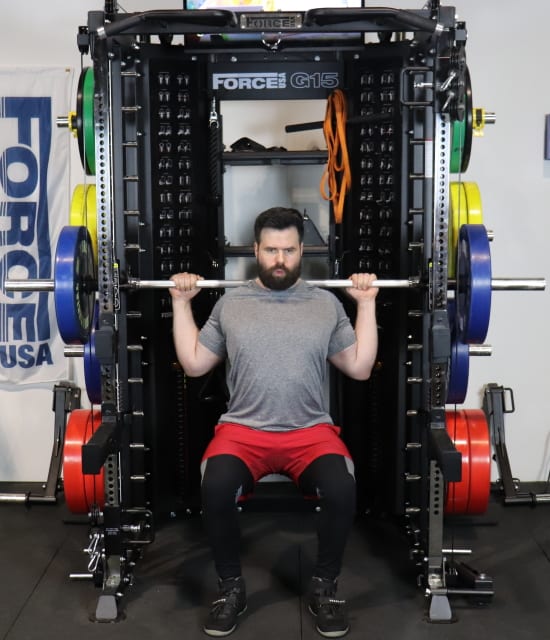
This makes the Smith machine a desirable feature if any female trainees will be using the G15, whether that’s you, your wife, your female friend or family member or if you do personal training with any female clients.
Here’s a list of some of the most popular Smith machine exercises, including a few of my favorites:
- Smith machine hack squat
- Smith machine split squat
- Smith RDL (ideally, standing on plates or a platform for greater range of motion)
- Smith machine calf raises (seated or standing)
- Smith machine seated incline press
- Smith machine bench press
- Smith machine decline bench press
- Smith machine seated shoulder press
- Smith machine upright row
- Smith machine one arm row
- Smith machine shrug
- Smith machine inverted row
The Force USA G15 Smith machine is counterbalanced. This means there is a counterweight that balances out the weight of the Smith bar. This makes the bar weigh 0 lbs when it’s empty. Whereas, a non-counterbalanced Smith bar would weigh ~45 lbs.
If someone isn’t strong enough to lift 45 lbs on certain exercises, then they’ll benefit from having a counterbalanced machine. Chances are you can handle 45 lbs just fine for just about any Smith machine exercise. However, I know many people considering the Force USA G15 will be using this with their kids or spouses who may not be strong enough to lift 45 lbs. The same goes who personal trainers who want an all-in-one gym to train their clients who may be novices or recovering from injuries.
I’m very happy that Force USA included the counterbalanced Smith machine on the G15 since I know it’s a must-have feature for some people. And it’s a nice-to-have feature for everyone else. The G9, G10 and G12 also have counterbalanced Smith machines. The Smith machines on the G3, G6 and G20 are non-counterbalanced.
Two types of fixed Smith machine tracks exist: vertical tracks and angled tracks. The G15 Smith machine uses a fully vertical track, as do all of the other G-Series Smith machines.
One type of track isn’t necessarily better than the other. It’s just that each is better suited for certain movements. Vertical tracks tend to be better for lower body movements, which usually have a more vertical bar path. Angled tracks tend to be better for upper body movements (especially pressing exercises) where the bar path is usually slightly angled.
That being said, you can do both types of movements on both types of tracks. It’s just a matter of modifying your body angle or position so the path feels more natural.
Notably, you CAN do Smith machine incline press variations in the G15. I make a big point of this because the incline Smith press is one of my favorite Smith machine exercises.
It’s a great tool for getting an intense pump/activation for the upper chest, which I find to be difficult with free weights.
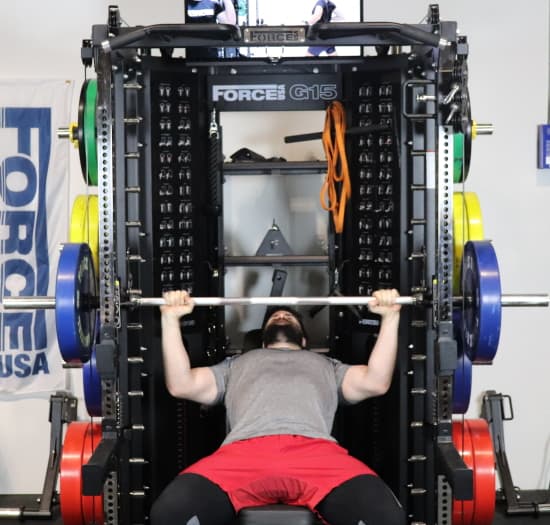
This is possible because the rack has enough internal depth to put your adjustable bench far enough back so that you can position yourself under the Smith bar while on an incline.
I should note that there are a couple of potential quirks to the Smith machine incline press setup. But don’t worry, it’s nothing you can’t get around:
- If you have the optional storage shelves installed, your adjustable bench’s backrest might hit into one of them and prevent you from pushing the bench far enough back. One solution is to remove the shelf or change its position. The other solution is to flip your bench around so you’re facing inside the machine; the only downside is that your legs will be up against the shelves and back of the unit, but only if you’re using lower incline angles.
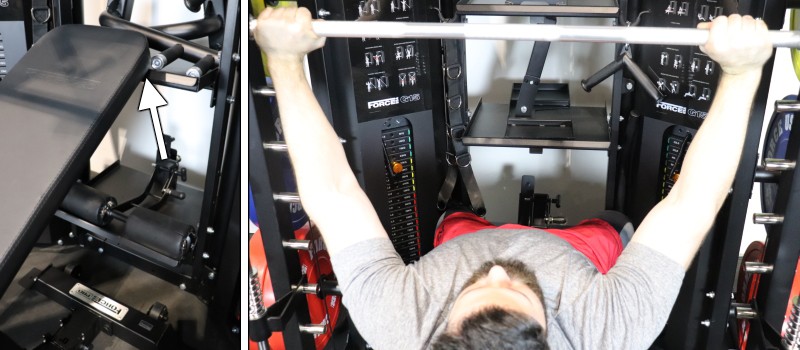
Right: Flipping the bench around the other way as a workaround.
- If you’re using a high incline or a completely upright angle on your adjustable bench, then you’ll need to flip the bench so you’re facing the inside of the unit. This ensures you can push the bench far enough back to get under the bar. When doing high incline angles, your legs will have extra room even if you have the storage shelves installed.
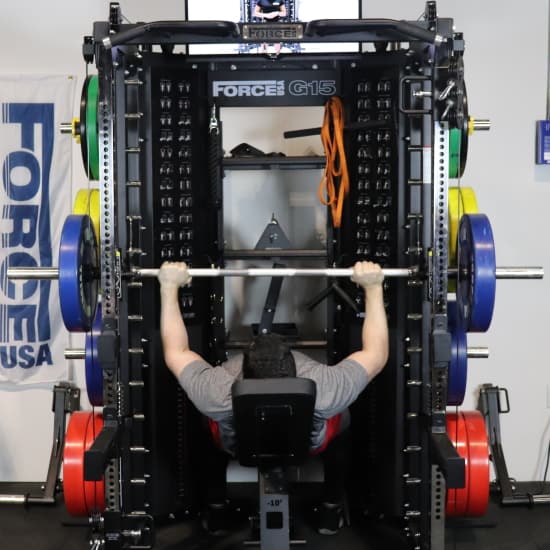
My biggest critique of the G12 and G9 is that they’re too shallow for incline Smith work – regardless of which direction you position the bench.
The G15 Smith machine sleeves measure 12″ long, which is the same as all the other units. I would’ve preferred them to be as long as Olympic barbell sleeves, which are typically around 16″. That said, you can still add enough weight especially if you have cast iron plates.

If you have thicker bumper plates, you may use up the full sleeve. Even then, that’ll give most lifters enough weight for their Smith machines training needs, which typically involves higher reps for hypertrophy. If you find yourself maxing out the sleeves for a certain exercise, you can simply add more band resistance using the band pegs.
If you do have thinner weight plates, don’t go beyond the Smith machine’s max weight capacity of 794 lbs. I don’t see anyone doing that since it’s a ridiculous amount of weight for Smith machine training.
Like the G10 and G20, the G15 Smith machine does not have removable sleeves that allow you to use standard weight plates (1″ hole diameter). This is in contrast to the G3, G6, G9 and G12, which do have this feature. Almost everyone is going to be using Olympic plates so I don’t see this as a negative.
The Smith machine sleeve construction consists of a metal casting as the outermost layer with some plastic beneath that. Beneath that is steel. This is similar to the construction on all of the other G-Series units.
This is not as robust as a solid steel sleeve construction like on a regular barbell. However, it’s solid enough to withstand normal use since it’s impossible to drop the Smith bar on the floor.
The Force USA G15 uses a compression spring as a stopper at the bottom of the Smith guide rods. All the other models besides the G10 use a rubber stopper instead. The compression spring is a step up in terms of durability because it can absorb a lot more impact than a rubber stop if you drop or slam the weight.
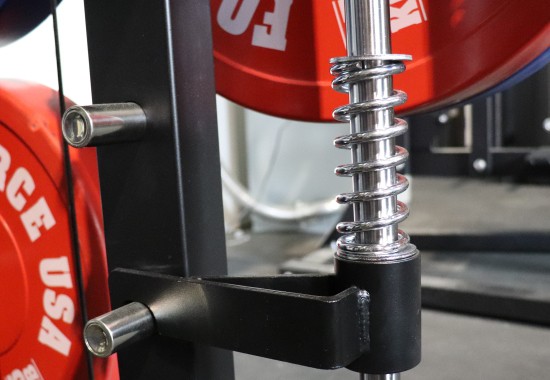
The only downside of the compression spring vs the rubber stopper is that you lose a little bit of range of motion at the bottom since the spring is a couple of inches taller. It’s a minor detail, and something you may only notice on an exercise like Smith RDLs, where you bring the bar very low, but it’s worth mentioning.
The Smith bar is 18″ above the floor at its lowest position, resting on the compression spring stoppers. This puts the bar at knee height for me (I’m 5’11″). This is a couple of inches higher than the other G-Series units, which don’t have spring stoppers.
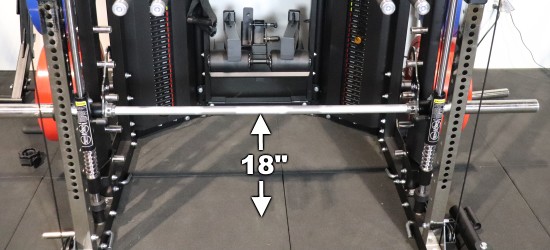
For certain exercises, this may be too high for you to get the type of range of motion you need. Examples of such exercises include Smith machine RDLs and Smith machine hip thrusts. Luckily, there’s an easy fix. Simply stand on a weight plate (or a stack of plates), an aerobic step platform or a sturdy box, as shown below (note: the video shows me on the G10, not the G15):
The highest rackable height is 69″ (5’9″) for the G15 Smith machine bar. This is a useful measurement because it tells you whether you can rack the Smith bar out of the way to walk under it. In this case, this is only possible if you’re shorter than 5’9″.
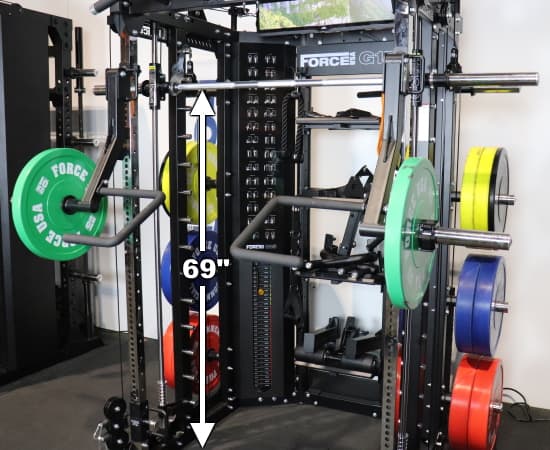
Compare this to the highest rackable Smith bar height for the other units:
- G3: 68″ (5’8″)
- G6: 77″ (6’5″)
- G9: 65″ (5’5″)
- G10: 69″ (5’9″)
- G12: 65″ (5’5″)
- G20: 73.5″ (6’1.5″)
The highest absolute Smith bar height is 74″ (6’2″) before it hits the top of the machine during exercise. This is worth knowing to see if it would be possible to do standing overhead press in the Smith machine. For many people, this will not be possible.
I’d estimate that you’d have to be under 5’5″ to do the full range of motion on Smith machine standing overhead press.
Chin Up Station
Buy the Force USA G15 – Use KING5 for 5% OFF »
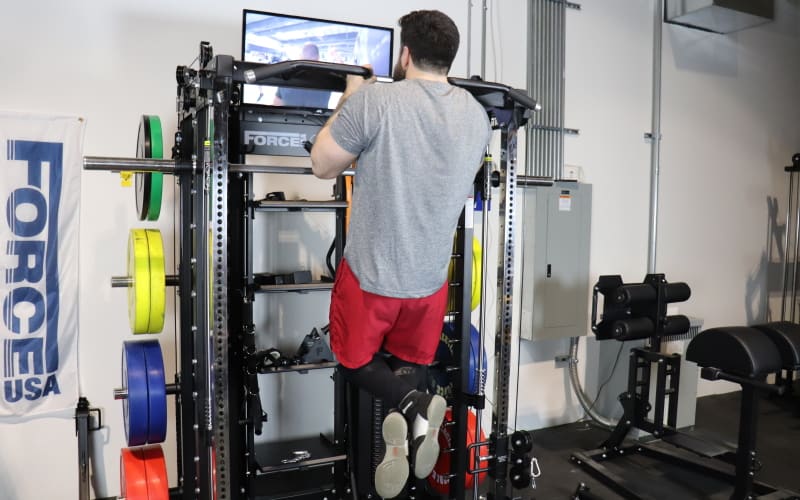
The Force USA G15 has a single multi-grip chin up station built into the front, upper crossmember.
It’s identical to the chin up station on the G10.
It’s very similar to the chin up stations on the G6, G9, G12 and the front chin up station on the G20. However, it has a slight improvement over these other models: There is light knurling on the powder coated steel portions for improved grip.
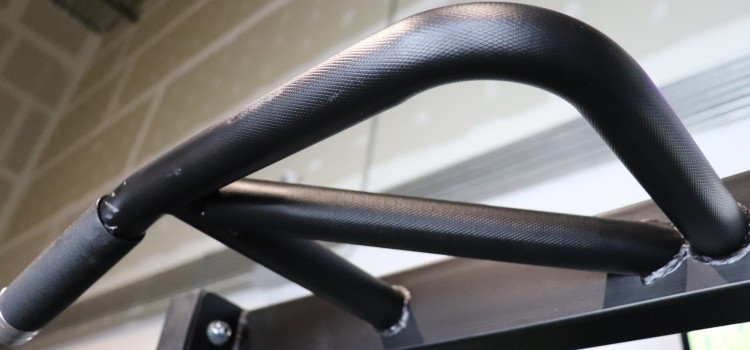
In my reviews of the other units, the lack of knurling was one of my critiques. So I’m glad they made this upgrade.
Here’s a breakdown of the different bars on this multi-grip station:
- 4 short parallel bar segments that allow for a close neutral grip or medium/wide neutral grip.
- 2 short diagonal bars for a medium-width semi-supinated grip (or a semi-pronated grip if you’re inside the rack, facing the opposite direction).
- 2 long bars in the front, running perpendicular to the 4 short parallel bars. There is a straight portion and an angled-down portion at the end. The straight portions let you use a narrow or medium-width pronated or supinated grip. The angled portions let you use a wide pronated grip with a more ergonomic wrist position.

You get a lot of exercise possibilities with all of the different combinations of bar segments. Here are several of the possible chin up variations:
- Close pronated grip chin ups
- Close supinated grip chin ups
- Close semi-supinated grip chin ups (using a diagonal + straight bar segment)
- Close neutral grip chin ups
- Medium pronated grip chin ups
- Medium supinated grip chin ups
- Medium semi-supinated grip chin ups
- Medium semi-pronated grip chin ups
- Wide pronated grip chin ups
- Wide/medium neutral grip chin ups
You can see me demonstrating some of the above-listed variations in the video below:
The angled-down portion of the multi-grip bar has a rubberized cover for better grip, which you’ll want when doing wide grip chin ups.
The diameter of the rubberized section is 38mm (1.5″). The regular powder coated section is 33mm (1.3″) thick. Both of these thicknesses feel good; they’re not too thin and not too thick.
As mentioned, other than the addition of light knurling, this chin up station is the same as on all other G-Series units – except the G3.
The G3 has a different style of multi-grip chin up bar. While they look quite different, they have nearly all of the same capabilities.
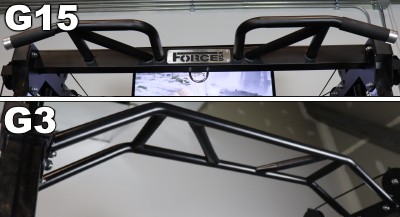
The main difference is that there’s no close neutral grip on the G3 bar. Also, the G3 doesn’t have rubberized grips on the angled wide grip segments.
Ceiling Clearance Needed for Chin Ups
If you have short ceilings, you’re in luck. The G15 is a relatively short all-in-one to begin with. So chances are you’ll have more than enough room to do pull ups without bumping your head.
You need about 10-12″ of clearance above the bar to do full range of motion chin ups. The chin up bar is 82″ tall, which means you need a minimum ceiling height of 7’8″ (92″). That ends up being just 5″ taller than the total unit height.
Lat Pulldown Station
Buy the Force USA G15 – Use KING5 for 5% OFF »
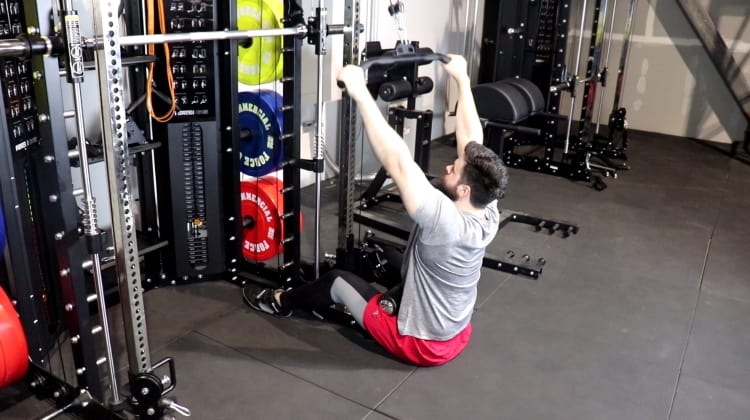
The lat pulldown station is created when you install the lat pulldown leg holder attachment on the functional trainer. You can put it on either of the columns.
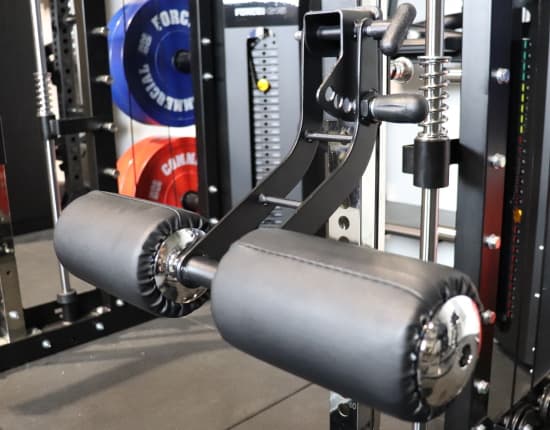
You can either sit on a bench or on the floor. I find it best to sit on the floor simply because the G15 is a shorter unit. I’m 5’11″ and have quite a long reach, so I can’t achieve full range of motion on lat pulldowns when sitting on a bench.
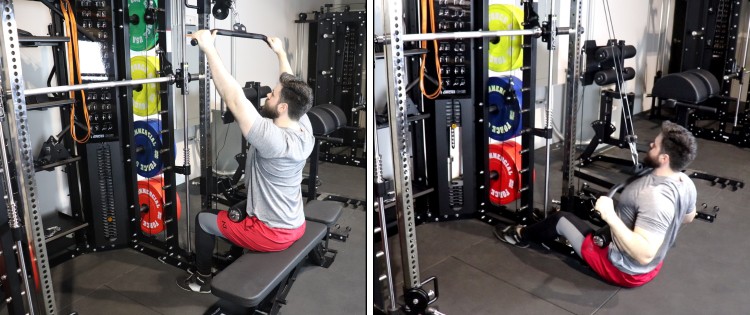
You’d have to be a few inches shorter than me to get a full stretch while seated on a bench (maybe 5’7″). Of course, you could sit on a shorter box, but I’d just recommend sitting on the floor.
For reference, the highest pulley setting is 72.5″ (6’0.5″) as measured from the floor to where the lower cable comes out of the trolley. That’s the lowest of all the G-Series units, which I’ve included below for comparison’s sake:
- G3: 76″ (6’4″)
- G6: 81″ (6’9″)
- G9: 73″ (6’1″)
- G10: 72.5″ (6’0.5″)
- G12: 73″ (6’1″)
- G20: 81″ (6’9″)
If you’re on the taller side, the G6 and G20 are the units that give you more room for full extension while seated on the bench.
The G3 can also work if you’re taller. Not only do its pulleys go a few inches higher than the G15, but it also has an actual seat attachment that you can position lower to the floor.
However, the G9, G10 and G12 fall in the same group as the G15, where a lot of people will be best off doing floor-seated pulldowns.
The floor-seated lat pulldown position works great. I was pleasantly surprised. You just outstretch your legs on either side of the functional trainer column. It feels stable and you can get right underneath the pulley for a very vertical line of pull. With the leg holder in place, you’re completely locked down.
With a max resistance of 144.5 lbs when using the 2:1 pulley ratio, most people will have all the weight they need to do lat pulldowns.
However, there are still plenty of stronger lifters out there who will want more weight. If that’s you, then I’ll bring up the same solution I recommended earlier in the functional trainer section: Buy a 10mm weight stack adapter pin like the Gym Pin or BSE Stacked Weight Pin. You can put one of these in the back of the weight stack and load Olympic plates on it.
The cable action feels very smooth on lat pulldowns, just as it does on any other functional trainer exercise.
The lat pulldown leg holder attachment installs like a j-hook into whichever hole you need on the power rack. Since the power rack has 1″ hole spacing, this by itself gives you plenty of accuracy in getting the right height.
However, you also have 5 micro-adjustment settings on the attachment for zeroing in on the perfect fit against your thighs. You put the pin in whichever of the 5 holes gives you the best fit.
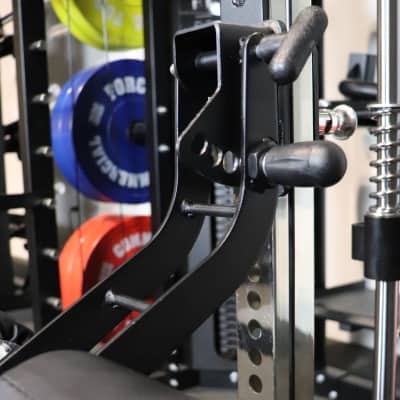
There is some play if you move it around while not against your thigh. Importantly, though, it feels secure when in use and pressing against your thighs.
The leg holder attachment is the same one used on all other units except for the G3. The G3 has a complete seat attachment, which is pretty cool.
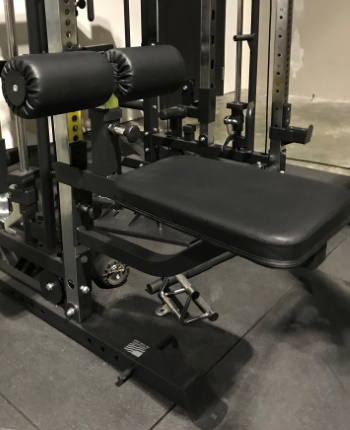
However, the downside to G3’s seat attachment is that has some sway to it when you’re leaning back. Also, a seat attachment on the G15 wouldn’t allow you to do floor-seated pulldowns.
Low Row Station
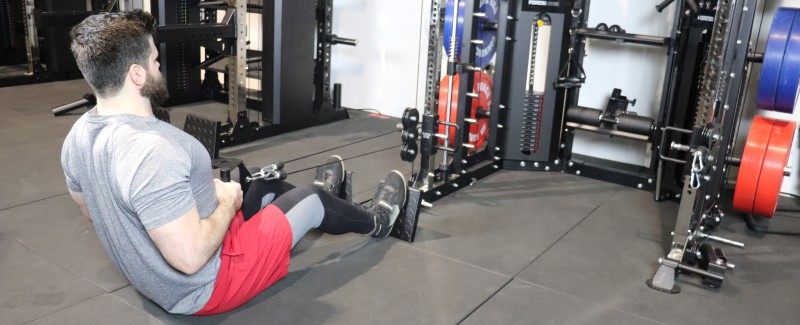
Buy the Force USA G15 – Use KING5 for 5% OFF »
The Force USA G15 All-In-One Trainer features a footplate designed specifically for doing low rows on the functional trainer. The only other G-Series model with this is the G10.
On G20, G12, G9 and G6 functional trainers, you can use the lat pulldown leg roller pad as a makeshift low row footplate, as shown below. The G3 has no such makeshift option.
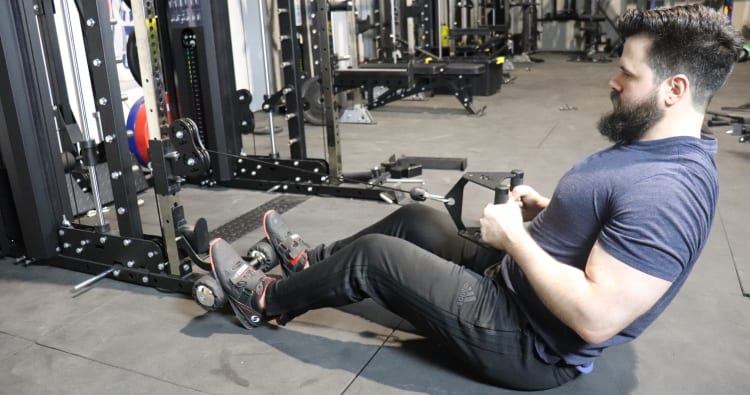
I’m a huge fan of low rows, so I’m extremely happy that Force USA included a specialized attachment for the G15 functional trainer.
The G9 does have a dedicated low footplate that’s built into the frame, but it’s located inside the rack rather than on the functional trainer. Similarly, the G20 has a dedicated built-in low row footplate as well, but you only get access to it if you buy the optional G20 Lat Row Station Upgrade, which installs on the back of the G20 base unit.
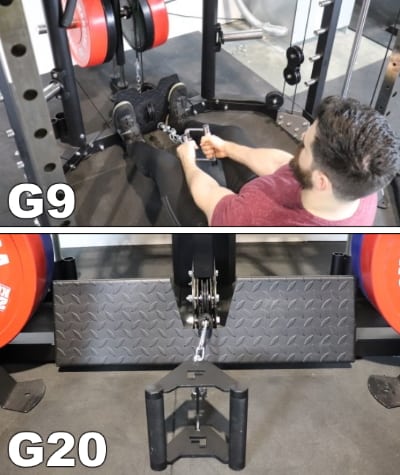
The G15 footplate works great. It’s sturdy and stable to use. It’s solid steel with a diamond steel pattern to prevent your feet from slipping.
It measures 9″ x 22″, which gives you plenty of space to comfortably position your feet.
There’s a cut-out in the center that is perfect for resting your cable attachment in between sets.
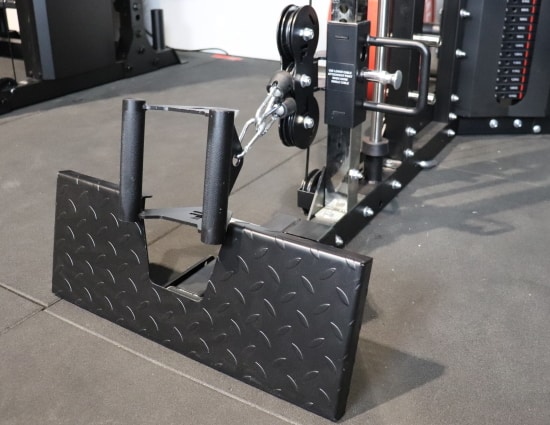
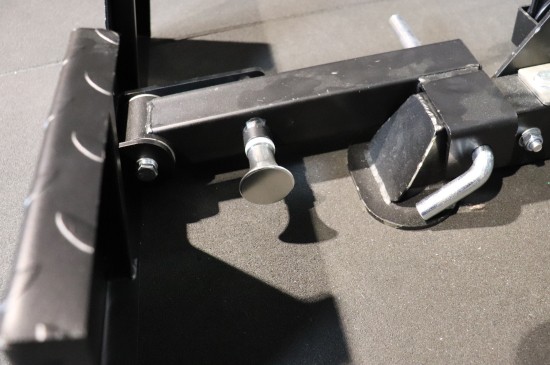
The footplate attaches to the unit on the front of the left frame foot. Installation is fast and easy. It has a bracket that you place over the frame foot. Then you secure it with a band peg. To uninstall the footplate, you remove the band peg.
It has a pop-pin system with 3 settings for modifying the angle of the plate. You can have it mostly upright or angled slightly back depending on what’s most comfortable for your feet and ankles.
Dip Station
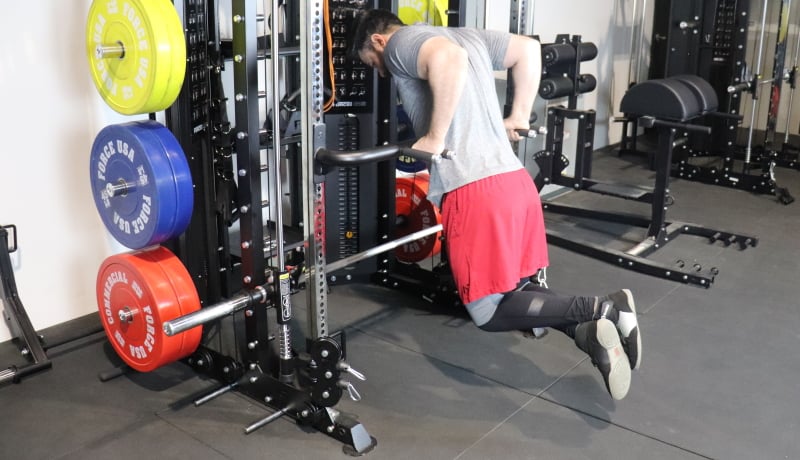
The dip station consists of 2 individual dip handles that you can attach at the desired height on each of the power rack uprights.
The handles give you access to 2 grip widths, including:
- A narrow/medium grip width where the handles are 20.5″ apart. This is best for triceps-focused dips, and/or is most suitable for smaller-framed lifters.
- A wider grip width where the handles are 26.5″ apart. This is best for chest-focused dips, and/or is most suitable for wider-framed lifters.
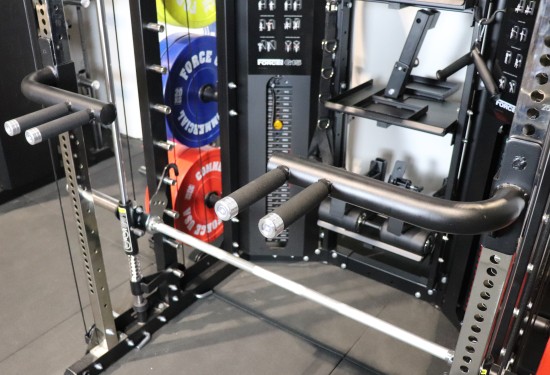
This is the same style of dip bars as on the G6, G9, G10 and G12. The G20 has a Matador-style (Y-shaped) dip station, but it’s on the optional G20 Lat Row Station Upgrade. And the G3 has no dip bar available at all.
The attachments are made of steel with rubberized coverings on the grip portions to allow for a more secure feel. The grips have a 30mm (1-3/16″) diameter, which feels natural in the hand during dips.
Having two individual handles that install between both uprights has some advantages over the Y-dip bar that attaches to a single upright:
- It’s a more stable setup since you’re positioned in the middle of the unit instead of on the side.
- You can face toward the unit or away from it.
- You can lean as far forward as you want without worrying about bumping your head into an upright. However, just make sure you don’t install the dip handles too high on the uprights so you don’t bump into the top crossmember when leaning forward.
The obvious exercise capabilities made possible by this dip station include:
- Wide grip dips
- Close grip dips
Some less common exercises you can use the dip handles for include:
- Inverted rows
- Inverted shrugs
- Incline push ups
- Band-assisted dips (by looping a band through the suspension trainer ring)
- Scap dips
Suspension Trainer Ring
Buy the Force USA G15 – Use KING5 for 5% OFF »
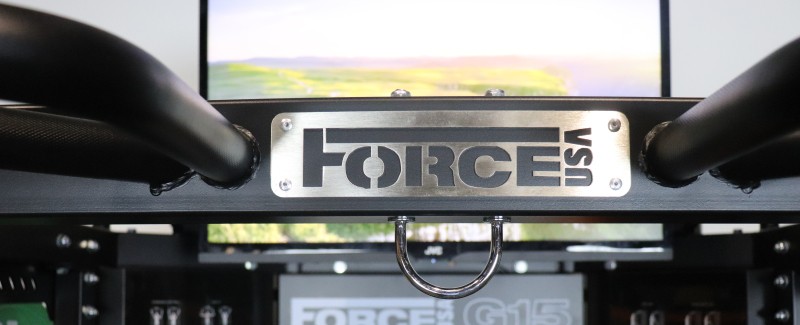
With the suspension trainer ring, you have the ideal location to hang any number of training accessories to expand your exercise repertoire.
The most obvious thing to hang from this ring is a suspension trainer system like TRX. Note that you’ll need to get your own suspension trainer since one is not included with the G15.
There are some other great uses for this ring beyond hanging a suspension trainer:
- Looping a resistance band through to do band-resisted exercises as well as band-assisted exercises
- Hanging a punching bag for cardio
- Hooking a cable exercise for storage when not in use
The suspension training ring consists of a thick U-bolt that goes from the bottom through the top of the upper crossmember, where it’s secured by 2 nuts.
You can safely support a lot of weight on this setup since you’re relying not only on the robust hardware but also on the frame of the entire unit.
Here are some popular suspension trainer exercises you can do on this station:
- Suspension trainer inverted row
- Suspension trainer pullover
- Suspension trainer push up
- Suspension trainer front raise
- Suspension trainer triceps extension
- Suspension trainer biceps curl
- Suspension trainer hip thrust
- Suspension trainer pistol squat
- Suspension trainer plank
- Suspension trainer pike
I also mentioned that you can do some band-related exercises by looping a band through this ring. Here are some examples:
- Band-assisted chin up
- Band-assisted dip
- Band face pull
- Band triceps pushdown
- Band pulldown
- Band straight arm pulldown
Included Accessory Storage
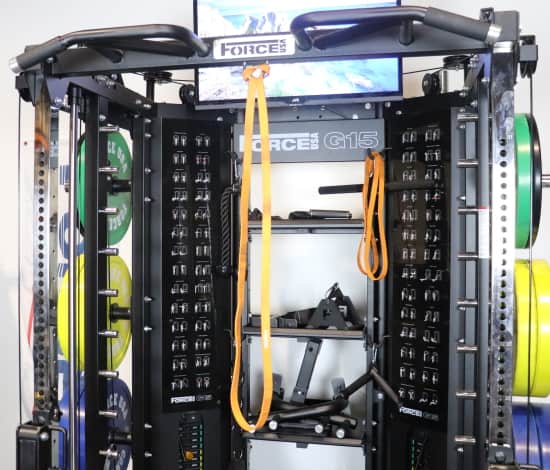
The accessory storage area that comes standard with the Force USA G15 All-In-One Trainer includes:
- 4 hooks on the inside of the unit
- 4 hangers on the back of the unit
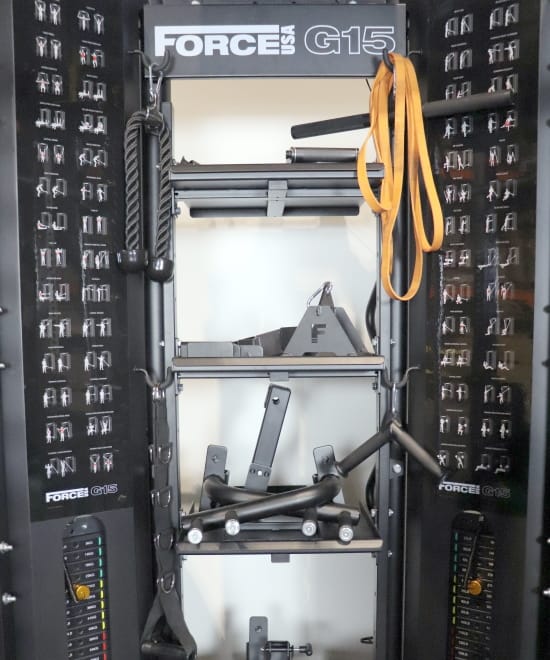
The hooks are the more useful storage implements in my opinion because of their accessibility. They’re easier to get to since they’re inside the machine.
The only issue with the hooks comes into play if you also buy the optional upgrade kit and install the storage shelves. Depending on where you install the storage shelves, they may be right next to the storage hooks – almost touching – which makes it so you have to use a little force to hook your accessory onto it.
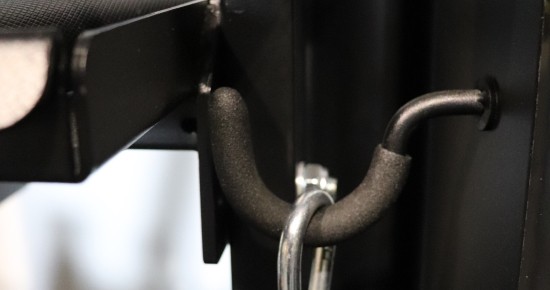
You can still get accessories on and off the hook, but it’s not seamless. You can avoid this hiccup by installing the shelves so they don’t line up with the storage hooks.
You can use the hangers on the back of the unit to hang accessories as you would with the hooks. They’re two-pronged, so it’s easy to hook on multiple accessories.
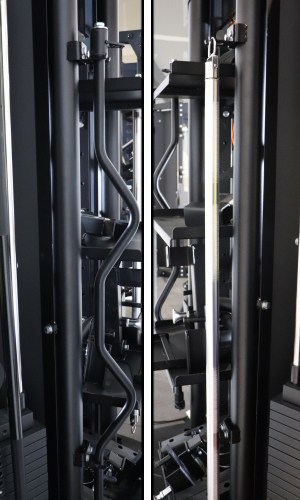
The hangers are also ideal for hanging certain accessories like the EZ curl cable bar since you can easily hang it between the two prongs.
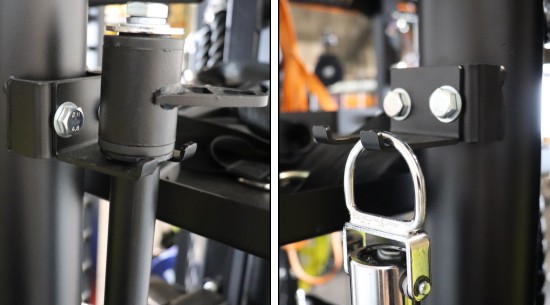
Right: Hooking an accessory onto one of the hanger’s prongs.
All in all, you have a total of 8 storage points which gives you enough space to store all of the included cable accessories.
You can fit considerably more accessories if you put multiple items on a single hook or hanger prong.
If you still find yourself needing more room for storage, you should consider buying the upgrade kit to get the storage shelves. The shelves are ideal for storing the larger power rack and functional trainer attachments.
Another popular option for storage in home gyms is Wall Control. It’s a modular metal pegboard system that installs on your wall. This keeps with the theme of maintaining a compact home gym. If you’re interested, you can use my coupon code KING for 10% off.
Barbell Storage
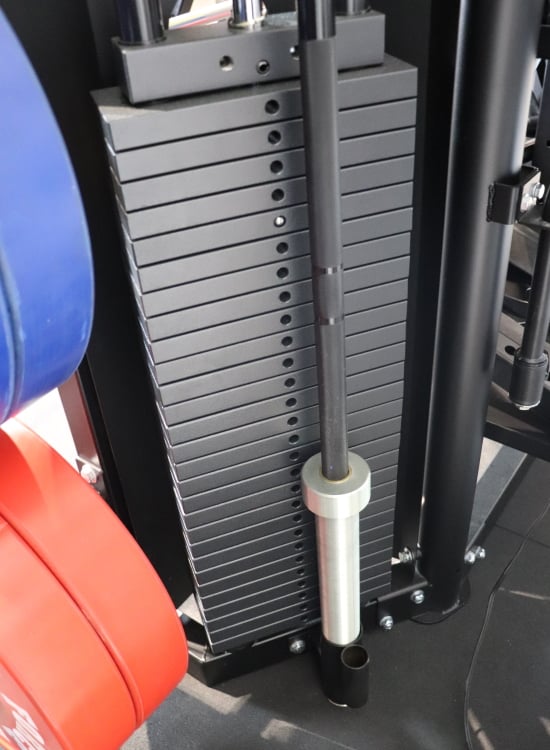
The Force USA G15 All-In-One Trainer comes standard with 2 vertical barbell holders. They are located directly behind the weight stacks.
Each bar holder unit has an Olympic barbell holder and a standard barbell holder.
This gives you the ability to store 2 Olympic barbells (~2″ sleeves) and 2 standard barbells (~1″ sleeves).
Most people will only care about the Olympic bar holders. As long as you have just one or two barbells in your gym, this takes care of all your barbell storage needs.
Note that the top of the barbell holder is 7″ off the floor. So you have to add that to the length of your bar to make sure you have enough vertical clearance. Assuming you have a normal-length Olympic bar of 86.6″ (220cm), this means you need a minimum ceiling height of 93.6″ (7’9.6″) to use the vertical barbell storage feature.
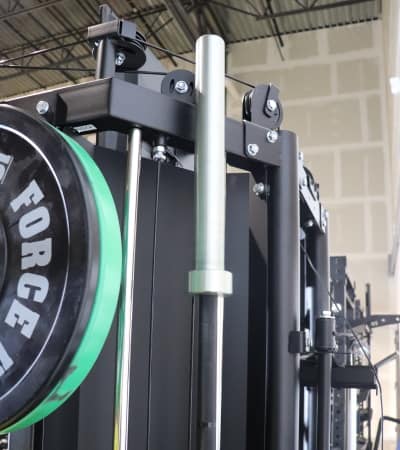
If your ceiling is too short or if you have more than 2 barbells in your gym, consider getting a wall-mounted barbell storage system like this horizontal bar rack or this vertical bar hook.
Weight Plate Storage
Buy the Force USA G15 – Use KING5 for 5% OFF »
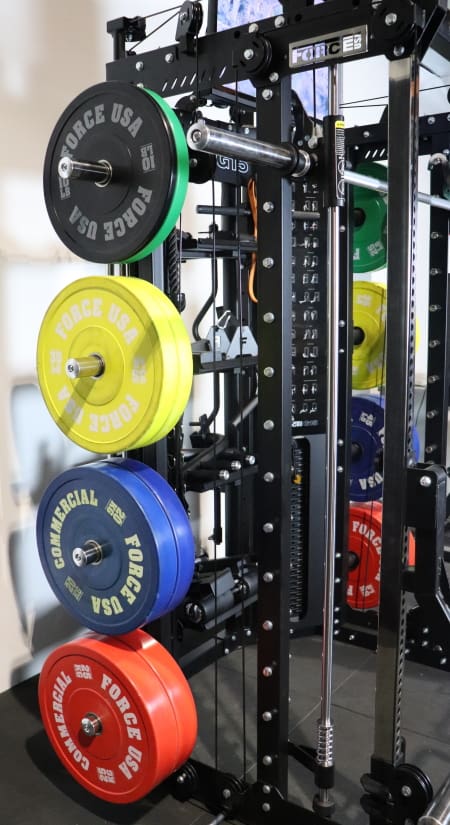
The Force USA G15 All-In-One Trainer has the best weight plate storage configuration of all the G-Series units, except for the G10 which has the same configuration.
It consists of 4 storage pegs per side or 8 total; same as on the G10. This is more storage pegs than on the G12, G9, G6 and G3, all of which have 3 pegs per side, or 6 total.
While most people can fit all of their plates on 6 pegs just fine, more pegs are better. It lets you better organize them by weight. Plus, some people just have a lot of plates and need more room.
The G20 does have more storage pegs, with 5 per side. Even though the G20 has an extra storage peg per side, you can’t use all 5 of them in certain scenarios. This is because the G20’s storage pegs are spaced closer together as you get closer to the top. This works if you have regular cast iron plates, and store the 45s at the bottom, the 35s above that, 25s at the next level and so on. But if you have bumper plates, which are all the same diameter, or if you have lots of cast iron 45s that you want to put on multiple levels, you can’t fit them properly.
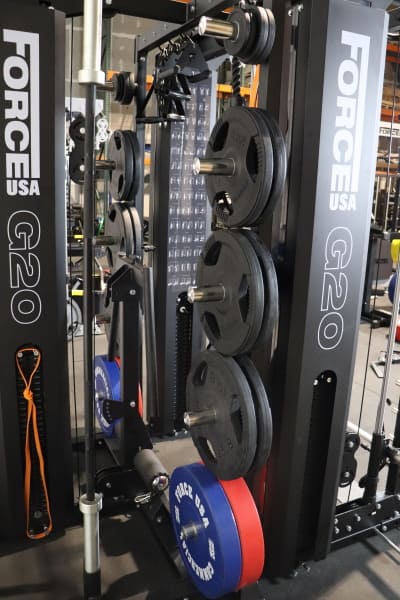
With the storage peg layout on the G15, this problem is avoided by having one less storage peg per side. There’s enough room for the pegs to be evenly spaced so you can fit full diameter plates on every level.
Each storage peg is 8″ long, which is a sufficient length. All of the other G-Series units also use 8″ pegs. The number of plates you can store on each peg depends on the thickness of the plates you’re using. If you’re using regular cast iron plates, that means you could store 5 45 lb plates (1.5″ thick) per peg. However, if you’re using thick bumper plates like in my photos, you could store three 45 lb plates or two 55 lb plates per peg.

The placement of the weight storage area on the G15 works well. It’s located on the sides of the unit, toward the rear. This position makes changing weight accessible and efficient since it puts you near the Smith machine and power rack. This is a little more convenient than on the G20 and G3, where the plate storage is located in the back.
The storage peg construction includes a metal casting over plastic, which goes over a steel rod. It gets the job done and will hold up to normal use. However, if I could choose, I’d prefer a basic powder-coated steel peg – no casting or plastic. It’s a simpler and more durable design.
Exercise Charts
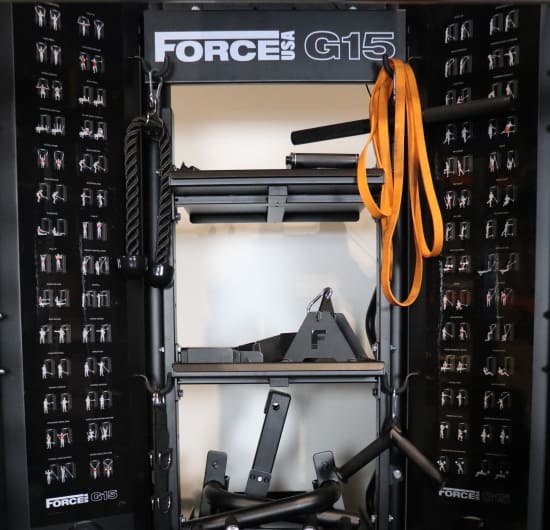
The Force USA G15 All-In-One Trainer has 2 functional trainer exercise charts inside the rack. They’re located on the panels just above each weight stack.
There are a total of 52 exercise diagrams between the 2 charts. This is more exercise diagrams than on any of the other G-Series units except the G10, which also shows 52 exercises. The G20 shows 42 exercises, the G12 and G6 both show 37 exercises, the G9 shows 35 and the G3 has no exercise charts at all.
Not everyone who buys the Force USA G15 will need the exercise charts. This includes experienced lifters who already know all the common cable exercises and have a set regimen anyway.
However, I know a lot of people do find them helpful, especially those who are newer to lifting; or at least new to lifting on a functional trainer.
Even if you’re not a newbie, the charts can be a handy tool if you’re not doing structured training and just want some quick exercise ideas.
Band Peg Holes + Band Pegs

In case you didn’t know, the purpose of band pegs is to attach resistance bands from an anchor point to whatever you’re lifting (e.g. barbell, Smith machine, etc.).
The benefit is that it changes the strength curve. It makes the exercise more challenging at the top of the movement, which helps train explosiveness.
The Force USA G15 comes with both upper AND lower band peg holes. Notably, the G15 along with the G10 is the only G-Series unit with upper band peg holes.
In comparison, the G3, G6 and G20 have lower band peg holes only. The G9 and G12 have no band peg holes at all.
The G15 comes with 4 band pegs for use in any of the holes.
There are 2 lower band peg holes on each foot of the machine. The holes are located in the Smith machine region. So the main purpose of the band peg holes is to give you the option to add band resistance to Smith machine exercises.
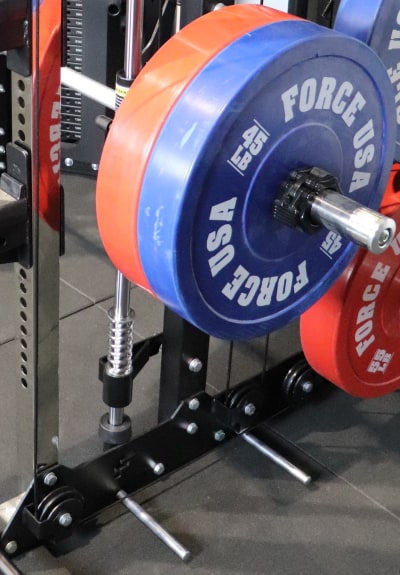
There are no band peg holes around the power rack area like on the G3, G6 and G20 – so you can’t add band resistance to your free weight exercises. However, this is understandable given the more compact design of the G15; the front feet don’t extend far enough forward, so band peg holes wouldn’t work in the power rack area.
The one thing Force USA could’ve improved about the G15’s band peg holes would have been to include one more set of them under the weight stack area like on the G6. This would have allowed you to easily add band resistance to the weight stacks. It’s still possible, as discussed here, but it’s not as seamless.
There are 3 upper band peg holes on the G15. Like the lower band peg holes, they are in the Smith machine area.
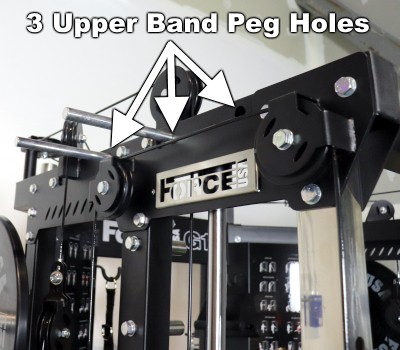
This makes it easy to attach resistance bands from the top of the unit to Smith machine sleeves. This makes it possible to do “reverse band” exercises on the Smith machine, which means the load becomes lighter at the bottom of the range of motion.
Even though the band peg holes are only in the Smith machine region, it’s a great spot to add band resistance to the optional jammer arms. Speaking of the jammer arms, that’s what I’ll discuss next.
Jammer Arms (Optional)
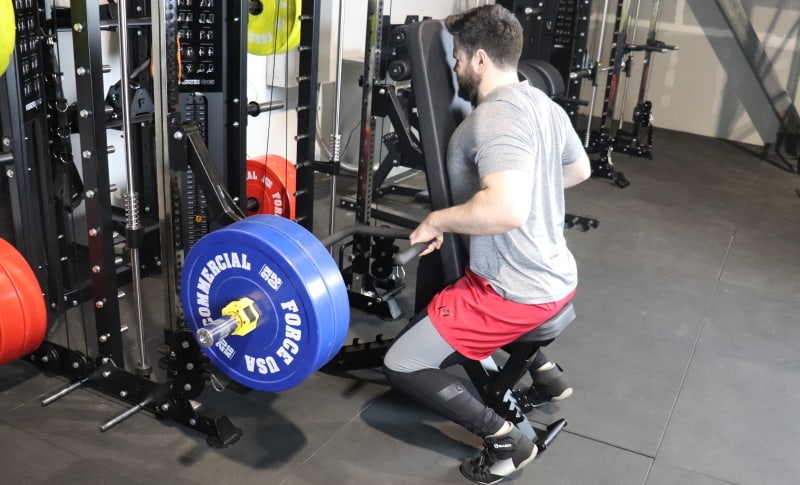
Buy the Force USA G15 – Use KING5 for 5% OFF »
Jammer arms were the #1 most requested feature for the G-Series before the development of the G15. Force USA took that customer feedback and made sure to include them as part of the optional upgrade kit.
If you’re unfamiliar, jammer arms are plate-loaded “arms” that swing out on a hinge. They attach to the power rack uprights.
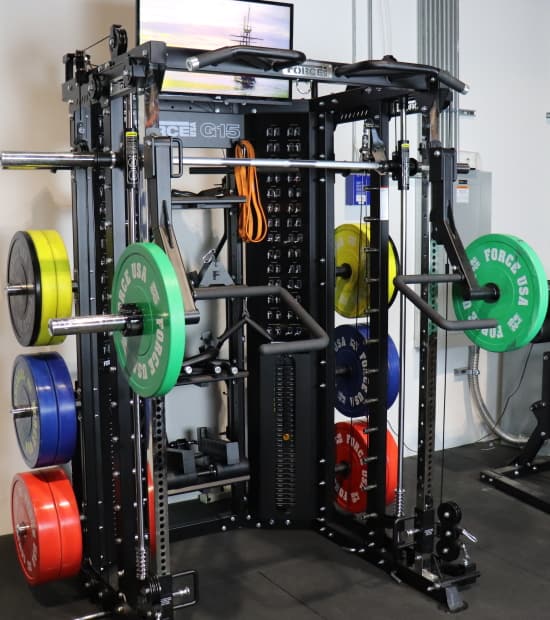
You can use them to mimic Hammer Strength-style plate-loaded machines that you’ll be familiar with if you’ve ever trained in a commercial gym.
They’re so versatile because:
- You can adjust them to any height.
- You can rest them against the uprights or on the spotter arms to achieve different starting positions.
The arms themselves are a little different than most other jammer arms on the market. Instead of being straight, they are bent ~30 degrees near the middle of the arm.
The benefit of an angled jammer arm is that you can easily prop it up on the spotter arm.
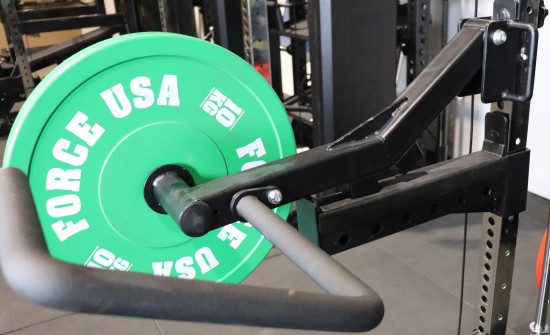
This makes it so that jammer arms start at a more horizontal or straight-out position. This unlocks the ability to do exercises that require being under the load instead of behind or in front of it. Some examples of this include flat bench press, incline bench press and standing shoulder press.
There is a rubber bumper on either side of the bend in the arm. This provides protection against metal-on-metal contact when the jammer arm is against either the power rack upright or the spotter arm.
The jammer arm handles are large and U-shaped, which gives you 1 pair of neutral grip segments and 2 pairs of straight grip segments.
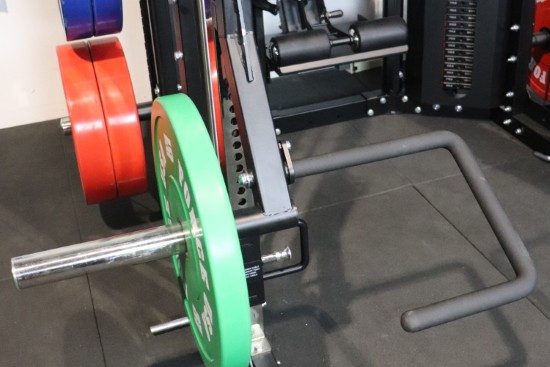
The two pairs of straight grip segments offer different leverages. The pair closer to the power rack makes the load feel heavier and the pair further away makes it feel lighter.
The handles have a rubberized covering to improve grip. It’s comfortable and has a nice tacky feel in the hand.
The weight plate holders on the jammer arms are the same sleeves as on the Smith machine. Each sleeve is 12″ long. This is commensurate with the weight holder length of most other jammer arms on the market. It gives you plenty of room to load enough weight for all the common jammer arm exercises.
One cool trick you can do with the jammer arms is to add cable resistance by connecting the pulleys to the jammer arm weight holders with chains. This makes it easy to rapidly change the weight by adjusting the weight stack instead of loading plates on and off the jammer arm.
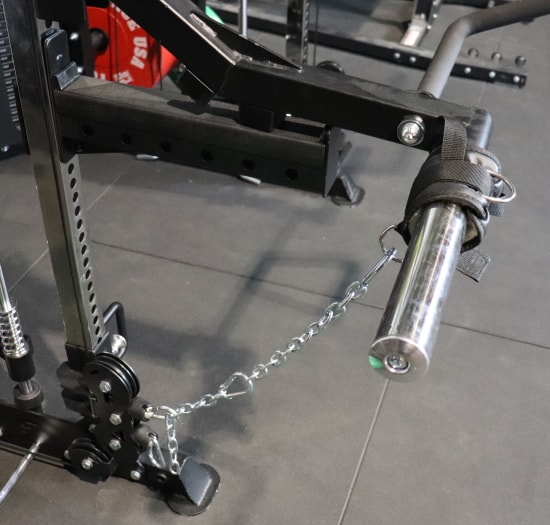
You can also use the band pegs to add band resistance to the jammer arms.
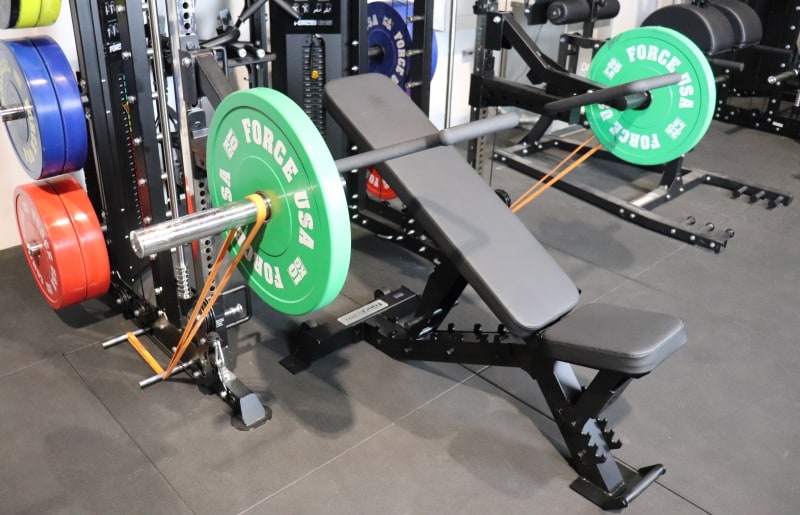
The only downside of the jammer arms is that it can take a little time and effort to adjust them to the desired position.
You install each jammer arm on the power rack by inserting its threaded pin through the desired hole. Then you fasten a star knob onto the threaded pin on the other side of the upright.
This process can be finicky at first, but it becomes easier over time. You’ll save a lot of time if you make note of the height settings you use for your go-to jammer arm exercises.
Many other jammer arms on the market have a trolley system that makes adjustments easier. However, that isn’t possible with all-in-one trainers since they already have a trolley system for the functional trainer.
In my opinion, the jammer arms are worth it. Sure, they take a little time to adjust. But the ability to do so many Hammer Strength-style machine exercises is too big of a benefit to ignore. It’s hard to beat the pump you get from fixed-path movements.
Here are some of my favorite jammer arm exercises that you can do on the G15:
- Jammer arm incline bench press
- Jammer arm seated chest press
- Jammer arm shoulder press
- Jammer arm one-arm push press
- Jammer arm chest-supported row
- Jammer arm bent over one-arm rows
- Jammer arm shrugs
- Jammer arm front squat
- Jammer arm RDL
Vertical Leg Press (Optional)
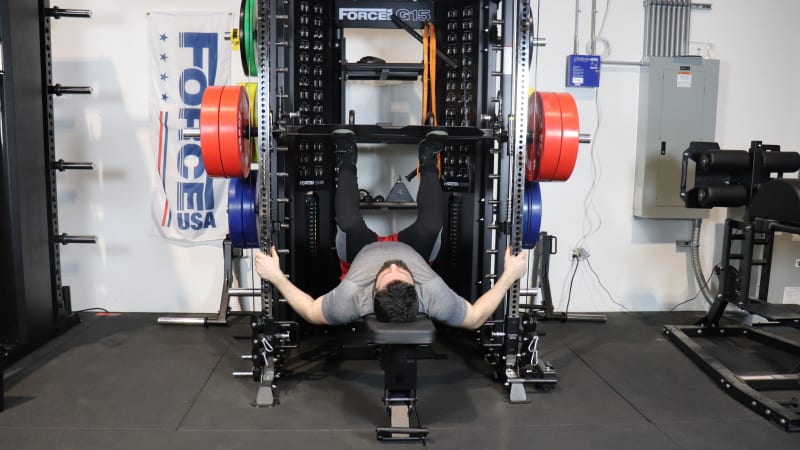
A vertical leg press attachment is available as part of the optional upgrade kit for the Force USA G15.
A vertical leg press attachment comes standard with all the other G-Series units, except the G10 and G3, which also have it available as an optional extra.
Besides barbell squats, the vertical leg press is the best exercise station on the G15 for building up your quads. Pressing directly against gravity on a fixed track is guaranteed to give you a huge pump.
The vertical leg press attachment consists of a specially designed plate that installs on the Smith machine bar. Once attached, it has a secure fit with no wiggle.
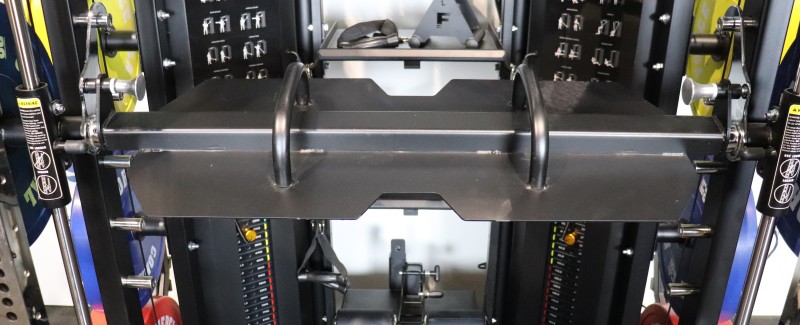
To install it, you first place it over the Smith bar shaft. It has pop-pins that you snap into 1 of 3 holes on the Smith machine hooks at the end of the Smith bar.
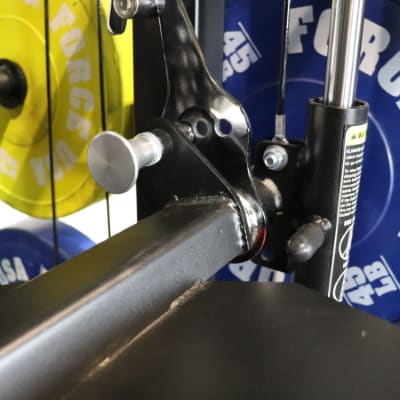
These holes are an important feature. They give you access to 3 different leg press plate angles. Notably, all other models with this style of leg press except the G10 (i.e. the G6, G9, G12 and G20) have just one 1 hole.
When you can modify the angle, it’s easier to perform leg presses because you don’t have to focus as much on stabilizing your ankle to keep the hooks from hitting the Smith machine pegs.
I will note that if you have the plate angled steeply (as I prefer), you have to be more careful about racking the weight at the end of your set. I recommend doing one of two things if you feel uneasy racking the weight when using the steep plate angle:
- Stick to light/moderate weight for high reps.
- If you’re going heavy, then complete your set at the bottom of the range of motion by leaving the bar on the Smith machine safeties.
The up and down motion is super smooth during the leg press movement. It feels stable since you can modify the plate angle to your liking and the plate is secure.
The leg press plate attachment uses a diamond steel pattern to give your feet a non-slip grip.
The usable width of the plate is 29.5″. That’s enough room to do narrow, medium or wide stance leg press variations. I generally stick to a medium-width stance when leg pressing, but I do like to mix it up once in a while.
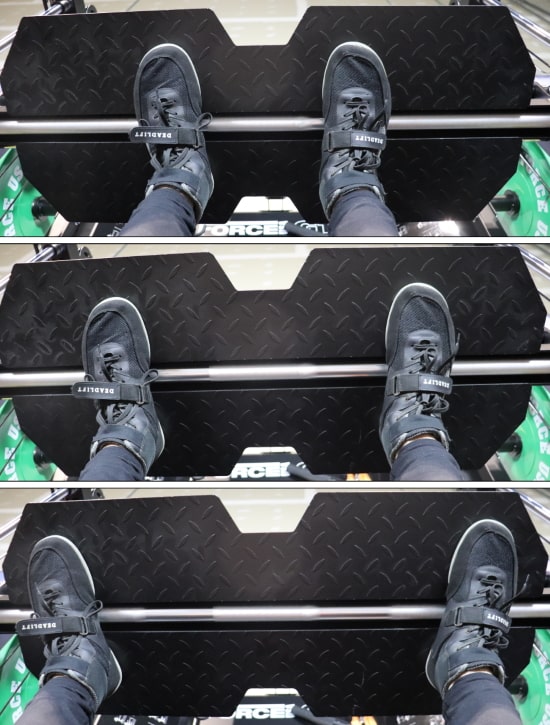
I should note that if you’re used to using the 45-degree leg press machines typically found in commercial gyms, you’re in for a bit of a different experience. At first, the setup on a vertical leg press can feel awkward. You have to lay down, face the ceiling and put your legs up. But you get used to it after a few sessions.
I recommend laying on your weight bench. The pad makes it comfortable on your back. Or you can do it on the floor. But if you do, you may want to buy an exercise mat to lay on.
The big benefit of a vertical leg press is that you don’t have to load up nearly as much weight as you do on a 45-degree leg press since the weight is literally on top of you. That means less time and effort loading on weight plates.
As I said, the G15 leg press attachment is identical to the G10 attachment and it’s very similar to the ones on the G6, G9, G12 and G20. However, it’s quite different from the G3 leg press attachment. Here’s how:
- The G3 plate can lock into place to be parallel with the floor.
- The G3 plate has a bit more play to it when installed; granted you don’t feel that with weight on during exercise.
- The G3 leg press comes with handrails that you turn inward or outward to rack or unrack the weight.
- The G3 plate is rectangular and a half-inch narrower.
- Installing the G3 takes a bit longer since it requires manually inserting 2 pins through the center of the Smith bar.
- The G3 leg press feels slightly less smooth since the G3 Smith machine isn’t as smooth as the G15 Smith machine.
Landmine + T-Bar Row Handle (Optional)
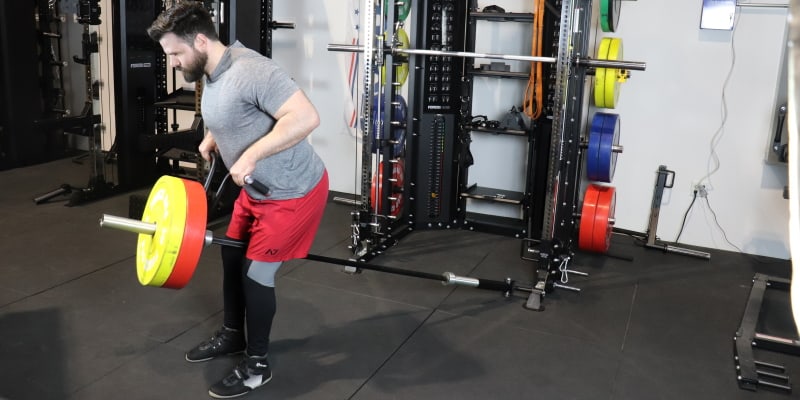
Buy the Force USA G15 – Use KING5 for 5% OFF »
A landmine attachment and a t-bar row handle are also included in the optional upgrade kit for the Force USA G15.
The landmine attachment is an open sleeve that attaches to the front of the right foot of the rack. You put one end of your barbell into the sleeve. Then you load the weight on the other end of the barbell and lift it up, down, left, right and all around since the landmine sleeve rotates.
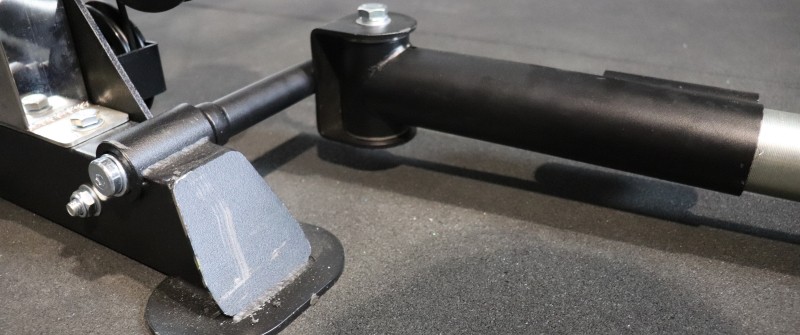
You can easily remove it from the rack if you want it out of the way. It uses a washer that allows you to insert or remove it from the holder when you line it up. Once inserted, this washer will drop down and lock the attachment in the holder. While this makes installation and removal a breeze, there is one drawback you need to be aware of:
You can’t put pressure against this washer during exercise. If you do, the attachment may wiggle out of place.
This means that if you want to position yourself and the barbell diagonally past the midline of the rack, you need to install the attachment on the inside of the rack. If you want to position yourself and the barbell to the outside of the rack, you need to install the attachment on the outside of the rack.
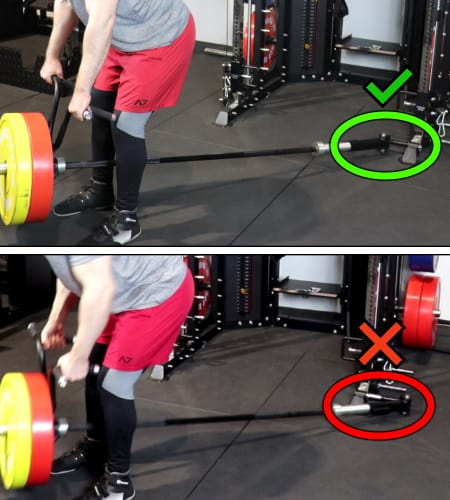
Bottom: Landmine is oriented in the wrong direction and you can see it’s wiggling out of place.
The landmine attachment gives you a ton of exercise variety for such a small piece of equipment. Most of the movements you can do with the landmine are shoulder and core exercises.
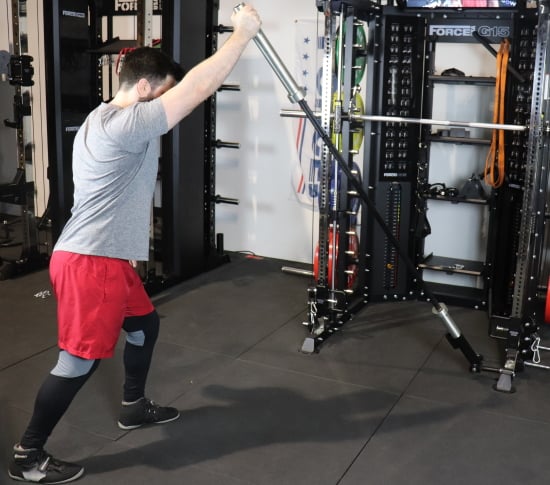
When you have a t-bar row handle, it gives you some back training options as well. The t-bar row handle is a multi-grip landmine handle attachment that slides onto the opposite end of the barbell. Then you load weights on behind it. It allows you to perform landmine t-bar rows using either a close neutral grip or medium overhand grip.
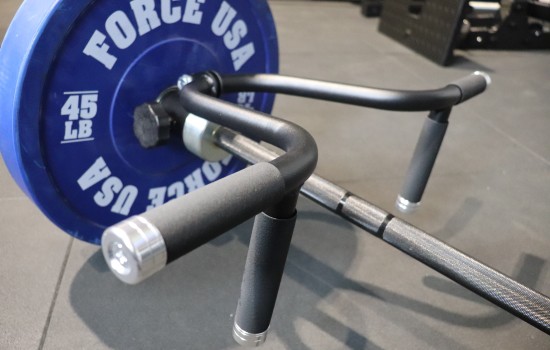
T-bar rows are one of my favorite back building exercises. You can use a lot of weight to blast your mid-back and lats while also getting some lower back and core work by stabilizing yourself while bent over.
SIDE NOTE: The t-bar row handle is fine. However, if you want to splurge on a better handle, you should get the Ironmaster Ultimate Row Handle, which I own and love. It’s extremely versatile because you can use it as a landmine handle for t-bar rows as well as a cable handle for rows and lat pulldowns. Plus it offers several adjustable grip width settings with both neutral and straight grip options.
In addition to t-bar rows, shoulder movements and core movements, you can get creative and do landmine variations of traditional strength training movements.
Here’s a list of several landmine exercises you can do on the G15:
- Landmine strict press
- Landmine push press
- Landmine half-kneeling press
- Landmine floor press
- Landmine twist
- Landmine rollout
- Landmine front squat
- Landmine split squat
- Landmine single leg RDL
- Landmine neutral grip t-bar row
- Landmine overhand t-bar row
- Landmine one arm row
- Landmine one arm rear delt row
It wouldn’t make sense to get the optional upgrade kit for the G15 if the landmine is the only optional attachment you’re after. If that were the case, I’d recommend buying a 3rd-party standalone landmine attachment and multi-grip t-bar row landmine handle.
On the other hand, if you are already planning on getting the optional upgrade kit to take advantage of the bigger attachments like the jammer arms, leg press or storage shelves, then you’ll end up getting the landmine and handle anyway.
Storage Shelves (Optional)
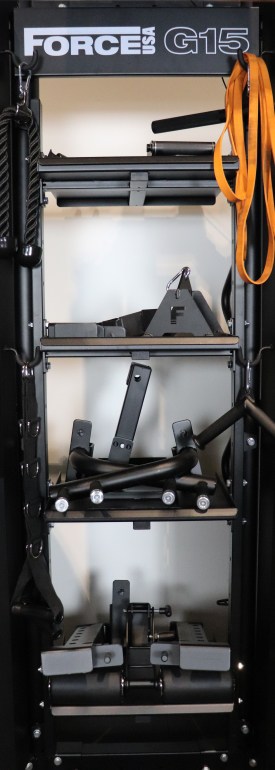
You get a set of 4 storage shelves when you purchase the Force USA G15 upgrade kit.
The shelves go between the opening in the back of the inside of the machine. There are 14 different height options for installing the shelves. Each shelf has 3 angle options so they can be completely flat, slightly angled or slightly more angled.
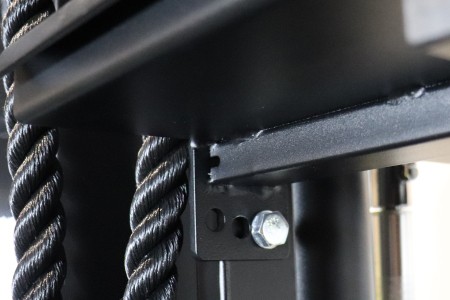
There is a short lip on the front and both sides of each shelf to keep your items from falling off. The front lip is particularly important if you have your shelves installed at an angle.
There is no grippy surface on the shelves. I would’ve liked to have seen this detail. It would help keep your stuff from sliding forward when you have the shelves at an angle.
The shelves measure 18″x16″. This gives you a good amount of storage space, especially when you multiply that surface area by 4 shelves.
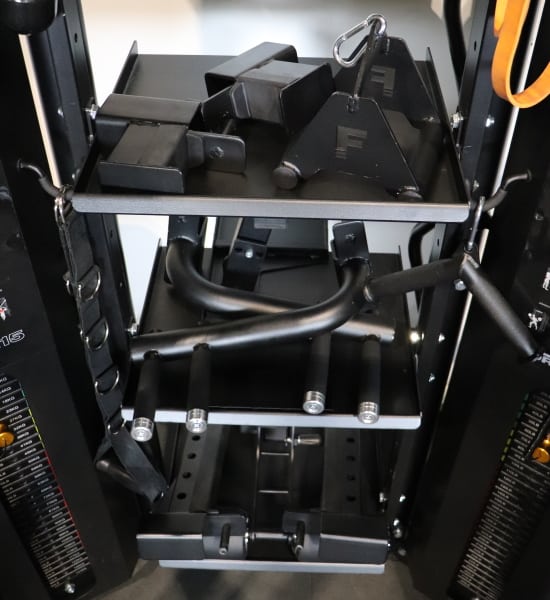
You can store all types of things on these. Here are just a few examples:
- The G15 attachments like the j-hooks, spotter arms and dip handles
- Resistance bands
- Cable handle attachments
- Barbell lock collars
- Chains
- Lifting straps
- Knee/elbow sleeves and wraps
The shelves are sturdy. So you can even store heavier items like dumbbells and kettlebells, though you’d only have enough room for a smaller collection (i.e. NOT a full set of dumbbells or kettlebells).
You could potentially fit a pair of adjustable dumbbells on the shelves. If you have a pair of PowerBlock adjustable dumbbells, these shelves would allow you to put them at a slight angle, which is required to properly adjust PowerBlocks (since the adder weights need to be tipped to the front).
However, I’ll note that you’d need to put one PowerBlock dumbbell per shelf to ensure you have enough room to remove and re-insert the selector pin when changing the weight.
I’ve mentioned this previously, but it bears repeating here: You need to add 6 more inches to the depth dimension if you plan on using the shelves. This is important to know if you plan on setting up your G15 against a wall.
TV Mount (Optional)
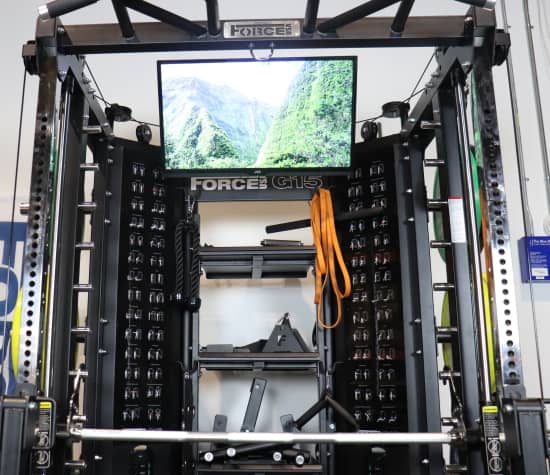
The optional upgrade kit also includes a TV mount that lets you attach a curved or flat-screen TV to the frame of your Force USA G15 All-In-One Trainer.
It bolts directly to the top rear crossmember and can hold up to a 32″ display. It uses a VESA hole pattern, which is the standard mounting interface used by virtually all TV brands and models.
It features 2 pop-pin adjustment joints, each with 3 adjustment holes. These adjustable joints let you easily change both the height and tilt of the TV.
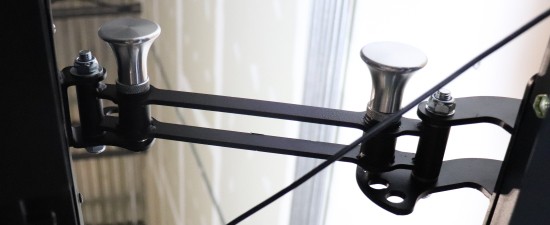
A TV mount attachment isn’t for everyone. But if you already wanted a TV in your gym, this may be a more convenient location than on your wall. It ensures your display will always be close to where you’re training.
You may want a TV to put on some entertainment to watch between sets. Or you can use it to play workout videos that you can train along with.
Leg Curl/Extension (Optional)
In Nov 2022, the optional leg curl/extension attachment became available for all G-Series models. For all models except the G15 and G10, it comes as part of an optional upgrade kit that includes jammer arms and, in some cases, dip handles.
The leg curl/extension attachment for the G15 and G10 can be purchased separately for $149 and isn’t included in the pre-existing G10/G15 upgrade kit. Adding it to the upgrade kit would’ve made more sense. However, that would also increase the cost of the kit, which would be a negative for anyone who doesn’t want the leg curl/extension attachment.
The leg curl/extension attachments for all G-Series models are virtually identical. However, the size of the attachment pin used varies depending on the size of the power rack holes. The G-Series models with 5/8″ power rack holes (i.e. G15, G20, G10, G3) use an attachment with a 5/8″ pin. And the G-Series models (i.e. G6, G9, G12) with 1″ power rack holes use an attachment with a 1″ pin.

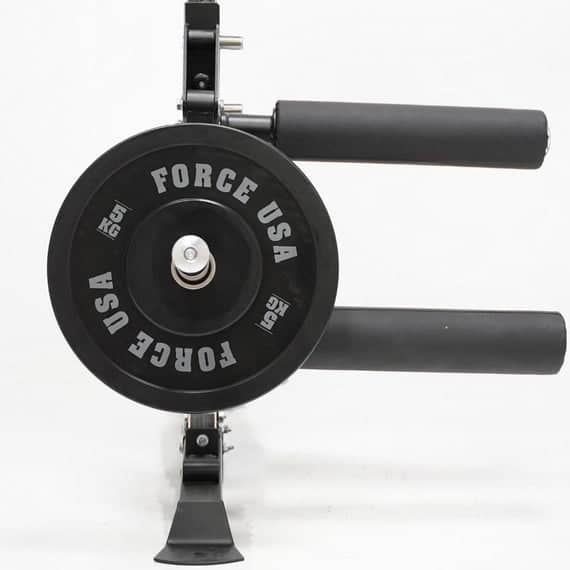
The G15 leg curl/extension attachment features a sturdy frame that securely attaches to the power rack upright using a 5/8″ pin. The attachment includes a lever, which is attached to the frame with a bolt that allows it to swing. A weight horn extends from the bottom of the lever for loading weight plates.
Two firm, covered foam roller pads provide comfortable support during use. The bottom roller is used to swing the lever with your leg. You can adjust this bottom roller with a pop-pin to accommodate the user’s leg length. The top roller, which is used to stabilize your thigh on both leg curls and leg extensions, can be removed if you want to get creative and do exercises like hip thrusts.

While hip thrusts and potentially other exercises are possible with this attachment, the main uses are for these two popular isolation leg exercises:
- Seated Leg Extensions: These require setting up a weight bench to sit on. The attachment should be positioned with the top roller at or just above the height of the bench pad. You can do these with either one leg or both, though single-leg leg extensions may give you a more balanced workout than bilateral leg extensions due to the resistances being side-loaded. Try both versions and see how they feel for you.
- Standing Leg Curls: Leg curls must be done while standing with this type of attachment design. As a result, that means you must train one leg at a time. While this may not as efficient as bilateral leg curls, you ensure that your strong leg isn’t compensating for your weak leg.
Missing Features
Now, I’ll cover the main features that the Force USA G15 All-In-One Trainer lacks that at least some of the other G-Series units have. To be honest, there are not many of these “missing features,” but I’ll list them out anyway:
No Monolift
There is no monolift available on the G15. To be fair, the G20 is the only unit with this attachment. Still, I thought there might’ve been one for the G15 since it’s like the G20 in that they’re both higher-end units with precise hole spacing, which appeals to powerlifters.
No Bolt-down Capability
Unlike the G3, G6 and G20, the G15 does not have a bolt-down capability. However, there’s not much use for this feature when you consider the super heavy 1150 lb weight of the unit. You won’t be able to budge it if you try.
No Standard Plate Compatibility
Unlike on the G3, G6, G9 and G12, the Smith machine sleeves cannot be adapted to fit standard weight plates on the G15. Few people will care that this capability is missing since most people who buy the G15 will be using Olympic plates.
Force USA Training App
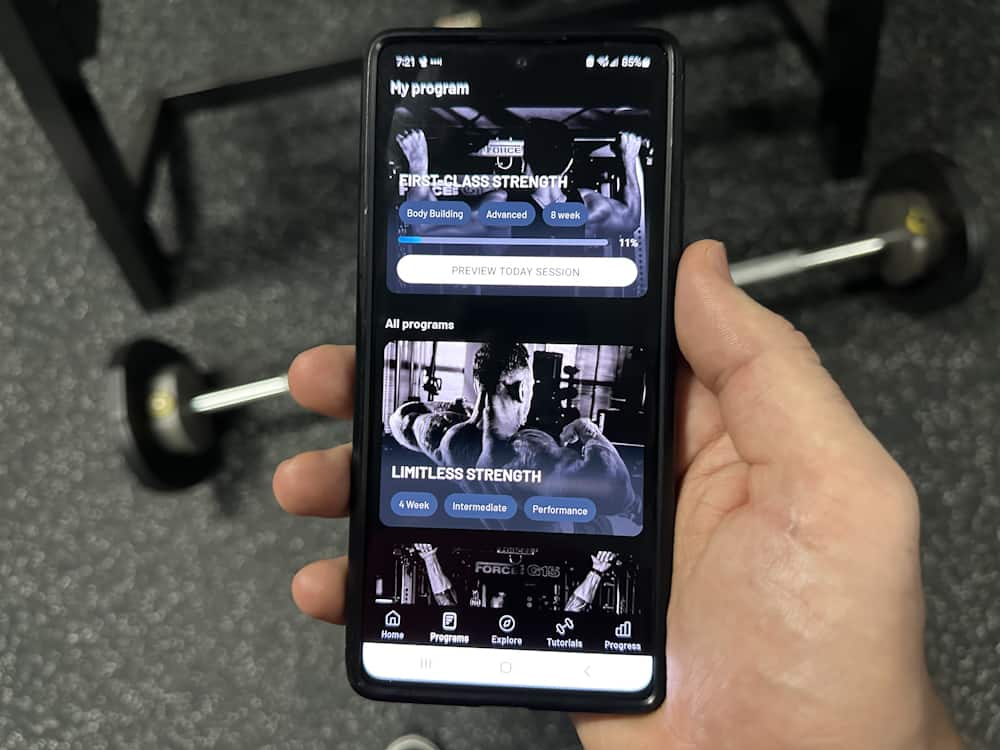
When I first heard that Force USA was launching a companion app, I approached it with a hint of skepticism. They specialize in gym equipment, but not tech. To my pleasant surprise, after exploring the Force USA Training App, I was impressed.
For G15 owners (or any G-Series models), one recurring challenge is harnessing the full potential of the equipment. Common questions such as “What exercises can I perform? How do I structure my workouts with this system?” are all addressed by this app.
Here’s a summary of its standout features:
- Programs for Different Goals: There is a large and growing list of pre-made workout programs to choose from. They are designed for a variety of different training goals and experience levels, so there’s something for everyone.
- Exercise Tutorials: An ever-expanding exercise library boasts hundreds of movement tutorials, ensuring you have clarity on every exercise before performing it.
- Progress Tracking: The “Goal Visualisation” feature is a nice touch. Witnessing the “Program Pyramid” progress after each session can be motivating. Plus, the capability of tracking personal bests and logging past workouts helps keep things organized.
- Intuitive User Interface: The app interface is simple, aesthetic, and intuitive. Finding tutorials, navigating the workout flow, and inputting workout data feel seamless. Being easy to use means you’ll actually use the app long-term.
- Automated Rest Timer: The automated timer keeps your rest periods precise, ensuring you stick to the flow of your workout. It’s not just about recovery; it’s about preventing distractions and maximizing productivity during your session.
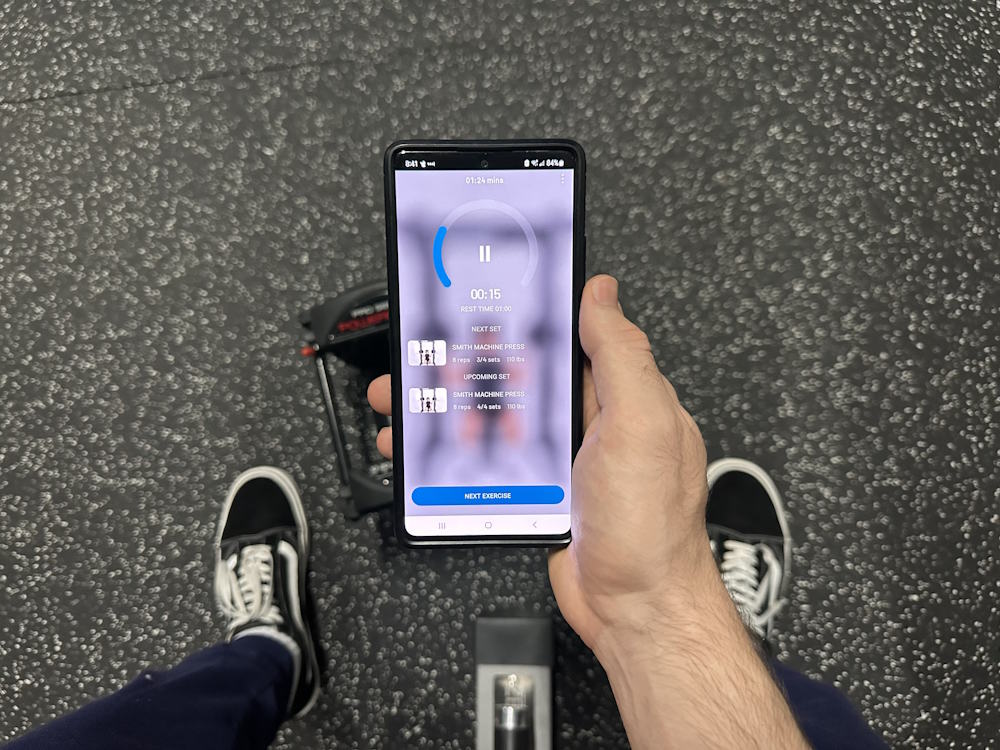
Note that you cannot create your own personalized routine from scratch with this app. So if there’s a specific program you’re already doing, this app may not be for you.
While I have tested the app myself to learn its features and user interface, I don’t use it as my go-to workout app because I’m running my own personalized routine. I’m more old-fashioned because I prefer to sloppily enter my workout numbers into a basic spreadsheet.
But for many other lifters, particularly those with the G15 or another G-Series model, this app will have everything you need to help get the most out of your all-in-one trainer.
Shipping
The Force USA G15 is available in many different countries. There isn’t one online retailer that sells to all the different countries. Rather, each country has its own online retailer(s) that you can buy from.
In the following sections, I’ll tell you the best place to buy the G15 depending on where you live. I’ll also give you region-specific shipping information for each country/retailer…
…But before I get into those details, I’ll lay out some universal shipping info and advice for the G15. It’s applicable to all orders, regardless of where you’re ordering from:
- Your order is delivered using an LTL freight trucking company. This is the go-to delivery method for such large and heavy items. It’s cost-effective and minimizes the likelihood of damage during transit.
- The trucking company will contact you ahead of time to confirm a delivery date and time to ensure you’ll be there.
- Make sure you inspect the shipment before you sign to ensure there’s no damage and verify everything is there.
- It is a curbside delivery, which means they leave it on your driveway. The truckers won’t bring it inside for you, so come prepared to do some lifting and carrying.
- The base unit is shipped on a single pallet. It’s packaged inside 4 wooden crates. It has a super heavy shipping weight of 1213 lbs (including shipping materials) thanks to the 2 weight stacks.
- The optional upgrade kit comes in 1 crate. Its total shipping weight is 210 lbs.
- Typically, you’ll save on shipping by adding more items to your order compared to buying them separately later. One item you don’t want to forget is gym flooring. You want to have the protective flooring down before you assemble your super heavy G15. Otherwise, good luck doing it later and having to move the unit to put the flooring beneath it. I recommend the VersaFit mats. They’re well-priced, thick and made of solid rubber.
US Shipping
For US customers, the Force USA G15 All-In-One Trainer is only available through ForceUSA.com. They ship to the 48 contiguous United States only.
The shipping cost is a flat rate of $349 regardless of which unit you buy and where you ship it.
The shipping price does NOT increase if you buy the optional upgrade kit (or any other equipment) with the base unit. You’ll stay at the same shipping rate of $349.
If you want to buy the optional upgrade kit by itself because you already own the G15, it will cost $99 to ship and will arrive via freight.
My 5% off coupon code KING5 will cancel out nearly all of the shipping costs.
International Shipping
Shipping to Australia
If you’re an Aussie, I recommend buying through Gym and Fitness. They’re the leading Australian retailer of Force USA equipment. Plus, I was able to negotiate a discount code with them, just like I have for my American readers: Use code KING5 for 5% off your order at GymAndFitness.com.au.
I can’t tell you exactly how much you’ll pay for shipping since Gym and Fitness has variable shipping costs depending on your shipping destination.
However, they have provided me with some data on the average shipping costs for ALL G-Series units. The average cost of shipping ranges from $130 to $480. Here is how the different regions rank within that range from the low end to the high end: QLD, ACT, NSW, SA, VIC, NT, TAS. The average across the entire country is $260.
You may be able to pay $0 for shipping! You can get free shipping if you sign up for the Gym and Fitness loyalty program as long as you aren’t in the Northern Territory, Western Australia or Tasmania.
Shipping to Canada
The team behind the ForceUSA.com website has started serving the Canadian market through a new Canadian website: ForceUSA.ca. This is the only place you can buy the G15 if you live in Canada.
You can use the same KING5 coupon code on the Canadian site that my US and Australian customers have access to.
Shipping prices vary based on your location in Canada. Generally, the shipping is higher in Canada compared to the US, but it’s not outrageous by any means.
Luckily, the shipping cost remains the same if you add additional items to your cart. So if you want the optional upgrade kit or any other Force USA equipment, be sure to buy it at the same time you buy the G15 base unit.
Shipping to the Middle East
For anyone living in the Gulf countries, you should buy your G15 from Garner Fitness Supplies (Garner.ae) or Alqudra Sports Equipment (Alqudra.sa). Both sites have the same parent company, but they serve different (yet overlapping) countries.
I spoke to the owner of these retailers and he agreed to honor my KING5 coupon code for 5% off.
Garner Fitness Supplies is based out of Dubai and has a showroom there. They ship to the UAE, Kuwait, Bahrain, Oman, Qatar and Saudi Arabia.
Alqudra Sports Equipment is located in Saudi Arabia where they have a showroom. They ship to Saudi Arabia, Kuwait, Bahrain, Oman and the UAE.
Shipping costs are variable for both retailers. Generally, you’ll get the lowest shipping cost by ordering from the retailer nearest to you.
Who Is the Force USA G15 Best for?
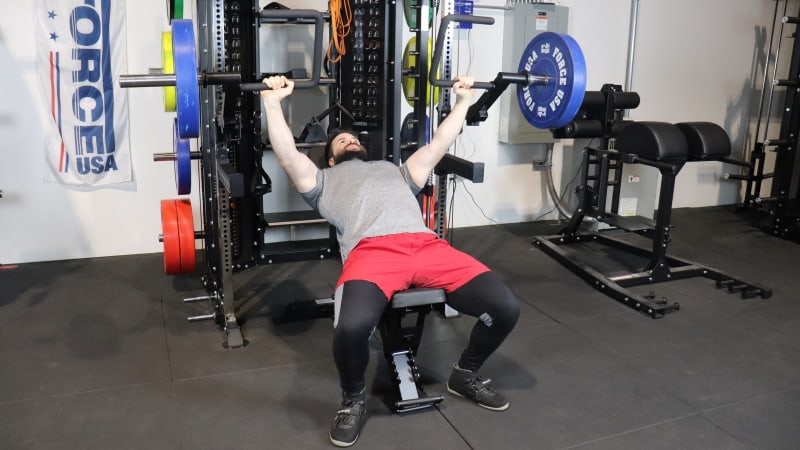
Buy the Force USA G15 – Use KING5 for 5% OFF »
The Force USA Force USA G15 is a great all-in-one trainer for many types of lifters. This section will detail the best use cases for the G15.
The G15 is one of the best all-in-one gyms for bodybuilders. Here’s why:
- The functional trainer uses a selectorized weight stack system instead of a plate-loaded system. This makes it possible to instantly change the weight by simply moving a pin. This makes it so easy to do drop sets, which are an essential bodybuilding training tactic. The fast weight change also helps with regular sets, since bodybuilders often rest for just 30 to 90 seconds between sets for most exercises.
- The 4:1 pulley ratio gives you access to tiny 2.5 lb increments for each weight stack setting. This is particularly helpful when doing the small isolation movements that are popular with bodybuilders like reverse flyers and lateral raises. When the weight is already relatively, you need small increments to progress efficiently as you get stronger.
- The jammer arms mimic the fixed-path machines that bodybuilders are used to using in commercial gyms. Bodybuilding and machine training goes hand-in-hand because the fixed-path motion makes it so much easier to focus on the target muscle.
The G15 is ideal for personal training studios and physical therapy practices. Here’s why:
- The selectorized weight stacks on the functional trainer make adjusting the resistance a snap. If you’re training clients, you don’t want to deal with a plate-loaded system like the G10. That just wastes their time and yours with constantly loading and unloading plates between sets. You also don’t want to exhaust yourself from doing that all day long for multiple clients.
- The interchangeable 2:1 and 4:1 pulley ratio will be an invaluable tool when training clients of varying strength levels. The 4:1 ratio is perfect for training complete novices or clients recovering from injuries, both of whom need light weight and small increments. Yet, the 2:1 ratio will give your stronger clients enough resistance on most if not all cable exercises.
- The counterbalanced Smith machine also helps when it comes to training novices or rehab clients since it has a starting weight of 0 lbs.
The G15 is a solid choice for small, niche gym settings. This includes office gyms, hotel gyms, fire departments gyms, police department gyms and community/rec center gyms. Here’s why:
- These types of gyms are typically quite limited in their space constraints. And a lot of that space is probably taken up by cardio equipment. The G15 lets you to pack a bunch of resistance training equipment into a small footprint, which will satisfy the needs of the users who want to lift.
- These are low-traffic gyms that are usually empty and may have just a few people in them at their busiest times. So, you won’t have a bunch of people waiting to use it at the same time. And, if you opt for the G15, you can have 2 people using the functional trainer at the same time.
The G15 is your best option if you want an all-in-one gym that’s suitable for different levels of experience. An example of this would be if your whole family would be using it (i.e. you and your spouse and possibly even your children). The interchangeable 2:1 and 4:1 pulley ratio allows for heavier or lighter weights and increments on cable exercises. Plus, the counterbalanced Smith machine starts at 0 lbs, so even complete novices won’t have an issue lifting it.
The G15 is ideal if you want a premium all-in-one setup but you have low ceiling heights. You only need a max height of 7’8″ (92″) to do full range of motion pull ups without hitting your head. The machine itself is even shorter, standing at 7’3″ (87″).
Who Shouldn’t Buy the Force USA G15?
Lifters who are set on having a 1:1 pulley ratio shouldn’t buy the Force USA G15. This group is more likely to include very strong, experienced lifters who won’t be sharing their machine with novices. If this is you, I strongly suggest getting the G20 instead, with my follow-up recommendation being the G12.
Another group that shouldn’t get the G15 includes those who want a taller unit. Some people want a tall all-in-one gym so they can do lat pulldowns with a full stretch while seated on a bench instead of being seated on the floor. With the G15, you can only get a full stretch while seated on a bench if they’re quite short. While I don’t mind sitting on the floor for pulldowns, I get why some people don’t like that.
Another reason for wanting a taller rack is if you’re quite tall yourself and want more headroom inside the machine. The G15 has an 80″ (6’8″) internal height which may feel a bit cramped if you’re very tall.
I should note that the short unit height on the G15 doesn’t mean that super tall guys can’t squat in the power rack. This is an issue on the G9 and G12, which are similarly short units. However, the G15 has a different design that lets you set the bar as high as 70″ (5’10″) off the floor. In theory, that would be high enough for 7-footers to squat on. Though, in practice, someone that tall would hit their head on the top of the frame.
Lastly, the Force USA G15 isn’t the best all-in-one trainer for you if it’s out of your budget.
If you want the G15 but can’t justify the price, consider the G6. It’s a couple of thousand dollars less but still has a selectorized weight stack system.
Of course, if you still really want the G15 but can’t drop all the cash at once, financing is available through Affirm.
Force USA G15 vs Force USA G10
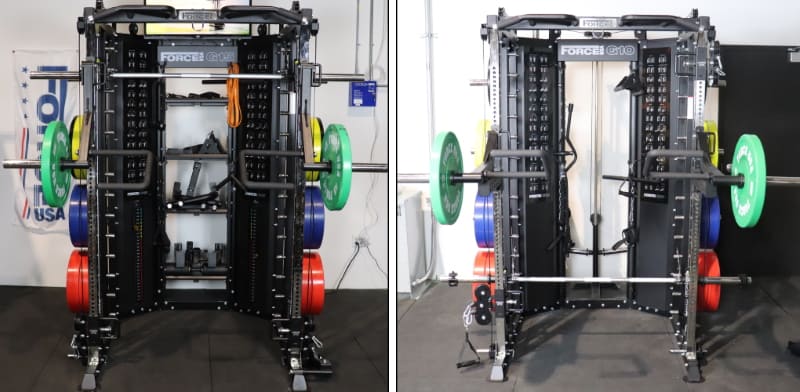
The Force USA G15 and Force USA G10 are very similar to each other. The difference is that the G15 is selectorized and the G10 is plate-loaded.
If you’ve narrowed down your choice to these 2 units, your decision comes down to your needs and preferences on these 3 factors:
Training Style
How does having a selectorized or plate-loaded functional trainer affect your training?
Here are the training scenarios when I recommend the Force USA G15 instead of the G10:
- If the rapid change capability of the weight stacks is important for your training style.
- If you simply don’t want to deal with the extra time and effort it takes to change weight on a plate-loaded system
- If you want the ability to train on one side of the functional trainer while your workout partner trains on the other.
Here’s when I recommend the Force USA G10 instead of the G15:
- If you want to load on a bunch of plates so you can use MUCH heavier cable resistance than with the G15’s weight stacks.
- If your training style does NOT require rapidly changing the weight between sets.
- If you don’t mind the extra time and effort it takes to change the weight on a plate-loaded system.
- If you don’t need to have 2 people training simultaneously on the functional trainer.
Budget
How much are you able AND willing to pay for your new all-in-one gym? This might be the only factor that matters in some cases.
The G15 costs $2,500 more than the G10. If you want the G15 and can justify the premium, go for it. Otherwise, stick with the G10.
If you could afford the G15’s higher price tag, but you were leaning toward the G10 anyway, then consider price savings are a bonus.
Space Constraints
The model you choose may depend on the space you’re planning to put it in.
The footprint is the same on the G10 and G15 except for the depth dimension. The G15 takes up just 53″ of depth. In comparison, the plate-loaded weight carriage on the G10 takes up an extra 20″ of room. Plus, you need to tack on an extra 6″ or so to account for how much space the weight plates will take up.
Of course, you also need to account for some room in front of the unit to perform various exercises.
If your space is too small to accommodate the larger G10 unit, then that makes the G15 a better choice by default.
Overall Rating
Force USA G15 All-In-One Trainer
The Force USA G15 is the best all-in-one trainer for lifters who want a selectorized functional trainer with an interchangeable 2:1 and 4:1 pulley ratio that allows for smaller weight increments. This feature makes it especially attractive if it'll be used by a mix of both novices and experiences lifters. Lastly, if jammer arms are a must, the G15 is also one of your only options.
Product Brand: Force USA
Product In-Stock: InStock
4.8
Force USA G15 vs G3 vs G6 vs G9 vs G10 vs G12 vs G20
There are now a total of 7 all-in-one trainer models within the Force USA G-Series lineup, with the G15 and G10 being the most recent additions.
Each model is different from the next. They all have their pros and cons and serve different slightly different purposes. The best model for you depends on your specific needs, preferences, and budget.
If you’ve finished reading this Force USA G15 review and have decided it’s right for you, you can click the link below to buy it:
Buy Now – Force USA G15 All-In-One Trainer »
But if you’re still undecided, then I’ll point you to my comparison guide on the Force USA G3 vs G6 vs G9 vs G10 vs G12 vs G15 vs G20. It will give you a direct comparison of each model from a high level across all the key features and specs.
Additionally, you can browse the product pages here:
Check Current Prices – Force USA G3, G6, G9, G10, G12, G15 & G20 »
If you end up buying any G-Series unit, remember to use my Force USA discount code KING5 for 5% off your order when you checkout.
P.S. To my Aussie and Canadian readers out there — Remember that you also have access to the same KING5 discount code for 5% off at GymAndFitness.com.au and ForceUSA.ca.

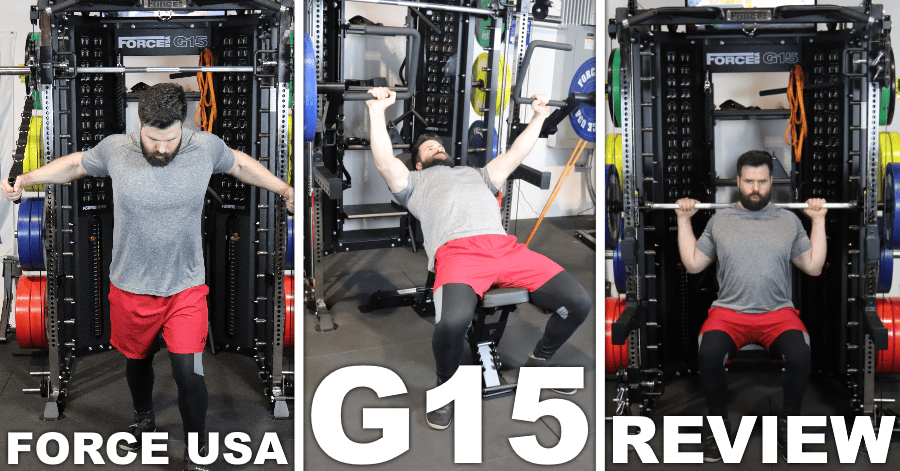
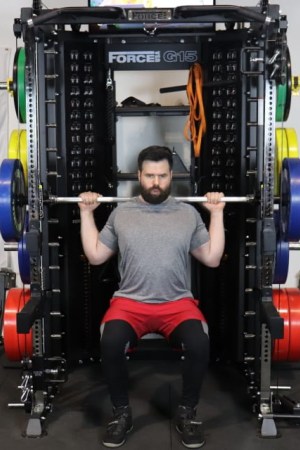


Vey nice & thorough review Alex. Just FYI, the G3 Adjustable Seat Attachment with Leg Holder also work for G15
That’s a great insight that I’m sure others will appreciate. Thanks for sharing!
Thats awesome! Any monolift attachment that would work with the G15?
The monolift for the G20 would work, but unfortunately, that’s not sold separately (it comes with the G20 only). Otherwise, you’d need to find a monolift that’s made for a 2″x2″ rack with 5/8″ holes, which isn’t common — I don’t know of any. It may be possible to do a semi-DIY solution where you buy one made for a 2″x3″ rack (e.g. the Titan T-3 monolifts) and then attach some type of block inside the j-hook portion to reduce the 3″ space to 2″ so that it would fit snugly around the 2″x2″ posts on the G15. No guarantee it would work perfectly and there’s the possibility you could hit other snags (e.g. it’s possible the hole sizes on the T-3 vs the G15 are slightly different and the T-3 monolift may not fit thru properly). The only way to know for sure would be to test it. You could always return the monolift. The other solution would be to find a custom fabricator, but that can be pricey.
Fantastic review ! It’s a shame that ForceUSA doesn’t bother to honor their commitment to replace defective jammer arm knobs. The knobs on the jammer arms I ordered with the unit just crumbled and fell apart as I was using the unit and they are giving me the runaround to get that replaced. It’s been two months and still nothing despite calling them and multiple e-mails. If only there had been an option to purchase the knobs on their website but even that is not possible. So I am left here unable to use equipment. Just know, if you buy their equipments which use very specific parts, if the parts break, you’re S.O.L.
Hey, glad you liked the review so much. And I’m sorry to hear about the jammer arm knob issue.
I’m wondering — Where did you purchase your G15 from?
Did you get it from ForceUSA.com (the only place to buy in the US)? Because I reached out to my contact there and told them about your issue. They told me they searched their customer service ticketing system and saw no requests for a new jammer arm knob that hadn’t received a response and didn’t have a replacement part sent out.
They’ve only received three requests for new jammer arm knobs since they started selling jammer arms — all of which received new replacement knobs to replace ones that cracked from overtightening.
So that being the case, I’m wondering if you purchased overseas? In any case, they asked me to relay to you that you should reach out to them using the information below to get a warranty replacement knob:
They’ve assured me that all messages and emails receive a response.
I really hope this helps solve your issue so you can get back to training hard!
Hi Alex, I was initially going to get the g10 however gymandfitness in Aus had boxing sale on the g12 and ended up getting the g12. After using the g12 for a couple of weeks, I am finding that I am too weak / the g12 1:1 ratio is too strong for me when it comes to cable exercises and was wondering what your thoughts were on g12 vs g15 if its worth the trouble of selling my g12 and getting the g15 and putting it together again. Cheers
Hey Alex, further to my post above, I am even considering now that maybe I will get the G10 instead of the G15. If I get the G10 even if I get the upgrade kit I will end up with a bit more funds vs getting the G15 I will need to spend an extra $1k and will need to spend even more if I want to get the upgrade kit. Thoughts?
Hey Sol, great question! This basically comes down to your budget/how much you’d prefer to save the extra cash vs how much you want a selectorized weight stack system.
If you’re fine with the plate-loaded option, then definitely go with the G10. The only real difference is that it takes more time to adjust the resistance. And as an added bonus, a benefit of the plate-loaded system is that you can load on a lot of weight if needed, so you can actually use a heavier max resistance than with the G15’s weight stacks.
Thanks for such a detailed review!
I went ahead and purchased one so thanks for the discount too!
I am still getting know the machine as I incorporate my program it I love it and it has well and truly tidied up my gym space.
One question was I also purchased the leg extension attachment but so far dissatisfied as I can’t do lying leg curls due to the space needed inside the rack for the bench. Have yo had any success with this?
Thanks
Hi Lea, glad you liked the review and are enjoying your G15 so far.
A couple of notes regarding the leg curl/extension attachment:
This is a really great review. It’s the reason I bought the unit (and used your code). I have had my G15 with upgrade kit for several months. I love everything about it except the J-hooks. I really, really wish they had included better J-hooks, like for the G20, with the tall vertical portion, so you can re-rack your bar straight into the vertical part and then let it settle down onto the horizontal part. It’s way safer to re-rack with tall J-hooks and protects the bar. The G20 has it but G15 doesn’t. I asked if they have any tall j-hooks, or know of any other brands with tall J-hooks that will fit the G15, and they said “no.” Do you know of any other company that makes a better j-hook that will fit the G15? this is my only complaint for a machine that is otherwise perfect for my needs. Just really bummed about the 1970’s style j-hooks.
Thanks for the support, Lanny! Yeah, the j-hooks are a weak point. I hope they change the design to something more modern in a future design update. In the meantime, though, I don’t actually know of any j-hooks from other manufacturers that would work. First off, 2×2 uprights really aren’t that common. And most of the 2×2 racks that do exist use larger 1″ holes.
You could try buying a j-hook for a 2×3 rack with 5/8″ holes, which are relatively common (Rogue and Titan have them; there’s even some on Amazon). Then you’d have to do a little DIY magic and put something against the back surface that takes up an inch of depth.
However, I’m not even 100% sure that option would work since I don’t know if the holes on G15 are true 5/8″ holes (there’s a chance they could be 1/2″ — I’m not sure). But it could be worth a shot, especially if you’re easily able to return the j-hooks — This Synergee j-hook from Amazon has free shipping and returns, so it may be the best if you want to test out if this potential workaround actually works.
The other, more ideal solution is to buy a custom j-hook. Of course, this will also be more expensive. I usually send people over to @savage_strength_equipment on Instagram for custom stuff. He’s based out of the UK and makes great custom stuff for a fair price. It’s worth reaching out for a quote at least. He can make them exactly how you want them.
Hope this helps! I’m glad you’re enjoying everything else on the G15, though.
Hello Alex, I’m considering buying the G15 over the G20 solely because of the weight storage being on the side vs the back (saves more than a foot of depth space). Am I missing out on anything significant on the G15 vs G20? Seems like the big differences are 4″ height, side pull-up station, and that extra lat row attachment which would make the depth even more. Is the quality of the build about the same?
Hi Mark, great question.
One notable difference would be that on the G15, you need to connect both cables (on a single pulley) to your handle in order to access the 2:1 ratio, which takes about a second or two longer to connect vs just hooking it on one cable like on the G20. Of course, this is the same feature that allows you to access a 4:1 ratio on the G15; something you don’t get on the G20.
Not sure if it’s important to you, but the G15 doesn’t have integrated mini-band pegs built into the weight stacks like the G20 does. This feature would let you easily add band resistance to the weight stacks.
The G20, by virtue of being larger and having a walkthrough design, gives you more internal depth to work with. There’s absolutely no quirks with Smith machine exercises that require putting a bench (particularly in the incline position) deep into the rack on the G20. Luckily, the G15 still allows you to do incline bench exercises on the Smith machines — though in some situations there may be little quirks and adjustments needed for the right setup — I talk about that in the G15 review, which you may have already read about (go to the article and use the CTRL + F search function for “incline smith press”).
Another, I guess more minor difference, is that the G15 has a counterweighted Smith machine, meaning the empty bar weighs 0 lbs. Many people prefer this. In comparison, the Smith bar on the G20 weighs about 45 lbs when empty.
The differences beyond these become smaller and smaller – aside from the obvious major ones that you mentioned.
In terms of build quality, they’re quite similar. The G20 may have a beefier “look” to it, but I think that’s mostly aesthetic (other than maybe it having a wider/deeper base that gives it a little more stability — though, it’s an unimportant difference since they’re already both so stable considering their heavy weight with the weight stacks). Furthermore, both the G15 and G20 have the same sized uprights and the same 11-gauge steel for the uprights and the other parts of the frame. For all practical purposes, their build quality is comparable.
Is the G20 worth the extra expense over the G20, in your opinion? It seems you get more with the base unit than with with base unit plus the upgrades on the G15. Also, isn’t one thing to consider when choosing the G15 or 20 over the G10 the cost of the plate weights included? Does the G20 have plate weights as well? Anyway, I think the counterbalanced Smith Machine feature is a must-have for me, as well as the 4:1 ratio being an option for my children. Lastly, would ANY of these machines work in a typical garage with a gradual slope?
Hi Cathy, good question.
Whether the G20 is worth the extra expense over the G15 depends on your training goals and equipment preferences.
In your case, it seems like it isn’t worth it. And even if they were the same price, it might not be the right choice. The reason being that you mentioned that a counterbalanced Smith machine is a must-have — you don’t get that on the G20. Same with the 4:1 ratio option — you don’t get that on the G20. If children will be using these, these 2 features will be valuable because you’ll be able to make it light enough for them to lift.
I’m confused about what you’re asking regarding the weight plates cost — it sounds like maybe you’re saying that weight plates are included with the G10 but not the G15 or G20? If that’s what you mean, that’s actually not the case. Assuming you don’t own an Olympic weight set already, you’ll need to buy that separately, whether you buy the G10, G15, G20, or any other G-Series model.
Regarding any of the machines working in garages with gradual slopes — Yes, they do. I know of multiple people who own and use them in a garage with a slight slope.
I hope that helps. Let me know if you have any follow up questions.
Hi Alex,
Any specific bench or plate recommendation you have for the G15?
Thanks!
For benches, I recommend buying an adjustable bench from REP Fitness. They make the most innovative as well as the best bang for your buck benches on the market.
If you want access to decline angles on your adjustable bench, go with either REP BlackWing if you have a bigger budget or the REP AB-3000 2.0 if you’re looking for a value option. Or, if you don’t care about having a decline option, I’d recommend the AB-5200 2.0 if you have a bigger budget or the AB-4100 for the value option. If you need more info, I cover all those in my guide to the best benches.
For weight plates, there are so many options you can choose from. And the differences in quality/value between brands aren’t as big as it is with benches. So it’s harder to make a mistake when choosing weight plates. That said, if you want bumper plates, go with Fringe Sport, REP, or Rogue…I’d say that’s my top 3.
If you want iron plates, go with REP, Rogue, or Bells of Steel.