This is the most detailed Force USA G20 review you’ll find anywhere.
The Force USA G20 Pro All-In-One Trainer is the top-of-the-line model in Force USA’s G-Series line of all-in-one gyms.
| Model | Pros & Cons | Rating |
|---|---|---|
Force USA G20 Pro All-In-One Trainer | Pros:
| Rated 4.9 out of 5 in All-In-Ones |
IMPORTANT UPDATE: In November 2022, Force USA made a few design upgrades to the G20 and changed the name from the “Force USA G20” to the “Force USA G20 Pro“. This wasn’t a complete design overall. But the changes are noteworthy and generally positive.
I’ll detail all the differences between the old and new versions of the G20 below. I’ve also updated the rest of the review to reflect the changes — so everything on this page discusses the new G20 Pro unless otherwise indicated (though some photos/videos show the original G20).
When the G20 was originally released, it overtook the G12 as the most premium quality, feature-rich and expensive unit.
The G6 used to be my favorite model overall. However, the G20 has since taken the top spot in my mind. The G20 pulls all the best features from the other G-Series units and combines them into one overbuilt machine — and then adds some additional unique features.
Of course, the G20 is not perfect and it’s not for everybody. I’ll go over all the cons. I’ll also tell you who I think it’s best for and who should avoid it.
Before I discuss all of the G20’s features in-depth, I’ll quickly summarize the top 5 features that make it stand out as the crème de la crème of Force USA’s all-in-one gyms:
- It has two 289 lb selectorized weight stacks on the functional trainer with a 2:1 pulley ratio (was 1:1 before the design update).
- It has an optional dedicated lat pulldown/low row/dip station called the “Lat Row Station Upgrade”. This add-on has its own 289 lb weight stack, but with a 1:1 ratio to allow for heavier weight on rows and pulldowns.
- As part of the design update, there is now an optional upgrade kit available with these power rack attachments: jammer arms, leg curl/extension and dip bars.
- It has 11-gauge uprights, whereas all other units (except the G10 and G15) have adequate but less robust 12-gauge uprights.
- It has uniform 1″ hole spacing on the power rack portion for precise positioning of attachments (before the design update, it had Westside spacing with 1″ and 2″ spacing).
Keep reading to learn about ALL of the G20’s features, specifications, attachments, pros and cons and comparisons to the other models.
When you finish reading my Force USA G20 review, you’ll know if this is the best all-in-one gym for you.
RELATED POSTS:
- Force USA G3 in-depth review
- Force USA G6 in-depth review
- Force USA G9 in-depth review
- Force USA G10 in-depth review
- Force USA G12 in-depth review
- Force USA G15 in-depth review
- Force USA G3, G6, G9, G10, G12, G15 & G20 review & comparison guide
Use the table of contents to skip to any section of my Force USA G20 review:
Table of Contents
What Comes with the Force USA G20?
Base Unit
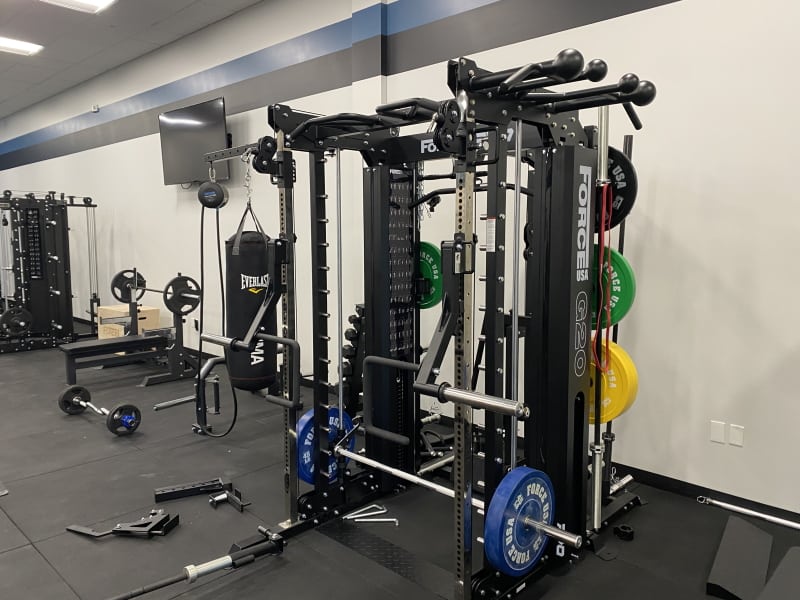
The Force USA G20 base unit is an 11-in-1 machine that comes with the following exercise stations:
- Power rack
- Includes roller j-hooks, a monolift attachment and safety spotter arms
- Functional trainer
- Includes 2 x 289 lb weight stacks (2:1 pulley ratio), a built-in exercise chart and 10 different cable accessories (listed in the next section)
- Smith machine
- Vertical leg press
- Chin up stations
- Includes 1 multi-grip chin up bar and 1 globe-grip chin up bar
- Lat pulldown station
- Includes a leg holder that attaches to the uprights so lat pulldowns can be performed on the functional trainer
- Low row station
- Low rows can be performed on the functional trainer using a low row footplate attachment.
- Core trainer
- Includes a rotating landmine unit and a multi-grip t-bar row handle
- Suspension trainer station
- Includes a built-in ring from where you can hang a suspension trainer
- Calf station
- Includes a heavy duty calf block that can be used for calf raises and a couple of other exercises
- Swing arm
- Includes a 5-foot swinging arm that attaches to top left or top right of the rack. Features 6 lock-in positions from 0-90 degrees. You can use this to hang a heavy bag or infinity rope, among other creative uses.
Buy the Force USA G20 – Use KING5 for 5% OFF »
The G20 comes with 10 different cable accessories that you can use on the functional trainer and the optional Lat Row Station Upgrade:
- Long Straight Bar (aka Functional Training Bar)
- Lat Pulldown Bar
- Short Straight Bar (aka Small Grip Frame Bar)
- Close Grip Row Handle
- Triceps V-Bar
- Metal Stirrup Handles (2)
- Adjustable Nylon Stirrup Handles (2)
- Nylon Stirrup Handles (2)
- Hammer Grip Bar
- Triceps Rope
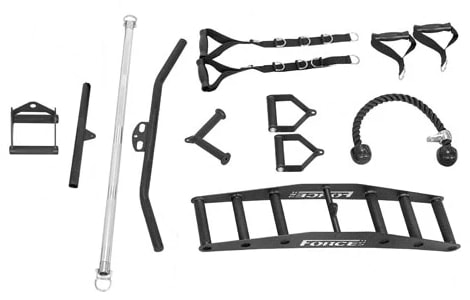
NOTE: I’ll show photos and provide exercise examples for each of the above-listed cable accessories in the functional trainer section of this Force USA G20 review.
There are also a few other items that come standard. This includes storage accessories, chains, clips and collars:
- Weight Plate Holders (10)
- Storage Hooks (8)
- Olympic Lock Collars (2)
- Olympic Spring Clips (6)
- Extension Chain (4)
- Spring Snap Clips (15)
- Band Pegs (4)
- Cup holder (1)
Optional Lat Row Station Upgrade
You have the option to upgrade and get a dedicated lat pulldown/low row/dip station. This high-value add-on, called the Lat Row Station Upgrade, attaches to the back of the base unit. It includes its own 289 lb weight stack with a 1:1 pulley ratio.
This upgrade takes the G20 from an 11-in-1 machine to a 14-in-1 machine.
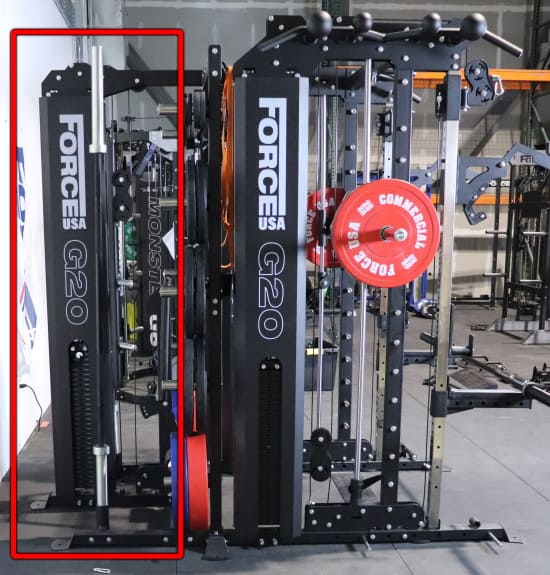
While you can do lat pulldowns and low rows on the base unit, it’s more efficient and fun to do them on this dedicated tower.
Optional Upgrade Kit
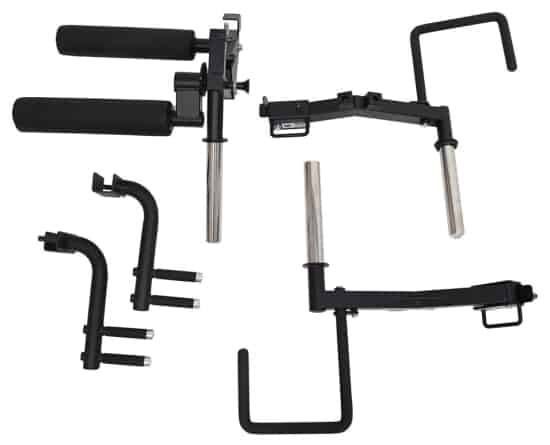
As part of a partial design revamp of the G20 in November 2022, Force USA came out with an optional upgrade kit that includes 3 attachments:
- Jammer arms
- Leg curl/extension attachment
- Dip bars (2 handles; attach to the power rack uprights)
If you buy this in addition to the optional Lat Row Upgrade kit, the G20 becomes a 17-in-1 machine! (Though there is some overlap between some stations, including the two types of dip stations and two types of low row stations).
Original G20 vs Updated G20: What’s Different?
The Force USA G20 was originally released in August 2020. In November 2022, it got some design changes. It wasn’t a complete overhaul. Rather, there were a few strategic improvements.
So before I get into the meat and potatoes of this Force USA G20 review, I want to go over all of the differences in this section. Keep these differences in mind when reading the rest of my review since I originally wrote it for the original version of the G20.
Update #1: Pulley Ratio on Functional Trainer
The new G20 design uses a 2:1 ratio on the functional trainer cable system instead of the 1:1 ratio that the original G20 had.
Here’s what this means:
- Now with the 2:1 ratio, if you select 100 lbs on the weight stack, it produces 50 lbs of resistance. Whereas previously with the 1:1 ratio, it produced 100 lbs of resistance. As a result, you’re able to use smaller weight increments because each selectorized plate provides 5 lbs of resistance instead of 10 lbs. This makes it easier to progress, especially on lighter exercises or for more novice lifters, since 10 lbs is often too big of a jump.
- The 2:1 ratio doubles the cable travel distance from 53″ to 106″. That means a lot more range of motion is possible.
This is a big improvement. It addresses a lot of customer feedback. The most common complaints about the original G20 that I heard from readers and owners of the original G20 were about the weight increments being too big and the cable length maxing out on certain exercises that require a larger range of motion.
That said, I didn’t mind the 1:1 ratio on the original G20. I even considered it a plus for strong lifters because it meant each weight stack could actually provide a max resistance of 289 lbs, which is plenty even for advanced lifters doing low rows and lat pulldowns.
Now, the max resistance of each stack on the functional trainer is 144.5 lbs. For stronger guys, that won’t be enough for heavy lat pulldowns and low rows. But luckily, you have the following options:
- Get the optional Lat Row Station Upgrade. This add-on that attaches to the back of the G20 base unit still has a 1:1 pully ratio for its single 289 lb weight stack. On top of that, it’s designed specifically for lat pulldowns and low row; it features a built-in adjustable leg holder for pulldowns and a built-in steel footplate for rows. This option gives you the best of both worlds for the G20: heavier resistance where you need it (1:1 Lat Row Station) and smaller increments where you need it (2:1 functional trainer).
- If you can’t or don’t want to opt for the optional Lat Row Station Upgrade, you can still increase the max resistance of the functional trainer weight stacks relatively easily. You can attach resistance bands to the stacks using their integrated mini band pegs.
Update #2: Hole Spacing
The original Force USA G20 had traditional Westside hole spacing with 1″ hole spacing in the middle section and 2″ hole space above and below that.
The new G20 has uniform 1″ hole spacing throughout. The previous hole spacing gave more than enough precision for positioning the j-hooks and spotter arms. The new spacing gives even more precision in the upper and lower parts of the rack.
The main reason for changing the hole spacing on the new G20 was to allow for the new jammer arm attachments to work on the upper and lower portion of the rack.
Update #3: Optional Upgrade Kit (New Attachments)
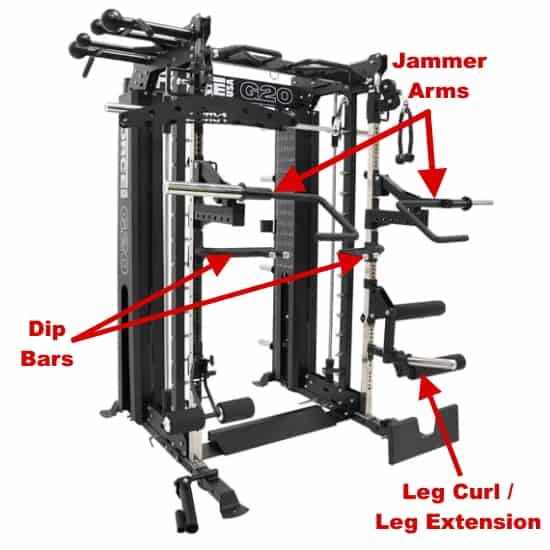
Some new, high-value power rack attachments are now available for the G20 when you get the optional upgrade kit:
- Jammer arms: These have been teased for a while and they’re finally here! These mimic lever-style machines and are great for both hypertrophy and explosiveness training.
- Leg curl/extension attachment: This adjustable attachment was a surprise to me. But a very welcome one. Generally, you can’t do isolation leg exercises like leg curls and leg extensions in a home gym without a large dedicated machine. So having a compact rack attachment with this capability is a big win. Additionally, you can use it for hip thrusts by removing the top roller.
- Dip bars: These dip bars are redundant if you’re also planning on buying the (more expensive) optional Lat Row Station Upgrade because it has its own built-in foldable Y-dip handle. However, if you’re not getting that station, then this gives you the ability to do dips. I know many people will appreciate that.
Update #4: Swing Arm Attachment
Force USA removed the second globe grip chin up bar and replaced it with a 5-foot swing arm attachment. It has 6 lock-in positions (0-90 degrees). You can use this to hang a heavy bag (up to 100 lbs) or an infinity rope attachment.
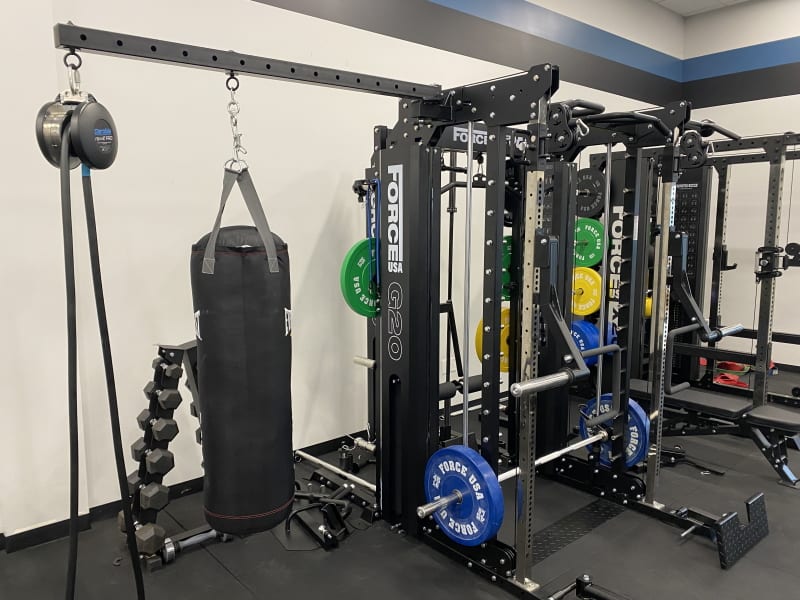
I like this change. It gives more variety while at the same time getting rid of a redundant feature.
Update #5: Globe Grip Chin Up Bar
As mentioned above, one of the two globe grip chin up bars has been removed on the new G20.
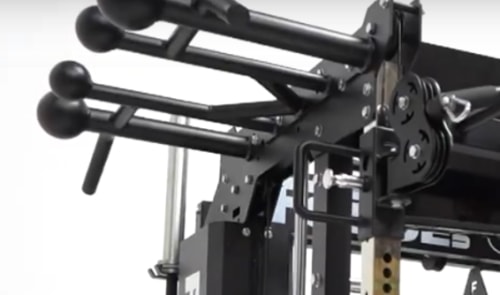
However, there’s still one remaining. And that one has been modified so that it extends out by an extra 3″. This way, your legs don’t swing into the side of the unit during pull ups.
Update #6: No More VersaPad
The VersaPad is no longer available. I believe it was scrapped because the new leg curl/extension attachment (included in the optional upgrade kit) allows you to do hip thrusts. Hip thrusts were the primary use of the VersaPad.
However, I wish they kept it. It was a versatile attachment had some pretty cool uses if you got creative with it. For example, you could use it as a seat to do lat pulldowns in the middle of the functional trainer.
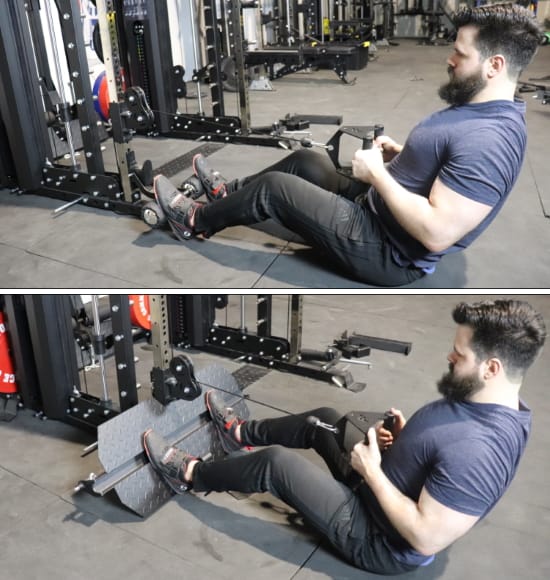
Update #7: Low Row Footplate for Functional Trainer
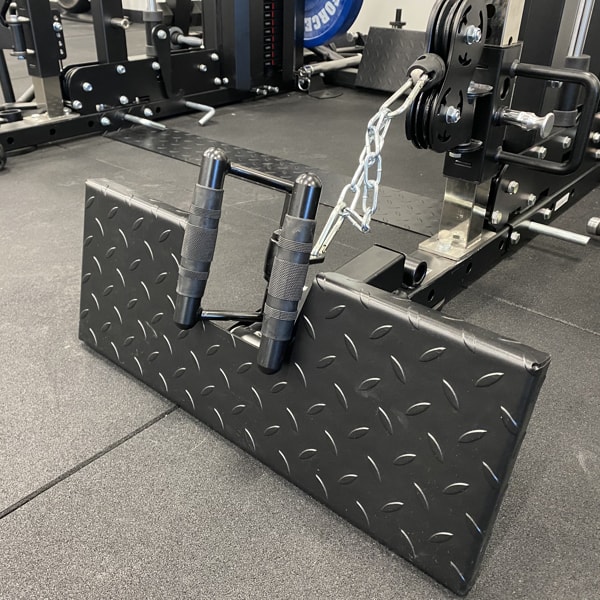
The functional trainer now comes with its own low row footplate attachment. And it comes standard with the base unit.
Previously, the lat pulldown leg holder attachment (or the leg press plate) was the makeshift way to do low rows on the functional trainer.
Update #8: Barbell Storage on Base Unit
Two vertical barbell storage hangers have been added to the new G20 base unit.
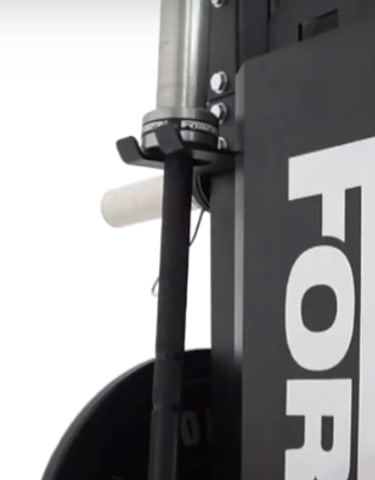
The original G20 base unit had no type of barbell storage; the only way you could get barbell storage was with the optional Lat Row Station Upgrade, which includes 2 vertical bar storage sleeves.
Update #9: Weight Storage Area
The weight storage area on the new G20 has adjustable-height weight storage pegs, allowing you to space the pegs in a custom configuration depending on your needs.
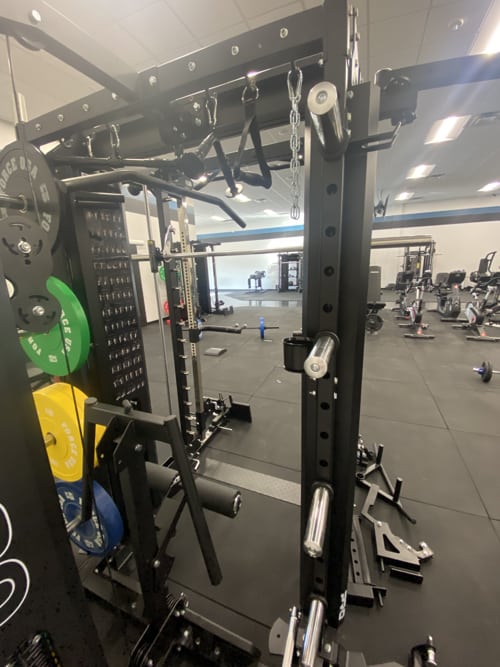
The original G20 had a fixed layout for the weight storage pegs. The spacing between pegs was designed for a traditional, variable-diameter weight set. It was set up for the larger plates to go on the bottom pegs and the smaller plates to go fo on the higher pegs. This posed problems if you had a bumper plate set because bumper plates all have the same large diameter regardless of weight. So, the bumper plates would overlap if you put them on consecutive pegs; meaning you could only use every other peg on the weight storage area.
The new design allows you to space 4 weight pegs evenly per side so you can fit bumper plates on all levels.
However, if you have a traditional, variable-diameter weight set, you can fit up to 5 weight pegs per side and space them accordingly.
Force USA G20 Dimensions
If you’re considering buying the Force USA G20, you’ll want to be sure it will fit wherever you want to put it. As such, this section has all the relevant dimensions you need to figure out if it will fit in your space.
I’m breaking this up into three sub-sections, which will include:
- Dimensions for just the base unit, AND…
- Dimensions for the base unit PLUS the optional Lat Row Station Upgrade
- Minimum space requirements for practical use
Dimensions for the G20 Base Unit
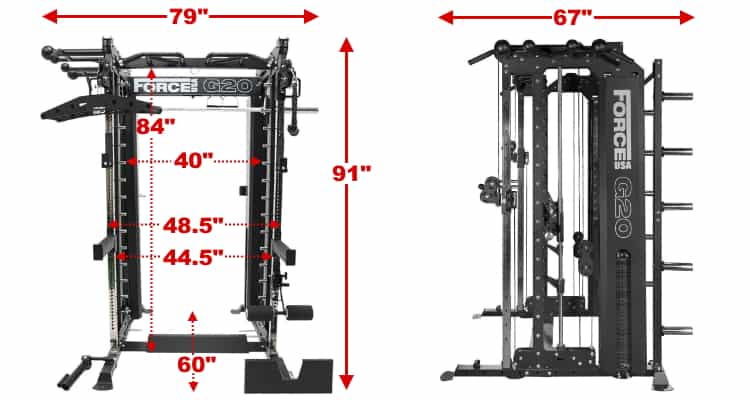
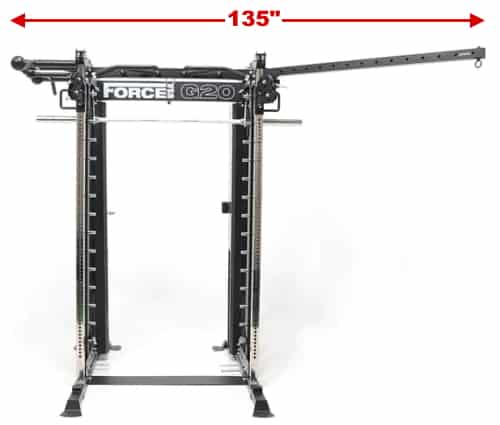
- External Width: 79″ (6’7″) (measured from end of globe grip bar to end of Smith machine bar)
- External Depth: 67″ (5’7″) *
- External Height: 91″ (7’7″)
- Internal Width (Between Uprights): 44.5″ (3’8.5″)
- Internal Width (Smith Machine): 40″ (3’4″)
- Internal Depth: 60″ (5’0″)
- Internal Height: 84″ (7’0″)
- Unit Weight: 1510 lbs
* You can reduce the external depth of the unit by 8 inches, to 59 inches (4’11”) by removing the rear weight storage pegs. Some people choose to do this to save space and put the G20 flush against a wall. They then use another plate storage solution such as a compact weight tree or a wall-mounted weight storage unit.
Dimensions for the G20 Base Unit + Optional Lat Row Station Upgrade
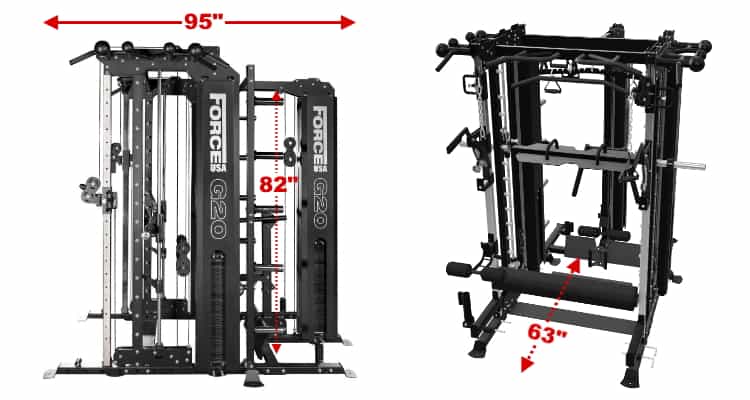
- External Width: 75″ (6’3″)
- External Depth: 95″ (7’11”)
- External Height: 91″ (7’7″)
- Internal Width (Between Uprights): 44.5″ (3’8.5″)
- Internal Width (Smith Machine): 40″ (3’4″)
- Internal Depth: 63″ (5’3″)
- Internal Height (of Base Unit portion): 84″ (7’0″)
- Internal Height (of Optional Lat Row portion): 82″ (6’10”)
- Total Weight: 1952 lbs (Lat Row Station Upgrade is 584 lbs)
Minimum Space Needed for Practical Use
I’ve just covered the dimensions of the Force USA G20 itself. But that doesn’t tell you everything. You still need to know if you’ll have enough space to move around, add and remove plates, and perform exercises on and inside of it.
Here are some recommended minimum clearances to ensure you can use the unit comfortably for most exercises:
- 1 foot off each side
- 1-2 feet of clearance in the rear if using the base unit only
- NOTE: As mentioned in the previous section, you can opt to not use the rear weight storage if you want to save space and put the unit flush against a wall. If you do this, then of course you need 0 feet of clearance in the rear, since you won’t be using the weight storage.
- 0 feet of clearance in the rear if using the base unit + the optional Lat Row Station Upgrade
- 4 feet in front
- NOTE: Any landmine exercise will require several more feet of clearance. However, nearly every other movement can be done within 4 feet of the front of the unit.
Force USA G20 Review: Features
The next several sections of my Force USA G20 review will give you an in-depth analysis of each major feature and exercise station.
Space-Efficient Design
When you first look at the G20, you see a behemoth of a machine. Heck, it’s the biggest of all the G-Series units. And that’s before you consider the optional Lat Row Station Upgrade.
However, it’s still actually quite a compact piece of equipment when you take into account all of the exercise stations it has.
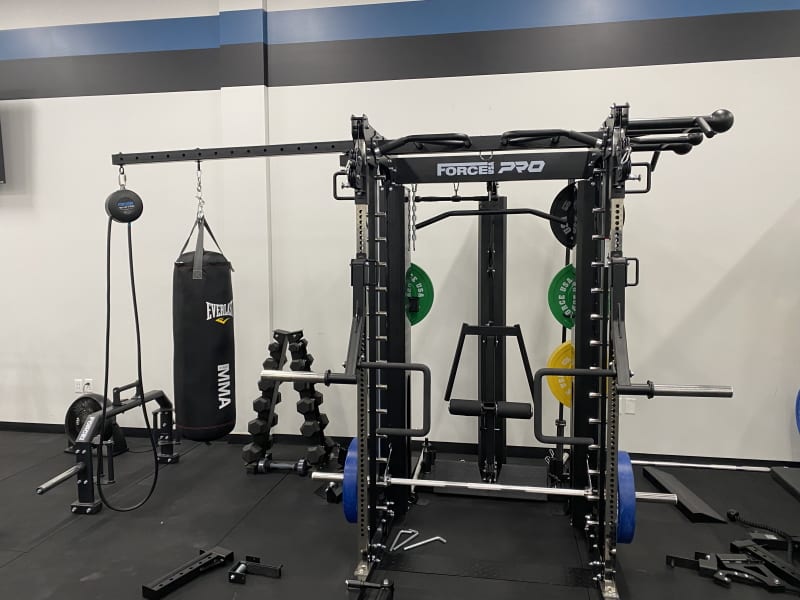
The base unit fits 11 training stations into a quarter (or less) of the footprint you’d need if you bought a dedicated piece of equipment for each station. This is more exercise stations than the other G-Series units, which have anywhere from 5 to 10 exercises stations depending on the model.
And that’s comparing just the base unit of the G20 to the other models. When you compare the G20 base unit plus the optional Lat Row Station Upgrade, you get a total of 14 different stations. And when add the optional upgrade kit on top of that, you get a whopping 17 different exercise stations.
Buy the Force USA G20 – Use KING5 for 5% OFF »
Having a high “feature-to-footprint ratio” as the G20 does is what a good all-in-one gym is all about. It’s the main draw for this category of gym equipment. When you have limited space in your home, garage or personal training studio, efficient use of space is of the utmost importance.
The G20’s space efficiency makes it ideal for lifters with limited space who don’t want to forgo exercise variety. The Force USA G20 gives you the ability to do most of the movements you can do in a commercial gym, or at least some variation of them.
Of course, an all-in-one gym necessarily makes some sacrifices with things like setup time and the location of certain components, compared to having dedicated equipment. Here are a few examples of these types of sacrifices:
- You have to install the leg press attachment on the Smith bar and get underneath it on the G20, as opposed to just sitting down on a dedicated leg press machine.
- You have to use an actual bench to sit on during lat pulldowns on the G20, whereas a dedicated lat pulldown machine has a built-in seat.
- If you’re switching between power rack exercises and cable exercises on the G20, you may need to remove the attachments to get the pulley in the desired position, or out of the way. If you had a dedicated power rack and a dedicated functional trainer, you wouldn’t have to bother moving the attachments.
While you may lose out on some of the ease-of-use benefits of dedicated equipment, you gain major benefits in the way of a compact, space-saving design.
To have all of the dedicated equipment needed to replicate each G20 exercise station would require a ton of space. That isn’t even an option for most people considering the Force USA G20, since space constraints are usually one of their main issues.
Cost Saving Design
Not only will the Force USA G20 save you a ton of space, but it can also save you money!
To be clear, the G20 is NOT an inexpensive piece of equipment in and of itself. The base unit is $5,999, the optional Lat Row station upgrade is another $1,299 and the optional upgrade kit runs you an additional $499.
BUT, it can potentially save you hundreds of dollars, if not thousands — compared to the alternative of buying several new specialized pieces of equipment that replicate its functionality.

Of course, you could shop around for second-hand dedicated equipment on places like Facebook Marketplace and Craigslist. If you do it right, you’d ultimately pay less than what the G20 costs.
However, it’s not guaranteed that you’d find all of the pieces you’d need. It would also likely take several months of searching to get all the items you need, and that’s assuming you live in a higher population area.
You’d have to put time and effort into negotiating the price after you find the items you need. And then you’d have to deal with picking up the different pieces from the various sellers. This may be fine for some people. And it can even be a fun and rewarding process.
But I know many people will want all the functionality all at once, sooner rather than later, and in one convenient package — You get that with the G20.
To even decide between the option of the G20 vs searching out dedicated equipment on the used market, you need enough space in the first place.
Versatile Design
All-in-one gyms are all about versatility. The Force USA G20 does not lack in that category whatsoever.

Your exercise selection is practically unlimited, with the 11 training stations that make it possible to do hundreds of exercise variations. There are even more possibilities if you opt for the Lat Row Station Upgrade and/or the optional upgrade kit.
Here’s an overview of the exercise possibilities with just the G20 base unit:
- The power rack station, which is really a half rack, lets you do practically every barbell movement you could do in a full-sized power rack. This includes an easy 40+ barbell exercises, including bench, squat, rack pulls, rows and so many more.
- The functional trainer station, which also includes lat pulldown station and low row station, gives you access to 75+ cable exercises. Your creativity is the limit when you have 2 adjustable height pulleys, 19 height settings and 10 different cable handle attachments.
- The Smith machine gives you the ability to do variations of most barbell exercises you can do in the power rack. On top of those, there are some movements specific to just the Smith machine. All in all, there are 30+ Smith machine exercises you can do on this station.
- The vertical leg press doesn’t give you a large quantity of exercise possibilities. But here, it’s about quality over quantity, since the leg press is a classic and highly effective quad-building movement. This attachment gives you the ability to do 3 leg press variations (narrow stance, medium stance, wide stance). There are maybe a couple more possibilities if you get really creative.
- Between the 1 multi-grip chin up bar and the 2 globe grip chin up bars, you have access to at least 12 pull up variations, including both grip-dominant and back-dominant movements.
- You have the ability to do around 30 landmine exercises with the core trainer station. Most of these are core and shoulder exercises. However, row variations and even squat and deadlift variations are possible.
- The suspension trainer station unlocks access to a full 80 suspension trainer exercises assuming you have your own suspension trainer unit to attach to it. You could also use it as a sturdy location to hang a punching bag for cardio if you so desire.
- The calf station lets you do 2 highly-valuable calf exercises (standing calf raises, seated calf raises). It is also great for heel-elevated squats if you’re looking to blast your quads.
- The swing arm attachment gives you the ability to do cardio in the form of boxing by allowing you to hang a punching bag. Beyond that, there are many other potential uses from creative band exercises to storage uses.
Here’s an overview of the exercise possibilities with the optional Lat Row Station Upgrade:
- The dedicated lat pulldown station makes it possible to do 10+ exercises, most of which are lat pulldown variations, triceps pulldown variations and core movements.
- The dedicated low row station gives you the ability to do around 10+ exercises, mostly consisting of cable row variations, cable biceps movements and cable upright row/shoulder movements.
- The dip station allows you to do 2 dip exercises (wider grip and narrower grip dips). Plus, you have the ability to load these by attaching a dip belt to the weight stack, which is right beneath you.
Here’s a summary of the exercises you can do with attachments in the optional upgrade kit:
- The jammer arms open up the ability to 20+ movements. By adjusting the height of the jammer arms, their starting position (i.e. propped up on the spotter arms or against the uprights) and optionally using an adjustable bench, you can find a way to emulate many of the lever-style machines you’ll find in a commercial gym.
- The leg curl/extension attachment makes it possible to do 3 lower body exercises, including leg curls, leg extensions and hip thrusts.
- The dip bars let you do 2+ types of dips; most notably wide and narrow grip dips. However, there are plenty of dip variations you can do if you want to get creative. Not to mention, the dip bars can be used for other movements like push ups and inverted rows.
Walkthrough Design
One cool feature the Force USA G20 has that none of the other G-Series models have is a walkthrough design.
This makes it super easy to transition between exercise stations. It frees up so much extra room in terms of the usable space inside the rack. Changing plates becomes much more convenient when you can access them from both inside and outside the rack.
The walkthrough design is particularly helpful if you train with a partner. Your partner can enter and exit the rack through the back to do the following:
- Help spot you on power rack and Smith machine exercises.
- Perform their own exercises on the Smith machine while you workout on the power rack or functional trainer.
The walkthrough design also makes the optional Lat Row Station Upgrade possible. Because the rack is open in the back, the Lat Row Station can bolt right in with no obstructions for its dedicated lat pulldown, low row and dip stations.
Of course, if you get the optional Lat Row Station Upgrade, you lose out on some of the benefits of the walkthrough design because you can’t walk through it anymore. However, there is still more than enough working room inside the rack even with the Lat Row Station installed.
Commercial Quality & Warranty
The Force USA G20 is built like a tank. Although many people use this machine in their home gym, it’s designed to withstand commercial use.
The frame is thicker than all other G-Series models. It uses 11-gauge (3mm thick) steel tubing for its uprights and frame components, with some frame components being even beefier at 10-gauge and lower.
The weight stacks and the Smith machine feature commercially sealed bearing pulleys for a super smooth experience like you’d have with commercial gym Smith machines. It also helps with the long-term durability of these high-use components.
While the G20 is a commercial quality machine, that doesn’t mean it would make sense in a “big box” commercial gym. That’s because big box gyms have a ton of floor space to hold many different specialized pieces of equipment, which makes an all-in-one gym like the G20 redundant.
Plus, even though it can handle multiple people working out on it at once, you probably wouldn’t want a bunch of strangers doing exercises right next to you when you’re also on it.
That being said, there are a few different commercial gym settings that are perfect for the Force USA G20:
- Personal training studios
- Physical therapy clinics
- Small rec centers or community gyms with limited equipment and space
- Boxing/MMA gyms that have mostly rings/mats/bags, but need some strength equipment
- Smaller police/firefighter/military gyms
- Office/corporate gyms
- Hotel gyms and apartment complex gyms
The Force USA G9, G10, G12 and G15 also work well for these commercial settings. However, the G20 provides an even more robust frame, heavier weight stacks and a better ability to accommodate multiple trainees at once, if needed. Whether that’s worth the higher price is up to you.
Buy the Force USA G20 – Use KING5 for 5% OFF »
Optional Lat Row Station Upgrade
The Force USA G20 has just one optional add-on: The “G20 Lat Row Station Upgrade.” This piece gives you a dedicated tower with a lat pulldown station, a low row station and a dip station.
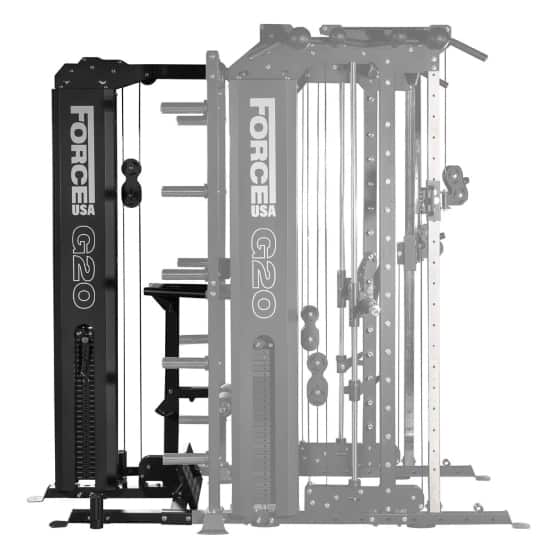
It bolts onto the back of the G20 base unit. It includes a single 289 lb weight stack with a 1:1 weight ratio that’s attached to a high pulley and a low pulley. The weight stack/pulley action is extremely smooth on the Lat Row Station Upgrade, just like the stacks on the base unit. After all, they use the same construction.
Dedicated Lat Pulldown Station on the Lat Row Station
The lat pulldown portion of the Lat Row Station includes the high pulley and the knee holder. The knee holder is sturdy, comfortable, adjustable and easy to use.
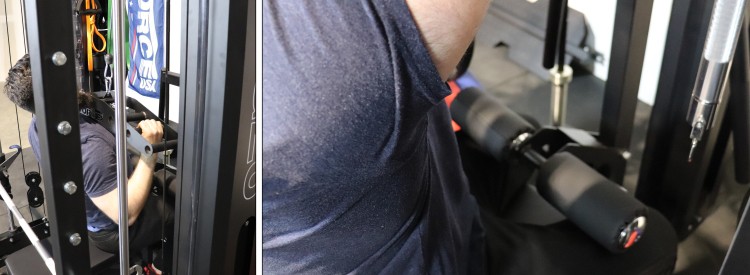
There are 5 adjustable roller height settings so you’ll be able to find the ideal fit to keep your legs firmly in place during pulldowns. In terms of the actual seat, you just use your weight bench to sit on.
To adjust the knee holder, you simply insert an included pin in one of the five holes to select the desired height setting. Then you remove the pin and allow the knee holder to fold down and out of the way when you’re not using it.
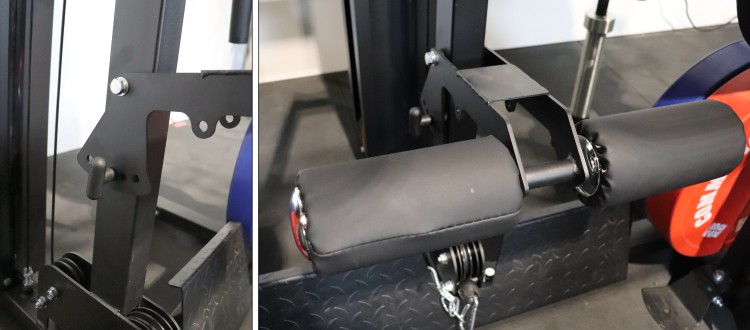
SIDE NOTE: Maybe this is the lazy part of me talking, but I found it very convenient to keep the knee holder extended out during low rows. After the set, I would grab onto it to help pull myself up off the floor. It’s all about conserving energy, right? ;-P
The pulley height is 81″ (6’9″). This is plenty of clearance for most lifters to get a full stretch. Note that when doing lat pulldowns on the functional trainer at the highest possible setting, it is also 81″ (6’9″) high.
How It Compares to the Lat Pulldown Station on the Functional Trainer
The Lat Row Station leg holder is superior to the one on the functional trainer lat pulldown station. Don’t get me wrong. Both are effective and stable.
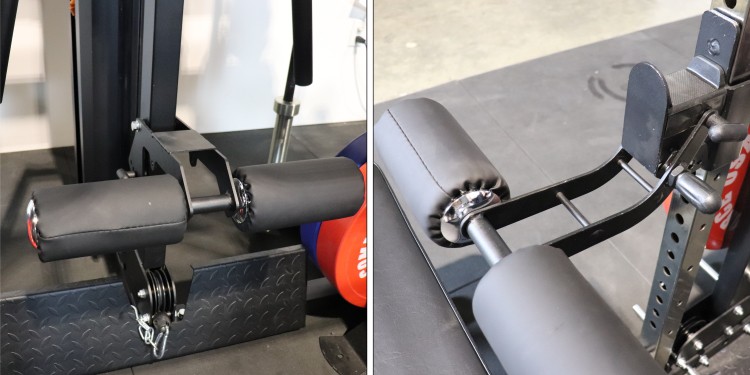
However, the one for the Lat Row Station has a quicker setup time and added stability compared to the one for the functional trainer. It’s always installed, but it can fold down and out of the way. Whereas, the leg holder on the functional trainer needs to be removed from the functional trainer column to get it out of the way.
The cable is always in the high position on the Lat Row Station’s dedicated lat pulldown. Whereas you may have to adjust the functional trainer pulley to the high position. When doing this, you’ll have to take the time to uninstall any power rack attachments if they’re in the way.
Supersetting is near-instant on the dedicated lat pulldown if you’re alternating between it and any exercise on the front of the G20.
In comparison, if you were to do supersets with the functional trainer lat pulldown station and another exercise on the front of the G20, you’d likely have some buffer time spent adjusting the pulley height and/or moving attachments around.
Got a training partner? If so, you can do lat pulldowns or any high pulley exercise inside the rack on the dedicated lat pulldown station while your partner works out on the functional trainer or power rack. No waiting or taking turns.
You’ll also notice that you achieve a more vertical line of pull with lat pulldowns on the Lat Row Station. This is because the pulley is more directly overhead. Whereas, the pulley is a bit more in front of you for pulldowns on the functional trainer. This means you’ll hit your lats a bit better.
Last but not least, you can take advantage of the 1:1 pulley ratio to achieve twice as much resistance compared to the functional trainer. Stronger lifters will max out the weight stack on the functional trainer for lat pulldowns. While it’s possible to go beyond the max by adding band resistance, it’s easier and more effective to use the heavier weight stack on the Lat Row Station if you have the option.
Dedicated Low Row Station on the Lat Row Station
The dedicated low row station on the optional Lat Row Station Upgrade always has its pulley fixed in the same low position. There’s no adjusting necessary.
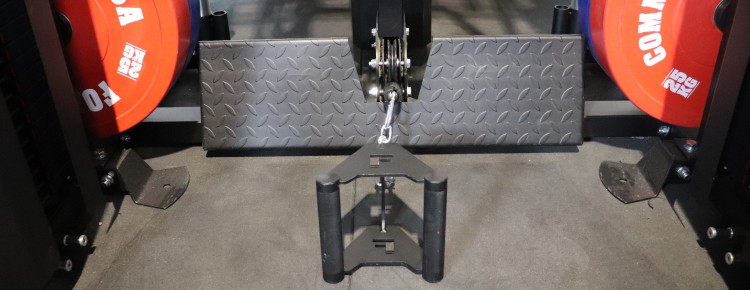
The most attractive feature of the dedicated low row station is its built-in steel footplate. It is 29.5″ wide and 9″ tall, giving you plenty of room to position your feet. Virtually your entire foot makes contact with it. It is angled slightly backward, which lets you assume a comfortable ankle angle.
How It Compares to the Low Row Station on the Functional Trainer
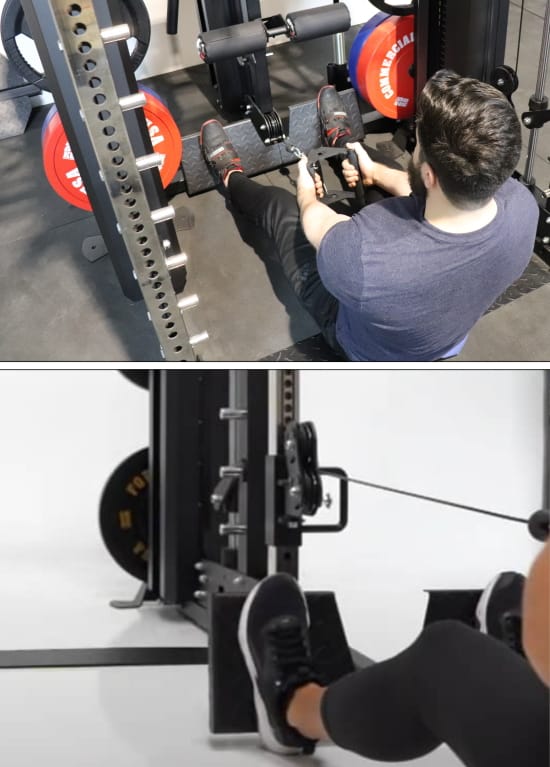
The dedicated low row station on the optional Lat Row Station Upgrade provides an ease-of-use improvement compared to doing low rows on the functional trainer for a few reasons:
- You never have to worry about installing or removing the footplate on the Lat Row Station since it’s built-in. With the functional trainer low row station, you have to install the footplate attachment.
- The cable is always in the low position on the Lat Row Station’s low row area. For functional trainer low rows, you may have to adjust the functional trainer pulley to the low position; possibly removing other attachments to do so.
- If you’re supersetting low rows on the Lat Row Station with another exercise on the power rack or functional trainer, the transition time from one movement to the other is just a couple of seconds since there’s no setup required.
- If you’re working out with a partner, one of you can do low rows on the dedicated station while the other does any exercise on the functional trainer or power rack.
Possibly the biggest advantage of doing low rows on the Lat Row Station instead of the functional trainer is that you can use twice as much resistance thanks to the 1:1 pulley ratio. Rows often require a lot of weight, especially for stronger lifters, so this is a major benefit.
Foldable Dip Station
The optional Low Row station comes with a foldable dip station. Fold it out when you need to use it. Fold it down and out of the way when you’re done.
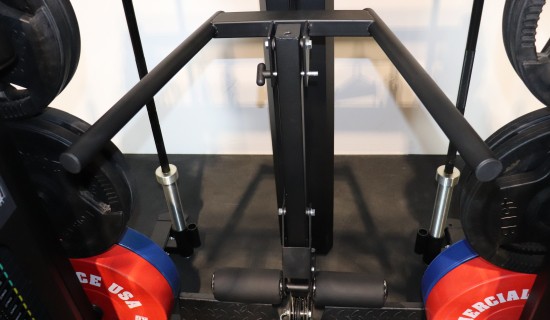
The folding functionality is easy to use. You simply use the same pin from the lat pulldown’s adjustable leg holder pad to lock it in place.
The foldability gives you the room needed to do exercises on the Lat Row Station’s high and low pulleys, such as lat pulldowns and low rows.
The dip station is sturdy and stable. I had no issues with shakiness when doing dips on it. The only issue is that you can’t lean far forward if you take a narrower grip on the handles as you’ll bump into the pulley cables.
One cool thing that’s possible with this dip station is the ability to attach the low pulley to your dip belt to add cable resistance. This is a super easy and effective way to do weighted dips. It’s a much faster setup than loading and unloading weight plates onto your dip belt, which can be a cumbersome task if you’re lifting a lot.
This used to be the only way to do dips on the G20. However, Force USA has since developed dip bars that attach to the power rack. These are available as part of the optional upgrade kit.
Barbell Storage
The optional Lat Row Station Upgrade adds 2 vertical barbell storage sleeves to the back of the unit. There’s one on the rear left side and one on the rear right side, attached to the feet, behind the weight storage.
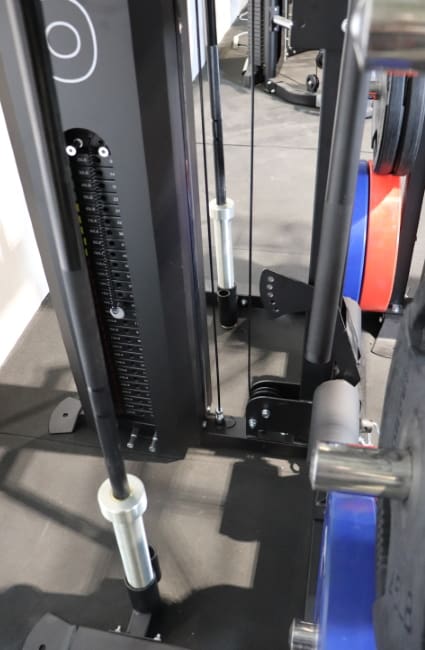
This gives the G20 a total of 4 barbell storage areas when combined with the 2 bar storage hangers that come standard on the G20 base unit.
The bar storage sleeves on the Lat Row Station accept the end of the barbell inside of the sleeve and hold it from the floor up.
Each of the bar storage sleeves has an Olympic sleeve (~2″ diameter) and a standard sleeve (~1″ diameter). In total, this allows you to store up to:
- 2 Olympic barbells
- 2 standard barbells
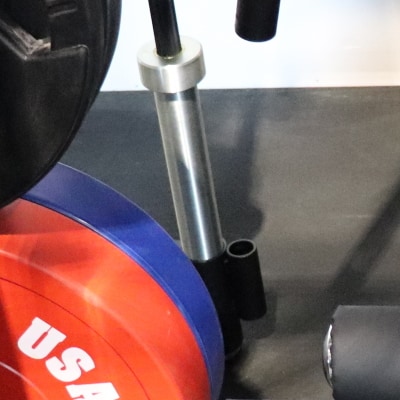
Most people won’t have standard bars to store, but it’s nice to have the option for those who do.
Note that you need sufficient ceiling clearance beyond the top of the rack to use the Olympic bar holders with a full-length Olympic barbell. You must account not only for the bar length (approx 86.5″ or 7’2.5″), but also for the amount of room needed to lift the barbell up and into the sleeve. Your ceiling height should be at least 93″ (7’9″) to use the barbell storage.
Are your ceilings too short for this? Don’t worry, you have options.
First and foremost, you can use the 2 storage hangers that come standard on the base unit. Those only require an extra ~3/4″ of clearance over the max height of the G20 (91″) for most barbells. Alternatively, you can pick up an affordable wall-mounted barbell holder like this vertical storage hook or this horizontal rack.
Otherwise, you can go the 100% free route and simply leave your barbell(s) on the j-hooks and/or spotter arms when you’re finished working out.
Can the Lat Row Station Be Used as a Stand-alone Unit?
Some people ask if they can set up the Lat Row Station as a stand-alone unit. The reason is they do not have enough space to attach it to the back of the rack. But they would be able to place it elsewhere in their gym if it could be used as an independent machine.
Unfortunately, this is not possible. You must attach the Lat Row station to the rear of the G20 base unit for it to work.
Is the Lat Row Station Upgrade Worth It?
To decide if the Lat Row Station Upgrade is worth it for you, you have to consider these factors:
- Space
- Money
- Capabilities
Space
Do you have enough space in your home gym for the Lat Row station? Remember, you’ll need an extra 28″ of depth beyond the 67″ (5’7″) depth of the base unit (total depth of 95″ or 7’11”).
If you don’t have the space, then it’s an easy decision. You shouldn’t get this optional upgrade.
If you do have the space, then it may be worth it. But you’ll still need to consider some other factors that I’ll discuss below.
Money
Don’t buy the optional Lat Row Station if you can’t afford it.
However, if you’re in the market for the G20, you likely have a bit of disposable income. Assuming that’s the case, then you just need to decide if the value for the money is there.
IMO, the price point for this add-on is fair. Of course, it’s not “cheap” at $1,299. However, in the context of the $5,999 price point for the base unit, it’s reasonable. Moreover, it delivers a lot of extra value in terms of exercise versatility and workout efficiency for its price.
Capabilities
If you have the space and can afford the optional Lat Row station upgrade, then the only thing left to figure out before deciding to buy it is if its capabilities are important to you.
As discussed previously, you can already do lat pulldowns and low rows on the functional trainer. However, the Lat Row Station Upgrade makes doing both of those exercises (and many other high cable and low cable exercises) more efficient and effective.
So if you’re big on back training, I’d say that’s a good reason to invest in this add-on. Even more so if you do a lot of supersets with your back training. Switching between the Lat Row Station and the other G20 stations is a snap.
Additionally, if you’ll be training with a workout partner, the optional Lat Row Station makes a lot of sense since one person can train on it while the other trains on the front of the G20.
If the main reason you want it is for the dip station, I’d say it does not make sense. First off, it doesn’t make sense to pay an extra $1,299 just to be able to do one more exercise.
Even if money’s no concern for you, the amount of space you’d give up in your gym just to do dips isn’t worth it. If you want to dips, just know that Force USA is currently developing a dip attachment that will install on the power rack uprights (ETA not known as of now). In the meantime, you can get a low-cost, compact dip station on Amazon.
However, if you want the dip station in addition to the dedicated lat and low row stations, then it does make sense as a purchase.
If you want to buy the optional Lat Row Station Upgrade, I highly recommend buying it when you order the G20 base unit. You’ll save a lot of money on shipping. Whereas, you’ll have to pay for shipping a second time if you order the Lat Row upgrade after you get the G20 base unit.
Power Rack
Buy the Force USA G20 – Use KING5 for 5% OFF »
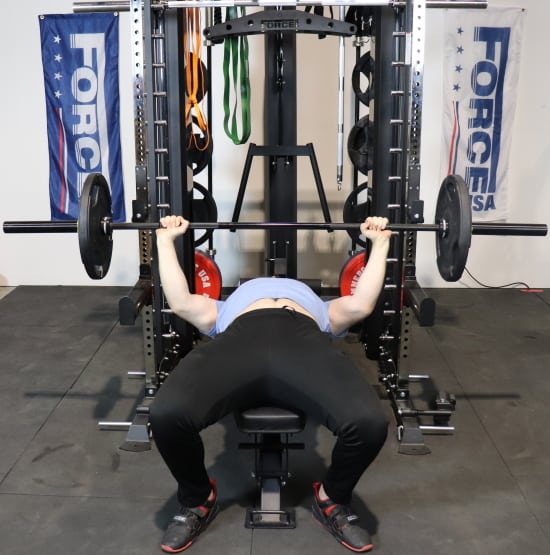
The power rack station in the Force USA G20 is really a half rack. This is because it has 2 posts in the front and none in the back. Whereas, a true power rack is fully enclosed with 2 posts in the front and 2 in the rear.
However, for this Force USA G20 review, I’ll continue referring to it as a “power rack” since that’s the terminology that Force USA uses.
In any case, you can do just about every barbell exercise on this station that you can do in a dedicated power rack. The entire G20 base unit takes up about the same footprint as a deep power rack with a storage section (i.e. a 6 post power rack).
Here’s a taste of the many barbell exercises you can do in the Force USA G20 power rack:
- Back squat
- Pin squat
- Front squat
- Lunge
- Split squat
- Good morning
- Bench press
- Pin press
- Incline bench press
- Decline bench press
- Close grip bench press
- JM press
- Floor press
- Z-press
- Standing shoulder press
- Seated shoulder press
- Shrug
- Power shrug
- Rack pull
- Rack cleans
- Barbell row
- Barbell curl
Some of the above movements will require a flat or adjustable weight bench. If you don’t already have one, you will need to buy it separately since it’s not included with the G20. The same goes for a barbell and weight plates.
The G20 power rack has a weight capacity of 992 lbs, as do all the other Force USA G-Series models. That’s virtually matching the industry standard of 1000 lbs for any “good” full-sized power rack. In short, it can handle more than virtually any lifter can throw at it.
The 2″x2″ uprights use 11-gauge steel. This is thicker and thus more rugged than the 12-gauge tubing on the G12, G9, G6 and G3. Only the G10 and G15 also use 11-gauge steel.
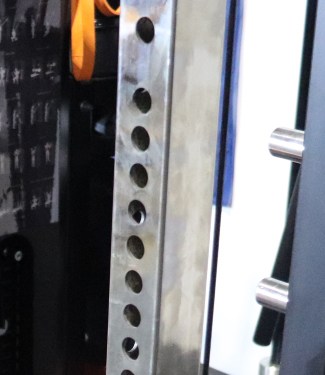
The Force USA G20 power rack has an internal width of 44.5″ between the uprights. This is commensurate with many full-sized power racks on the market, which generally range from 41-44″. You’ll have plenty of space to do even a wide grip bench without having to worry about pinching your fingers.
In comparison, the G3, G10 and G15 are 44″. The G6 is narrower at 41″. And the G9 and G12 are super wide at 48″.
The external width of the uprights is 48.5″. This is toward the wider end of the spectrum when it comes to the external width of power racks.
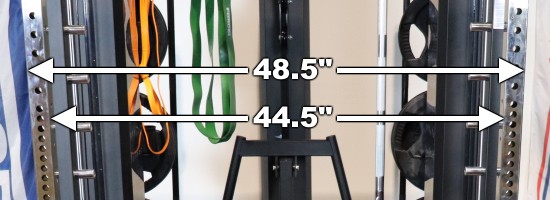
External width is an important measurement because the wider it is, the less clearance you’ll have between the j-hook and your barbell sleeves when racking and unracking the bar.
So, is 48.5″ too wide? No.
You just have to be a bit more aware of where the bar is when you’re racking/unracking to avoid bumping the sleeve collars into the j-hooks. It’s pretty easy to get used to, but I wanted to point it out if you’re used to narrower racks.
As a comparison, the popular Rogue Monster power racks have a 49″ width, which is slightly wider. REP Fitness uses a 47″ external width on their PR-5000 v2 power racks, which gives a couple of extra inches of clearance.
In comparison to the other G-Series models, the G3, G10 and G15 all have an external width of 48″. The G6 has a 45″ external width. And the G9 and G12 have an extremely wide external width of 52″. Though for practical purposes, the effective external width on the G9/G12 is 49″ since the j-hooks and spotter arms are indented 1.5″ inward on each side to ensure the bar fits.
Roller j-hooks and a monolift attachment are included with the G20 power rack. Both of these attachments are used to rack and unrack the barbell on different exercises.
It also comes with safety spotter arms which will catch the barbell at the bottom of the range of motion in case you fail and need to abandon the lift.
The power rack features uniform 1″ hole spacing, which allows you to install these included attachments anywhere on the uprights in height increments of just 1″.
I’ll discuss the hole spacing, roller j-hooks, monolift attachment and spotter arms in detail, below.
Uniform 1″ Hole Spacing
The original version of the Force USA G20 had Westside hole spacing with ⅝” holes spaced 1″ and 2″ apart (1″ in the middle section, 2″ above and below).
However, the new version of the G20 has even more precise hole spacing: The holes are spaced 1″ apart throughout the entire height of the uprights.
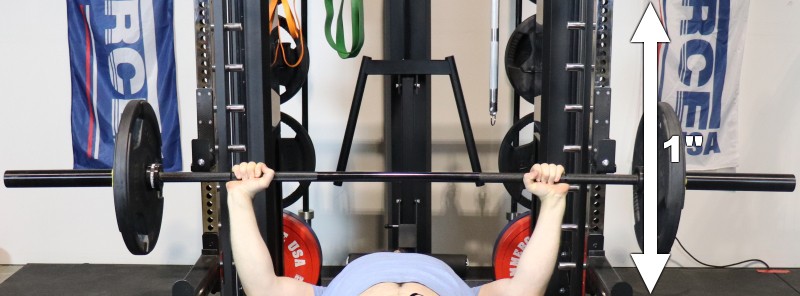
Traditional Westside hole spacing gives you 1″ hole spacing is just in the middle section of the uprights where you’d set the safeties and j-hooks or monolift for bench press. Now, with the uniform 1″ spacing on the updated G20 design, you now get this extreme precision for all exercises.
The Force USA G10 and G15 also have uniform 1″ hole spacing. The G3 has traditional Westside hole spacing. All the other units have much larger (3.75″) uniform hole spacing.
I’m glad the G20 has such narrow hole spacing. You never have to worry about having your attachments set too low or too high.
There are 65 holes on the power rack, ensuring you’ll be able to install the attachments wherever you want.
The good thing about the holes on the G20 is that they’re ALL actually accessible for installing the j-hooks and monolift. This is not the case on all the other G-Series models, except the G6, G10 and G15.
The other models are flawed in that they have their uppermost power rack hole(s) blocked by the cable pulley, which necessarily must be above the j-hooks (otherwise the cable gets in the way of the barbell).
Having all holes accessible on the G20 power rack is great because:
- You should obviously be able to use every hole that’s there. Otherwise, what’s the point of the hole being there? And…
- It maximizes the highest possible j-hook/monolift setting for extra tall lifters who need to set up higher up on the uprights for squats.
Roller J-Hooks
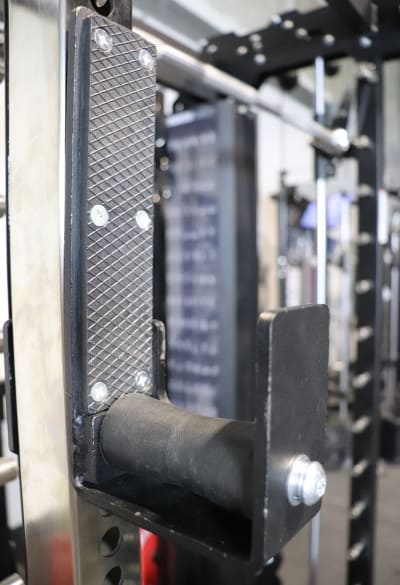
The Force USA G20 comes with a pair of roller j-hooks for racking and unracking the bar on any power rack exercise.
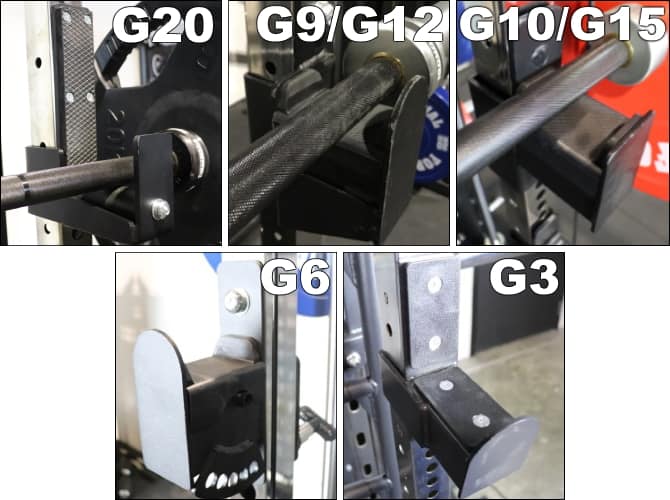
These roller j-hooks are vastly superior to the j-hooks on the other G-Series models. Let me explain why.
The biggest upgrade is the inclusion of the “roller” part of the j-hook. The barbell rests on the roller portion. The rollers let you move a loaded barbell left or right with minimal effort.
This way you can easily center the barbell in the middle of the rack before you lift off for squats, bench or any other exercise.
Doing this on non-roller j-hooks takes a big effort and wears down the protective layer over time.
The video below shows me moving the bar side to side on the G20 roller j-hooks. You’ll see that I’m using very little effort and the motion is super smooth:
Although rollers in j-hooks have been around for years, they were very rare and rudimentary and most people had never seen them. I used some on an old Nebula power rack in a commercial gym I went to a few years ago.
However, roller j-hooks have recently become a popular premium accessory available from a growing number of companies. The designs are much better than in the past.
I’m very glad Force USA included roller j-hooks with the G20. After all, the G20 is a premium all-in-one gym so it should have some premium attachments like these.
The next big improvement of the G20 roller j-hooks vs the j-hooks on the other G-Series models is the very tall back. It’s a full 7″ tall. It’s just 4″ tall on the G3. And the G15, G12, G10, G9 and G6 don’t have a true back portion.
Buy the Force USA G20 – Use KING5 for 5% OFF »
Having a tall back gives you a much better experience when using the power rack. You can rack the barbell high up on j-hooks without worrying about overshooting the top and banging into the uprights.
This protects your bar and the uprights. Moreover, it makes racking the bar one less thing you need to think about while lifting.
The Force USA G20’s j-hooks have a couple of other notable improvements over G15, G12, G10, G9 and G6 j-hooks (not the G3 j-hooks). For one, the backs of the G20 j-hooks have a protective lining.
Secondly, the bolts that hold the protective lining on the G20 j-hooks do not protrude out like the large bolt head on the back of the G12, G9 and G6 j-hooks. This does a lot in terms of saving the barbell from major scuffs when contact is made.

That being said, the bolts on the G20 j-hooks could be improved if they were recessed. As is, they sit flush with the protective lining itself.
So you can still make some metal-on-metal contact if you slam the bar directly into them. If that’s a concern for you, though, it’s simple to place some electrical tape over the bolt heads.
There are a few different materials used to construct the roller j-hooks.
- The body of the j-hooks is made from steel. The welds all look good.
- The roller is made from a high-density plastic composite material that’s chosen for its strength and durability. I can’t say how long it will last or if it will ever need replacing, but I don’t have any concerns about premature wear based on the testing I did.
- The protective backing is made from a plastic composite. I’m not sure the specific type, but I’d prefer if this used the industry-standard UHMW plastic, which is a tried and true j-hook material. However, this material didn’t exhibit any issues of concern during testing and I have no reason to believe it won’t last a very long time.
If you’re a taller lifter, you may be wondering if you’ll be able to set the j-hooks high enough to squat on. The good news is that nearly any person will be able to set up for squats without issue.
The highest j-hook setting is 67″ (5’7″) from the floor to the roller. This translates to a max user height of around 7’0″ for squatting comfortably on the j-hooks!
The G3 and G6 provide similarly high clearances as well, with their j-hooks putting the bar 66″ (5’6″) and 69″ (5’9″) above the floor, respectively. The G10 and G15 have even higher max j-hook settings of 70″ (5’10”) off the floor.
However, the G9 and G12 are notably shorter at 60″ (5’0″), making them best only for lifters up to 6’5″. So if you’re taller than that, you should only be looking at the G20, G15, G10, G6 or G3.
Monolift Attachment
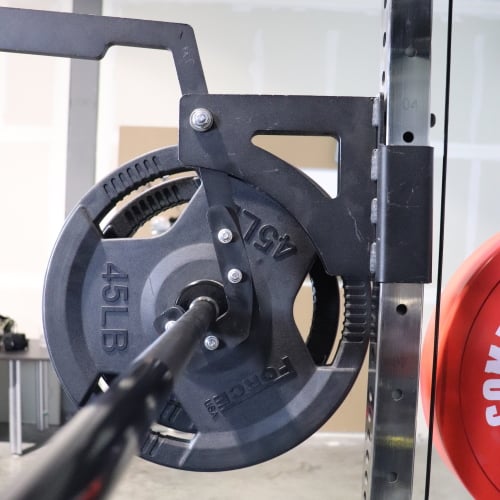
The Force USA G20 comes with a monolift attachment for the power rack. This is the only G-Series model with this functionality.
This attachment replicates the functionality of a dedicated monolift rack, which itself would take up as much space as a full power rack and run you thousands of dollars.
The idea behind a monolift rack, or in this case, a monolift attachment, is to be able to unrack the bar on squats without having to walk out the weight.
Similarly, you can use it to lift off more efficiently on bench press when the bar is directly above your chest. You save energy and maintain your position better compared to starting with the bar above your eyes, hoisting it off the j-hooks and bringing it over your chest.
How does it achieve these feats?
It has an arm on a pendulum with hooks at the bottom to hold the bar. When the bar is on the hooks, the arms swing out and away from the uprights. When you unrack the bar, the arms swing back against the uprights.
This gives you clearance to lift without having to walk out the bar on squats or pull the bar toward your chest on bench press.
The G20 monolift attachments are powder coated in the same black as the j-hooks, spotter arms and the rest of the G20 frame.
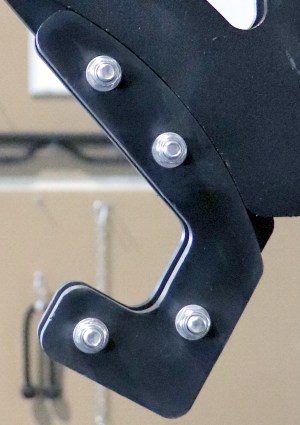
There is protective plastic around the hooks on the monolift arms. This helps protect the barbell knurling and finish from scratches and dings.
It’s well-balanced. The arms swing out just about as much with the 45 lb bar as they do with a bar with hundreds of pounds loaded on. It also swings all the way back when the bar is lifted off.
The swing distance is 5″. That’s the distance the monolift hook travels from loaded to unloaded. This is average to above average compared to other monolift attachments on the market.
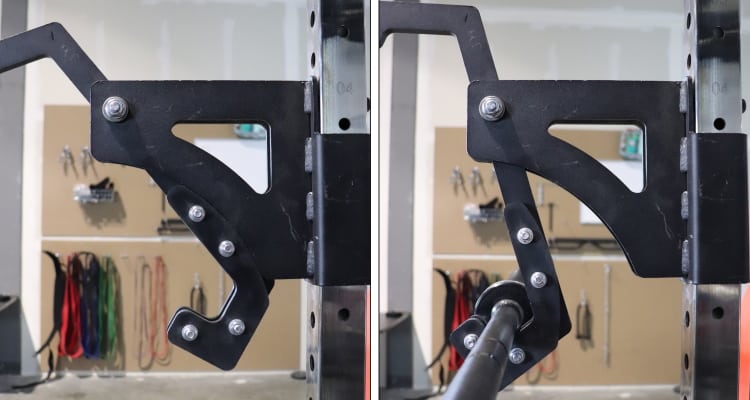
This is probably the most important spec for this type of attachment. You’ll only want to use a monolift attachment that gives you enough clearance to lift comfortably without worrying about hitting the hooks during the lift.
When I tested the monolift attachment, I felt like I had enough room to lift without feeling cramped.
One thing to note is that this monolift attachment does not have a “stop bolt” like some others on the market do.
The purpose of a stop bolt is to prevent the arms from swinging any further forward. The benefit is that on squats, you can push back against the bar with your traps to finalize your setup before unracking. However, a stop bolt also reduces the swing distance.
I would take a greater swing distance over a stop bolt. Especially because I can get my traps setup when I push forward into the bar/monolift.
The highest possible monolift setting is 65″ (5’5″) above the floor. That’s the distance from the floor to where the bar sits in the monolift hook. This translates to a maximum user height of 6’10” to squat comfortably on the monolift. That covers nearly everyone.
Safety Spotter Arms

The Force USA G20 comes with a pair of spotter arms for the power rack. Their purpose is to catch the barbell in case you fail at the bottom of the range of motion or otherwise need to dump the barbell.
The spotter arms work well overall. They’re stable and sturdy and do their job of catching the weight when you need them.
They’re 15″ long, just like the spotter arms on G15, G12, G10, G9 and G6. Only the G3 spotter arms are longer at 17.5″.
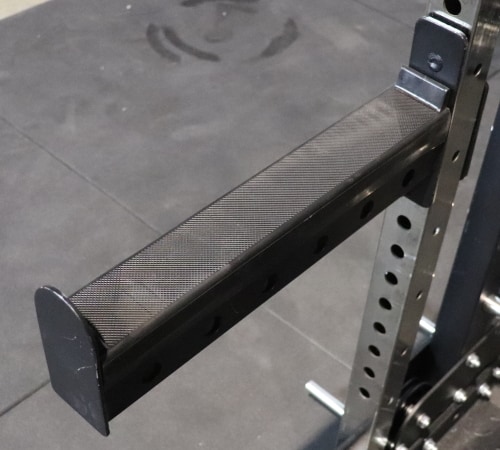
If I could wave a magic wand, I’d make the spotter arms for the G20, and all other models, closer to 20″-24″ long. That’s the typical spotter arm length on most dedicated power racks and half racks.
It’s not the end of the world, though. You just have to get used to squatting with shorter spotter arms. Simply avoid walking out the squat beyond the end of the spotters, which would only occur if you’re used to taking big steps. It’ll become second nature after a few workouts.
The spotter arms have a protective rubber insert to protect the barbell from damage as well as the spotter arm itself. It’s the same material as on the G15, G12, G10, G9 and G6 spotter arms.
I would have preferred the industry of UHMW plastic. That said, this rubber lining does the job and I don’t foresee any issues with premature wear.
The spotter arms have band peg holes, which is a nice-to-have feature. Only the G15, G10 and G3 have this feature, too. The G12, G9 and G6 do not.
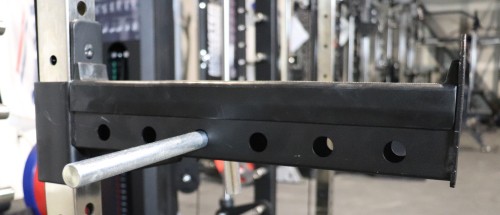
It’s not that common to need band pegs on the spotter arms, but it’s nice to have them when you need to get creative. Here are some possible applications off the top of my head:
- Attaching bands across the spotter arms to hold your legs down when doing lat pulldowns in the center of the functional trainer.
- NOTE: When testing this pulldown setup, I personally preferred using the Smith machine to hold my legs down.
- Setting bands between the spotter arms to add band assistance when doing band-assisted pull ups.
- Setting the spotter arms near the lowest setting and stretching the bands across them. Then getting underneath the bands to do band-resisted hip thrusts.
In terms of practical measurements to know for the spotters, the lowest possible position is 9.5″ from the floor to the surface of the spotter arms.
This is quite low, and it’s great if you want to do low rack pulls since it puts you just a bit higher than if the bar was on the floor with 45s on. You can then increase the height in 2″ increments.
Included Weight Collars
The Force USA G20 comes with a couple of different types of weight collars to prevent the plates from sliding off the barbell sleeves:
- Olympic Lock Collars (2)
- Olympic Spring Clips (6)
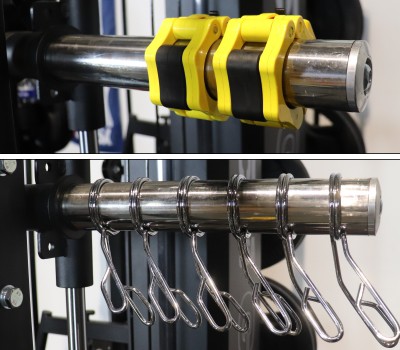
It’s nice that these are included in case you don’t already have some. The Olympic lock collars are the most secure and easy-to-use option, but the spring clips will also get the job done.
Functional Trainer
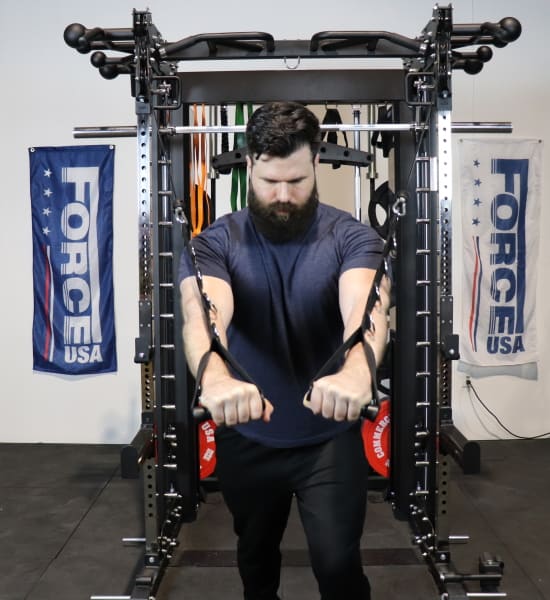
Buy the Force USA G20 – Use KING5 for 5% OFF »
The functional trainer station is the centerpiece of the Force USA G20 all-in-one gym. This is where the majority of the exercise possibilities come from.
The G20 functional trainer consists of two adjustable height cable pulleys. Each cable pulley is on its own column. The columns double as the power rack uprights.
There are a total of 19 pulley height settings, spaced 3.5″ apart. The lowest pulley height setting is 13″ and the highest pulley height setting is 81″ (6’9″). This gives you the ability to do cable exercises from any angle you need: high, low, straight out and everything in between.
The cables attach to two 289 lb weight stacks with a 2:1 pulley ratio.
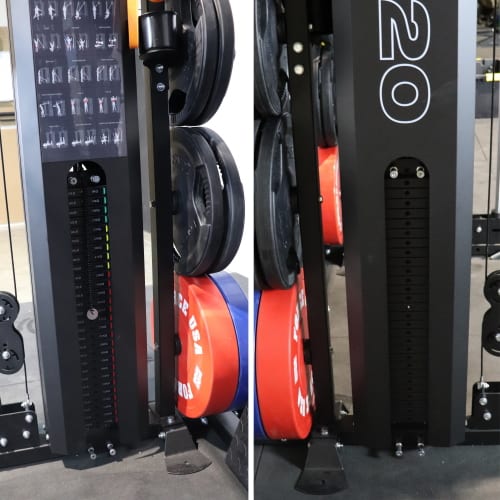
A 2:1 ratio means that the resistance you feel is half of the amount of weight you select. For example, if you select the 100 lb setting, you will feel 50 lbs of resistance.
As mentioned earlier in this review, the Force USA G20 had some design changes in November 2022. The previous design actually utilized a 1:1 pulley ratio on the functional trainer. That meant that if you selected the 100 lb setting, you felt 100 lbs of resistance…
…Of course, this means the max resistance of each weight stack is 144.5 lbs on the new G20 design. Whereas, it was 289 lbs on the original G20 design.
You might be thinking that is actually a downgrade. Well, not necessarily. This switch from a 1:1 to a 2:1 pulley ratio actually addressed the most common feedback on the original design:
- The weight increments were too heavy.
- The cable couldn’t travel through a long enough range of motion before stopping.
The original G20 had heavy weight increments of 10 lbs per weight setting. If you’re a stronger guy doing relatively heavy lifts, that’s not a big deal. However, if you’re more of a novice and/or if you’re doing light exercises (e.g. lateral raises), then a 10 lb jump between weight settings is too heavy.
The new G20 design has much more manageable 5 lb weight increments thanks to its 2:1 ratio. This makes progression more efficient.
The switch from a 1:1 to a 2:1 pulley ratio also doubled the functional trainer’s cable travel distance to 106″ (8’10”) (previously 53″). On the original G20, the cable wouldn’t give you enough range of motion on certain exercises. For example, some people would hit the end of the cable when doing cable lateral raises (particularly if they leaned away from the upright, which is a common technique for engaging outer delt more during the exercise).
Now, the 106″ cable travel distance gives more than enough range of motion for any cable exercise.
For comparison, the other G-Series models have cable travel distances as follows:
- The G3 cables extend 145 inches. This is the best unit to do walking-type cable movements like cable lunges, cable sled pulls and others, because it has so much extra cable length.
- The G6 cables extend 60 inches.
- The G9 cables extend 51.5 inches if you use both cables at once, or 103 inches if you extend just one at a time. (The reason for the difference is that both cables attach to one weight bracket.)
- The G10 cables extend 60 inches when using the 2:1 ratio, or 120 inches when using the 4:1 ratio.
- The G12 cables extend 53 inches.
- The G15 cables extend 60 inches when using the 2:1 ratio, or 120 inches when using the 4:1 ratio.
While the change from a 1:1 to a 2:1 ratio is beneficial for smaller weight increments and greater cable travel, I don’t want to gloss over the downside of the reduced max weight. Now that the max resistance is 144.5 lbs instead of 289 lbs per stack, stronger lifters will find themselves wanting more weight on heavy functional trainer exercises like rows and lat pulldowns.
Luckily, there are a couple of good ways to use heavier weight on cable exercises that require it:
- Buy the optional Lat Row Station Upgrade: This is the best option, but it will cost some money. It attaches to the back of the G20 base unit and comes with its own 289 lb weight stack. However, this stack uses a 1:1 pulley ratio so you can go super heavy on lat pulldowns and low rows. Plus, it has a built-in leg holder to get your legs planted during pulldowns. And it has a built-in steel footplate for low rows.
- Attach bands to the integrated weight stack band pegs: This doesn’t cost anything extra. It provides an easy way to add band resistance to cable exercises. This lets you go beyond the max resistance of the 2:1 weight stacks. Just note that it provides variable resistance, meaning the bands provide more resistance as they’re stretched. I’ll talk more about these integrated band pegs below:
The integrated weight stack band pegs are a unique and highly useful little feature.
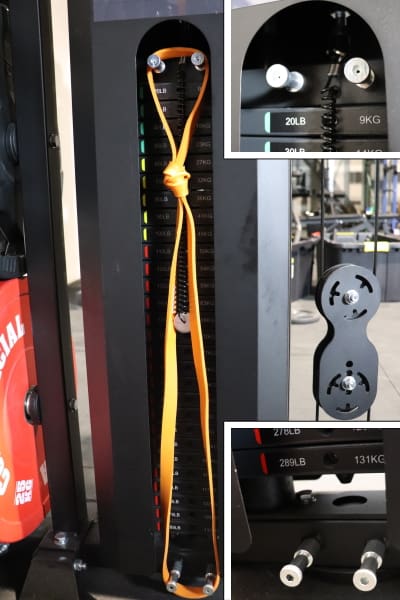
These “band pegs” aren’t the traditional long band pegs that you insert through a hole like on the main rack. These are short pegs that are built into the weight stack. Both the inside and outside of each stack feature two pegs on the top and two on the bottom.
I’ve seen similar integrated pegs on premium selectorized weight stack machines from the likes of Sorinex and Rogue.
The purpose of these pegs is to make adding band resistance to the weight stack easy. You simply hook the bands around the top two pegs and then loop them around the bottom two.
As mentioned previously, this is a great way to bypass the max resistance (144.5 lbs) of the 2:1 weight stacks. Beyond that, you can get a slightly different training stimulus by adding bands. Bands make the movement more difficult at the top of the rep. This is a good technique for mixing up your training.
A premium detail you’ll notice when adjusting the weight on the stacks is that the selector pins are magnetic. This ensures the connection is secure every time. The pin will stay in throughout the set even if you accidentally slam the stack.
The cable motion is super smooth on the Force USA G20. It’s as smooth as on the G10 and G15. It’s possibly a bit smoother than on the G12, G9 and G6, which are already quite smooth in their own right. It’s notably smoother than the G3, which is relatively smooth, but not to this level.
Basically, the smoothness of the G20 functional trainer system could hold its own against other machines you’d find in a commercial gym environment.
Each cable on the G20 is rated at 2,000 lbs, so they’ll easily handle the weight of the stacks (plus any added resistance if you attach bands to the built-in pegs).
Since there are two separate cable stacks, each one moves independently of the other. This means each side can be used by a different person for a different exercise, simultaneously.
This is not possible on the G9 or the G10, which are both connected to a single weight carriage. However, all of the other models can do this.
Cable Accessories
The Force USA G20 functional trainer station comes standard with 10 cable accessories. This is more than any of the other G-Series models. The G15 and G10 each come standard with 9 cable accessories (plus 2 more that come if you get the G15/G10 upgrade kit). The G12 and G9 each come with 5 cable accessories, the G6 comes with 9, and the G3 comes with 7.
Overall, the quality of the G20 cable accessories is on par with, or slightly above that of the G15, G12, G10, G9 and G6 accessories. They’re notably higher quality than the G3 cable accessories.
Here’s a list and overview of all the G20 cable accessories:
Long Straight Bar (aka Functional Training Bar)
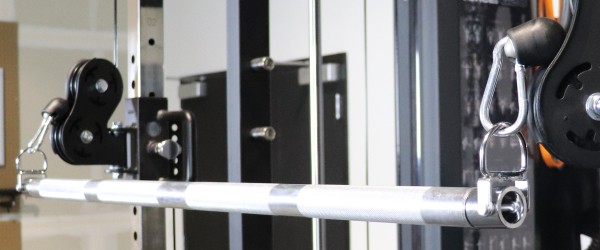
The long straight bar attaches to both sides of the functional trainer, which allows you to lift both stacks at once.
It’s perfect for chest and shoulder presses, triceps pushdowns, jackhammer pushdowns, standing or seated rows (in the center of the functional trainer), or lat pulldowns (also in the center of the functional trainer).
You can also attach it to just one of the cable pulleys so you can do rotational exercises for your core.
The G20’s long straight bar is thick like the ones on the G12, G9 and G6. However, it uses a metal shaft with light, almost passive knurling, instead of a rubberized grip.
Lat Pulldown Bar

The lat pulldown bar on the G20 is the same as the ones on the G10 and G15. It’s upgraded compared to the ones on the G12, G9 and G6 (the G3 doesn’t come with a lat pulldown bar).
It has a light to medium knurl instead of a rubberized grip. It also has a black powder coating finish to give it a blacked-out look.
This is the go-to bar for lat pulldowns, including wide grip, medium grip and reverse grip variations. You can also use it for exercises like wide grip rows, straight arm pulldowns, triceps pushdowns and others.
Short Straight Bar (aka Small Grip Frame Bar)
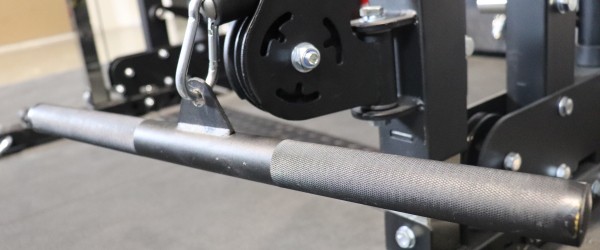
The short straight bar is perfect for cable curls, triceps pushdowns, upright rows and supinated grip rows. This is the same short straight bar included with the G10 and G15.
It features light to medium knurling and sports a black powder coating to give it a dark look.
I prefer this over the rubberized grips on the short straight bar that comes with the G6. It’s also a cut above the G3’s version with a non-knurled surface. The G9 and G12 do not have this accessory.
Close Grip Row Handle
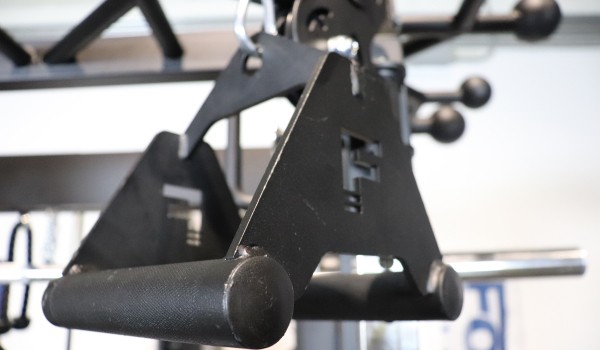
The close grip row handle is one of my favorite cable accessories. That’s probably because close grip cable rows are one of my favorite exercises.
This handle has a beefy frame with a Force USA “F” logo icon laser cut into it, which is a cool little detail. And it has a blacked-out look thanks to its powder coating.
The knurling is light, which is sufficient for most sets. However, I’d have preferred it to be a bit deeper.
This accessory is ideal for cable row variations. But it’s also great for close grip lat pulldowns.
Triceps V-Bar
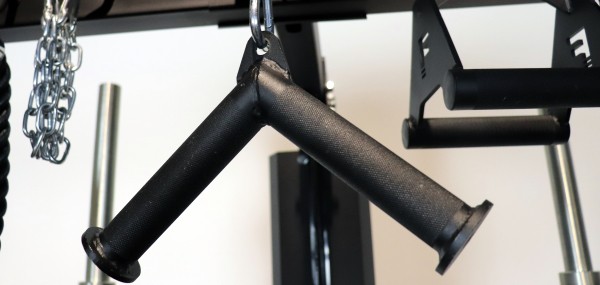
The triceps v-bar is a pretty basic piece that’s only practical for triceps pushdowns. It’s a great alternative to the triceps rope when you want to keep your grip width and hand position fixed.
It is blacked out with a black powder coating finish. It has a knurled surface instead of rubber grips like on the G6 version, which is an upgrade. The knurling is light, which is fine for a bar that you’ll be using for push exercises.
Metal Stirrup Handles (2)
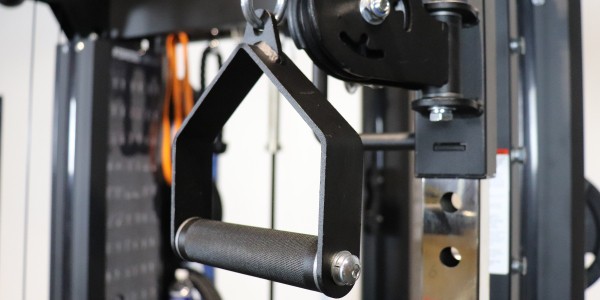
The metal stirrup handles are the highest quality of the three pairs of stirrup handles that come with the Force USA G20.
They’re steel with a black powder coating. They have a bearing that allows for seamless rotation, which can be helpful for exercises like cable curls or cable crossovers.
They feature a comfortable medium knurl, which I like better than the rubber-coated stirrup handles that come with G6. It’s definitely an upgrade from the plastic/nylon stirrups that come with some of the the other G-Series units.
These handles can be used for both unilateral and bilateral cable movements, including standing and lying chest flyes at all angles, bent over lateral raises, lateral raises, single arm rows, one arm press, bench press, shoulder press, lunges, single arm curls, underhand triceps extensions, bilateral shrugs, single arm pulldowns and bilateral lat pulldowns.
Adjustable Nylon Stirrup Handles (2)
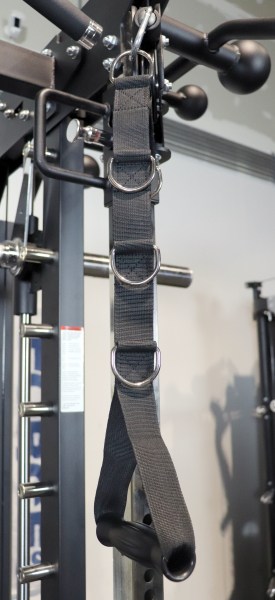
The adjustable nylon stirrup handles are basic but useful. They have a high-density plastic grip portion with an adjustable nylon strap.
Each strap has 5 rings at 5 points along its length. This lets you move the handle closer to, or further away from, the pulley.
You may find it helpful to put extra distance between yourself and the pulley to get further away from the rack on cable flyes. It’s also clutch if you’re doing pulldowns in the center of the functional trainer since the extra strap length lets you reach the handles when seated. It’s also handy if you’re doing standing single arm cable rows and want to be clear of the rack’s feet.
Nylon Stirrup Handles (2)
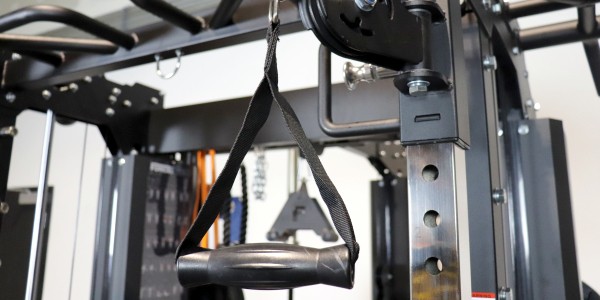
The nylon stirrup handles are a very basic pair of stirrup handles. Each handle grip is made of high-density plastic and the strap is nylon.
There’s nothing special about these, but they work. I’d choose the Metal Stirrup Handles over them most of the time. However, they can be nice if you want something lighter.
Hammer Grip Bar
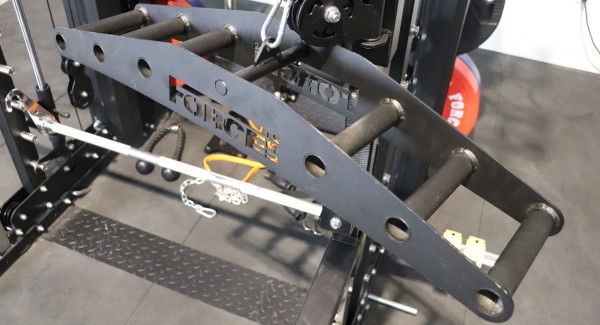
The hammer grip bar is probably my favorite cable accessory that comes with G20. I’d say it slightly beats out the close grip row handle.
This is a larger cable accessory that is designed for lat pulldowns and cable rows. It has 3 sets of neutral grip handles, including one for close grip, one for medium grip and one for wide grip.
I’m a big fan of neutral grip (aka hammer grip) on lat pulldowns and rows, since it’s easier on my shoulders and wrists, and I feel like I can get a little better back muscle activation.
One fun training technique I enjoyed doing with this bar was burnout sets on lat pulldowns and rows, starting with the widest grip and going to failure. Then I’d immediately take the medium grip and go to failure. And finishing by taking the close grip to failure.
The only improvement I’d like to see on this is for the side panels to be narrower towards the center. This would allow you to bring the bar closer to your chest or abdomen, thus increasing the range of motion slightly.
To do this, Force USA would have to get rid of the laser cut logo. It would be worth losing this aesthetic detail to gain the added functionality.
Triceps Rope
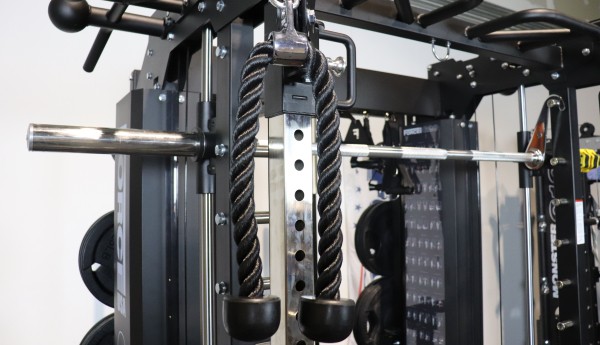
Nothing beats this classic cable accessory for triceps extensions. The triceps rope is just like any other double-ended triceps rope you’d find at a Globo gym. It works just like you’d hope.
Other than triceps extensions, you can do other movements like cable hammer curls, face pulls, straight arm pulldowns, crunches and upright rows.
Sawtooth Bar + 2 Handles
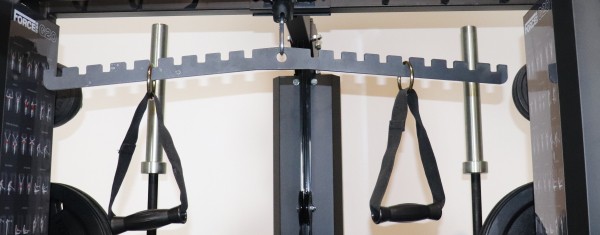
UPDATE: Since the November 2022 design update, the sawtooth bar is no longer included with the new G20. I’m keeping this section in the review for anyone who may be buying an original G20 used or from a third-party retailer.
The sawtooth bar looks cool and has some cool functionality, too. It is a serrated steel bar that lets you put the 2 included stirrup handles between any of the teeth. There are 9 possible positions on each side of the bar to put the stirrups.
This lets you have a wide grip or a very narrow grip, and anything in between. The best part is that it’s super quick to switch the width.
This setup also lets you use a neutral, pronated, supinated or rotating grip thanks to the flexible nylon handles in the stirrups. I really like starting with a neutral grip and slowly rotating to a supinated grip on pulling movements.
I found it best for cable rows. I also like it for cable curls.
It was not great for lat pulldowns on the functional trainer or the optional Lat Row Station Upgrade. The handles hung down too low so I couldn’t fully extend my arms at the top. However, this probably wouldn’t be an issue for shorter lifters (i.e. maybe around 5’7″-5’8″). It also wouldn’t be an issue if you did floor-seated lat pulldowns.
The functional trainer also comes with a few supplemental accessories for attaching the cable handles to the pulley:
Spring Snap Clips (15)

The spring snap clips are used to attach any cable handle to the pulley. They can also be used to attach cable handles to extension chains, or link multiple extension chains together.
Extension Chains (4)

You can use one or more extension chains if you need more distance between yourself and the pulley. Simply connect one end to the pulley with a snap clip and connect the other end of the chain to the handle with another snap clip.
A few exercises where this can be helpful are low rows (if you’re inflexible and can’t reach the handle), cable curls, cable hamstring curls, cable crossovers and several others.
Smith Machine
Buy the Force USA G20 – Use KING5 for 5% OFF »
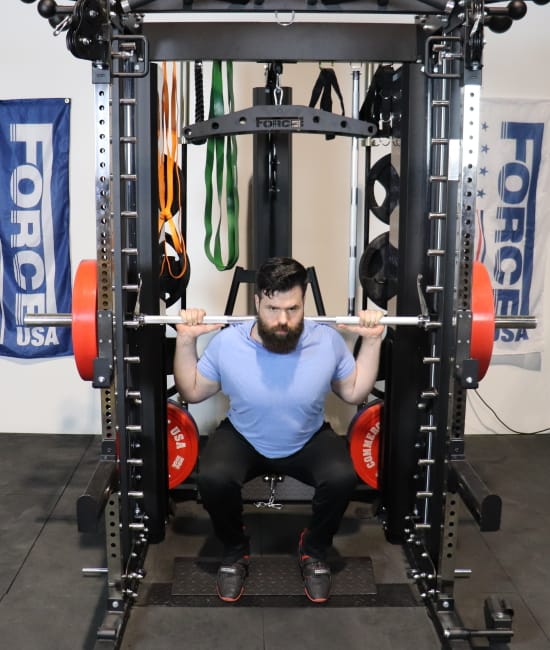
The Force USA G20 Smith machine gives you the ability to do nearly any exercise you can do with a free weight barbell, but on a fixed track. There are also a few exercises that are only possible on a Smith machine.
The Smith machine’s fixed track lets you focus more on the target muscles, and less on stabilization. This makes it a great tool for hypertrophy training.
A lot of serious gym guys look down on the Smith machine. They see it as a piece of equipment only for women. That’s a misconception.
It doesn’t have to be the centerpiece of your training. But you can use it to strategically add some highly effective accessory movements and hypertrophy-specific lifts into your routine.
Of course, the Smith machine IS very popular with female trainees since it’s an excellent machine for “booty” exercises. If you’re a woman yourself or plan to have female friends, family members or personal training clients working out on the G20 with you, then this can be a very high-value feature.
The Force USA G20 Smith machine is very smooth. There’s no drag and the track isn’t shaky. It’s comparable to what you’d find on dedicated Smith machines in commercial gyms. This is achieved through the use of a well-implemented commercially sealed linear bearing system installed on a sturdy track.
The Smith machine on the G20 has a vertical track, as do all of the other G-Series models. This is in contrast to an angled track that you’ll find on some other Smith machines. One is not necessarily better than the other. Rather, each type is a bit more tailored to certain types of movements.
To generalize, a vertical track is more conducive to lower body movements where the natural bar path tends to be more vertical. An angled track is more conducive to upper body pressing movements where the natural bar path has a slight angle.
You can still do upper body pressing movements on the G20 Smith machine. You just may need to modify your body/torso position slightly to adapt to the vertical path.
The G20 Smith machine has safety catches that work just like the ones on the G12, G9 and G6 (it’s also similar to the G10/G15 Smith safety catches, except they also have a compression spring on top).
Here’s how they work: You simply put the hook on the chrome peg at the height that’s at or just below the bottom of your range of motion. It’s a good safety practice to set the Smith safeties every time you’re doing a Smith machine exercise where you’re under the bar. Even if you’re lifting lighter weight, it’s a good habit to build.
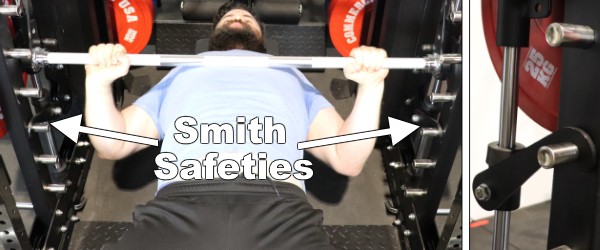
One major improvement on the Force USA G20 Smith machine, compared to G12 and G9 Smith machines, is that you have enough depth inside the rack to set up an adjustable bench for incline presses.
This is thanks to the open design of the G20 that provides a lot of extra space to work. You’ll still have plenty of space even if you get the Lat Row Station Upgrade for the back of the G20.
On the G12 and G9, there just isn’t enough space between the Smith bar and the rear of the unit to put an adjustable bench far enough back for incline work. The other units besides the G20 that have enough space for incline presses are the G15, G10, G6 and G3 (if you don’t have the optional G3 stabilizer pad attachment installed).
The G20 Smith machine is NOT counterbalanced like the G9, G10, G12 and G15 Smith machines. If you’re unfamiliar, a counterbalanced Smith machine means that the Smith bar weighs zero lbs when it’s empty, as shown in this clip of the G12:
A non-counterbalanced Smith bar weighs the same as a regular barbell (i.e. 45 lbs).
A counterbalanced Smith machine is useful if 45 lbs is too heavy. This can be the case for brand new lifters, injured/rehabbing lifters, older populations and kids. Of course, most people ordering the G20 are probably decently strong already and would never need less than 45 lbs on the Smith machine. After all, this is clearly an all-in-one gym built for heavy lifting.
However, many people who buy the G20 aren’t the only ones using it. They often use it with their family. Some people use it to train clients for their personal training business. It’s for these scenarios that I wish the G20 had a counterbalanced Smith machine like the G9, G10, G12 and G15.
Luckily, there is a workaround. You can use the functional trainer with the long straight bar attachment connected to both pulleys. Then select either one plate or no plates on the weight stacks.
The Smith machine’s loadable sleeve length is 12″. This is the same as on all of the G-Series models. However, it’s shorter than the length of a traditional barbell sleeve, which is just over 16″.
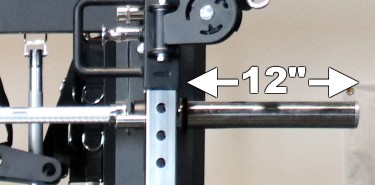
It would be nice to have the sleeves be a bit longer. However, I think they’re shorter so people don’t try to exceed the max load of 794 lbs, not that most people would need anywhere near that weight for a Smith machine exercise.
While most people will have plenty of room for weights on the 12″ sleeves, you could run into an issue if you use extra thick “crumb” bumper plates. You can only fit 3 of those 45 lb plates per side, for a total of 315 lbs including the bar. That’s still more than most would need. However, some guys may want to go heavier especially if they’re using the leg press attachment. In this case, the workaround would be to add band resistance using the band pegs.
All of this is a moot point if you have slimmer bumper plates or even thinner cast iron plates, in which case you can load on a lot more weight.
I’ll also mention that the Smith machine sleeves on the G20 are a bit better than on the other G-Series models. The other models have removable sleeves that reveal a smaller 1″ diameter sleeve in case you want to use standard weight plates instead of Olympic plates.
While it can be nice to have that option, the vast majority of people use only Olympic plates. Thus, very few people will use this feature. I prefer that the G20 Smith sleeves aren’t removable. It makes them more secure and durable in the long term.
As with all the other models, the G20 Smith machine sleeves aren’t solid steel. They have a metal casting over the top with some plastic underneath, and then steel inside of that. This is durable enough since it’s impossible to ever drop this bar on the floor. Still, it would be a nice upgrade to have steel sleeves like on a regular barbell, though it wouldn’t need to spin.
The Smith bar’s lowest possible height is 16″ above the floor. This is low enough that I could get just below the knee on Smith RDLs.
It was also low enough to get a decent range of motion on the hip thrusts. However, you might want to put a weight plate under each foot to get a deeper stretch at the bottom of the rep.
Another nice thing about the G20 Smith machine is that you can rack it much higher up compared to all other models except the G6. The highest rackable height is 73.5″ (6’1.5″) from floor to bar.
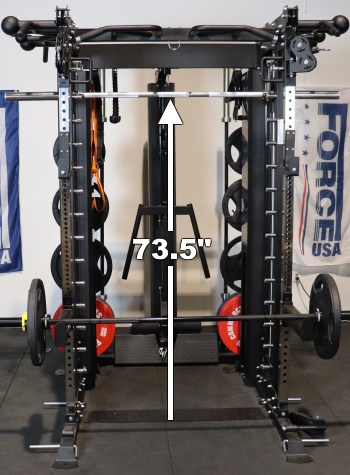
Compare this to 69″ (5’9″) on the G15 and G10, 65″ (5’5″) on the G12 and G9, and 68″ (5’8″) on the G3. Only the G6 Smith bar can be racked higher at 77″ (6’5″).
This matters because you’ll be able to move the G20 Smith bar up and out of the way when it’s not in use. You’ll be able to walk through the rack without having to duck — or only having to duck slightly if you’re a taller guy. It’s better than having it stored at the lowest setting where you have to step over it anytime you need to get past it.
The highest absolute Smith bar height is 80.5″ (6’8.5″). This is as high as it will go during exercise before hitting the top of the machine.
In my case, at 5’11” with longer than average arms, I was able to do standing Smith machine shoulder presses with a wide stance. It’s reasonable to conclude that someone who’s a couple of inches shorter with an average wingspan could do this exercise with a normal stance.
In contrast, all other units except the G6 have a shorter max Smith bar height. The G15 and G10 both have a 74″ (6’2″) max Smith bar height. The G12 and G9 come in at 72.5″ (6’0.5″). The G3 comes in at 68″ (5’8″), which is the same as its top rackable height. Only the G6 has a higher absolute Smith bar height of 84″ (7’0″).
Vertical Leg Press
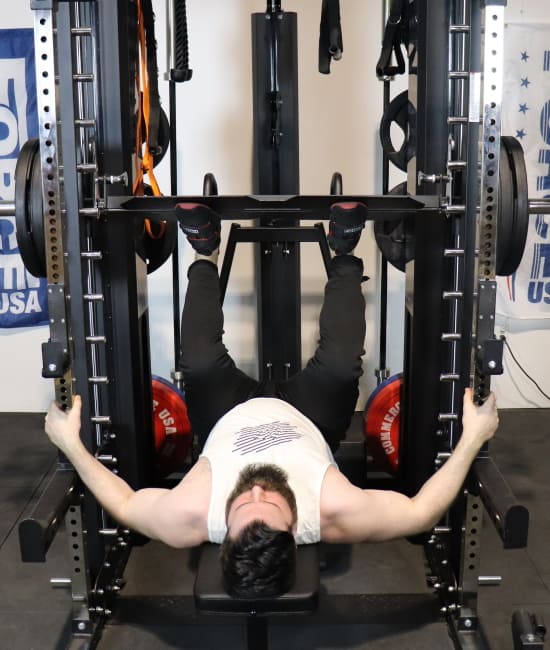
Buy the Force USA G20 – Use KING5 for 5% OFF »
The Force USA G20 vertical leg press attachment is the best way to build bigger and more powerful legs on this machine, outside of free weight barbell squats.
Unlike regular squats, the vertical leg press doesn’t load your spine. So you can get a killer leg workout without taxing your spine. This is great if you train legs 2-3 times a week, but you don’t want to tax your spine with barbell squats each session.
If you’re used to the large 45-degree leg press machines found in commercial gyms, the vertical leg press will take some getting used to. First off, it’s a bit tougher to get into position on the vertical leg press. You have to lay flat on your back and put your legs straight up instead of reclining and putting your legs up at an angle.
One of the nice things about the vertical leg press is that you can use way less weight than a 45-degree leg press, but get the same training effect. Less weight is required because it’s harder to lift 100% against gravity.
Less weight means you spend less time loading plates on and off. By extension, you don’t need to invest in having a ton of extra weight plates.
The Force USA G20 vertical leg press uses the same design as the leg presses on the G12, G9 and G6. And it’s a very similar to the G10 and G15 leg press design (I’ll discuss the difference in a bit). Here’s how to use the G20 leg press:
- Install the leg press plate: Attach the plate to the Smith machine barbell via pop-pins that snap into the hooks on the end of the Smith bar. This connection is secure and there’s no rattling.
- Set the Smith machine safeties: These will protect you from getting stuck under the Smith bar in the off-chance you fail and can’t re-rack it.
- Setup the bench: Move a flat bench (or an adjustable bench in the flat position) under the leg press.
- NOTE: You can also do the leg press on the floor if you prefer. If you do, you may want to invest in an exercise mat to provide a cushion for comfort. It’s up to you.
- Get in position: Lay on the bench, facing toward the back of the G20. Put your legs up and onto the plate. Your knees should be somewhat bent.
- Unrack and press: Extend your legs and unrack the Smith bar. To clear the hooks, bend your ankle slightly by bringing your feet toward your shins. Perform the exercise by lowering the plate until your knees touch your torso, then press it back up.
- Re-rack: Complete your set. With your legs straight, hook the Smith bar onto the rack by extending your ankles.
The G20 leg press motion is super smooth. After all, it’s on the Smith machine, which as I discussed earlier, is very smooth and stable.
The G20 leg press plate is 29.5″ wide. This allows you to do leg presses with a narrow stance, medium stance and wide stance.
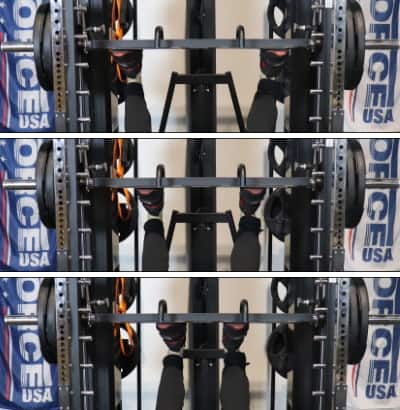
It is a bit awkward to use the leg press at first. You have to train yourself to stabilize the platform with your ankles. You need to keep your feet angled a bit above parallel to the floor (toes above heels) throughout the movement. If you bring your toes more toward your shins during the exercise, the Smith bar will rotate and the hooks will hit the chrome pegs.
It’s something you’ll get used to after a few sessions. The same thing happens on the G12, G9 and G6 leg presses since they have an identical design.
The G10 and G15 leg presses require less stabilization and allow you to do leg presses without worrying about hitting the Smith bar hooks into the chrome pegs. This is because it has a pop-pin mechanism that lets you adjust the plate angle to whatever is most natural for your ankles and body position:
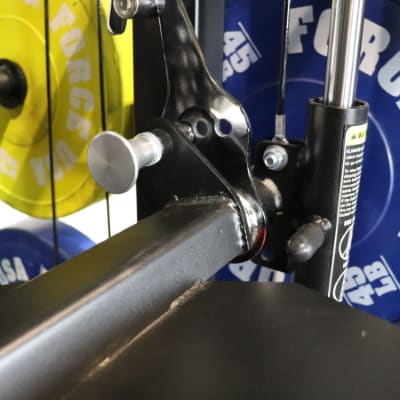
The G3 is the only model with a leg press where you don’t have to stabilize the plate at all while pressing.
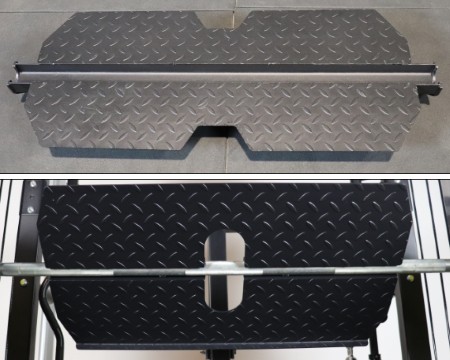
The key differences between the G3 leg press and the G20 leg press (as well as the other models) are as follows:
- You can optionally lock the G3 leg press into place so it’s always parallel with the floor. This means you don’t have to worry about stabilizing the plate with your ankles.
- The G3 leg press has hand rails that you can rotate in and out, to rack or unrack the bar manually. It’s a bit easier than using your feet to rack and unrack.
- The G3 leg press is a different shape and is half an inch narrower, though this doesn’t have much of a functional difference during the exercise.
- The G3 leg press takes longer to install and uninstall.
- The G3 leg press is less smooth since the G3 Smith machine is not as smooth.
- The G3 leg press is sold separately.
Chin Up Stations
The Force USA G20 is very different from all the other G-Series models when it comes to the chin up station…or should I say chin up stations.
That’s right, there are 2 separate chin up stations on the G20 compared to just 1 on the other models. The G20 chin up stations include:
- One multi-grip chin up bar on the front
- One globe-grip style chin up bar on the side
- NOTE: The original G20 design included two globe-grip bars (one on each side; however, on the new design, the second globe grip bar was removed and replaced with the Swing Arm attachment)
Multi-grip Chin Up Bar
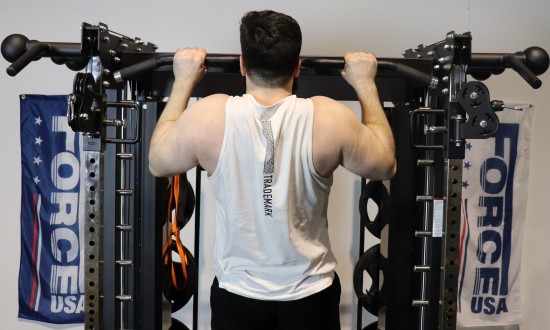
The main chin up station in the front of the unit is the same type of multi-grip chin up station that’s found on the G15, G12, G10, G9 and G6. It’s made up of the following bar segments:
- Two angled bars that allow for a semi-pronated or semi-supinated grip.
- Four short bars spaced apart and parallel to one another. These allow for a neutral grip.
- Two longer bars that connect to, and are perpendicular to, the short bars. Each is angled downward at the end. These longer bars allow you to use a fully pronated or supinated grip. The angled portions allow you to use a pronated wide grip that’s more comfortable on the wrists.

Since these bar segments allow for many different grip positions, you can do many different pull up variations. Here are several of the possibilities:
- Normal width pronated grip chin ups
- Normal width supinated grip chin ups
- Normal width semi-supinated grip chin ups
- Close pronated grip chin ups
- Close supinated grip chin ups
- Close semi-pronated grip chin ups (with a diagonal & straight bar segment)
- Close neutral grip chin ups
- Wide pronated grip chin ups
- Wide neutral grip chin ups
Check out the video below of me doing several different chin up exercises on the multi-grip bar:
Note that the exercises listed above and shown in the video clip are just basic chin up variations based on grip position. You can check out my chin up variations article to see how you can get more creative and do even more types of chin ups.
The angled portions of the straight bar have rubberized grips for a more comfortable and secure grip when doing wide grip pull ups. This rubberized portion has a 38mm (1.5″) diameter. The non-rubberized segments of the multi-grip bar have a 33mm (1.3″) diameter.
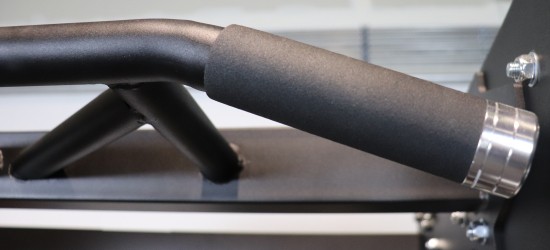
As mentioned earlier in this G20 review, this is the same style of multi-grip bar that’s used on the G15, G12, G10, G9 and G6. Only the Force USA G3 has a different style. Despite the G3 multi-grip bar looking different as you’ll see in the photo below, they’re quite similar in the exercises they allow you to do.
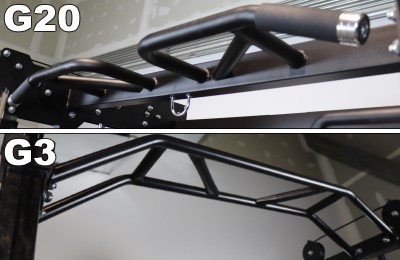
The only practical difference in exercise possibilities is that close grip neutral grip chin ups are possible on the G20, but not on the G3. However, one thing that’s nice about the G3 multi-grip bar is that some of its segments have light knurling for enhanced grip.
It would be nice if the G20 implemented knurling on the non-rubberized bar segments (which is something they actually added to the G10/G15 multi-grip chin up bars). That said, the powder coat provides decent tackiness. If ever you feel you’re slipping, just add a small amount of chalk to your hands.
Globe-grip Chin Up Bars
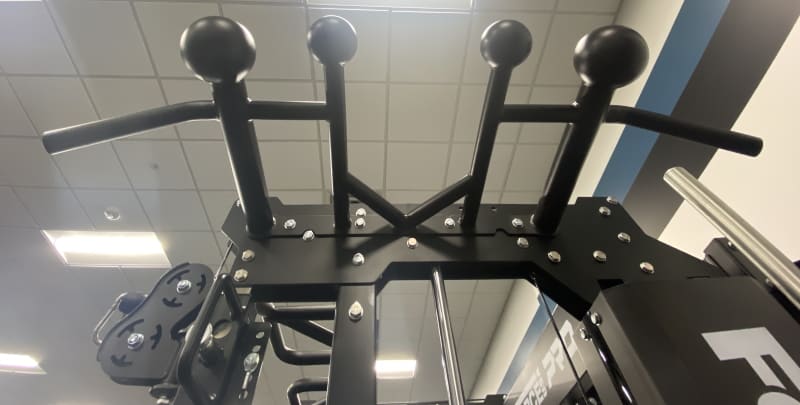
The original G20 design had two globe-grip chin up chin up stations (one on each side). After the November 2022 design update, the new G20 now comes with a single globe-grip chin up bar that you can install on either the left or right side.
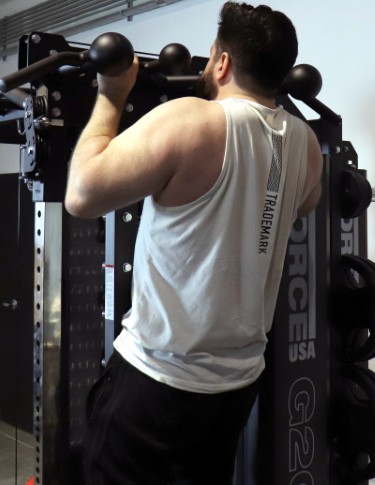
The second globe-grip chin up station has been replaced with the Swing Arm attachment. I think it was a smart move because the second bar was overkill, especially considering there’s also a multi-grip chin up station on the front of the unit.
The “globes” on this type of chin up bar are the main feature. Their purpose is to train your grip and forearm muscles because you have to palm them to hold yourself up.
There are 4 globes on each of the globe-grip chin up bars, including 2 larger globes on the outside for a wider grip and 2 smaller globes on the inside for a narrower grip. Each globe grip is on the end of a neutral grip bar segment that sticks straight out from the side of the G20.

There are straight bar segments that run between the globe grips on the left and right sides of the chin up bar. There is an angled-down portion at the very end of the straight bar segments that allow for a more comfortable wrist position on wide grip pull ups. I like that the wide grip portion is knurled for better grip.

Finally, there are a couple of oblique segments between the middle 2 globe grips. These are for a semi-supinated grip.
There’s a noteworthy improvement in the globe-grip chin up bar in the new G20 design vs the original G20 design. It has been extended 3 inches further out. This addresses an issue with the old design where you your legs would hit into the side of the G20 during pull ups. Now, you have more clearance.
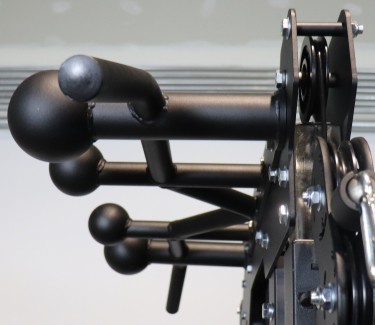
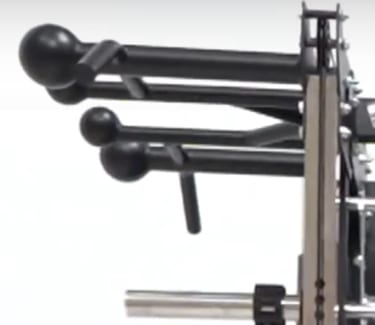
One thing you’ll have to be aware of when using the globe-grip chin up bar is that the Smith machine bar must be out of the way to use them. You should set it at the lowest setting. If you don’t, the sleeves will be in the way of your legs or torso.
Ceiling Clearance for Chin Up Bars
If you have a lower ceiling, you may be wondering if you’ll be able to do chin ups on the G20 without bumping your head. A good rule of thumb is to have at least 1 foot of clearance above the chin up bar height.
The multi-grip chin up bar and both globe grip chin up bars are 88″ (7’4″) tall. So your ceilings should be at least 100″ (8’4″) tall to use all of the chin up bars comfortably.
You can get away with a little less than a foot of clearance. However, in that case, you’d have to go slower and be mindful of your head position relative to the ceiling.
Lat Pulldown Station (on Functional Trainer)
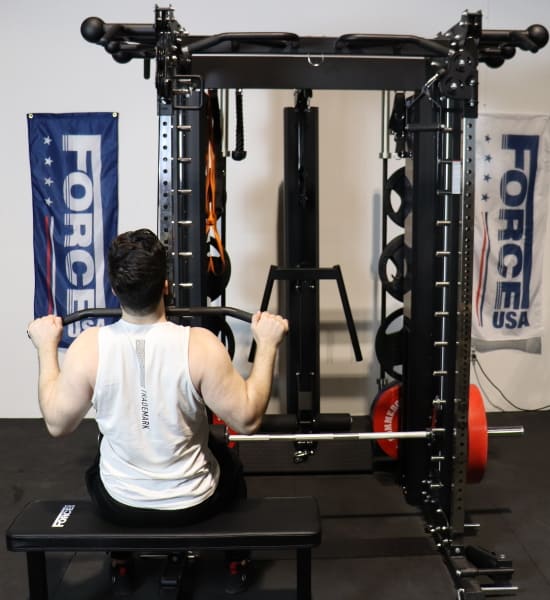
Buy the Force USA G20 – Use KING5 for 5% OFF »
The lat pulldown station on the functional trainer is set up with three main components:
- The functional trainer pulley that’s set at or near the highest setting, with your preferred cable accessory attached.
- A flat bench to sit on, positioned in front of the functional trainer column
- The lat pulldown leg holder that holds your thighs down when seated
This setup works well for lat pulldowns. The only potential issue is that the max resistance of 144.5 lbs may not be enough for stronger lifters. Luckily, you can simply attach a resistance band around the integrated weight stack band pegs to go beyond this limit.
The cable motion is very smooth. It’s just as smooth as it is on other functional trainer exercises.
Adjusting the lat pulldown leg holder is pretty straightforward. It comes with a j-hook; it’s the style of j-hook that’s used on the G15, G12, G10, G9 and G6 for power rack exercises.
The leg holder installs on this j-hook with a pin. The j-hook itself installs on the functional trainer/power rack upright in any of the holes.
Since you’re installing the j-hook in the 1 inch hole spacing area, you’ll have no issue getting it positioned at the right height.
However, you can further adjust the leg holder height if needed, once it’s on the column. There are 5 micro-adjustments to move the leg holder rollers slightly up or down. Insert the pin in whichever of the 5 holes will give you the desired roller pad height.
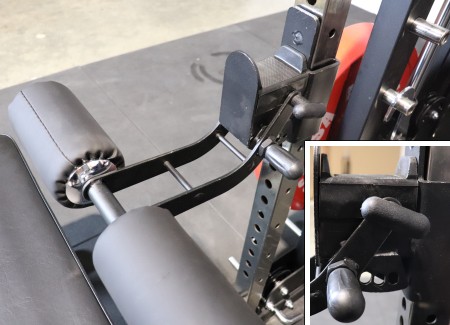
The j-hook can wiggle around a little bit if you move it with your hand. But it’s stable when it’s in use with your legs pushing up on it.
This leg holder design is the same as the one used on the Force USA G15, G12, G10, G9 and G6. Only the G3 has a different mechanism. It uses a fully integrated seat with built-in leg holder roller pads, as shown below:
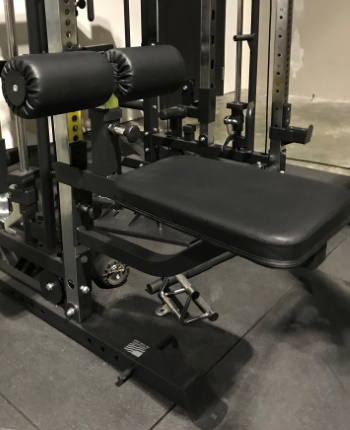
The G3’s seat attachment makes setup easier because you don’t need to use your bench. That convenience factor is nice. However, you do feel the seat sink down a bit each time you pull the weight down. This is why I prefer sitting on a bench; it’s rock solid.
Now, if there was a way to make the G3 lat pulldown seat attachment more solid to prevent the swaying, that would be ideal. Hopefully, Force USA can look into developing an option like that for the G20 in the future.
There’s one big improvement that tall lifters will appreciate about the G20 lat pulldown setup vs G15, G12, G10, G9 and G3 setups. The top pulley height on the G20 is high enough that even taller lifters can fully extend their arms at the top of the rep, even when using a closer grip.
When using the G12 and G9, I’d have to use a medium to wide grip and lean back ever so slightly to ensure I could get a full stretch at the top. If I stayed more upright and used a close grip, my arms would have a slight bend at the top of the rep.
To compare, these are the heights of the pulley (where the cable comes out) at the highest functional trainer setting for all models:
- G20: 81″ (6’9″)
- G15: 72.5″ (6’0.5″)
- G12: 73″ (6’1″)
- G10: 72.5″ (6’0.5″)
- G9: 73″ (6’1″)
- G6: 81″ (6’9″) (same as the G20)
- G3: 76″ (6’4″)
Of course, the overall experience on the G20 functional trainer lat pulldown station is not quite as good as doing lat pulldowns on the optional Lat Row Station Upgrade. Here’s how they differ:
- The Lat Row Station allows you to position yourself directly underneath the cable. This allows for a more vertical pulldown motion. With lat pulldowns on the functional trainer, you’re not as directly underneath the cable; you’re a bit further back. This means there’s a slightly more diagonal angle of pull. The more vertical the angle, the more emphasis on the lats.
- Setup time is quicker on the Lat Row Station. You simply have to flip up the leg holder and set the height. Whereas you have to install the j-hook style lat pulldown leg holder on the functional trainer, slide the pulley to the highest setting and possibly move other attachments out of the way.
Note that both the functional trainer lat pulldown and Lat Row Station Upgrade pulldown have the same max pulley height of 81″ (6’9″) above the floor.
Low Row Station (on Functional Trainer)
Before the November 2022 design update to the G20, the only way to do low rows on the functional trainer was by using one of two makeshift footplate solutions:
- Using the lat pulldown leg holder attachment as the footplate
- Using the vertical leg press attachment as the footplate

Luckily, there’s a better option now!…
…Part of the G20’s design update in November 2022 was to include a steel footplate attachment specifically designed for doing low rows on the functional trainer:
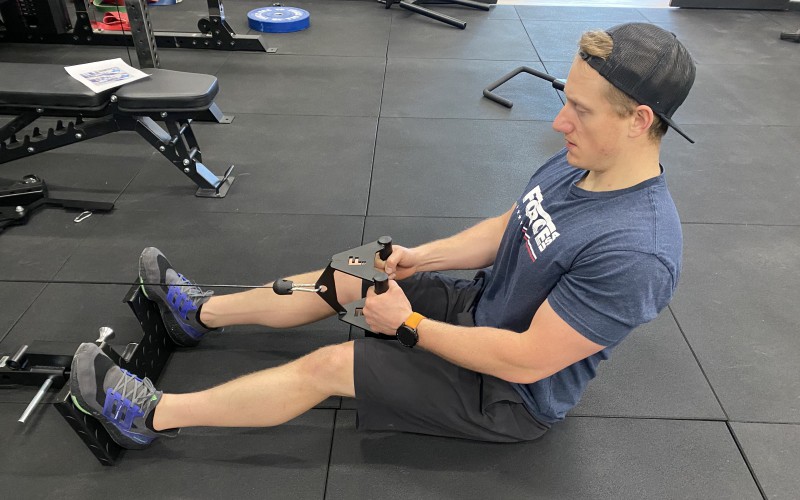
This footplate attachment installs on either the left or right foot of the rack, in front of the upright. It takes just a couple of seconds to install or detach it.
The footplate doesn’t have adjustable angle settings like the ones on the G10 and G15. Rather it is fixed. However, the fixed angle is at a natural and comfortable angle for most people.
There is a cut-out in the middle of the footplate. This ensures the cable doesn’t rub against the top of the footplate during exercise. Plus, it gives you a convenient place to place your cable attachment between sets; to keep it within reach.
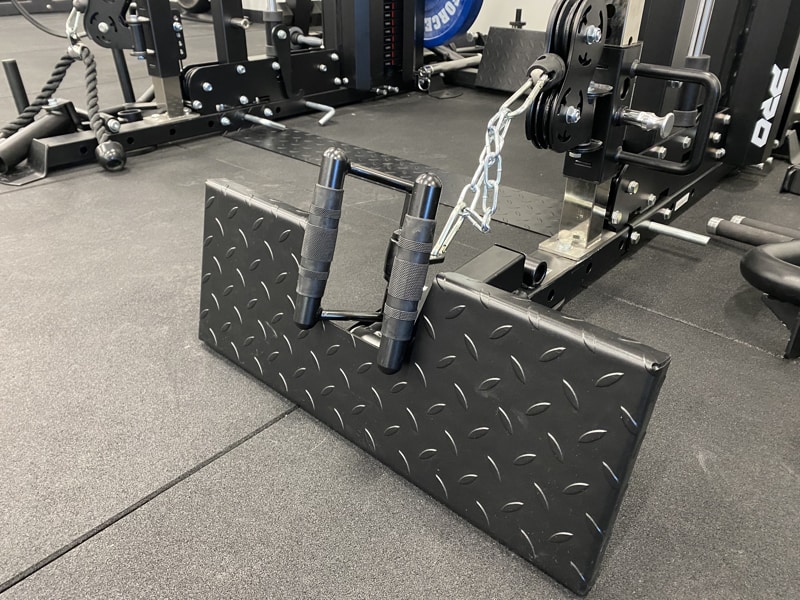
The cable motion is very smooth when doing low rows on the functional trainer. It’s just as smooth as it is with any other cable exercise on the G20 functional trainer.
If you max out the weight stack when doing rows on the functional trainer, remember that you can always add resistance bands to the integrated band pegs on the weight stacks. Alternatively, you can upgrade and get the optional Lat Row Station, which features its own weight stack that uses a heavier 1:1 pulley ratio instead of a 2:1 ratio like on the functional trainer.
Landmine / Core Trainer
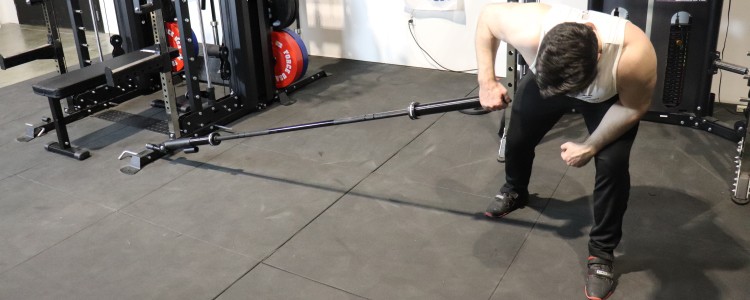
The Force USA G20 comes with a landmine / core trainer. This consists of
- A landmine attachment that installs on the front of the G20 feet
- A multi-grip T-bar handle attachment
You can choose to put the landmine attachment on either the left or right side. It mounts into the pre-designated cylindrical tube that’s welded atop each foot on the unit.
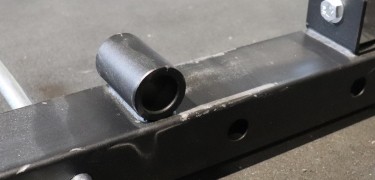
For those unfamiliar, a landmine is a small, simple and space-efficient piece of equipment that gives you a ton of exercise options, with an emphasis on core movements.
The landmine consists of a black powder coated steel sleeve. It’s designed to hold the end of your barbell. You use the other end of the barbell to load weight and to hold during the exercises.
The sleeve is connected to its attachment point with a short rod that rotates around its axis. There is a pivot joint connecting this rod to the actual landmine sleeve.
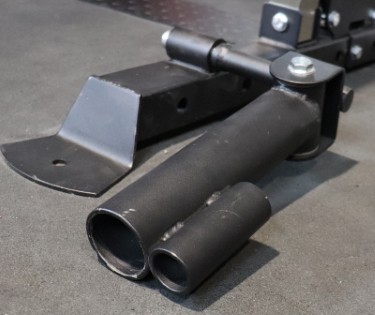
The combination of the rotation and pivot capabilities allows you to:
- Set the direction of the landmine to the front, to the rear, out to the side, or anywhere in between. This lets you set up for landmine exercises wherever you want.
- Move the barbell through multiple planes of motion, rather than being a single fixed plane.
Note that there’s also a smaller 1″ diameter sleeve below the main Olympic-sized sleeve in case you have a standard-sized bar that you wanted to use on this. However, not many people have long standard bars these days, so this is a feature that very few people will ever use.
When not in use, you can flip the landmine sleeve up and back so that it’s out of your way.
There are a great many landmine exercise possibilities. Most will work your shoulders and/or core. You can also do some variations of the Big 3 plus different types of rows. Here’s a list of some popular ones:
- Landmine rotation
- Landmine crunch
- Landmine press
- Landmine floor press
- Landmine half-kneeling press
- Landmine hack squat
- Landmine front squat
- Landmine split squat
- Landmine overhead squat
- Landmine RDL
- Landmine single leg RDL
- Landmine single arm row
The original G20 design did not include a t-bar row handle attachment for use with the landmine.
A multi-grip t-bar handle attachment comes standard with the landmine station.
It gives you access to two types of grips:
- Wide straight grip
- Medium neutral grip
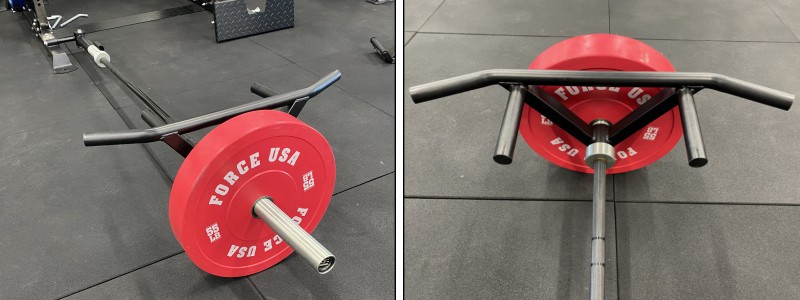
To use this attachment, you first put one end of the barbell into the landmine attachment. Then you slide the t-bar handle over the other end of the barbell. Lastly, you load plates onto the same end of the barbell, which helps keep the t-bar handle in place.
If you like doing landmine rows (i.e. T-bar rows), then you’ll appreciate this handle. It’s a simple design that gives you access to the classic t-bar row variations including:
- Overhand T-bar row
- Neutral grip T-bar row
You can also use it for less common exercises like these:
- Landmine standing shrug
- Landmine bent over shrug
VersaPad Hip Thrust Attachment

Buy the Force USA G20 – Use KING5 for 5% OFF »
UPDATE: The VersaPad is no longer included with the new G20 as of the November 2022 design update. To be clear, it’s not included standard and it’s not available for sale separately. Getting rid of the VersaPad was the only thing I didn’t really like about the design update. I was a fan of this attachment because it allowed you to get creative with different exercises.
I will keep this section in this review for anyone who may be buying the original G20 (from a third-party retailer or on the used equipment market).
The VersaPad is one of my favorite attachments on the Force USA G20. You won’t find this on any of the G-Series models.
It consists of a 6.5″ wide upholstered pad with a steel base. The padding is thick and dense, while still being comfortable.
It attaches between the functional trainer columns. It inserts into the adjustment holes for the functional trainer pulleys, which gives you 19 possible height settings, spaced 3.5″ apart.
In reality, you’ll probably only use the lower height settings since there’s little to no utility for this type of attachment at the top of the rack.
Once installed, it provides you with a strong and stable pad that you can sit on, stand on, lean on, lay on or otherwise use to get into a certain position. This lends itself to utility in a great many exercise variations, most notably bodyweight, dumbbell and barbell movements.
It’s also possible to take advantage of other nearby exercise stations, such as the weight stacks and the Smith machine.
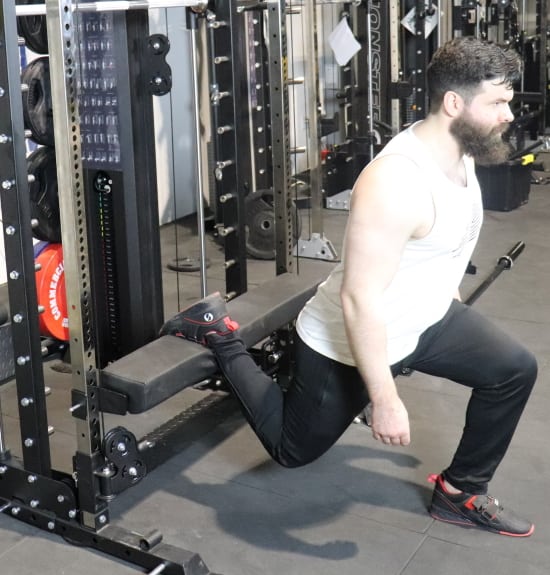
Most of the exercises you can do on the VersaPad are lower body movements, but there are more than a few upper body movements you can do as well. Here are some of the many VersaPad exercise possibilities:
- Hip thrusts
- Single leg hip thrusts
- Heel elevated hip thrusts
- Single leg heel elevated hip thrusts
- Bulgarian split squats
- Triceps dips
- Preacher curls
- Dumbbell pullover
- Incline push ups
- Decline push ups
- Incline planks
- Decline planks
- Leg extensions
- Box squats
- Seat for Smith machine seated calf raises
- Seat for lat pulldown (when doing lat pulldowns in the center of the machine, using both sides of the functional trainer)
NOTE: You can technically also do step ups on the VersaPad, but it’s a bit iffy since you could potentially bang your head on the top of the rack if you’re not careful. Personally, I’d stick to doing step ups on a weight bench.
Hip thrusts are probably the most popular use for the VersaPad attachment. Just note that VersaPad hip thrusts don’t work well with the Smith machine. The Smith bar is too close to the pad. But the VersaPad is excellent for barbell hip thrusts and bodyweight hip thrusts.
I’d like to highlight a few creative yet very useful exercises I came up with when using the VersaPad:
Leg Extensions on the VersaPad
This one requires the optional Lat Row Station Upgrade as well as an ankle strap cable accessory.
- Set the VersaPad high enough that your feet dangle a few inches above the floor.
- Set the rear weight stack to the desired resistance.
- Link 3 chains together and attach them to the low pulley.
- Sit down on the VersaPad and connect the other end of the chains to your ankle strap.
- Perform the leg extension movement.
Smith Machine Seated Calf Raises on the VersaPad
- Set the VersaPad so that you can sit with your feet flat.
- Put the Smith machine at knee height. Load it with the desired weight.
- Position the calf block underneath.
- Sit down and get your thighs under the Smith bar. If needed, add a squat pad or wrap a towel around the bar for comfort.
- Put your feet on the calf block (heels at bottom, toes at top).
- Once in position, lift the Smith bar off the hooks.
- Perform the calf raise movement.
Lat Pulldowns on the VersaPad
- Select the desired weight on each weight stack.
- Set the VersaPad so you can sit on it with your heels on the floor.
- Set the Smith bar on the safeties such that it will hold your thighs down. Add some weight to the bar to keep it from coming up during the exercise.
- If the Smith bar is a bit too high to actually hold your legs down, put the calf block under your heels to lift your legs against the bar.
- For the cable accessory, you can use either stirrups or the long straight bar that attaches to both sides of the functional trainer.
- Once seated, grab the attachment and perform the pulldown movement.
The photo below shows how I hold my legs in place with the Smith machine bar and the calf block:
Other VersaPad Uses
Oh and there’s one more thing that the VersaPad is great for…
…resting between sets!
Calf Block
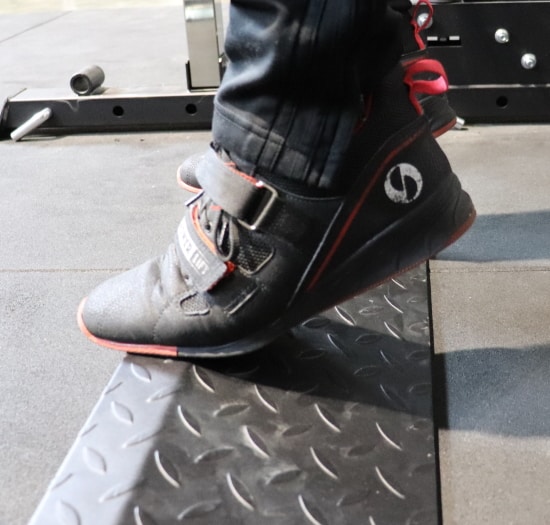
Buy the Force USA G20 – Use KING5 for 5% OFF »
The Force USA G20 comes with a calf block. This is a simple but effective tool for doing both seated and standing calf raises.
It is much more effective and easier to set up than the typical workaround of doing calf raises on weight plates.
The calf block is a long and relatively heavy steel block. It has one angled side that comes to a ledge at the top so you can go up on your toes at the top of a calf raise rep.
The angle is just right for getting the full eccentric range of motion at the bottom of a calf raise rep.
The angled and ledge portions feature a “diamond plate” grip pattern to prevent slipping.
The calf block doesn’t move around on the floor thanks to its heavier weight. This is even the case when you have the calf block on top of the flat steel support strip inside the rack. I thought the metal on metal might cause slipping, but this was not the case.

Note that while this is a relatively heavy piece of equipment, you can still pick it up and move it around easily. It’s not that heavy. Just heavy for its size.
In terms of calf exercises, here’s a list of what you can do with the calf block:
- Smith machine standing calf raise
- Barbell standing calf raise
- Cable standing calf raise
- Smith machine seated calf raise
- Barbell seated calf raise
- Landmine standing calf raise
- Bodyweight standing calf raise
- Bodyweight single leg standing calf raise
There are a couple of other uses of the calf block that are worth mentioning.
The first one is as part of the setup for lat pulldowns in the middle of the functional trainer while sitting on the VersaPad, which I described in the previous section.
The other use is to elevate your heels in heel-elevated squats. This is a great squat variation for demolishing your quads in particular. It’s best done for moderate to high reps as a tool for hypertrophy. I recommend using either a barbell or the Smith machine for heel-elevated squats, though you can also do it with the functional trainer.
Suspension Trainer Ring
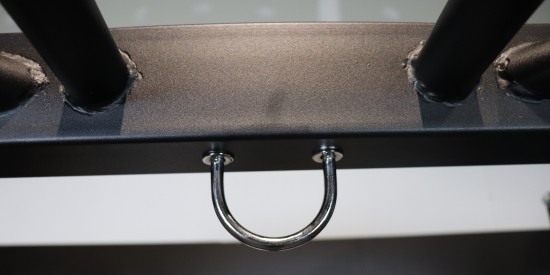
The suspension trainer ring is a convenient way to add a whole new class of exercises to the G20.
This is a super simple feature, but it doesn’t have to be complex to have a big impact. It provides an ideal spot to install a suspension trainer like the TRX, which is one of the most versatile pieces of bodyweight training equipment. Note, however, that a suspension trainer is not included with the G20.
The ring makes installing and removing a suspension trainer super quick and easy. Not only that, but it ensures:
- You’ll be safe: The ring is created with strong hardware. It uses a thick U-bolt that goes through the entire front crossbeam. It is secured with two bolts from the top side. So you have both the heavy duty hardware and the crossbeam supporting the suspension trainer and your bodyweight.
- It won’t slide around: There’s no chance the suspension trainer will slide from side to side since it’s inside the ring. If it were attached to the crossbeam, some sliding could occur while exercising.
Here are several of the many suspension trainer exercises you can do on this station:
- Suspension trainer push up
- Suspension trainer feet-elevated push up
- Suspension trainer chest fly
- Suspension trainer reverse fly
- Suspension trainer inverted row
- Suspension trainer inverted shrug
- Suspension trainer biceps curl
- Suspension trainer triceps extension
- Suspension trainer chest dip (torso leaning forward, feet off the floor)
- Suspension trainer triceps dip (legs in front, feet on the floor)
- Suspension trainer Bulgarian split squat
- Suspension trainer hamstring curl
- Suspension trainer hip thrust
- Suspension trainer plank
- Suspension trainer knee tucks
- Suspension trainer mountain climbers
The utility of the suspension trainer ring goes beyond suspension trainers. It’s also the perfect place to loop a resistance band through. This allows you to do band exercises like these:
- Band face pull
- Band triceps pulldown
- Band high-to-low row
- Band lat pulldown
- Band behind-the-neck pulldown
- Band straight arm pulldown
- Band high-to-low woodchop
- Band-assisted dips and band-assisted pull ups
- To do these, you place your foot in the bottom band loop. This makes you lighter, which makes the exercise easier.
Beyond all of the above exercise possibilities, you can also hang a heavy bag on the suspension trainer. It can handle plenty of weight and whatever you can throw at it in terms of punching power.
Swing Arm

The most physically prominent part of the new G20 design is the addition of the swing arm attachment.
This is 5-foot long steel tube that you can install on either the left or right side of the top of the rack.
It replaces the second globe grip chin up station from the original design.
You can adjust the angle of the swing arm using a pop-pin mechanism. It will lock into any of 6 positions from 0-90 degrees.
The purpose of the swing arm is to give you a place to attach other training equipment away from the main unit. The most obvious use case is to use it to hang a heavy bag for boxing cardio.
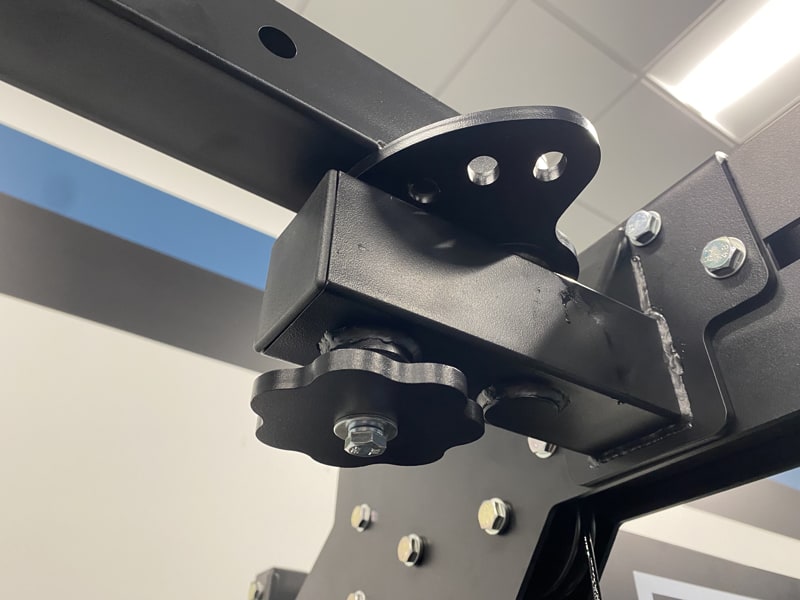
It could also be used to attach an infinity rope attachment. However, it would have to make sure it could fit on the arm since not all such attachments would be able to be mounted.
Other uses could include the following:
- A convenient place to do band work: Wrap around the swing arm and do band face pulls, band triceps extension, band pulldowns, etc.
- Overflow storage area: Drape flexible gym gear (e.g. bands, wraps) over the top of the swing arm or insert band pegs through the holes on the swing arm to hang other attachments.
I’m sure there are plenty of other creative uses for this attachment.
Just note that it has 100 lb weight limit (at least when using it at the far end). So don’t try to do pull ups on it or use it to for suspension trainer exercises.
Accessory Storage
The main accessory storage area on the Force USA G20 is located on the rear crossmember, inside the rack. It consists of 6 storage hooks where you can hang cable accessories, chains, bands, clips, straps and anything else you can put on a hook.
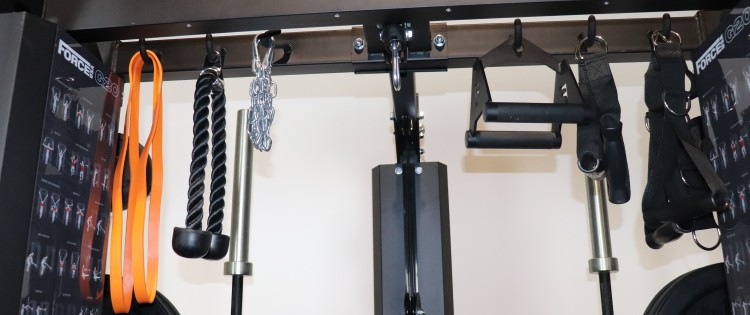
There is a secondary storage area halfway up the rear right frame column. It features 2 more storage hooks for hanging additional accessories.
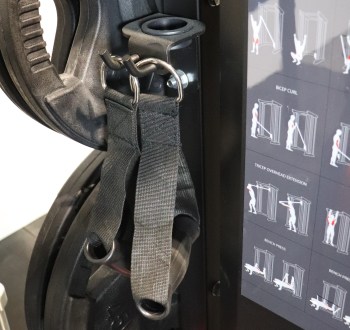
You’ll be able to store all 10 of the included cable accessories plus more items on the 8 storage hooks when you consider that you can fit multiple items per hook.
The final storage feature I’ll mention is the cup holder! No all-in-one gym is complete without one. 😀
You can use this to hold your water bottle. I think it also makes for a convenient place to hold your lifting chalk.
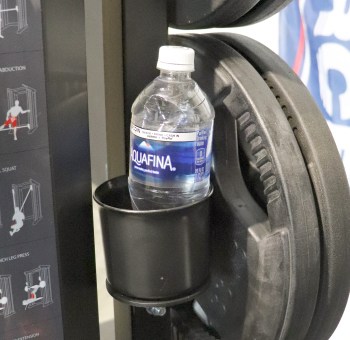
Exercise Chart
The Force USA G20 features dual exercise charts on the protective casing above each functional trainer weight stack.
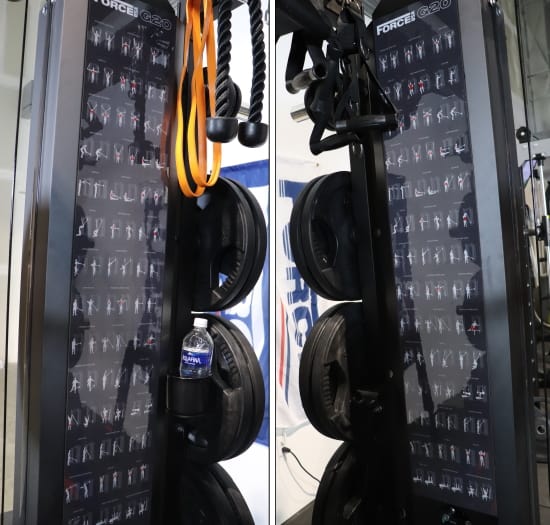
Each chart shows the same 42 exercises, most of which are cable exercises. In comparison, the G15 and G10 each feature 52 exercises. The G12 and G6 each feature 37 exercises. The G9 features 35. The G3 does not have an exercise chart.
My guess is that most people buying this unit won’t “need” this chart, since they’re probably familiar with a ton of cable movements.
However, the exercise chart can still be a handy reference if you’re mixing things up on the fly. It can also be a great tool if you’re using the G20 with others who are novices.
Weight Plate Storage
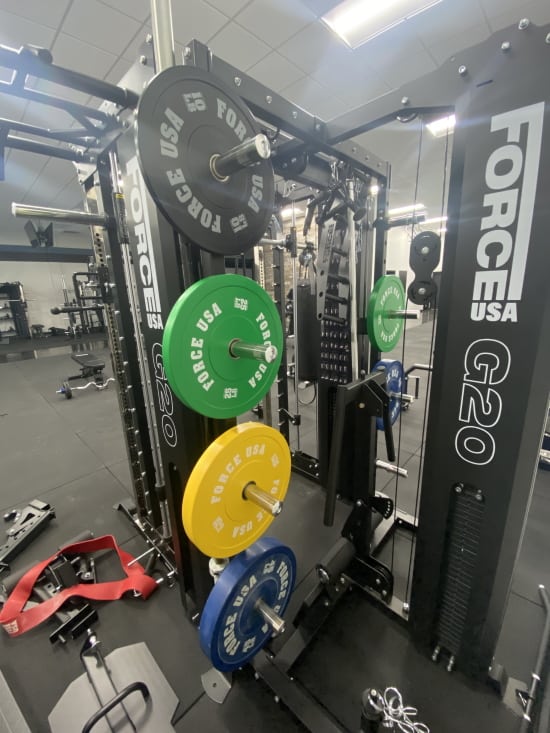
The Force USA G20 features a weight storage area on the back of the base unit. It was upgraded in the November 2022 design update.
The original G20’s weight storage area had a flaw in the design: The weight holder pegs were fixed in place and were spaced such that you could only use all of the pegs if you put larger diameter plates (i.e. 45s) at the lower weight pegs and smaller diameter plates (i.e. 35s, 25s, 10s, etc.) on the upper weight pegs.
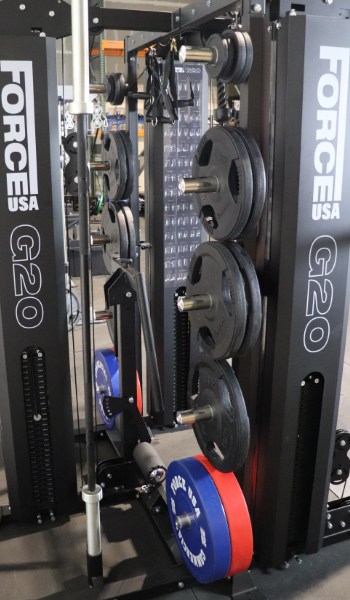
This meant that if you had a bumper plate set on the original G20, you couldn’t use all of the weight pegs since all bumper plates have the same large diameter. It was only possible to put bumper plates on every other weight storage peg, meaning you could only use 3 of the 5 pegs on each side.
This flaw was fixed with the new G20 design. Now, the weight storage pegs can be adjusted to different heights. This allows you to have a custom weight peg layout depending on the type of weights you have and the configuration in which you want to store your plates.
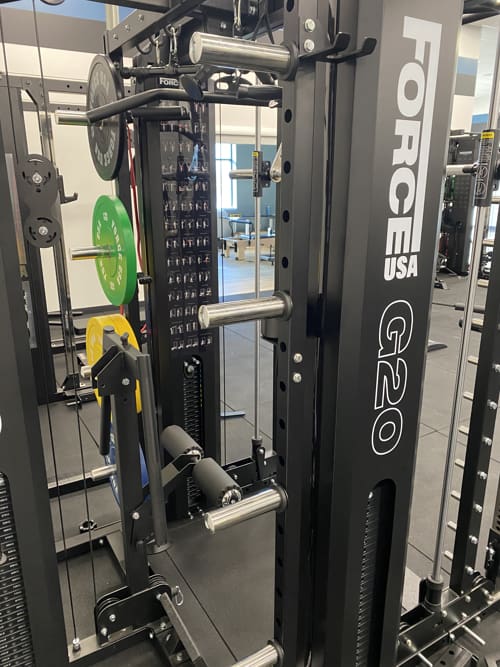
The plate storage area comes with 10 plate holder pegs in total, as was the case on the original design. You can put up to 5 pegs on the left frame column and 5 on the right.
You can use all of the pegs if your weight set includes variable-diameter plates.
If you have a bumper plate set where the plates all have a large diameter, then you can use 4 pegs per side and space them equally apart. This gives you an extra peg per side (2 pegs total) compared to the original G20 design.
Each weight plate holder is 8 inches long.
In terms of the storage peg material, it’s similar to the G9, G10, G12 and G15. It’s a metal casting over plastic, with metal inside. It works and I don’t see any long-term durability issues for most use cases. Still, I think this is an area that could be improved. I’d like to see powder-coated steel storage pegs, which are common on many dedicated power racks.
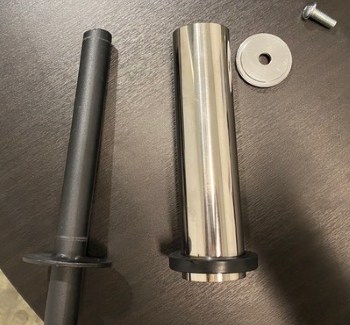
Technically, you can remove the outer sheath on these storage pegs to reveal a 1″ diameter rod that can hold standard plates. Most people don’t have standard plates unless they’re for adjustable dumbbells. So this isn’t something most people would be interested in. But it’s an option.
Barbell Storage
The original G20 design didn’t have any barbell storage on the base unit. However, since the November 2022 design update, the new G20 base unit comes standard with 2 vertical barbell storage hangers; one on each side of the unit, right behind the weight stack panel.

These hook under the barbell sleeve collar and hold the bar from top of the frame.
This gives you a total of 4 barbell storage areas IF you also buy the optional Lat Row Station Upgrade, which comes with 2 barbell storage sleeves.

In terms of comparing the bar storage sleeves vs the bar storage hangers — Both types provide effective storage, but the storage sleeves may cause some light scratching on your barbell sleeves over time…
…If you care about this, I recommend using the storage hangers on the base unit. If you have multiple barbells, then store the cheaper ones in the rear storage sleeves. If you don’t care about minor cosmetic damage, use whichever bar storage option you want.
The G3, G6, G9 and G12 all only have a single barbell storage area with 1 Olympic sleeve and 1 standard sleeve. The G10 and G15 have 2 pairs of each.
The fact that the G20 has 4 total bar storage areas makes sense given that the G20 is designed to handle multiple lifters. If you’ll be using your G20 with at least one other person, chances are you’ll have multiple barbells.
For the barbell storage hangers (on the base unit), you only need an extra ~3/4″ above the height of the max height of the unit. So you’re ceiling height should be at least 91 3/4″ (7’7.75″). Chances are if the G20 itself fits in the room, you’ll have the tiny extra bit of clearnace needed to store a barbell on the hangers as well.
Band Peg Holes
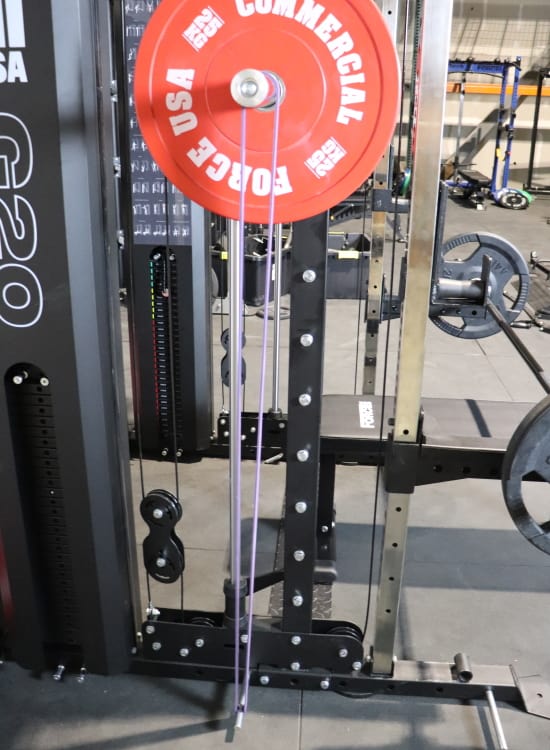
Buy the Force USA G20 – Use KING5 for 5% OFF »
The Force USA G20 includes band peg holes in the base of the rack, on the feet. It comes with 4 band pegs for these holes.
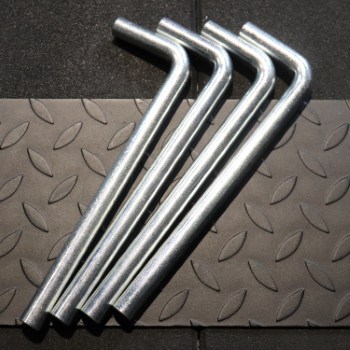
If you’re unfamiliar, band peg holes allow you to insert band pegs into the rack. You can then attach bands from the band pegs to the barbell, Smith bar or even your own body.
This gives you the ability to perform band-resisted exercises like band squats, band deadlifts, band shoulder press, band bench press and band hip thrusts, to name a few. You can even add band resistance to bodyweight movements like pull ups.
The idea is to make the exercise more difficult towards the top of the range of motion, as the band tension increases.
The inclusion of band peg holes in the G20 is a big win. One of my main critiques of the G12 and G9 was that they did not have band peg holes. I’m glad that Force USA included them in the G20’s design. The G3, G6, G10 and G15 also share this useful feature.
There are 7 band peg holes on each foot of the rack, from the very front to just behind the Smith machine track.
There are no band peg holes in the weight stack area like on the G3 and G6. However, there’s no need for that on the G20.
If you want to add band resistance to the G20’s weight stacks, there are built-in band pegs above and below each stack. This is a very smart design feature that adds a lot of convenience.
Bolt-down Capability
You can optionally bolt down the Force USA G20. This is made possible by the inclusion of Dynabolt holes at each end of each of the flat feet on the rack.
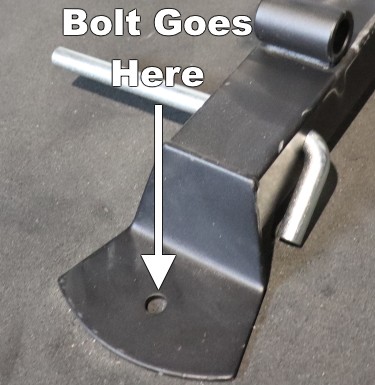
Bolting down is not a requirement by any means, as the G20 base unit, including its two weight stacks, weighs just over 1510 lbs. Add another 584 lbs if you get the Lat Row Station Upgrade as well. Plus, any weight you have stored on the unit. That is way more than enough to keep the unit stable and in place.
Still, if you do a lot of heavy band-resisted work, you may want that extra bit of security and stability provided by bolting down just to make sure it doesn’t budge even a millimeter.
Or maybe you’re using it in a commercial facility and want to keep it bolted down for liability purposes.
Jammer Arms (Optional)
The long-awaited jammer arm attachments are finally here for the G20! They became available when the updated G20 design was released.
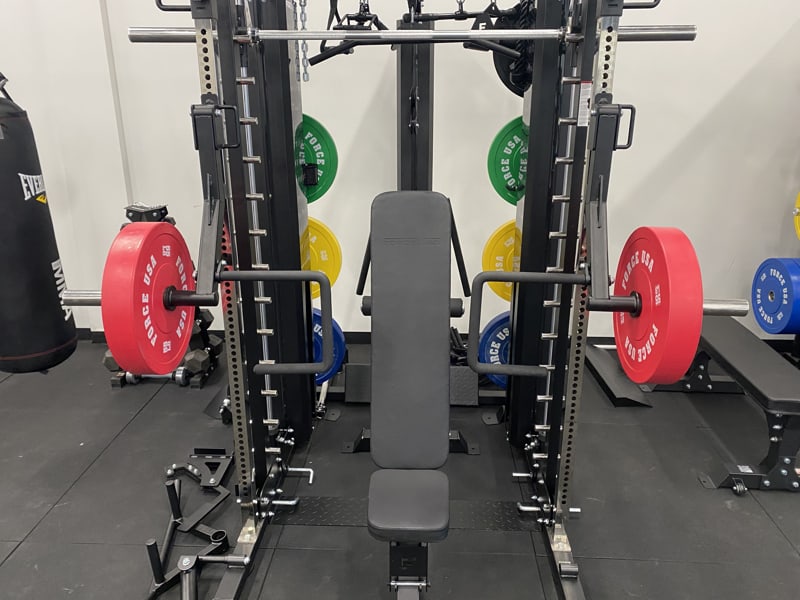
They are available as part of the optional upgrade kit.
In case you don’t know, jammer arms are a popular style of power rack attachment. They are plate-loaded levers on a hinge with handles. They make it possible to imitate lever-style machine movements that you’ve probably done if you’ve ever trained in a commercial gym (e.g. think Hammer Strength machines).
There are so many possible jammer arm exercise variations because:
- You can adjust the height to anywhere on the upright.
- You can set the jammer arm on the spotter arm so that it starts from a straight-out position; or you can let it rest against the upright so that it starts down and back.
One thing that sets these jammer arms apart from most other jammer arms on the market is that they have a slight (~30 degree) bend in the arm. Most jammer arms are just straight.
The benefit of the bend is that it allows for the jammer arm to be easily propped up on the spotter arm, making it possible an exercise with the arms completely horizontal. This is useful when you want to be under the weight rather than behind or in front of it.
Regardless of if you have the jammer arms on the spotter arms or against the uprights, there are built-in rubber stopper pads on the back to prevent damage.
Each jammer arm has a large, grippy, rubber-coated U-shaped handle. This handle shape gives you one pair of neutral grip handles and two pairs of straight grip handles.
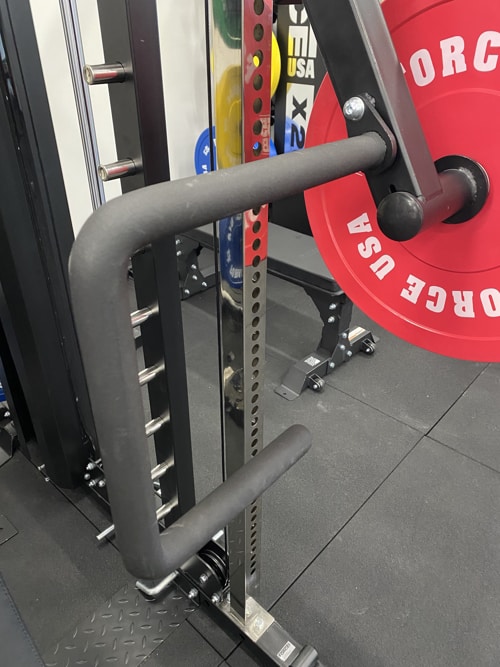
The two pairs of straight grip segments offer you two different leverages to choose from. Use the pair closer to the rack to make the weight feel heavier. Use the ones further away makes to make the resistance lighter.
Unfortunately, you can’t “hack” the unit to connect the cable pulley to the jammer arms like you can on the G10 and G15. This is because it’s not possible to position the cable trolleys below the jammer arms on the G20’s uprights. The cable travels directly in front of the G20’s uprights, which gets in the way of installing the jammer arms above the cable trolley. Whereas, the cable stays out of the way on the G10/G15 because it goes down the sides of the uprights.
However, you can add band resistance to the G20’s jammer arms by attaching a band from the jammer arm sleeve to a band peg on the base of the frame.
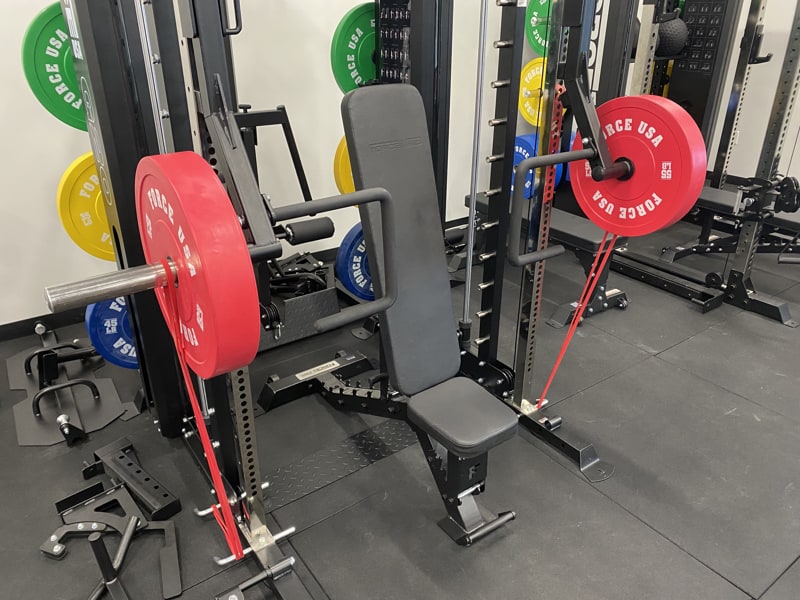
The sleeves on the jammer arms are 12″ long, which gives you plenty of room to load enough weight.
The jammer arms are installed by inserting the threaded pin on the back of the arm through any hole on the upright. Secure it by fastening the included star knob onto the threaded pin.
The only downside of the jammer arms is that they do take a bit of time and effort to install. The real time-suck is when you don’t know exactly which height to install them at, so you end up moving them around a few times before you get the height right.
For this reason, I recommend writing down your preferred installation height for your go-to jammer arm movements. You can even place small stickers next to the holes as reminders. This will make your life easier, I promise.
IMPORTANT: If you have an original G20 (purchased prior to November 18, 2022), the jammer arms will only work on the 1″ hole spacing area in the middle section of the uprights. It cannot be installed in the 2″ spacing area at the top and bottom. This effectively means you’ll only be able to do bench-seated, floor-seated and kneeling jammer arm movements on the original G20. You won’t be able to do jammer arm exercises while standing. There are no compatibility limitations with the other attachments included in the optional upgrade kit (i.e. leg curl/extension and dip bars).
Leg Curl/Extension (Optional)
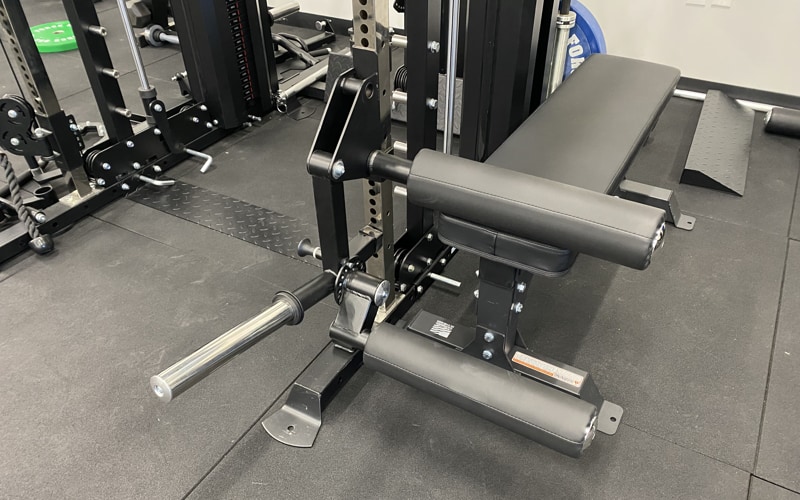
The leg curl/extension attachment was released at the same time that the G20 design was updated in November 2022.
It is available as part of the optional upgrade kit, along with the jammer arms and dip bars. However, it is also available for purchase separately. So if you don’t want the jammer arms and dip bars, you can buy just the leg curl/extension attachment by itself.
Most home gym owners miss out on the ability to do leg extensions and leg curls because that typically requires one or two dedicated pieces of equipment that take up a fair amount of floor space. For most people, it’s not worth giving up the space and money for just a couple of exercises.
That’s why I like this particular attachment. It gives you the ability to do these popular isolation leg exercises without taking up extra space and at a reasonable price.
This style of leg curl/extension attachment is relatively rare in the equipment industry. I’ve only seen ones from Kingbox and BLK BOX (both UK companies) as well as some DIY versions of the same concept. So it’s cool to see Force USA coming out with their own version of a relatively unique concept.
This attachment consists of the following components:
- A frame that attaches to the power rack.
- A lever that attaches to the frame and swings on a hinge
- A weight horn connected to the bottom of the lever that sticks out to the front
- Two high-density foam rollers with sweat-resistant covers. There is a top roller and a bottom roller:
- The top roller is removable and adjustable. You can attach at one of two heights.
- There is a pop-pin adjustment mechanism for adjusting the bottom roller. You can adjust this to modify the height/angle of the roller as needed for your leg length.
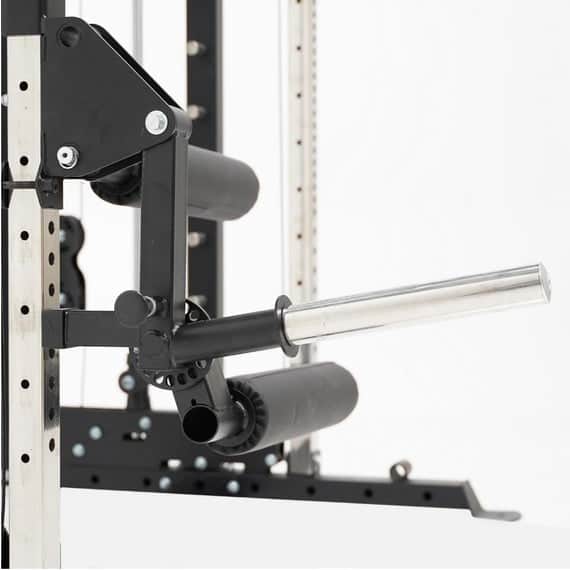
This attachment is installed on one of the power rack uprights at the desired height. It goes on and off similar to how you’d install a j-hook. The frame bracket wraps around the upright from opposite sides for a secure fit. To further enhance security, there’s a removable pin that inserts through the bracket, along the edge of the upright.
There’s a weight horn sticking out on the front of the leg curl/extension attachment. Slide weights onto this to achieve the desired resistance for your exercise. The horn is angled slightly up to keep plates from sliding off.
When attaching it to the rack, you just need to be sure it’s not so low that the plates hit into the foot of the rack — if this becomes an issue, you can simply use smaller diameter plates (e.g. 25s instead of 45s).
To perform leg curls:
- Stand with your quad touching the top roller and the back of your ankle against the bottom roller.
- Then you curl your leg up. This is obviously done one leg at time.
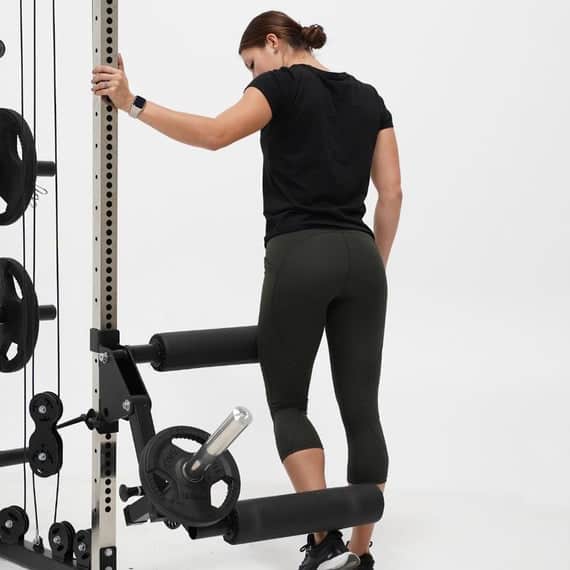
To perform leg extensions:
- You’ll need to sit on a bench, a plyo box or any other type of makeshift seat.
- Position the seat behind the attachment and make sure the seat’s surface is at or slightly below the top roller.
- Sit on the seat, put your knees over the top roller and tuck the front of your ankles behind the lower roller.
- Extend your leg(s) — You can do one leg at a time or both legs simultaneously.
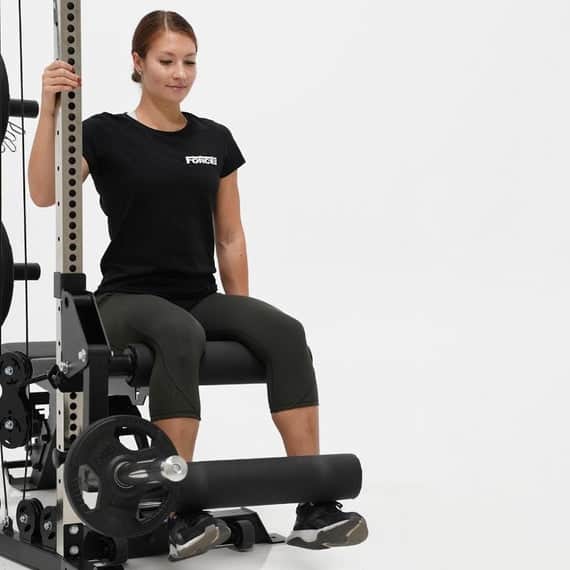
There’s a hidden feature of this attachment: You can use it for hip thrusts too. Here’s how:
- Set up a bench behind the attachment.
- Remove the top roller from the attachment.
- Position your upper back on the bench.
- Position your hips under the bottom roller.
- Thrust your hips!
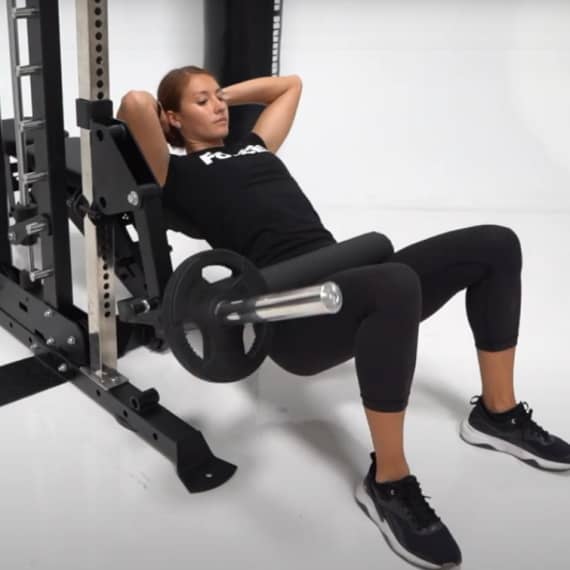
The main limitation when comes to hip thrusts is that you’ll be limited in how much weight you can load on. I know a lot of people who do hip thrusts can do hundreds of pounds, which isn’t that feasible with this attachment. In that case, you’re better off doing plain old barbell hip thrusts. But for relatively lighter hip thrusts, this will certainly do the trick.
Also, some people may find they may not achieve full range of motion at the bottom of the motion. While that’s not ideal, you have to realize that this attachment wasn’t designed specifically for hip thrusts. It’s just a bonus feature. Some people will have a better experience with it than others.
While there are many positives to this attachment, it’s not perfect.
For example, you’ll feel a slight difference in the resistance between your left and right leg on leg extensions. This is because the weight is not centered; it’s on the side. So the resistance will feel a bit different for the leg closer to the weight vs the leg further away from the weight. This will never be an issue for leg curls, which must necessarily be done with a single leg. However, it can be an issue when doing leg extensions with both legs. If you find the imbalance to be too much, then you can simply do single-leg leg extensions.
This is an inevitable compromise for this design. It’s not a major issue, but it’s worth noting.
Dip Bars (Optional)
The third and final attachment that comes in the optional upgrade kit is the pair of dip bars.
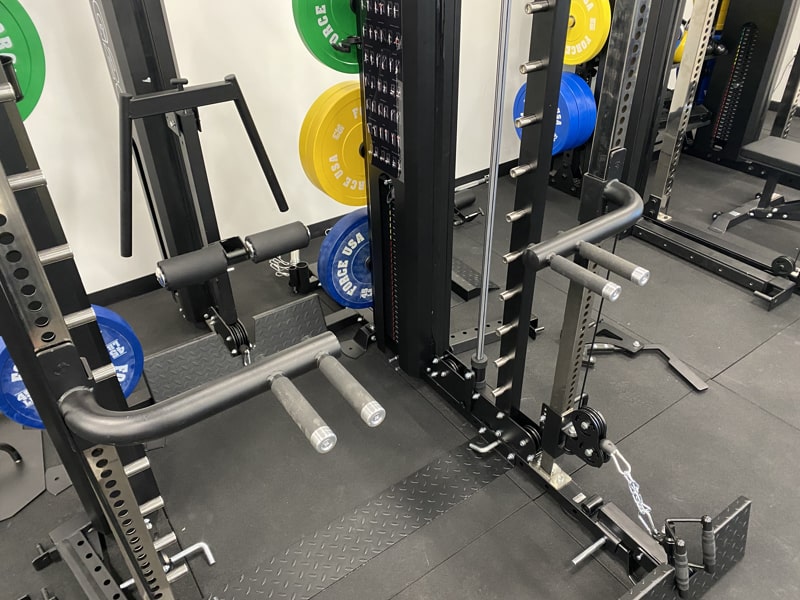
These are the same style of dip bars that come standard on the G6, G9, G10, G12 and G15.
You attach each bar to the power rack uprights at whichever height you want. They allow you do dips in the middle of the unit, which makes for a very stable setup (even more so than a Y-dip style attachment that goes on the left or right upright). Being in the middle of the unit allows gives you the option to face either forward or backward for dips.
These dip bars give you two pairs of grips:
- Narrow Grip: These grips are spaced 20″ apart. This grip width is best if you have a narrower frame and/or want to focus more on your triceps.
- Wide Grip: These grips are spaced 26.5″ apart. This grip width is best if you have a broader frame and/or want to focus more on your chest.
In addition to narrow and wide grip dips, there are a few other exercises you can do with these dip bars:
- Inverted rows
- Scap dips
- Band-assisted dips
- Dip hold knee raises
- Incline push ups
The handles have a rubberized covering, which gives you a nice tacky non-slip grip.
The handle diameters are 30mm (1-3/16″). That’s slightly thicker than a powerlifting barbell. It’s a comfortable diameter for most people. It’s easy to grasp yet not so thin that it’ll dig into your palms.
Missing Features on the Force USA G20
There isn’t much that the Force USA G20 lacks compared to other models. Below, I’ll discuss the main missing feature. I used to have more missing features, but Force USA addressed them when they did their revamp of the G20’s design in November 2022.
No Standard Plate Compatibility (for the Smith Machine)
The Smith machines on all of the other G-Series models have adaptable plate-loaded sleeves that allow them to be compatible with both Olympic (~2″ diameter) and standard plates (1″ diameter). There’s a thicker outer sleeve that can be removed to reveal the thinner sleeve inside.
The Force USA G20 Smith machine bucks this trend. It is only compatible with Olympic plates. There’s no removable portion.
I prefer this, as it makes the sleeve more secure and sturdier. When you have an outer sleeve over an inner sleeve, there’s always a chance of the outer sleeve sliding off when you’re removing plates.
Besides, most people don’t have any standard weight plates. And if they do, they’re probably using them on standard adjustable dumbbell handles and not on the G20.
Attachment Cross-Compatibility with Other Models
I’ve been asked by readers if the G20 roller j-hooks or monolift attachment are compatible with the G3, or if the G3 lat pulldown seat will fit on the G20. People ask these questions because both racks have the same upright dimensions, hole size and hole spacing.
Unfortunately, they are NOT compatible with each other. There are slight differences that make them incompatible. None of the G3 attachments will work with the G20 and vice versa.
There is companitbility with the leg curl/extension attachment between the G20 and the G10/G15. If you’re buying the G10 or G15, just know that you can buy that attachment by itself (instead of buying the entire G20 optional upgrade kit).
Force USA Training App
For G20 users (or any of the G-Series), there’s always the question: “How do I use this to its full potential?” The Force USA Training App addresses that.
I’ve been pleasantly surprised by this companion app for the G-Series all-in-one trainers. A lot of times when non-tech companies come out with apps, they often don’t add much value. And they’re typically white-labeled out-of-the-box software.
But this one was built from scratch. And for the right user, it can add a lot of value to the G20.
Here’s a quick look at what it offers:
- Goal-Specific Workout Plans: There’s a good mix of workout plans available, catering to different fitness goals and levels. So, most users will find something that fits their needs. More routines are always being added.
- How-to Exercise Videos: The app includes a ton of exercise tutorial videos of most of the movements you can do on an all-in-one trainer. If you’re unfamiliar It’s good to know exactly how to do an exercise before diving in.
- Track Your Gains: The app tracks your progress over time, keeping logs of every set in every workout you complete. The “Program Pyramid” gives you a visual snapshot of how well you’re sticking to your routine. Also, you can see your best numbers for all your main lifts, which is good for reference and motivation.
- Intuitive User Interface: The app’s design is clean and easy to navigate. This means you spend less time figuring things out and more time working out. When doing workouts, you flow seamlessly from set to rest period and from exercise to exercise. All with a simple button tap. You can quickly modify weight and reps if and as needed.
- Rest Timer: The built-in rest timer is an excellent feature. It helps ensure you’re not resting too long or too short between sets. Moreover, it keeps you from getting distracted and wasting time in the gym.
One thing to note, though: you can’t design a completely custom workout. So if you’ve got a specific plan you’re following, the app might not be ideal for you.
While I did try the app to understand its features, it didn’t fit the bill for me simply because I have a custom routine. Plus, I’ve been logging my workouts into the same Google Sheets spreadsheet for years, and that’s a habit I don’t see changing any time soon.
But for many, especially those with a G20 or other G-Series machine, this app could be a great tool to make the most out of your all-in-one trainer. Even if you don’t own a G-Series unit, you can still use this app as long as you have access to similar exercise stations.
Shipping
US Shipping
ForceUSA.com ships the G20 to the 48 contiguous United States only. There is no other US retailer.
The G20 is shipped via LTL freight. This brings down the cost of shipping significantly compared to shipping via traditional parcel shipping (i.e. UPS or FedEx). It also reduces the likelihood of damage. Frankly, the shipment is so large and heavy that traditional shipping probably isn’t even possible.
The base unit comes on a single pallet. There are 4 large wooden crates on the pallet. One crate is very large and contains the G20 frame, all accessories and exercise stations. The other 2 crates are smaller and contain the functional trainer weight stacks.
The total shipping weight of the equipment in the 4 crates for the base unit is 1510 lbs:
- Crate #1 = 450 lbs (frame, components, etc.)
- Crate #2 = 480 lbs (frame, components, etc.)
- Crate #3 = 290 lbs (weight stack)
- Crate #4 = 290 lbs (weight stack)
If you buy the optional Lat Row Station Upgrade, that will come on a second pallet with 2 large wooden crates. The larger crate will contain the frame, dip station, low row plate and related components. The second crate will contain the weight stack.
The total shipping weight of all equipment in the 2 crates for the Lat Row Station Upgrade is 584 lbs (main box = 294 lbs; weight stack box = 290 lbs).
If you buy the optional upgrade kit (jammer arms, dip bars, leg curl/extension), that will come in it’s own crate that weights 100 lbs. If you buy it with the G20 base unit, then it will be stacked on the same pallet as the base unit crates. If you buy the G20 optional upgrade kit by itself (i.e. if you already have the G20), then it will ship via parcel instead of via freight.
The G20’s total cost of shipping is $349. This is the case whether you buy just the base unit or the base unit, optional upgrade kit and Lat Row Station at the same time. Considering the size and weight of everything, this is a very good rate.
In terms of logistics for the shipment, the freight company will call you ahead of time to schedule the drop-off date and estimated time. You will have to be home for the delivery, as you will need to sign for it. Be sure to inspect the delivery for any obvious damage and incorrect quantity before signing.
It will be a curbside delivery, so be prepared to bring it into your home after the drop-off. The shipping guys won’t be able to bring it inside for you.
Buy the Force USA G20 – Use KING5 for 5% OFF »
International Shipping
Shipping to Australia
While my review is targeted toward the US market who buys from ForceUSA.com, I realize the Force USA G20 is also sold in other countries, including Australia. In fact, the Force USA brand is quite big in the Australian market.
Knowing this and having received questions about the Force USA G-Series from many Australian readers, I reached out to the largest Australian retailer of Force USA products — Gym and Fitness.
I was able to negotiate with Gym and Fitness to get the same 5% off discount code that I have for US customers on ForceUSA.com. So now, all Australian readers can also get 5% off their order when they use code KING5 on GymAndFitness.com.au.
In terms of shipping costs when ordering through Gym and Fitness, there are a few things to know:
- Shipping costs vary depending on which region of Australia you’re shipping to. To give you a general idea, the average shipping costs for all G-Series units (not just the G20) range from approx. $130 to $480, with an average of ~$260 across all of the country. The regions, from lowest average shipping cost to highest are as follows: QLD, ACT, NSW, SA, VIC, NT, TAS.
- PRO TIP: Customers who sign up for the Gym and Fitness loyalty program qualify for FREE shipping. Note that this offer excludes the Northern Territory, Western Australia and Tasmania.
- Before you checkout, you may also want to consider picking up some VersaFit mats if you don’t already have protective flooring in your gym. These are good quality, thick rubber mats and you’ll save a lot on shipping if you include them in your G20 order.
Shipping to Canada
If you live in Canada, you’re in luck. Force USA recently created ForceUSA.ca to give the Canadian market access to the G-Series lineup and other Force USA products.
My KING5 coupon code is also valid on the Canadian site.
Shipping to the Middle East
For any of my readers living in the Gulf region, I recommend going through Garner Fitness Supplies (Garner.ae) or Alqudra Sports Equipment (Alqudra.sa) to get your G20. Both sites carry all of the other models as well. Also, both sites will accept my KING5 coupon code for 5% off.
Both of these retailers are owned by the same parent company. Garner is based in the UAE/Dubai and ships to the UAE, Kuwait, Bahrain, Oman, Qatar and Saudi Arabia (if needed). Alqudra is based in Saudi Arabia and ships to Saudi Arabia, Kuwait, Bahrain, Oman and the UAE (if needed).
Who Is the Force USA G20 Best for?
The Force USA G20 is not for everyone. But there are a few different types of people and situations where the G20 is one of, if not, the best choice for an all-in-one gym. I’ll discuss who the Force USA G20 is best for, below:
First and foremost, the G20 is the best all-in-one gym for serious bodybuilders and strength trainees. Here’s why:
- It’s the beefiest model of all the G-Series units, so even very strong lifters won’t have to worry about taming down their training intensity.
- Like the G15, G12 and G6, the G20 features two selectorized weight stacks for the functional trainer rather than a plate-loaded mechanism. Weight stacks are ideal for quick weight changes so you can do drop sets and supersets, which are a staple of bodybuilding-style training.
- The G20 gives you the ability to add a third weight stack to the back of the unit with the Lat Row Station Upgrade. This weight stack uses a 1:1 ratio instead of a 2:1 ratio like on the functional trainer; meaning you can use up to a whopping 289 lbs of resistance for heavy movements like rows an pulldowns. This is significantly heavier than you can go on any other selectorized G-Series unit. You’ll never need more weight than this unless you’re a truly elite lifter.
- NOTE: If you can’t afford or don’t want the optional Lat Row Station Upgrade, you can access heavier resistance on the functional trainer by attaching bands to the integrated weight stack band pegs. These let you go beyond the max resistance of each stack. No other G-Series unit has these built-in band pegs.
- You can attach band resistance to every part of the G20, including the barbell, Smith machine and the weight stacks. This is a great tool for strength training as it allows you to use accommodating resistance, where the resistance increases at the top of the movement.
- The G20 features roller j-hooks and a monolift, which none of the other G-Series units have. These are super useful pieces of equipment for strength training. The roller j-hooks make it effortless to center a super heavy barbell in the middle of the j-hooks. The monolift attachment lets you do heavy squats without having to walk out, and unrack on heavy bench press sets without a spotter.
- NOTE: While the G20 may be great for general strength trainees, it may not be the best choice for competitive powerlifters. Those lifters are more likely to want a full-sized power rack, rather than an all-in-one gym, which has a half rack. Though, if you are a competitive powerlifter who knows you want an all-in-one gym, then the G20 is the best choice thanks to its uniform 1″ hole spacing and heavy weight stacks. The next best choice is the G15. The G15 also has 1″ hole spacing, but it lacks a Lat Row Station Upgrade, so you can’t get a heavy 1:1 ratio for rows and pulldowns. Plus, the G15 is notably shorter.
The Force USA G20 is also the best all-in-one gym for home gym owners who want the most premium quality and feature-rich model regardless of price. Previously, this was the G12, but now the G20 has taken the throne. Here’s why the G20 is the best choice for the high-end all-in-one gym customer:
- It has has a robust frame with 11-gauge uprights and other parts of the frame that are 10-gauge or thicker. Only the G10 and G15 also have 11-gauge steel uprights. All other models use thinner 12-gauge uprights.
- It features roller j-hooks, which is a nice little premium feature to have. If you’ve ever tried to center a heavy barbell on non-roller j-hooks, you know how much of a pain it is. These j-hooks make it a piece of cake. You’ll save all your energy for the actual exercise.
- The functional trainer station has 2 x 289 lb selectorized weight stacks. The max max resistance is 144.5 lbs with the 2:1 ratio, which is plenty for most people and most exercises. But if you want to go heavier, it’s simple to do so by adding bands using the built-in band pegs on each stack. Even better, you can opt for the Lat Row Station Upgrade, which I’ll touch on in the next bullet point.
- You have the option to buy the Lat Row Station Upgrade for an even more premium all-in-one gym experience. This option gives you access to a dedicated lat pulldown and low row station. This station not only gives you the ability to do lat pulldowns and low rows more effectively than on the functional trainer, but it also reduces the setup time and effort. Importantly, this station gives you a third 289 lb weight stack, but with a 1:1 ratio (instead of 2:1) to give you access to much heavier resistance than the weight stacks on the functional trainer. All in all, it makes your workouts more seamless and focused. Oh, and it has a nice fold-away dip station on it, too!
The Force USA G20 is one of the best all-in-one gyms for personal training studios or physical therapy practices. Here’s why:
- The G20 is designed to withstand certain commercial applications, which you’ll want when using it for in a clinic or studio. Moreover, it’s built to withstand the wear that comes from training several sessions per day with multiple clients. It’s notably more robust than the other G-Series units.
- It features selectorized weight stacks, which are almost a must-have feature for personal training or physical therapy. They allow you to make rapid weight changes compared to plate-loaded options. This saves you valuable time during each client’s session. It also means you don’t waste your energy throughout the day by constantly loading and unloading weight plates for cable exercises.
- If you train athletes, even the strongest among them won’t run into the issue of maxing out with the 289 lb 1:1 weight stack on the optional Lat Row Station Upgrade. It’s not possible to use that much resistance on any of the other selectorized G-Series machines.
- NOTE: The G20 does not have a counterbalanced Smith machine. That is, the Smith bar starts at 45 lbs instead of 0 lbs. This may or may not be important depending on your clientele and your training style. If you need a counterbalanced Smith machine, then the G15 or G12 are your best bets (assuming you also want selectorized cable systems).
The Force USA G20 is an excellent all-in-one gym for corporate/office gyms or hotel gyms. These places may overlook the G20 due to its price compared to other models since they see this purchase as just a basic amenity. However, this is the all-in-one model to buy if you’re looking to give your office employees or hotel guests the best experience. Here’s why:
- The rooms that are dedicated to a fitness center in a typical hotel or a small to medium sized office complex are usually on the smaller side. The G20 provides the greatest amount of exercise versatility in such spaces compared to other all-in-one gyms.
- It comes with a commercial warranty, which you’ll want since you’ll have it as part of your business. You’ll also want the greater durability that comes with a robust commercial unit like the G20 since you’ll likely have multiple people using it daily. And not all of them will be as gentle on it as you may like.
- It has selectorized weight stacks instead of plate-loaded pulleys. This means you don’t need to invest as much in weight plates. Having fewer weight plates means less clean up time for your staff, since people have a tendency to leave the weight on the machine or scattered across the floor.
- Most office and hotel gyms aren’t busy, but you may occasionally have 2 or 3 people training at once. With the G20, It’s more practical for multiple people to workout on it at the same time compared to the other models. It has a walkthrough design. This makes it easy to get around without interfering with other exercise stations. Similarly, it features multiple pull up stations. Lastly, all the weight stacks can be used independently and simultaneously.
- It’s one of the only G-Series units that can be bolted to the floor. The G6 and G3 can also be bolted down, but they’re not as heavy-duty and thus aren’t ideal choices for commercial settings. While bolting the G20 to the floor isn’t necessary in a practical sense, it may be something you want to do from a liability standpoint if you’re using the G20 in a business setting.
- NOTE: If you’re looking for an all-in-one gym for an office gym or hotel gym, but can’t justify the price for your organization, then I’d recommend the G15 or G12 as your next best options. You lose out on some nice features, but you still get selectorized weight stacks, which I see as a must-have for this scenario.
It’s perfect for gyms in fire departments and police departments. It could also work for smaller military bases, assuming the logistics to get it there are in place. Here’s why the G20 works for these settings:
- If these places even have a space for a gym, it’s likely a small space. Yet, you still need a lot of exercise variety to meet the needs of the fit individuals that work in these physically demanding professions.
- You’ll have many stronger lifters using the G20 every day. So you’re going to want a beefier all-in-one gym that can take everything that’s thrown at it. The lifetime commercial warranty is reassuring in this scenario.
- Cops, firefighters and soldiers are among the fittest of demographics out there. The G20 is built for stronger trainees like this, which is apparent with the super heavy 289 lb weight stack with a 1:1 ratio on the optional Lat Row Station Upgrade.
- In these types of training facilities, you may have two or three people training at the same time. This is not a problem on the G20 for most exercises, especially if you get the Lat Row Station Upgrade. This upgrade adds a third weight stack in the back with a low and high pulley and a dip station.
The Force USA G20 could make a great centerpiece in any small rec center or fitness center. Here’s why:
- These smaller facilities likely only have a small place for resistance training equipment. The other square footage is probably taken up by cardio equipment, a pool area, and maybe a basketball court or other amenities. The G20 gives you more exercise options than any of the other all-in-one gym models, especially if you opt to get the Lat Row Station Upgrade as well.
- You obviously don’t want a scenario where there’s a bunch of people vying to use the G20 at the same time. That’s why it’s perfect for these types of low-traffic facilities in smaller communities. It’s possible to have two or three people training on the G20 simultaneously or with limited interruption when switching stations or taking turns.
The Force USA G20 is a smart choice for smaller boxing/MMA gyms. Here’s why:
- Many times, these types of gyms are focused mostly on ring/mat-work. However, they also have a small area dedicated to strength training. The G20 gives you the most exercise variety out of all of the G-Series models.
- As you can imagine, boxers and MMA guys are already stronger than the average person. The max resistance of 144.5 lbs on the 2:1 functional trainer weight stacks will suffice for most of them. But for the heavyweight guys, they can add band resistance OR use the optional Lat Row Station Upgrade, which sports a 289 lb 1:1 ratio in the back of the unit. In either case, no one will complain about maxing out on cable work.
- Most people spend most if not all of their time in these gyms rolling, sparring, doing bag work or conditioning drills. Accordingly, you’ll probably see at most 2 or 3 people doing resistance training at once. The G20 can pretty easily handle that number of lifters, especially if the Lat Row Station Upgrade is included.
Who Shouldn’t Buy the Force USA G20
First and foremost, you shouldn’t buy the Force USA G20 if you can’t afford it. It is after all the most expensive of the G-Series units. Save up first if you want this unit.
There are also financing options available on the product page. But still, make sure you can afford the expense even if you finance it.
It’s also not the best choice for you if any of the other G-Series models have all the features you need or want. For example, maybe you’re fine with a plate-loaded functional trainer system instead of a weight stack system. That opens up the G10, G9 and G3 as possible options, assuming they have all the other features you need.
The point is to get the model that checks all the boxes for you. Don’t get the G20 just because it has all the bells and whistles if one of the other models has everything you want.
Finally, you shouldn’t buy the G20, or any of the G-Series models for that matter, if you don’t actually want an all-in-one gym for your space. That said, I assume most people on this page are already in the all-in-one gym market.
Overall Rating
Force USA G20 All-In-One Trainer
The Force USA G20 is the best all-in-one trainer for lifters who are serious about strength and never want to worry about maxing out the weight stacks. It's by far the beefiest and feature-rich all-in-one built by Force USA.
Product Brand: Force USA
Product In-Stock: InStock
4.9
Buy the Force USA G20 – Use KING5 for 5% OFF »
Force USA G20 vs G3 vs G6 vs G9 vs G10 vs G12 vs G15
Each model in the Force USA all-in-one gym product line has its own advantages and disadvantages. Each unit’s unique set of features appeals to different lifters and use cases.
Knowing this, it can be a challenge to pick the best model for you.
If after reading my Force USA G20 review, you still don’t know if it’s the best model for you, then I strongly recommend you check out my Force USA G3, G6, G9, G10, G12, G15 & G20 review and buying guide.
It’s a great resource for comparing all of the G-Series models across all the important features and specs.
You can also look at the product pages for all of the G-Series models on Force USA’s website by clicking below:
Check Current Prices – Force USA G3, G6, G9, G10, G12, G15 & G20 »
And remember — You can get 5% off by using my Force USA discount code KING5 at checkout. It works for whichever model you get and it applies to your entire order.
P.S. To my Australian and Canadian readers — Don’t forget that you can also get 5% off your order with code KING5 on GymAndFitness.com.au and ForceUSA.ca.

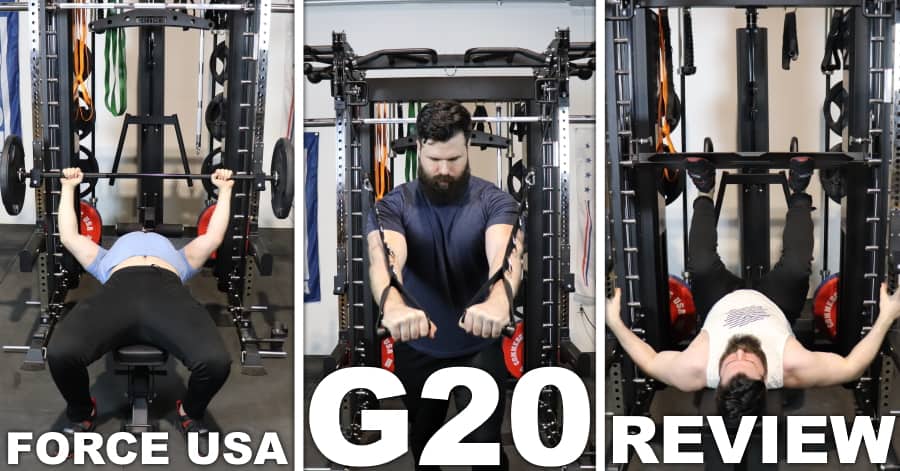
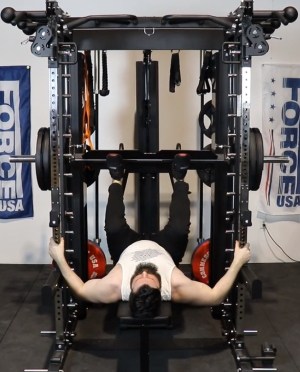


Thank you Alex, appreciate the indepth review on the G20. I’ll be ordering one in August when I move to Colorado. Will make sure to apply your code when I do so 🙂
I’m happy you found the G20 review so useful, Carlos. Good luck with your move!
Thanks a lot for your elaborate review! It really helps.
I’m considering the G12 or the G20, both have some pro’s and cons in respect to each other. The versapad is a plus for me for training hip thrusts (and sitting calves).
Do you know if you can mount the versapad to the spotter arms also? It would be a nice support while doing cable chest presses of cable flies.
Thanks Simon, glad you’ve found it useful.
No, you cannot attach the versa pad to the spotters. The spacing is specifically for the uprights and has a pin that goes in the back; not the side.
I greatly appreciate the detailed report on the ForceUSA G20 home gym. I placed my order last week and now patiently waiting for it to ship. Sounds like it will be a few weeks until I even see any updates.
I have a question regarding the weight stacks (not many photos of it available). I am excited for the 289 pound 1:1 ratio weight stack compared to my previous 2:1 ratio setup.
This 1:1 ratio in 10-pound increments does worry me for my female clients. 10 pounds is big increment for effective progression.
My question, do you have any idea of how to add 2.5 or 5 pound increments? I have seen weight stack pins, however with the weight stacks going up inside the covers, I do not think this will work.
Any insight or advice would be greatly appreciated.
Hope to hear from you soon
Brent
Great question Brent — I love the 1:1 ratio as well, but I also know a lot of people get concerned with the 10 lb increments, especially for more novice/weaker lifters.
The best solution for achieving smaller incremental progression between the 10 lb weight stack settings is by using PlateMate magnetic add-on weights…
…I recommend either the single 5 lb PlateMate add-on brick or the pair of 2.5 lb PlateMate add-on donuts — OR both; if you get both, then you can achieve 2.5 lb, 5 lb or 7.5 lb increments.
There’s about a 2″ inch gap between the side of the weight stack and the weight stack guard panel. Both of the PlateMate models I mentioned are thinner than 2″ so you’ll be able to fit them on the stack without them getting knocked off by the panel when the weight stack goes up during the exercise.
You can’t use the typical add-on weights that you’d put on top of the stack (i.e. this style), since there’s not enough room between the top of the weight stack and the top of the opening of the panel. That is, unless you remove the weight stack panel, which is possible, but probably not something you’d want to do unless you had to.
The other solution for incremental progress would be to attach light resistance bands to the built-in weight stack band pegs, and just modify the tension as needed.
Again, the PlateMate option is the cleanest solution.
Hope that helps — Enjoy your G20!
Thanks for the in-depth review Alex. I just have two practicality questions about the G20 with optional lat attachment:
1) Can you still hang attachments from the rear hooks? Or will they get in the way of the bar when doing a lat pull down?
2) I’ve seen that Force USA have released a TV mount compatible with the G20 – any idea where this attaches and if having the lat station addon means not being able to install the tv mount?
Great questions, Raymond.
Hey Alex. One of the best reviews ever and helped me buy a G20. I got a deal on black Friday sales do didn’t buy here.. Sorry.
Anyway can you tell me why the lat pull down seat won’t fit the G20 only the G3 and others. Surely the pin diameter and distance apart are the same on all models. I get they want me to buy the lat station but that would block my mirror.
Great review.. Micky
Glad you found my G20 review so useful! I’m glad you got a great deal, regardless of where you bought it!
That’s a really good question. I wish I thought to confirm that to see exactly why it doesn’t fit when I had both units at my disposal.
You’re right that it seems it would work, but they list it as incompatible. It’s possible the upright hole size and/or spacing is slightly different between the 2 units.
I guess you could try to buy one to test it out on your own to see if it somehow does work, and return it if it doesn’t. Though that would end up costing you time and money if it doesn’t work out since you’d have to pay for the return shipping out of your pocket. Besides, as I mention in my G3 review, the G3 seat isn’t perfect, as you’ll notice a bit of swaying or a slight sinking as you pull the weight down during lat pulldowns…
…I’m sure you already know, but when you sit on a bench and use the included G20 leg holder attachment to do lat pulldowns on the functional trainer, there’s no movement at all underneath you.
Hello Alex,
Thank you for such a detailed review, this was very helpful. I have a question. Can you use the dual cables unit as assisted pull machine? Here is a link to a video demonstrating what I mean:https://www.youtube.com/watch?v=_MjzWCNYEV8
Yes, you can do that. You would use the long straight bar attachment.
But let me ask, how tall are you?…
…I ask because the only issue that I could see would be if you were on the taller side, in which case the long straight bar would touch the floor before you get a full lat stretch at the bottom of the range of motion. For example, in this video — https://www.youtube.com/watch?v=AoYWwBhxCUs — you can see that my feet more or less can reach the floor at the bottom of the range of motion if I extend them straight. (For your reference, I’m 5’11 with a 6’4″ish wingspan which is a long reach)
Of course, in that situation, this could be remedied by bending your knees while standing on the long straight, to avoid bottoming out.
This is a cool assisted dip variation, which I’ve never seen before — so thanks for sharing it. I usually recommend just using a resistance band for assisted dips (you can hang it from the suspension trainer ring, or you can string the band across the spotter arms). But I can see the appeal of your variation.
Hi Alex,
Can you tell me where I can buy G20 from? Looks like is sold out.
Your review is the best I found. I want to thank you for sharing.
Thanks Arek, happy to hear you found the review helpful. I just spoke to my contact at Force USA and he said they have a big shipment en route and his estimate is it’ll be at their warehouse in 2 weeks. He said he couldn’t guarantee that timeline since there is always the possibility of a supply chain hiccup. But that’s a good ballpark guess.
In the meantime, I’d recommend submitting your email on the G20 product page to get notified when it’s back in stock.
Thanks Alex, this is an awesome review.
I love this machine but also wish it is a counterbalanced smith, you have mentioned a workaround, does it help to counter the 45lbs bar weight?
Hey Simon, I think the “workaround” of mine that you’re referring to is actually for the 1:1 selectorized weight stack system (a way to make smaller increments between weight stack settings).
However, I didn’t write about a workaround for making the NON-counterbalanced Smith machine on the G20 less heavy. But thinking of it now, you could attach bands from each end of the bar to the top of the frame. This would make it feel lighter, especially at the start of the movement (it would get heavier as you get toward the top of the repetition since the slack gets taken out of the band). You’d have to play around with the type of band and the tautness of the band to get the tension right for your setup. It’s not a perfect solution, but it’ll help somewhat.
Hey mate.
Is there any chance you could do a review video of the rack mount leg ext/curl that force have released?
Thanks
Hi, very good review. In the original G20, you mentioned we can use some magnet weights to get smaller increments in the weights as it is 1:1 and the weight increments are too high for some exercises. Where can I get them please?
Hi Neil, they are called PlateMate magnetic weights. You can get them on Amazon here and here.
However, I see from your email address, you may be based out of Australia and I’m not sure if they’re available in Australia. You can try contacting the Platemate company directly here.
Thank you Alex.
Hi Alex,
I am seriously considering either the G15 or G20 now – after reading your G6, G12, G15 and G20 reviews multiple times!
I like that the G15 has 2:1 and 4:1 cable ratio and I will be able to further micro-load it by using 5lb addon weights (which is accessible from the back of the machine where the weight stack is open) and GymPin to increase the weight past its limit. However, the machine is short hence the smith bar max rackable height is shorter than me, giving me worry that I may accidentally knock my head from time to time.
The G20 fits all great, but the 2:1 cable and 1:1 (with Lat Tower) does not seem to be able to microload as the weight stack is enclosed. There isn’t any display unit available to see in my country for the G20 so I cannot tell if the 5lb addon weight or GymPin will be able to fit into the weight stack. Are you able to confirm if this can be done?
Thank you. I love your reviews, I have been reading them multiple times but yet to be able to make a decision on which G series to buy!
After reading through the longgg comments section, I noticed you had already mentioned before that you can use PlateMate magnetic weights on the weight stack to microload the G20!
That’s great news because I already have so many of them – 4×2.5lbs, 8×1.25lbs and 4×0.625lbs, all donut shape which I have been using for my Ivanko Steel Dumbbells to microload.
But it would seem that I still must get the Lat Tower upgrade as the 2:1 cable ratio is not sufficient for Lat Pulldown/Cable Rows and they cannot use the GymPin.
That’s great that you already have those magnetic plates, it’ll make micro-loading so easy.
You’re correct that you can’t really use the GymPin on the base unit’s functional trainer weight stacks. That is, unless were to remove (or not install) the weight stack guard panels; if you did that, it would be possible, though you’d also have to make sure that the plates on the weight storage area aren’t in the way either. Of course, don’t forget that you can increase the resistance significantly by adding band resistance using the built-in weight stack band pegs.
However, like you said, having the G20 Lat Row upgrade is the best/most convenient option to get access to heavier cable resistance for lat pulldowns and low rows.
Hi!
Very good and detailed review… Well done! Much appreciated 🙂 However… there is another very good multi functional and versatile home gym rack that is definitely worth a detailed comparison. This is the top line Tytax product: The Tytax T3-X or the more affordable (money and space wise) T1-X.
Would you be able to make such a review and comparison? I’m really not sure which one I should invest in the G20 Pro with the lat pulldown station or the Tytax T1-X – and I’d like to be 100% sure about this before splurging out around EUR-10,000! Unfortunately there’s not one review comparing the two products. I believe these two to be neck-to-neck competitors.
Cheers!
Thanks, Brian. While it would definitely be cool to test the Tytax units, I don’t see that happening anytime soon due to the major time and budget investments. From my glancing at the T1-X, it looks to have more versatility overall than the G20, yet it still lacks a true functional trainer setup (i.e. limited height settings for pulleys) and it’s all plate loaded rather than selectorized). Plus, it requires more space. But if the extra versatility it provides in other aspects is something you really want, it could be a good choice — whether that’s worth an extra $5,000 is a tough question, though.
Wish I could be more helpful. Let me know what you end up deciding.
Thanks Alex, this is the best review. I purchased mine because of this review, i was very interested in the jammer arms because I wanted to mimic machine movements for chest press. One issue I’m having with the arms is the correct setup for chest and incline chest. The combination of the correct arm height and bench angle is tricky, specially with the arms being angled 30 degrees. I have been experimenting with it and can’t really find the sweet spot. I feel my shoulders are heavily involved specially with the bench inclined. I would really appreciate it if you have the correct setup for those exercises. Tx