These bench press tips will improve your bench pressing power instantly, while also allowing you to see consistent and long-term strength gains.
The barbell bench press is quite possibly the most popular weight lifting exercise in the world. While it may be somewhat over-hyped compared to full body lifts like squats or power cleans, the fact remains…
…The bench press is the single most effective pushing exercise for lifting the maximum amount of weight using your upper body muscles. Put simply, it enables you to gain muscle mass and build strength in your chest, arms and shoulders — fast.
This page explains simple bench press tips and tweaks that can make a “night and day” difference in your performance, and your shoulder health.
Table of Contents
1. Do Bench Press First in Your Workout
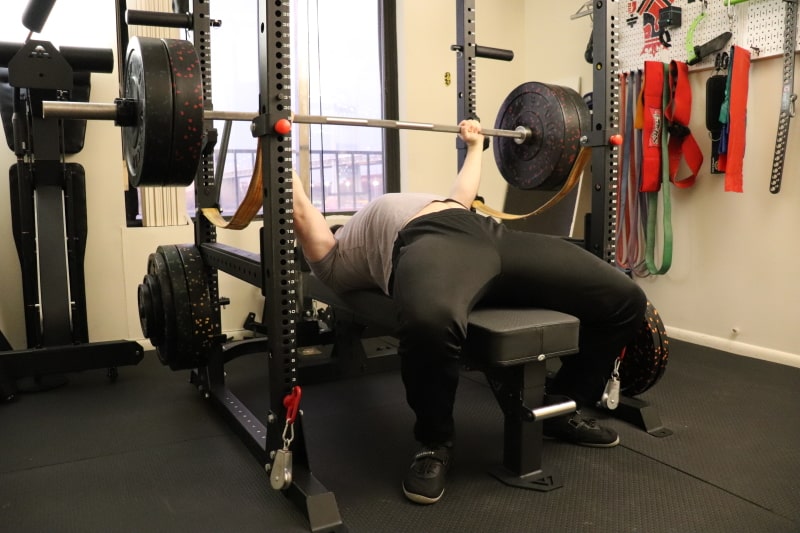
Performing other weight lifting exercises that use the same muscle groups as benching can cause the muscles to fatigue, thus making you weaker on the bench press.
The solution is to make the bench press the first weight lifting exercise in your workout.
2. Warm Up Properly
This is one of the simplest and most intuitive bench press tips, yet many weight trainees underestimate its importance. Your strength is inhibited if you fail to warm up properly. There are three goals when warming up for the bench press exercise:
- Range of Motion. Improve your flexibility so that you can perform the range of motion without issues.
- Blood Flow & Heart Rage. Increase your blood flow directly to the chest and arm muscles. This naturally means your heart rate will increase to pump the blood.
- Weight Acclimation. Incrementally build your way up to the heavier weights that you’ll be using during the bench press. Your body and your mind must be prepped for lifting heavy loads.
- Avoid Fatigue. You want to do all of the above without fatiguing your muscles, which also weakens your maximum strength potential.
- Check out this warm up routine and implement it to maximize your bench press performance.
3. Use a Good Weight Bench
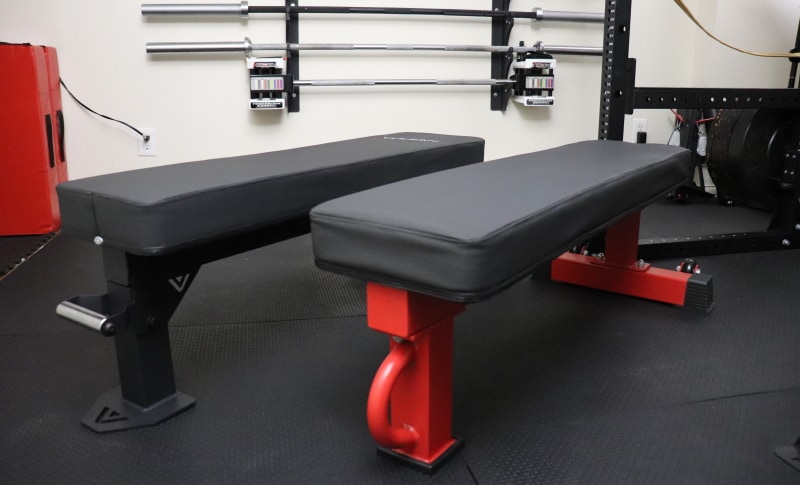
Not all weight benches are created equal. In an ideal scenario, the bench should have the following specs/features:
- Height of 16.5-17.5 inches tall for optimal leg drive
- Sufficient back pad width for proper shoulder support (i.e. at least 11.5 inches wide)
- Tripod style frame (i.e. 1 foot in the front; 2 feet in the rear) to allow for an unobstructed stance/foot positioning
- Stable and strong frame (i.e. no wobbling; beefy frame)
If you have a home gym and are looking to buy such a bench, I strongly recommend the Rep FB-5000. I think it’s the best flat utility bench on the market, which is why I bought it — You can read my Rep FB-5000 review to learn more about it.
If you train at a commercial gym, you may not have access to a bench that ticks all of these “ideal” requirements. That’s okay. Just find the one that checks the most boxes. Work with what you have.
4. Chin Under Barbell
Before you lift the barbell off the safety pins, it’s important that your body is positioned on the correct part of the bench.
Assuming you’re benching by yourself (no spotter), the easiest way to ensure your position is correct is to have your chin directly under the barbell.
For most people, this avoids excessive shoulder strain when bringing the bar over your chest during the lift-off. Plus, it puts you far enough away to clear the safety pins when performing reps. Some people may want to scoot a bit further back (bar over neck) or further forward (bar over mouth/nose). Go with what’s most comfortable for you. Just know it’s a tradeoff between the possibility of bumping the bar into the pins during your set vs stressing your shoulders during the liftoff.
As I mentioned, the above is advice if you’re benching without a spotter. If you do have a spotter, it’s different. You can go more forward so that you’re starting with the bar over your eyes, if you so choose. That’s what I personally prefer since I don’t even have to think about the safety pins getting in the way — the spotter takes the shoulder strain out of the picture by helping you with the liftoff.
5. Retract Shoulder Blades & Stick Chest Out
Bringing your scapulae (shoulder blades) together will naturally bring your chest out. This essential bench press tip has three beneficial effects:
- Stable Foundation. First, your shoulder blades and the surrounding upper back muscles give you a solid foundation off of which to push.
- Shorter Range of Motion. Second, the combination of retracted scapulae, a flexed upper back and a puffed out chest decreases the distance you need to push the barbell.
- Shoulder Health. Finally, you save your shoulder joints and scapulae from injury; leaving your shoulders protracted with scapula hanging all willy-nilly can only lead to shoulder issues down the road.
6. Four Points of Contact
Make sure that your head, shoulders and buttocks are touching the bench the entire time. And make sure that your feet are firmly planted on the floor.
This is usually referred to as the five points of contact, with the lower back being the fifth point of contact. However, it’s unnecessary to keep your lower back on the bench if your goal is maximum strength production and you know what you’re doing – as I’ll explain in the following bench press tip…
7. Arch Your Back
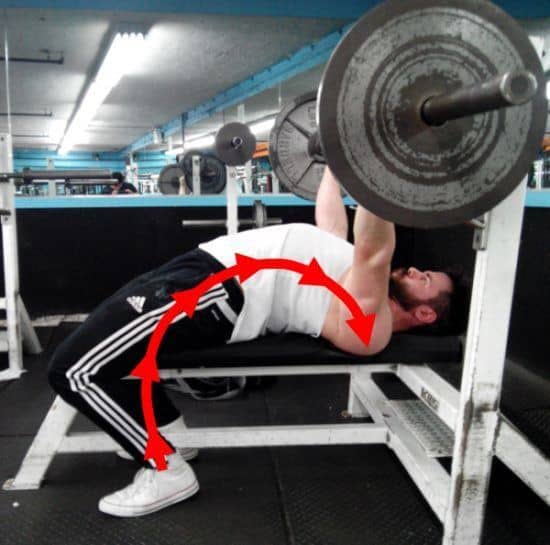
Create a slight arch, so that your body isn’t touching the bench in the area between your buttocks and upper back/shoulder region.
It may help to bring your feet as far back as possible by bending your knees more. But make sure your feet don’t come off the ground and don’t go overboard to make an exaggerated arch.
You may come across some bodybuilders or average gym-goers who don’t use this bench press tip. This is only because maximizing their bench pressing power is not their goal.
8. Tighten Your Lats
Although this is a chest exercise, your upper back and lat muscles also play a role in this pushing exercise. They act to stabilize the resistance against your body, especially at the bottom of the repetition.
9. Keep Your Wrists Straight with Knuckles to the Ceiling
Many people tend to grip the bar so that their wrists bend backward. Not only does this strain the wrists, but the transfer of power to the barbell during the upwards motion is inefficient. Consequently, your strength suffers.
10. Tuck Your Elbows In
This is a vital bench press tip if you want to have healthy shoulder joints later in life.
It’s all too common to see trainees pumping out reps of the “bodybuilding-style” bench press, which entails an elbows-out position that’s supposed to better target your chest muscles. While it may hit the chest a little better, it definitely does a number on your shoulder joints over time.
If that isn’t enough to sway you, then know that tucking your elbows will instantly and significantly increase your bench press.
11. Choke the Bar to Death!
Using a death grip on the barbell is a quick and easy tip for squeezing out (no pun) a few extra pounds on the bench. It makes you feel more in control of the bar movement and it helps to tense up the other assisting muscles.
This is one of the bench press tips that I wish I had known when beginning!
12. Lift-off & Lockout
Right after lift-off, be sure to hold the barbell in the lockout position (i.e. arms/elbows fully extended) for a couple to a few seconds before initiating the negative repetition.
This gives you a “feel” for how much force you’ll need to lower and lift the load. You also improve your lockout strength, which is a sticking point for some trainees. Be sure to lockout after each repetition as well (but you don’t have to hold it).
13. Use the Valsalva Maneuver
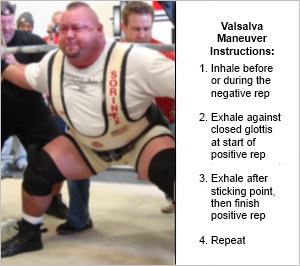
Here’s how you use the Valsalva maneuver:
- Take a deep breath before you lower, or if you’d prefer, while you lower the weight.
- Hold it in as you push upwards.
- Don’t let your breath out until you complete the rep (unless you’re struggling for oxygen!).
This technique gives you better core stability and spinal reinforcement – leading to a stronger bench press and a safer lower back.
14. Maintain a Visual Point of Reference
When you’re in the lockout position, take the time to notice where the center of the barbell is, relative to the ceiling above you. Lock onto this point with your eyes like a laser-targeted missile. This is where you’ll be returning the barbell for each repetition, so there’s no need to look anywhere else.
15. Touch the Bar to Nipple-level
Bring the bar down to your chest around the nipple line (assuming you don’t have saggy…never mind :-O). Bringing the bar to this position should be natural if you are following tip #9 (tucking your elbows in).
16. Push Your Feet Against the Floor

Drive power through your feet and legs. This fortifies the arch in your back, thus stabilizing your body and focusing the energy towards your upper body.
However, pushing through your legs does not mean raising your ass off the bench, which is crucial to remember.
17. Squeeze Your Glutes & Abs
Flexing your glutes and abs is another surefire bench press tip for stabilizing your entire body structure and improving your bench press strength.
This technique is also a strong safeguard against lower back injuries, assuming your glutes remain on the bench.
18. Explode Upwards
Fast lifting builds strength (and muscle) fast. Contract your muscles forcefully to lift as fast as possible. Even if the bar goes up slowly, the point is that you’re delivering maximal force output.
Adhering to this bench press tip allows you to lift heavier because you utilize the barbell’s momentum and minimize muscular fatigue; thus using the smallest amount of energy to lift the heaviest amount of weight.
19. Use an Approximately Vertical Bar “Groove”
The groove refers to the barbell path through a repetition. The closer to a completely vertical groove, the shorter the distance required to lift it.
However, recall that the starting/ending position and the position at the bottom of the rep are not directly aligned with each other. Therefore, you can’t perform the bench press with proper technique using a perfectly vertical groove – but you can get damn close to it by moving directly between the starting/ending position and bottom of the rep position.
20. Remember These 3 Perpendicular (90°) Angles
This bench press tip ensures that you use the proper grip width and arm angles for performing an efficient bench press repetition; using technique that also provides better shoulder joint protection. You should be able to observe these three perpendicular angles:
- Starting & Ending Position. When viewed from the side, your extended arms (i.e. the lockout) should be perpendicular to the bench, which occurs when the bar is approximately above your upper chest. This ensures that you don’t waste any energy in the lockout position, by holding the bar too far forwards or backwards.
- Bottom of the Rep. When viewed from the side, your forearms should be perpendicular to the floor. This ensures that you will be pushing straight into the barbell. It also means that there is no rotational stress on the shoulder joint.
- Bottom of the Rep. When viewed form the front, your forearms should be perpendicular to the bar as well as the floor. This ensures that your grip width is optimal for efficient transfer of energy when bench pressing upwards.
21. Strengthen Opposing Muscles
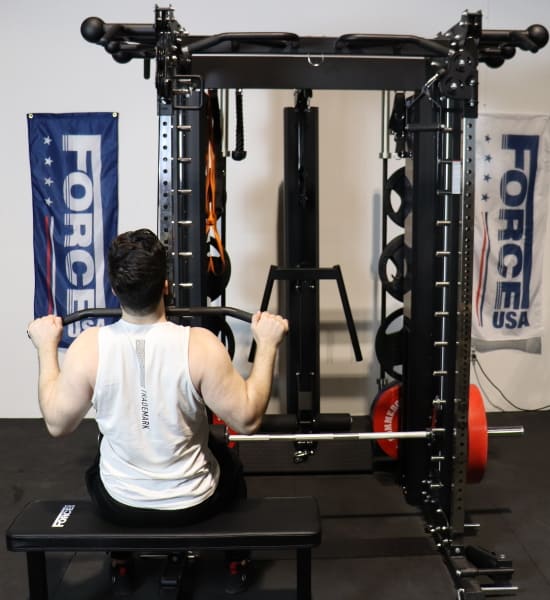
One of the most effective, yet overlooked bench press tips is to improve your strength on back exercises and bicep exercises.
The back and biceps are the major opposing muscle groups involved in this exercise. The stronger these muscles are, the more potential you have for adding weight to the bench press and developing the muscles involved in the movement.
22. Strengthen Secondary Muscles
The secondary muscle groups involved in the bench press exercise are the triceps and front deltoids. Sometimes the secondary muscles can be a weak link that’s restricting progress. Therefore strengthening these muscles groups can help you to rejuvenate your results.
23. The 1-Rep Warm-Up Trick
This is one of my favorite bench press tips. You should be able to perform better during your work sets if you do just 1 rep with greater than 100% of your working set weight.
For example, if you plan to lift 185 lbs. for 5 reps for your work sets, then your final warm up set should be 190-200 lbs. for 1 rep.
24. Un-stick Your Sticking Points
These final bench press tips are mostly intended for those who are more experienced lifters that are facing a plateau. When your progress slows, you may notice that you seem to have noticeable difficulty with one part of the range of motion (e.g. lift-off, lockout, bottom, etc.).
The following bench press tips and techniques deal with sticking points and plateaus:
- Partials. This training method allows you to use much more weight than you’d use for your one-rep max using full range of motion. To perform bench press partials, find a power rack and adjust the position of the safety supports to that of your sticking point. The range of motion to use during the partial should be from the start of your sticking point to the point where your reps become easier (when doing normal repetitions). For example, rack lockouts are a partials exercise that addresses the lockout; a very common sticking point caused by weak triceps.
- Chains. Chain training allows you to improve your bench press strength at the top of the repetition, including the lockout. By attaching long and heavy chains to each end of the barbell, you make it so that the load is its heaviest when your arms are fully extended; its lightest when at the bottom of the rep since much of the chain is on the ground.
- Negatives. Negatives allow you to adapt your body to more total stress, since the negative (lowering) repetition allows you to handle up to 40% more weight than the positive repetition. Preferably using a power rack, unrack the weight and lower the weight in a controlled fashion. Since the weight will be too heavy to press up, you’ll need spotters to bring it up for you.
Hopefully these bench press tips will help to increase your bench press strength and bust through plateaus. Some of these won’t apply to everyone, so be sure to use only the tips that are relevant to your goals and situation.



Great article and tips, I always used the nice and easy approach, by the sounds of your article I need to put some explosive effort to get better results.
I sort of feel compelled to comment when I saw the “Eyes under Barbell.” bit. DO NOT DO THIS. THe reason being if the barbell starts over your eyes and you drop it it will land on yuor neck. The correct form (what power lifters, strength coaches etc do) is to start with the BB over your neck this way if you are unable to control it it wont fall on your neck. Other than that good article.
That rebuttal was hogwash. About the eyes under the bar , bench setup. I would question his intermittent strength gains.
Best article on this concept that I have read yet. Great work!