In this article, I’m going to share 6 weight lifting belt tips to get the most out of your training.
The kinds of things I’ll be talking about are little techniques you can use to make your belt fit better. I’ll also give you guidelines for when and when not to use your belt.
This is not a full-blown weight lifting belt guide. However, if you’re looking to buy your first belt now, here’s a brief summary of what most lifters should look for: leather material, 4″ wide all around, 10mm thick, single-prong or lever buckle, quality brand (e.g. A7/Pioneer, BestBelts, Inzer, Titan, Cardillo, Rogue).
Now, let me get to the meat and potatoes of this post and reveal these weight lifting belt tips.
1. Use Leverage to Tighten Belt (for pronged belts only)
Don’t struggle to get the belt on tight using just your hand and arm strength. Instead, call upon the laws of physics and summon the power of leverage!
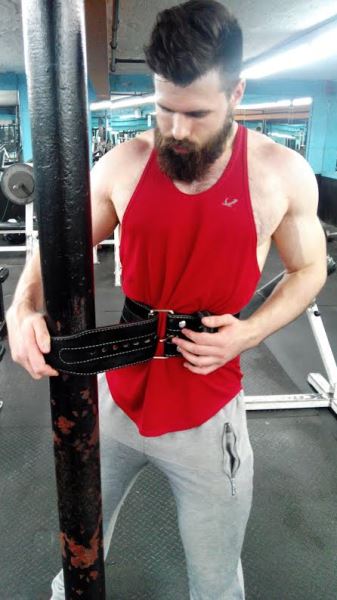
Find a vertical column of some sort, such as a pole, a power rack support or a bench press upright.
Put the belt around your waist and pass the end through the buckle, but don’t secure it yet.
Wrap the end of the belt around the vertical column, and lean back, allowing the force of your body weight to tighten the belt. Secure the prong in the desired belt notch.

This gets the belt tighter with minimal effort since the column acts as a sort of fulcrum and you use your entire bodyweight to generate a pulling force.
2. Only Use a Belt on Heavier Sets
Don’t wear your belt on light sets. There’s no benefit in doing so, and you lose out on the benefit of improving core strength and stability by lifting beltless with lighter loads.
My advice is to only consider wearing a belt when using a weight that’s 70-80% or more of your one-rep max.
Depending on how you warm up, and whether you do ramping work sets (i.e. gradually increase the weight on work sets) or do sets across (i.e. all work sets at same weight), you’ll most likely put your belt on before you do your heaviest set(s).
This is desirable since you’re able to get your body used to the subtle yet important technique differences between doing an exercise with a belt vs. beltless (i.e. breathing/pushing abdominals into your belt).
Accordingly, practicing the belted exercise technique on the (relatively) lighter sets will prime your central nervous system so that you can perform better on your heaviest set(s).
3. You May Need to Tighten Belt Slightly More on Bench Press
If you usually squat with your belt on the 6th notch, then you may need to go to notch 7 on bench press. This is because you arch your back on the bench press, which causes the belt to be slightly looser around your torso than if your back was straight.
Please note that this isn’t always the case. For some, the belt may be sufficiently tight on the same notch for all lifts.
4. Find the Right Belt Height Position for You
Unsurprisingly, different people wear their belts in different positions, including:
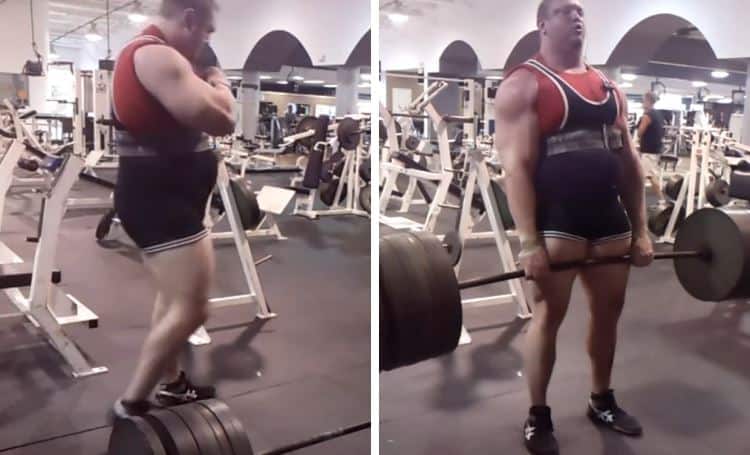
- Very High: Just atop the bottom of the rib cage. (See the pic of George Leeman in tip #5, below, for an example of this belt position.)
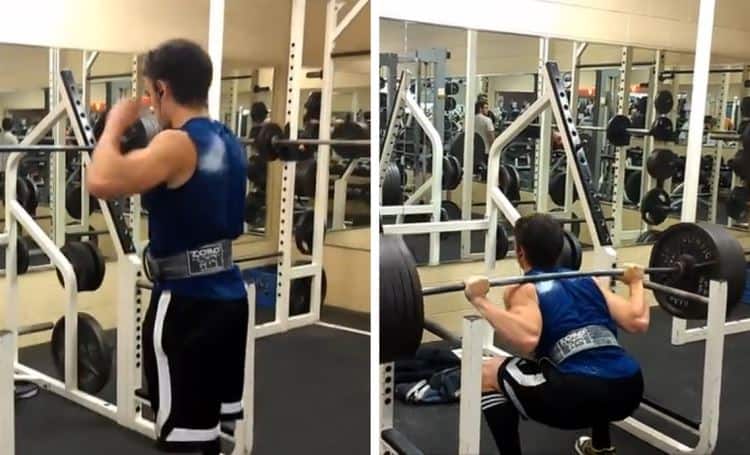
- Very Low: Just atop the uppermost part of the pelvis. (This usually only works for heavy lifters with big guts, whether fat or just very muscular stomachs; the gut pushes the belt out more, preventing it from really digging into the bone. See Stan Efferding squatting for an example of this belt position.)
- Somewhere in between: Somewhere between the bottom of the rib cage and the top of the pelvis.
It’s your job to find what works for you.
You want to find a relatively comfortable position that allows you to take the deepest breath and produce the greatest amount of intra-abdominal pressure during the Valsalva maneuver.
The belt height position should not restrict your range of motion on whatever lift you’re doing.
Note that you might use a different position on different exercises. For example, many people wear their belts a bit higher on deadlifts so that the belt doesn’t jam into their pelvis at the bottom of the movement.
What Belt Height Position Works for Most People?
Most people will find that putting the belt over their navel is the most comfortable position. So, if you’re new to wearing a belt, use this as a starting point.
5. Belt Angle:
Angling the Belt Slightly Downward (most common)
Position the belt slightly higher on your back and slightly lower on your abs – When this is viewed from a side profile view, the belt is angled ever-so-slightly downward from back to front.
This puts the belt nearer to the lower abs, which is the part of your stomach that extends out the furthest when doing the Valsalva maneuver. Positioning the belt slightly higher on your back allows the belt to clear the top of your pelvis.
Understand that this downward angle is very slight; it may or may not actually appear to be at an angle if you look at it in the mirror from the side. The important thing is that you feel the belt being slightly lower on your stomach than it is on your back.

Angling the Belt Slightly Upward (rare)
While most people will find a slight downward angle to work best, it’s not right for every person in every situation.
As I mentioned earlier, some people wear their belt very high up, usually for deadlifts. When this is the case, it may actually be more advantageous to have the belt slightly higher on the front and slightly lower on the back.

6. Train Beltless Sometimes
A weight lifting belt is a highly effective tool, but sometimes it’s good to switch things up and train without a belt.
Even though you lift less weight when training beltless, your core musculature gets trained more intensely. The core strength and stability progress you make from beltless training will translate to stronger lifts when training with a belt.
When To Implement Beltless Training
Personally, I squat and bench twice per week – One day I’ll train heavier and use a belt; the other day I’ll train somewhat lighter without a belt.
A different strategy could be alternating between belted and beltless training cycles (i.e. train belted for x number of weeks, then beltless for y number of weeks).

