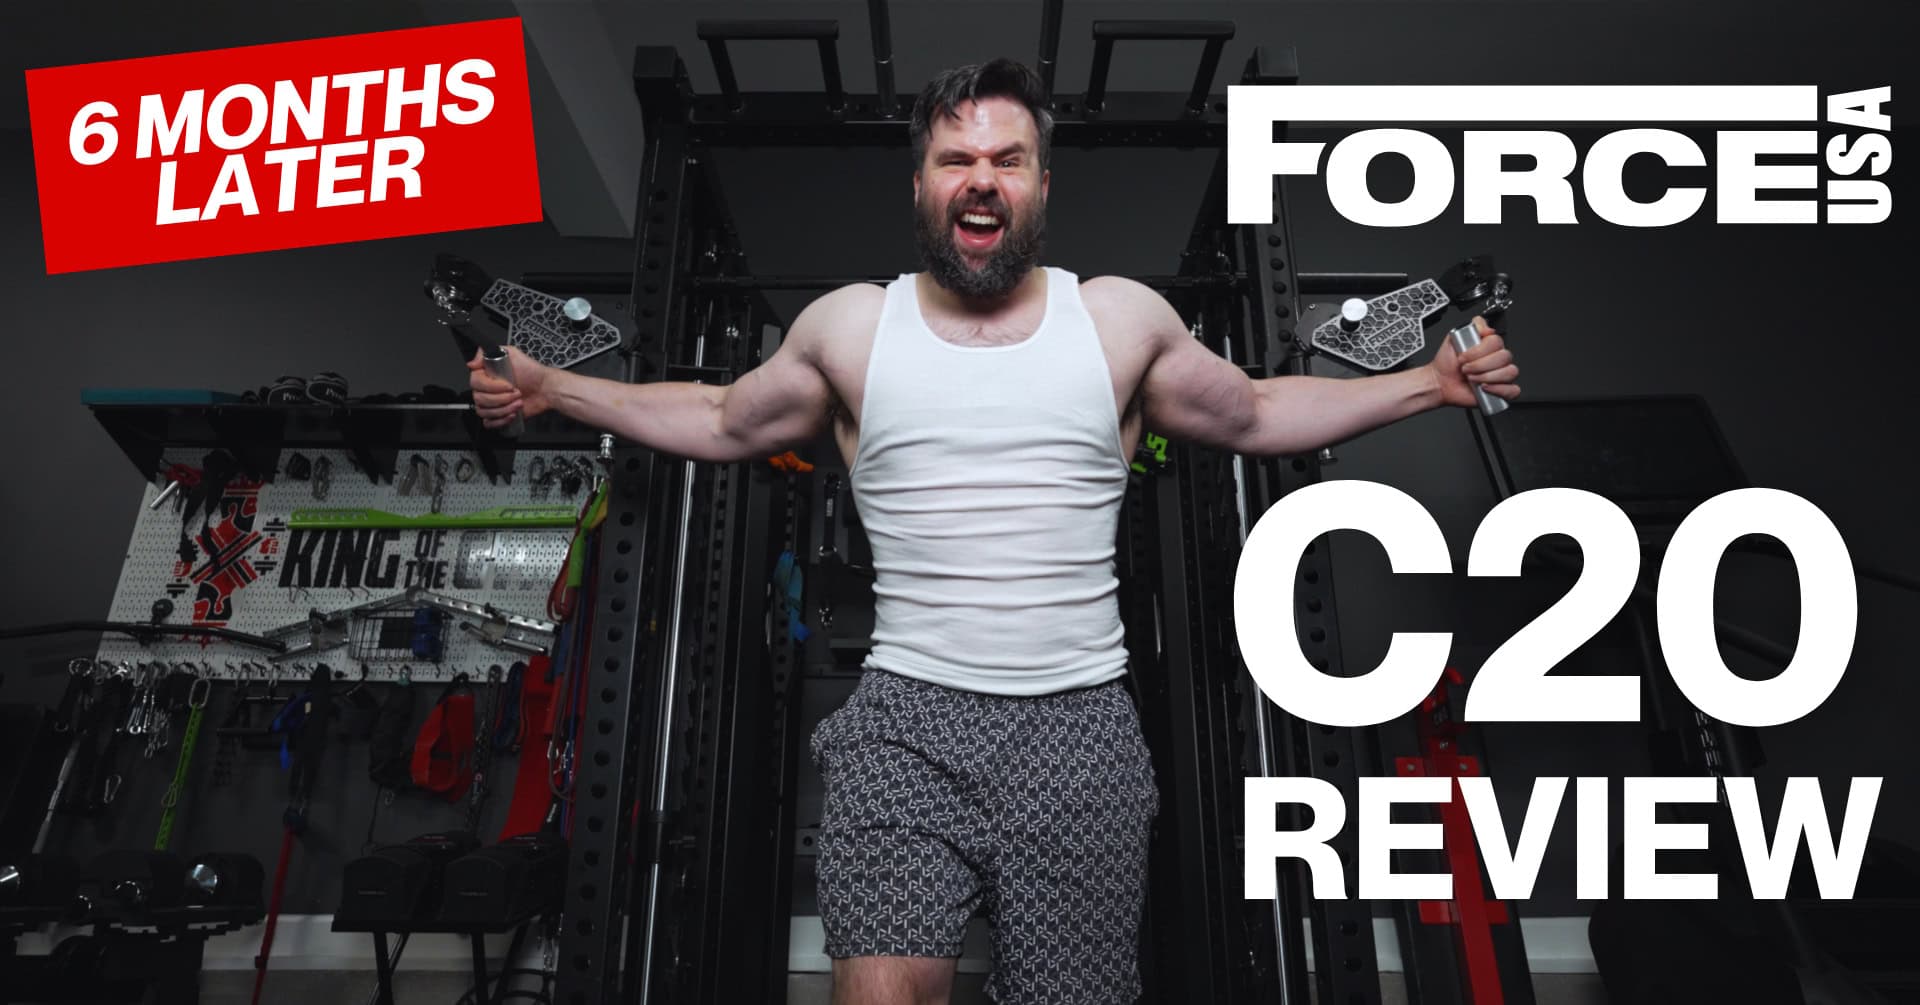
The Force USA C20 is the most complete all-in-one trainer I’ve tested.
It combines a 3×3 half rack, Smith machine, dual selectorized weight stacks, articulating functional trainer arms, center lat pulldown, low row, pull-up station, dip handles, landmine, plate storage, accessory storage, and optional add-ons into one large training system.
| Model | Pros & Cons | Rating |
|---|---|---|
Force USA C20 All-In-One Trainer | Pros:
| Rated 4.7 out of 5 |

I first tested the C20 at Force USA’s headquarters in Utah and made a first impressions video while I was there. I was intrigued enough that I later had one sent to my home gym in exchange for an honest long-term review.
Since then, I’ve used it for about six months of real workouts, training on it four times per week.
This Force USA C20 review is based on that longer-term experience: what I like, what I don’t like, what I’d change, and the smaller details you only notice after actually living with the machine.
Table of Contents
Watch My Force USA C20 Review Video
Watch my Force USA C20 review video on YouTube:
See all my other Force USA C20 YouTube videos below:
- Force USA Unboxing & Step-by-Step Assembly Guide
- How I Actually Use My Force USA C20 (Favorite Exercises)
- My Force USA C20 First Impressions Video at the Utah HQ
- The Force USA C20 vs the Force USA Functional Trainer Rack (FTR)
Quick Verdict
The Force USA C20 is best for lifters who want a serious all-in-one home gym setup out of the box (as opposed to building one piecemeal), with a strong emphasis on cables, Smith machine work, and exercise variety.
It makes the most sense for bodybuilding-style training, general strength training, and home gym owners with limited space who want one machine that can handle most of their resistance training without needing a bunch of separate machines.
The articulating arms are the standout feature for me, followed closely by the Smith machine.
The heavy dual weight stacks (upgradable to 300 pounds each) is also a major selling point if you train heavy on cables.
And while it’s not something I own (yet), the ability to integrate Force USA’s innovative Sliding Bench system with the lower cables is a big draw for many buyers, because it gives you the ability to do leg press, hack squats, leg extensions, leg curls, and preacher curls, all inside of the C20 using its cable tension.
That said, the C20 is not perfect. The Smith sleeve and weight horn finish scratches too easily, the optional swivel seat has stability issues with heavier lat pulldowns, the low row footplate has a workflow quirk if you store spotter arms on the rear crossmember, and I had a few quality control issues early on.
Still, I genuinely like using it, to the point that it has become the go-to rack in my gym, edging out my Rep PR-5000 + Ares 1.0 rack.
Who the Force USA C20 Is Best For
The Force USA C20 is best for someone who wants a lot of training options in one relatively compact footprint.
If your training includes barbell work, Smith machine work, cable work, pulldowns, rows, and accessory movements, the C20 makes a lot of sense. It’s especially well-suited for hypertrophy-focused training because the cable options are so strong.
It’s also a good fit for general fitness and strength training users who want variety without building a gym around several separate machines.
Where it makes less sense is for someone who only cares about traditional barbell lifts i.e. powerlifters. If you mainly squat, bench, and deadlift, and you barely use cables or Smith machines, the C20 is probably more machine than you need.
It’s also not ideal if your main priority is maximum rack modularity. While the front uprights do give you real third-party attachment compatibility, the C20 is designed first as a complete all-in-one system from the start, not an endlessly customizable rack ecosystem.
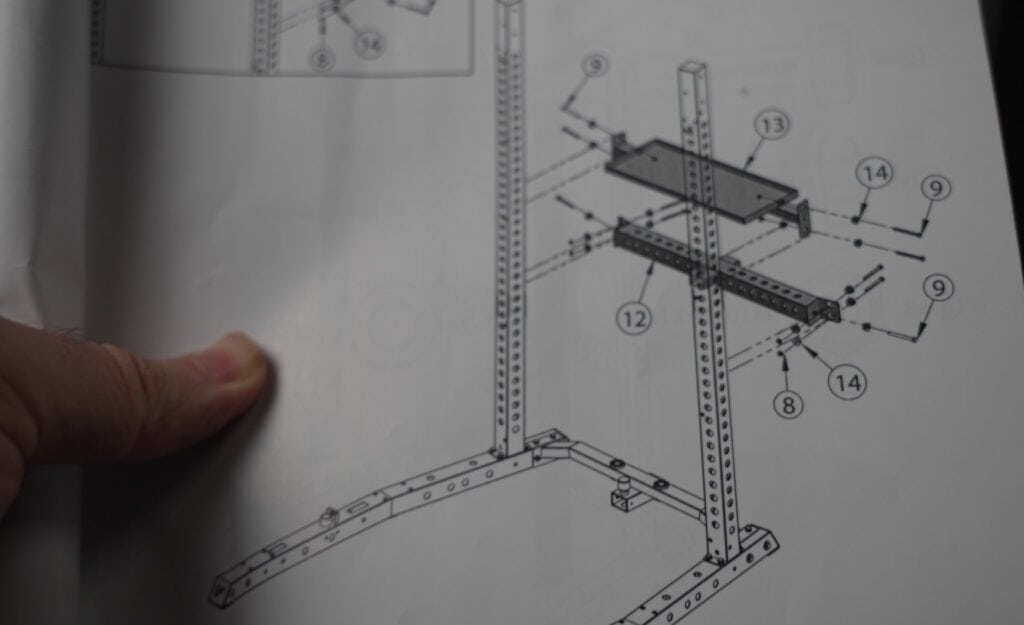
Assembly
The assembly process isn’t exactly quick and easy, but it’s still doable. And if you do buy one and decide to install it yourself (there is an option for white glove installation), you’re in luck because I created a full unboxing and step-by-step and assembly video that will make the process way easier for you.
It’s helped a lot of people save a lot of time and effort while assembling. You can check it out here to get an idea of what it’s like to put this behemoth of a machine together:
If I hadn’t been filming the whole process, which did make things take way longer for me, I estimate assembly would have taken around eight to nine hours working straight through, not including unboxing. That’s a long time, but kind of expected for something like this.
The vast majority of it can be done solo, but there are points where having another person really helps a lot. And just in general, having a second set of hands will speed things up.
What the Force USA C20 Is
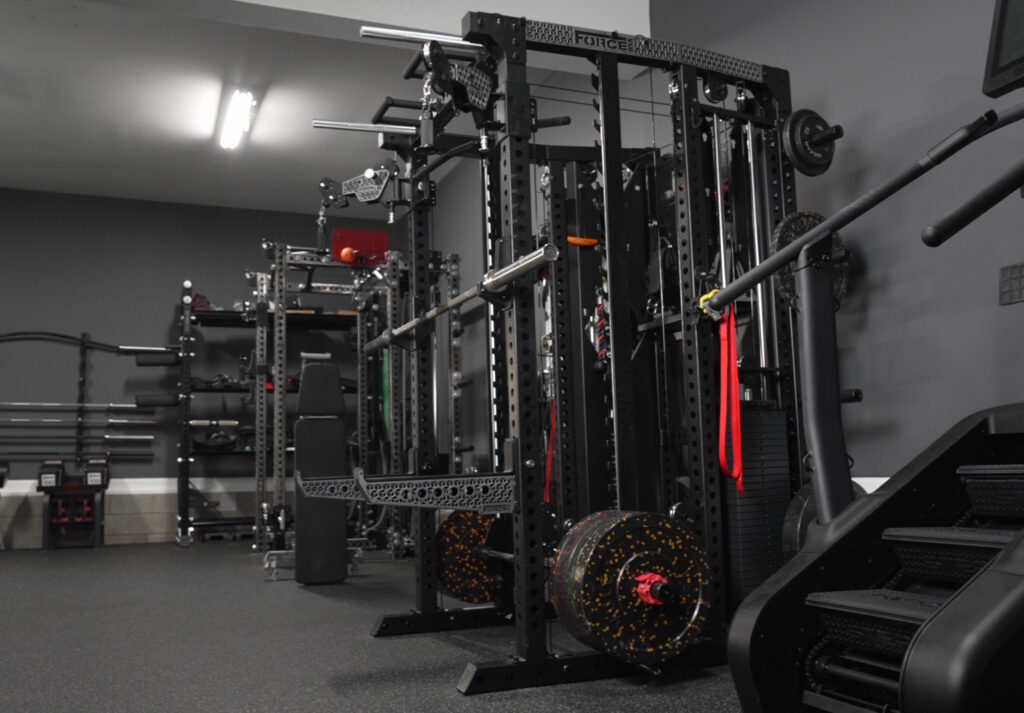
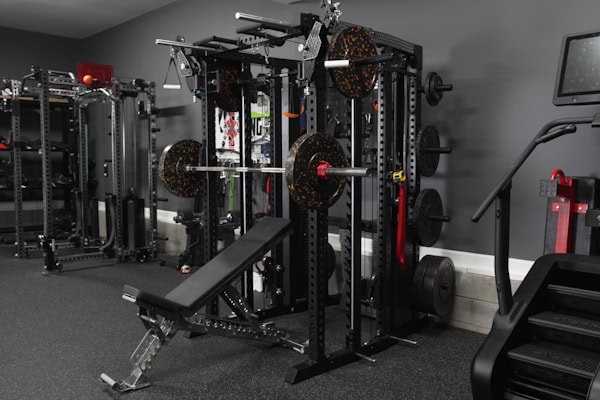
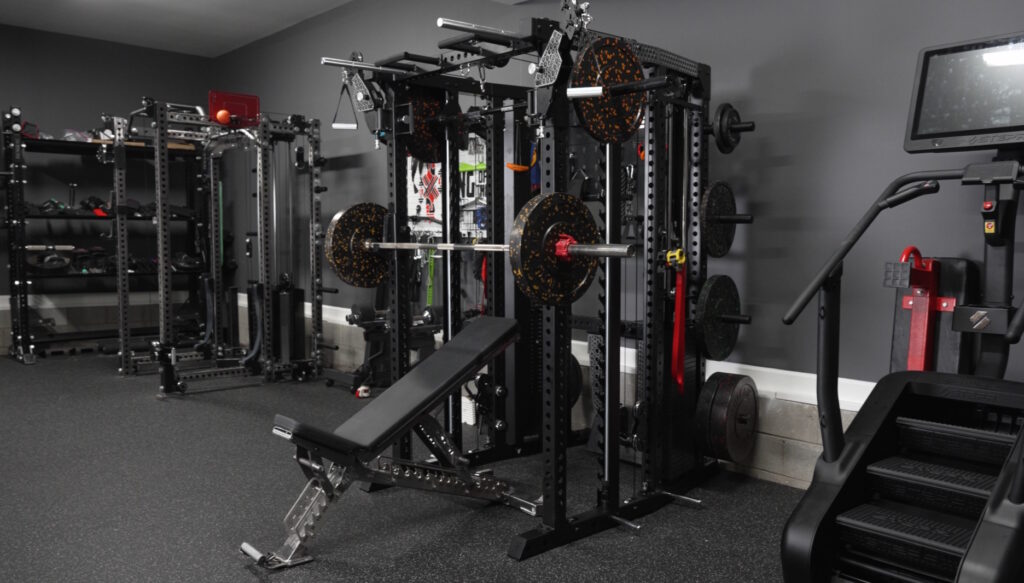
The Force USA C20 is an all-in-one trainer built on top of a flat-foot rack frame.
The main structure uses 3×3 uprights with 1-inch holes. It includes an integrated Smith machine, dual selectorized weight stacks, articulating functional trainer arms, a center pulley system for lat pulldowns and low rows, a pull-up station, dip handles, a landmine, plate storage, and built-in accessory storage.
Basically, it’s designed as a complete system from the start.
That’s important to note because there are two ways to build a setup like this. One approach is a fully modular rack where you add separate cable systems, Smith machine attachments, and accessories over time. The other is something like the C20, where the machine is built as a cohesive, all-in-one trainer right out of the box.
The C20 still gives you some modularity, especially on the front uprights. But its core identity is that it’s already integrated.
Rack Specs and Third-Party Compatibility
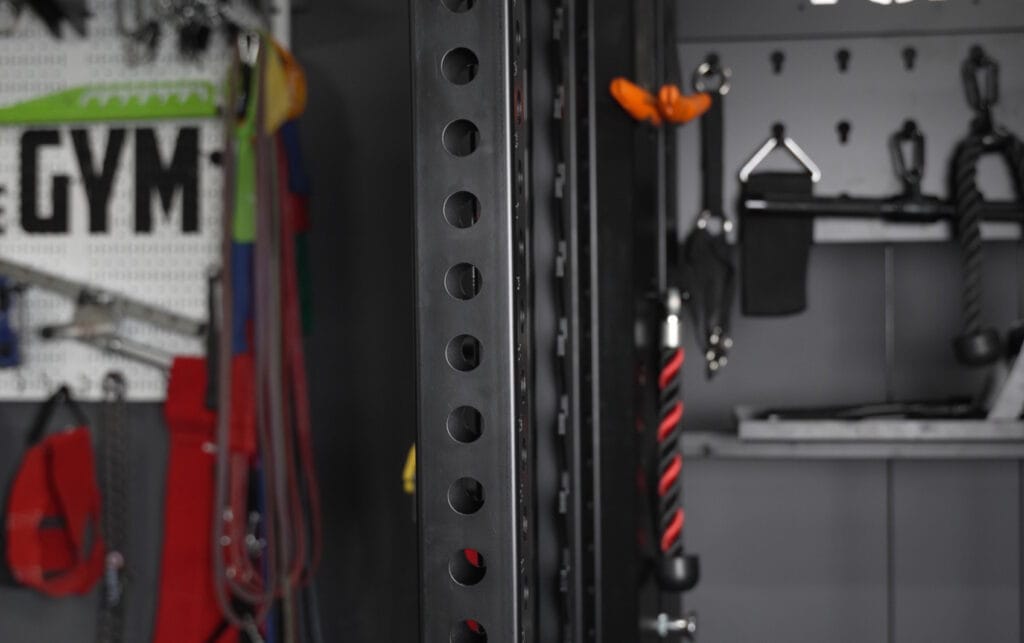
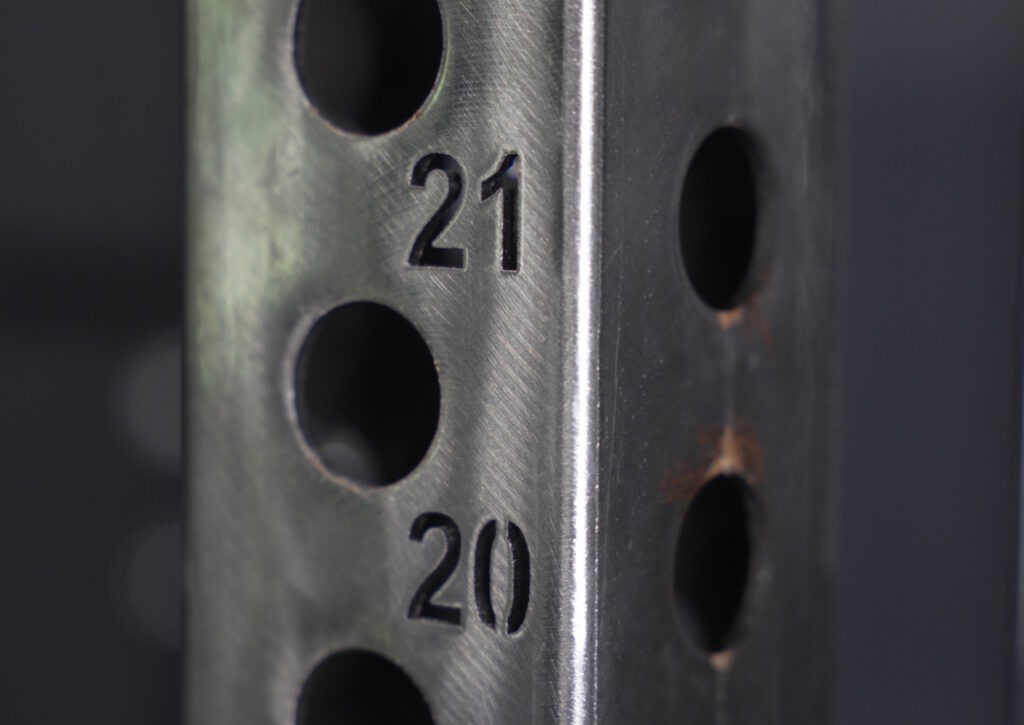
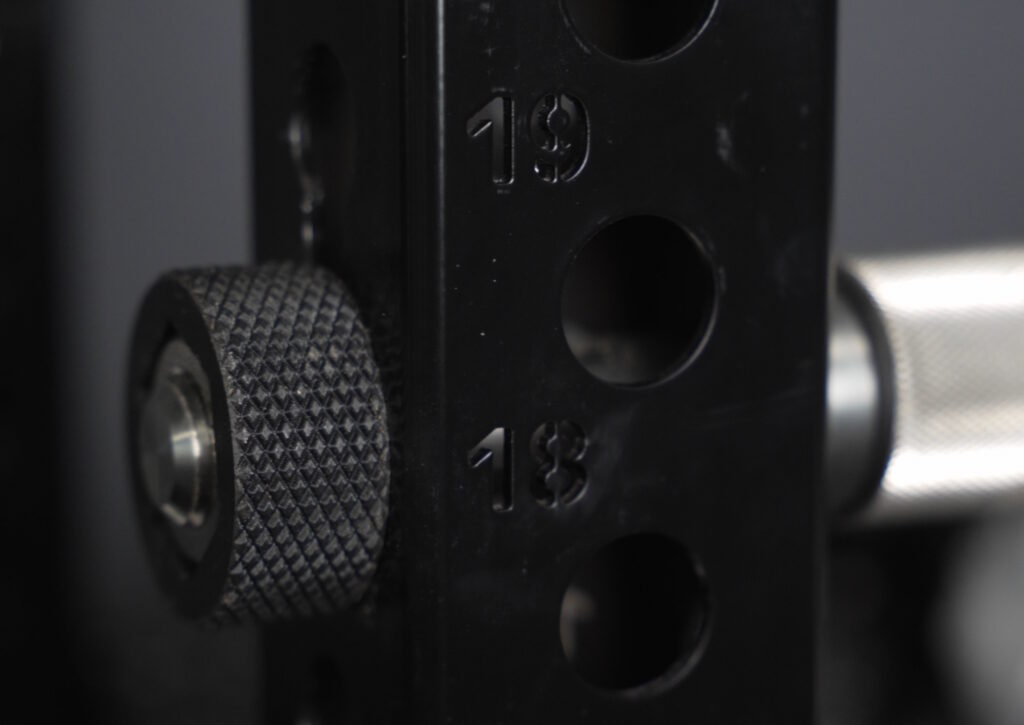
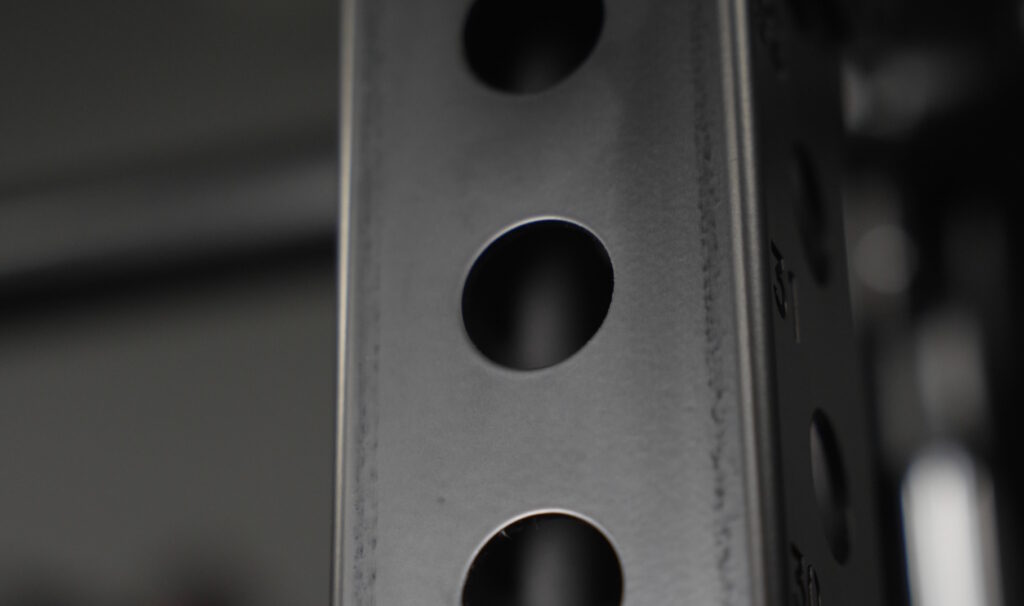
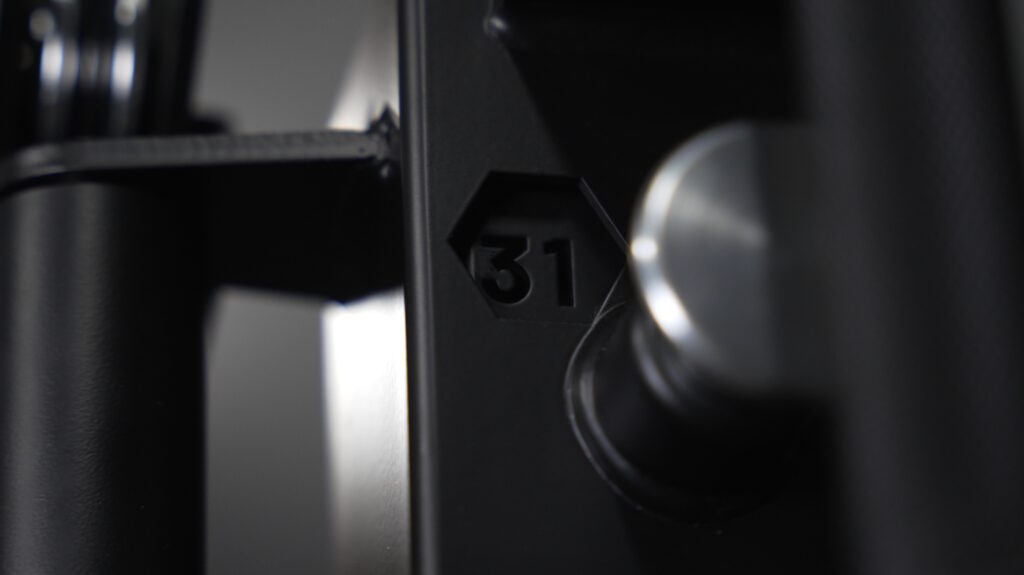
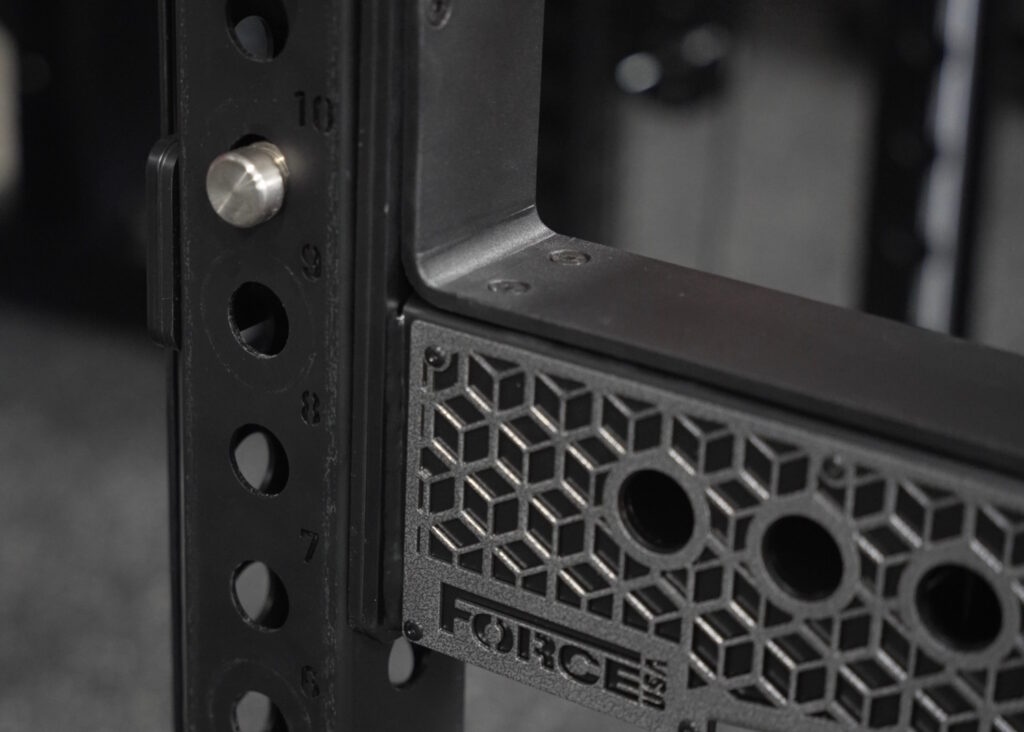
One of the most important upgrades with the Force USA C20, compared to predecessors like the C10 and the G-Series all-in-ones, is that it uses 3×3 uprights with 1-inch holes and 2-inch spacing, which is the industry standard (though there are slight differences between metric vs imperial versions from different manufacturers).
The front uprights most closely mimic Rogue Monster Rack dimensions. And like Rogue, the Force USA rack measures 49 inches wide between the outsides of the uprights, which means Rogue attachments that span the width of the rack can fit.
I confirmed this with the Rogue hip thrust pad, which I successfully mounted between the front uprights.
The tubing is very close to the “true” (i.e. imperial) 3×3-inch sizing found on Rogue (and other, usually US-made racks). Though when I measured mine with a caliper, it was slightly narrower than my Rogue uprights, but larger than my REP Fitness (metric) uprights. So it’s basically “true” 3×3 within a small margin.
From my measurements, the holes on the uprights are spot-on in terms of being “true” one-inch holes spaced two inches apart. So any Rogue or other imperial 3×3 attachments that use two holes on the same upright should also work.
And ANY 3×3 attachment, whether metric or imperial, should fit as long as it uses just one hole on one upright.
The key takeaway is that the Force USA C20 gives you meaningful third-party compatibility on the front uprights. You’re not nearly as locked in as you are with the older Force USA systems that used completely non-standard dimensions for the uprights and hole size/spacing.
In terms of other rack dimensions, I’ll list them below:
- Interior: 43″ W × 47″ D × 81″ H
- Exterior: 77″ W × 66″ D × 88″ H
Stability and Frame Feel
The Force USA C20 is extremely stable.
The flat-foot design helps keep the unit planted. A sumo base (i.e. lifted lower crossmembers) might allow for more modularity in some ways, but I like the flat-foot design here because it adds stability and, very importantly, allows the Smith machine bar to travel lower than if it were on a sumo base rack.
That lower Smith bar travel is important for RDLs, which I’ll cover later.
The full unit weighs well over 1,000 pounds when fully assembled with the upgraded weight stacks. Between the heavy stacks, Smith machine structure, rack frame, and multiple crossmembers, it feels dense and solid.
I’ve used it for heavy Smith work, cable work, barbell work, explosive pull-ups, and faster cable movements, and never once has the rack’s stability been a concern.
Rack Finish

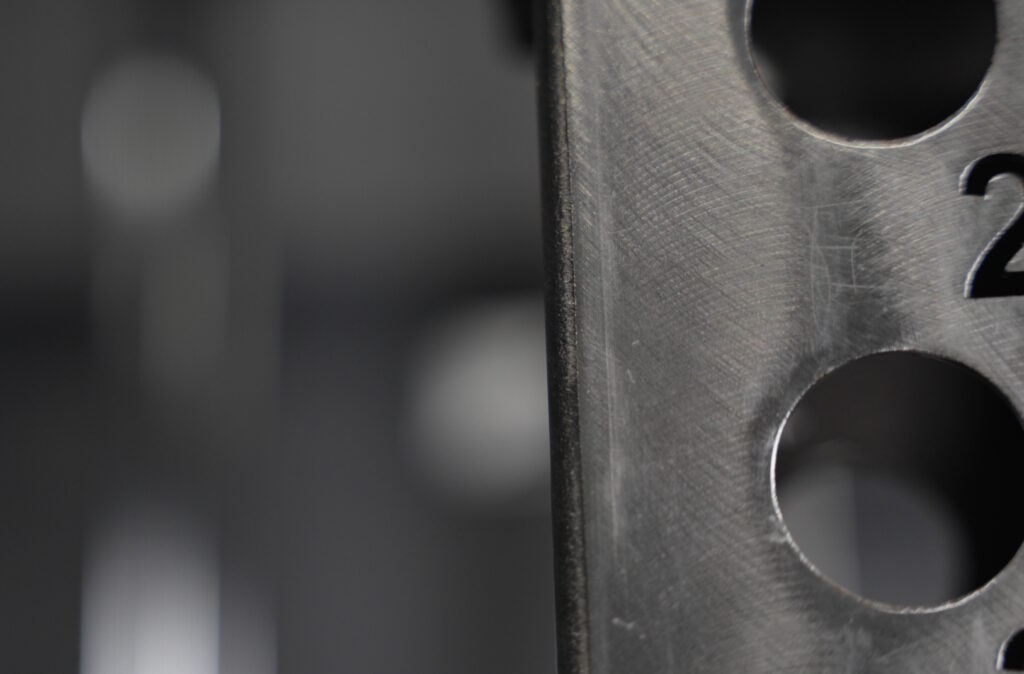
The Force USA C20 uses a matte black electrostatic finish on the rack frame.
Overall, mine has held up pretty well. I wouldn’t put it quite on the level of REP, and especially not Rogue, in terms of overall finish quality and refinement, but it’s solid.
This is separate from the finish on the Smith sleeves and weight plate horns. Those use a different finish and have more obvious scratch issues, which I’ll cover later.
The main wear I’ve noticed on the rack frame is on the edges of the front uprights where the pulley carriages ride up and down. There is some light marking there, but that’s fairly normal. You have a relatively heavy carriage moving repeatedly along the upright, so friction wear is expected.
I’ve seen similar marking on my REP PR-5000 with the Ares system. It’s just less obvious there because of the clear coat finish compared to the black finish on the C20.
Force USA told me they have already improved the finish process on newer units. A very small number of C20 units in the first manufacturing run had more significant chipping issues because the coating wasn’t applied quickly enough after the metal treatment, which affected adhesion. That has since been corrected.
My C20 unit, despite being among the first ones sent out, was not one of the units chipping issues. But Force USA told me that newer units that undergo the improved finish process should fare better than mine when it comes to the slight marring from repeated pulley carriage movement. That said, you should still expect some wear since it’s inevitable due to repeated friction, no matter how good the finish is.
Cable Feel
The cable feel is very smooth, even at lighter weights. There isn’t cable drag like you find on cheaper systems.
There is one nuance with the articulating arms, though. The system feels best when the cable exits the arm in a way that tracks properly over one of the pulleys.
If the cable comes out too straight, it can occasionally bump the exit pulleys and add a tiny bit of friction.
This is subtle. Most people probably won’t notice it right away. But after a lot of use, I started paying attention to how this makes a slight difference in the feel and smoothness. So, now I always make sure to position the arms so the cable rides cleanly over one of the pulleys.
I also had one annoying issue early on where the floating pulley brackets on the sides of the rack would wobble and bang into the upright during certain cable movements, especially if I was going very fast on cable lateral raises. When I hit a certain tempo, the bracket would start oscillating and would eventually smack into the uprights.
But I found the cause: excess cable slack. So I tightened the cable where it meets the weight stack, and the problem went away. There are other adjustment points, but the stack-side adjustment was the easiest one for me.
Despite being fixable, I wish Force USA added a little more space between those brackets and the uprights so the cable tension didn’t have to be quite as dialed in. But once adjusted properly, it has not been an issue. So if you get the C20 and experience the same problem, now you know how to fix it.
Cable Ratios Explained
The Force USA C20 has different pulley ratios, and I’ve found that a lot of people get confused here, so I’ll break it down as simply as possible.
The functional trainer arms are 2:1, which is typical. That means if you select 100 pounds on the stack, you feel about 50 pounds of resistance.
With the upgraded 300-pound stacks, that gives you up to 150 pounds of felt resistance per arm. For nearly all people, that’s plenty of resistance for most, if not all, functional trainer exercises.
And if you somehow find an exercise where you need a little more weight, you can add resistance bands with the built-in band pegs.
The 2:1 ratio also gives you plenty of cable travel; 68 inches to be exact, so you won’t run into any limitations there.
The center pulley system works differently.
The upper center pulleys, which are used for lat pulldowns, are each 2:1 individually, just like the functional trainer pulleys. But in practice, you usually clip both upper pulleys together and use both stacks at the same time. Used that way, it’s easier to think of it like a 1:1 system (even though it technically isn’t, and you do have to select the weight on both stacks).
The lower pulleys, used for low rows and the optional Sliding Bench, are each 1:1. Since you usually connect both lower pulleys together, you can effectively access both stacks at full resistance.
With 300-pound stacks, that means you can theoretically get up to 600 pounds of felt resistance through the low row setup if you use both pulleys together. So, in that way, you can think of it as a 2:1 ratio (even though it’s really just two 1:1 pulleys used together).
Of course, nobody needs 600 pounds of resistance for rows, but it does come in handy if you plan to use the optional Sliding Bench for leg press or hack squats.
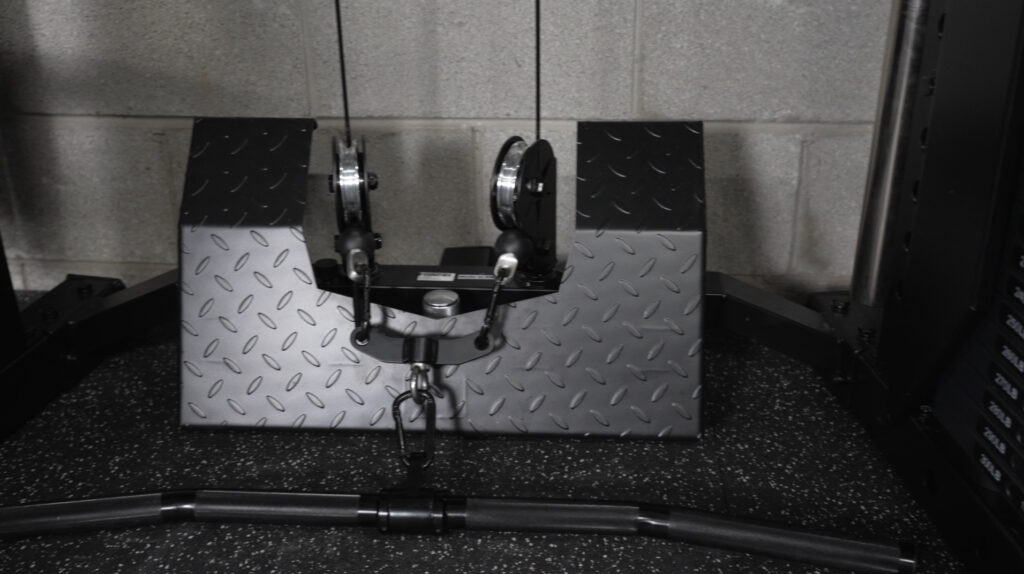
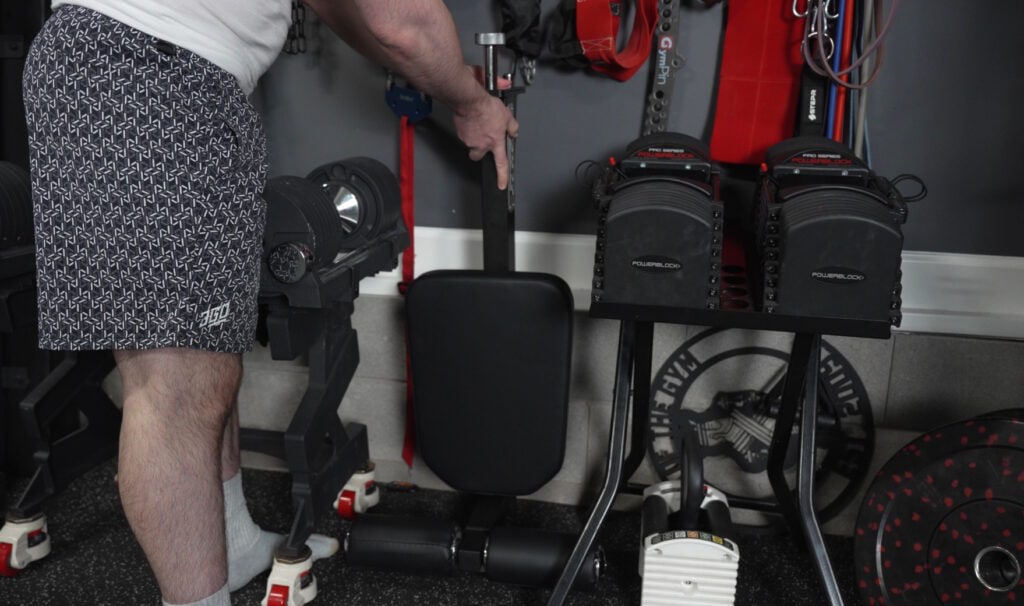
Optional Sliding Bench
Speaking of the Force USA Sliding Bench, I should clarify that I don’t currently own it, at least not yet. I only tested it briefly at Force USA HQ, so I can’t speak to long-term use.
From what I tried, though, I can say it’s a very clever use of the center pulley system for leg press and hack squats while saving space in your gym compared to a dedicated machine.
It also comes with a leg developer attachment and preacher curl pad, so you can also do leg curls, leg extensions, and preacher curls on it; all using your C20’s cable tension.
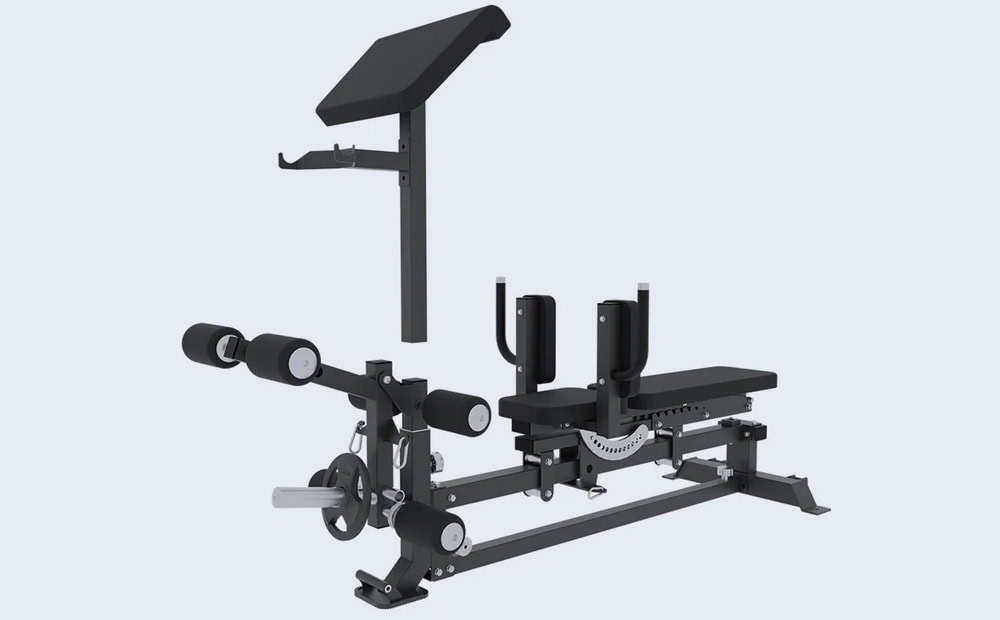
The footplate angle, bench starting position, and seat angle are adjustable, though it does take some setup time to switch everything into position.
And in case it wasn’t obvious, it also acts as a regular adjustable weight bench, so you can use it for bench press, incline press and seated press, and virtually anything else you’d use an adjustable bench for; with the caveat being that it’s a bit more cumbersome to move around.
I hope to get this in my home gym at some point to test and review, since I have heard a lot of people really do love it.
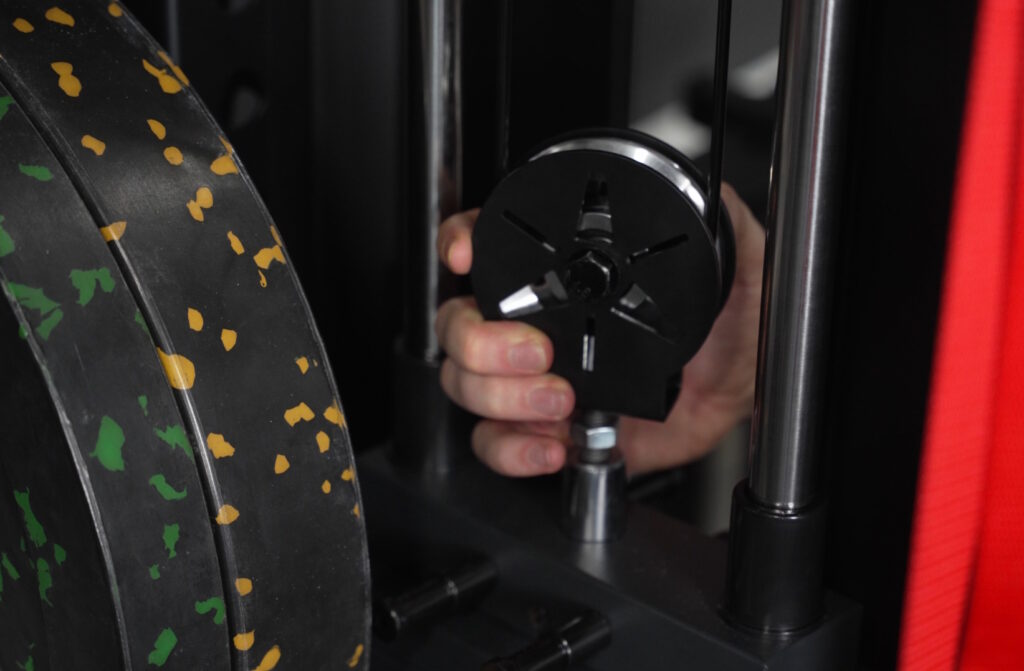
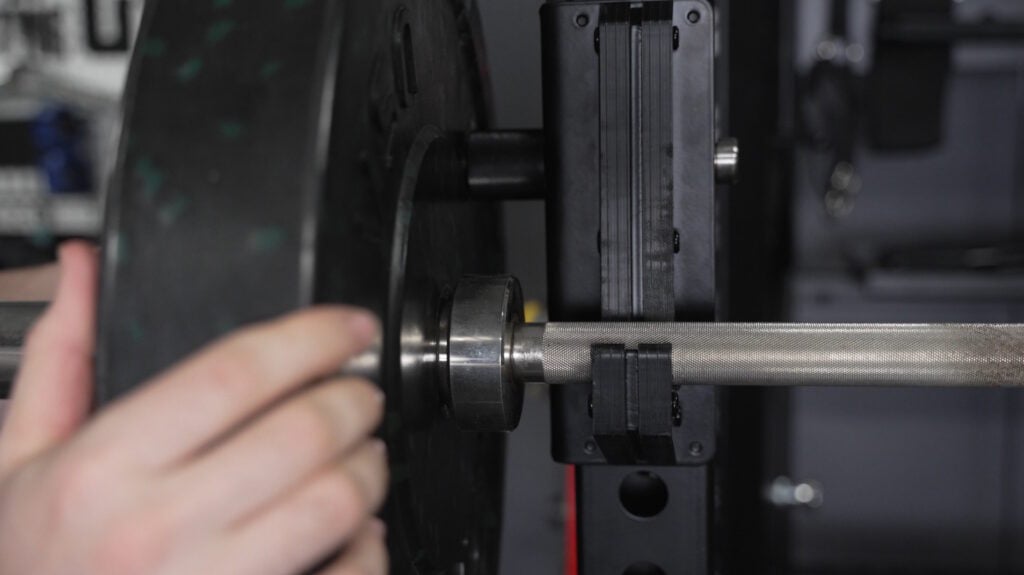
Weight Stack Options
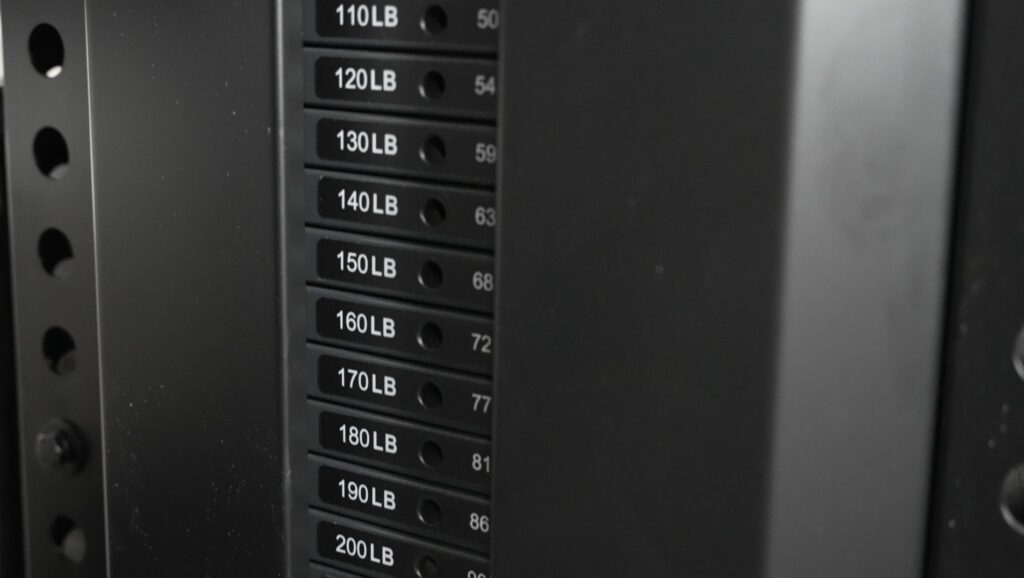
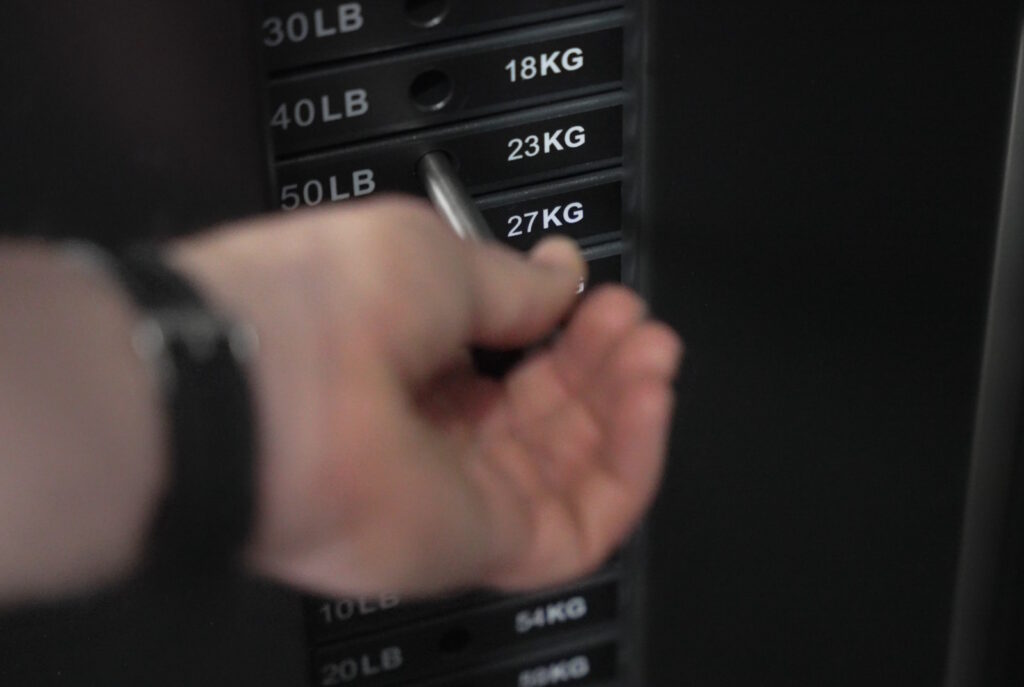
The Force USA C20 comes standard with 200 pounds per stack. You can upgrade to 250 pounds per side, then upgrade again to 300 pounds per side.
I went all the way to 300, and I’m glad I did. The 300-pound stacks make the machine feel more future-proof. They give the upper pulleys plenty of resistance for lat pulldowns, let you take full advantage of the Sliding Bench (if you choose to get it), and they make the 2:1 functional trainer arms more capable for stronger users.
That said, not everyone needs the full upgrade.
If I weren’t already maxing out cable shrugs on the functional trainer and considering the Sliding Bench in the future, I probably would have stopped at the 250-pound upgrade. I do a little over 200 pounds for lat pulldowns and don’t see myself going over 250 there.
Each stack also has a built-in 5-pound drop-down plate. This is a great feature because the main plates move in 10-pound increments. For smaller cable movements, 10-pound jumps can be too large, so the drop-down plate makes progression easier without needing a separate add-on weight that you have to store elsewhere when not in use.

Just make sure to apply silicone lubricant to the guide rods. This improves the motion of the entire stack, with the difference being most noticeable when manually adjusting the 5-pound drop-down plates up and down.
One minor callout about the weight stacks is that there isn’t a good place to store the selector pin when you’re using only the top plate. This is common on many stack designs, and I understand why it’s difficult here because the center rod takes up the obvious hole location. Still, an integrated top-plate pin holder would be a useful quality-of-life improvement.
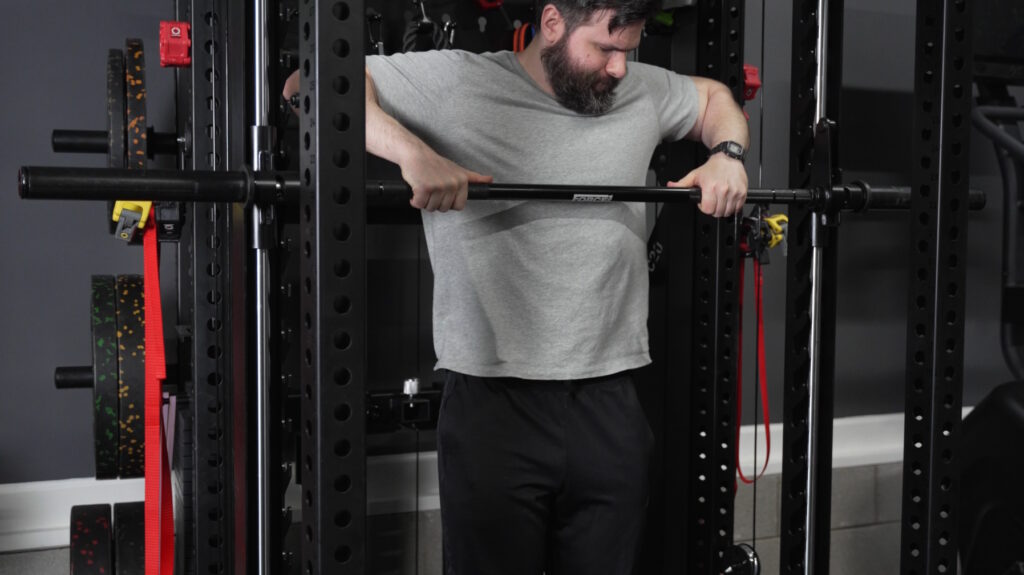
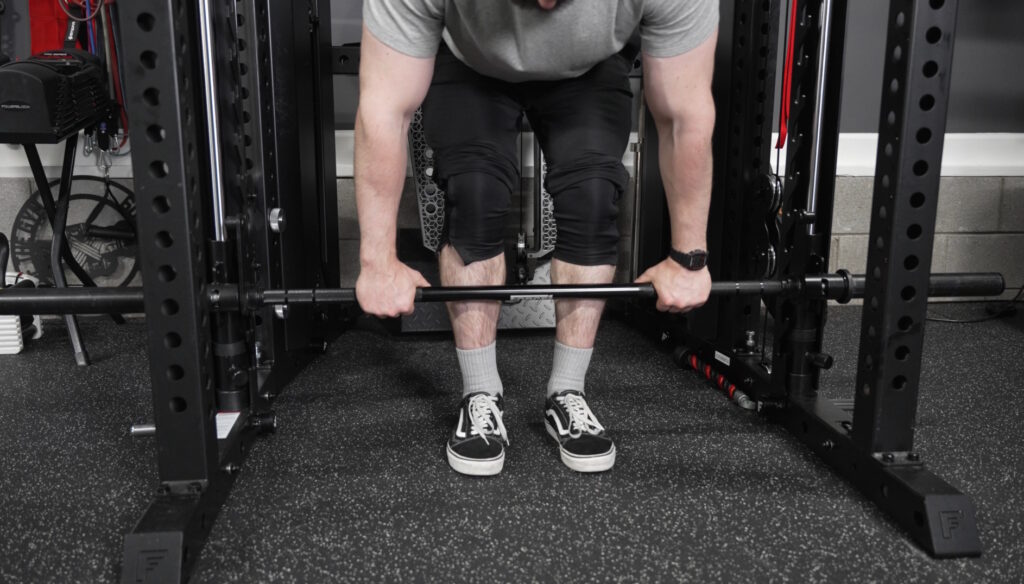
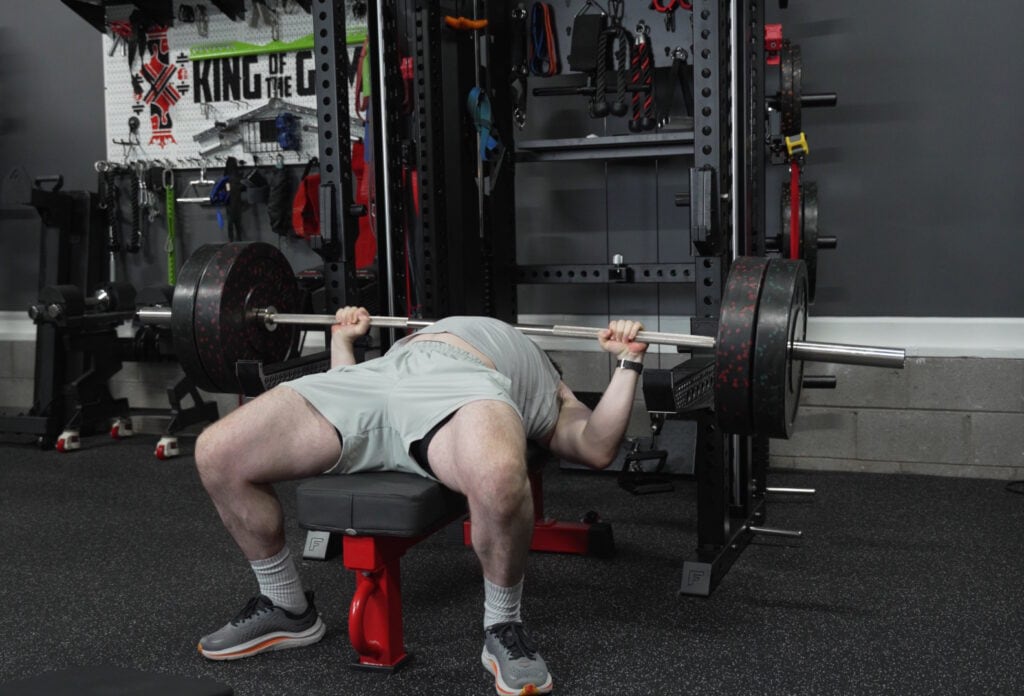
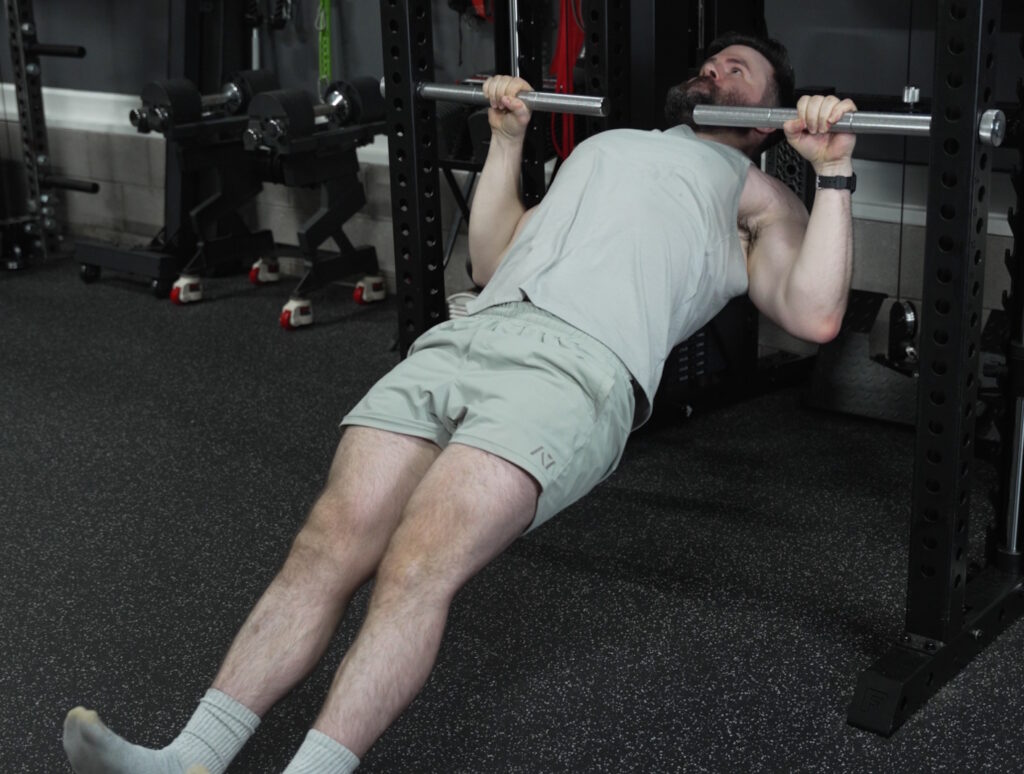
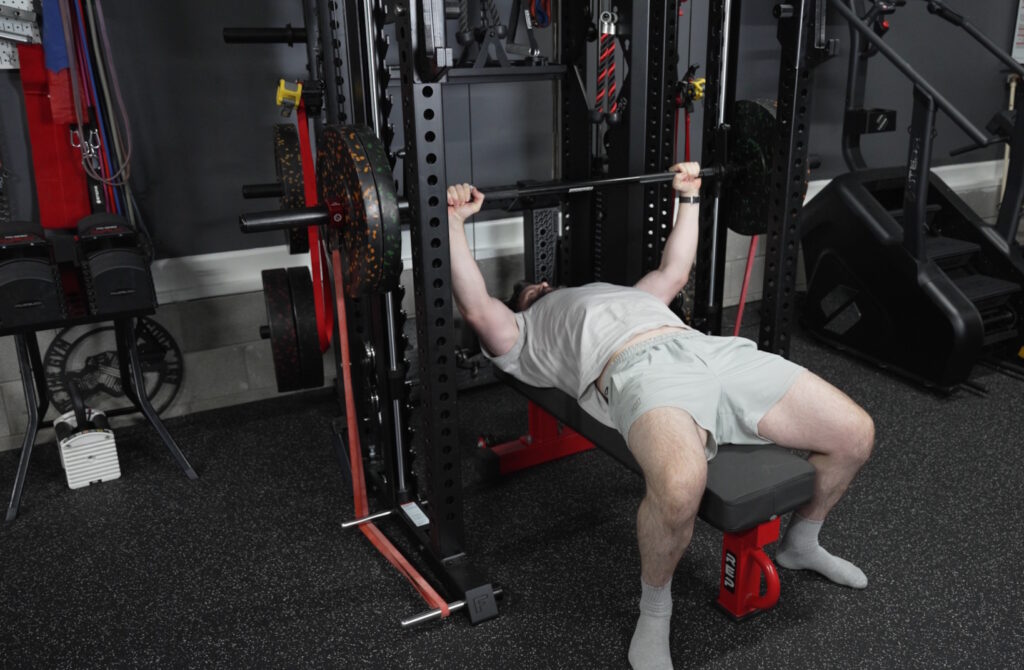
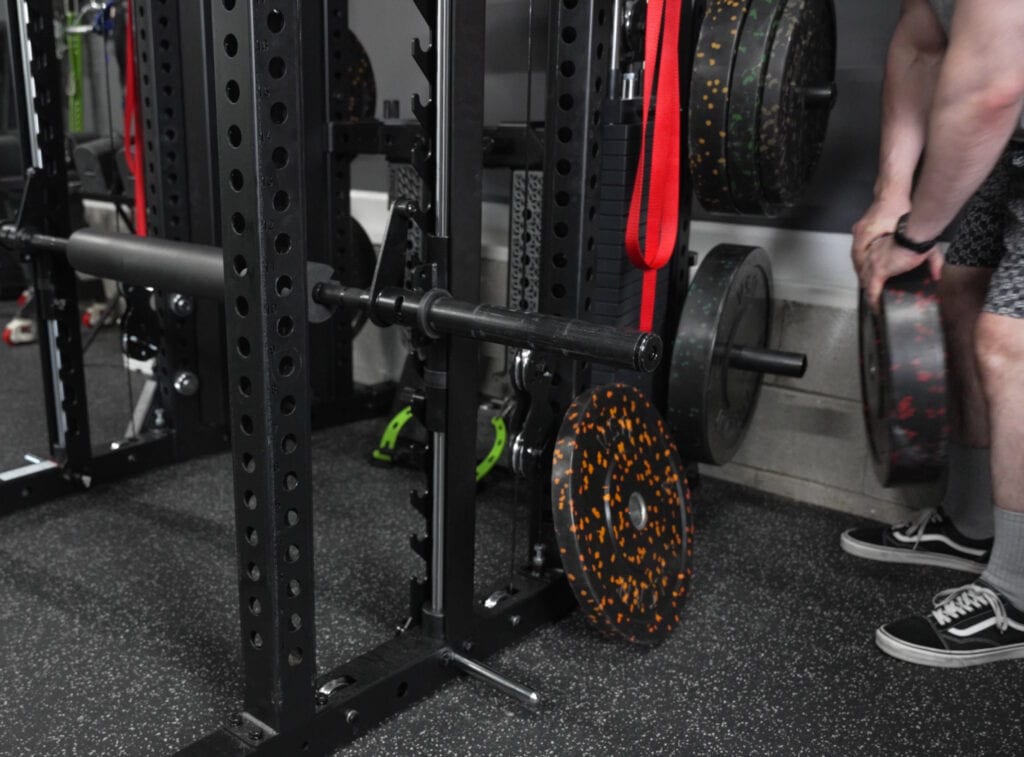
Smith Machine
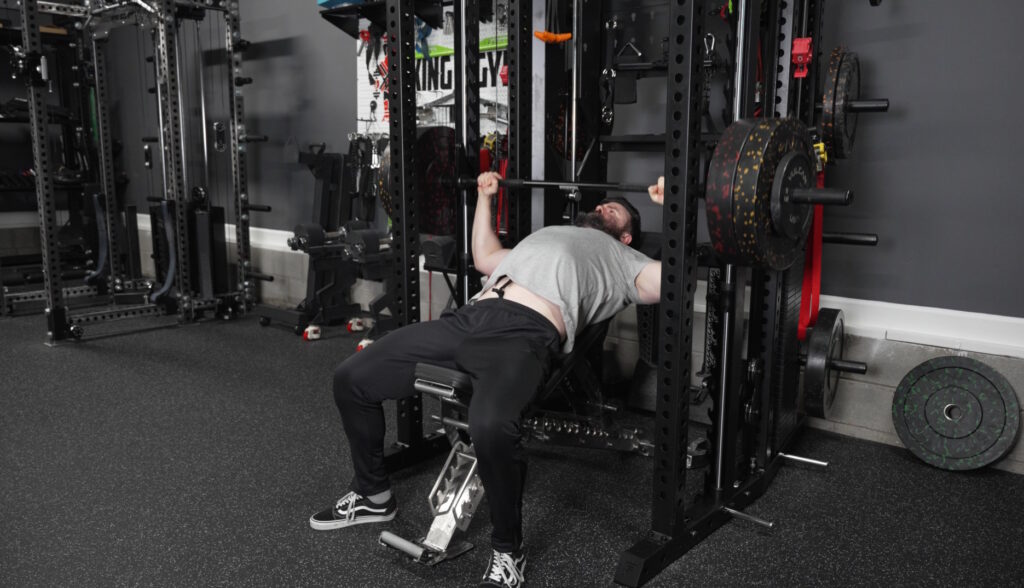
The Smith machine is one of my favorite parts of the Force USA C20, second only to the articulating arms.
It feels smooth, the bar has A LOT of racking positions, and it does not feel like an afterthought.
My three favorite exercises on it are incline press, hack squats, and RDLs.

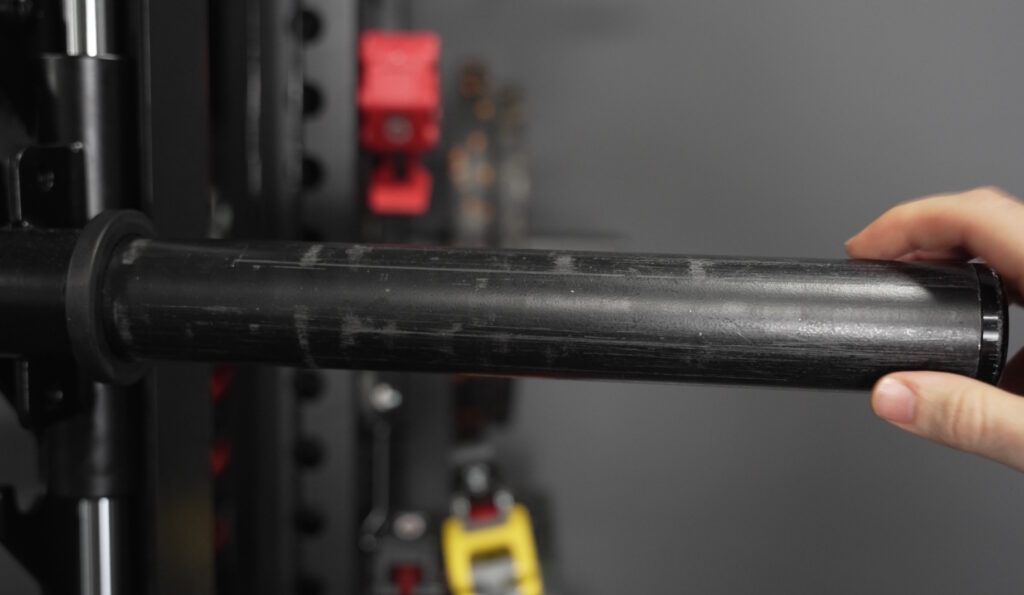
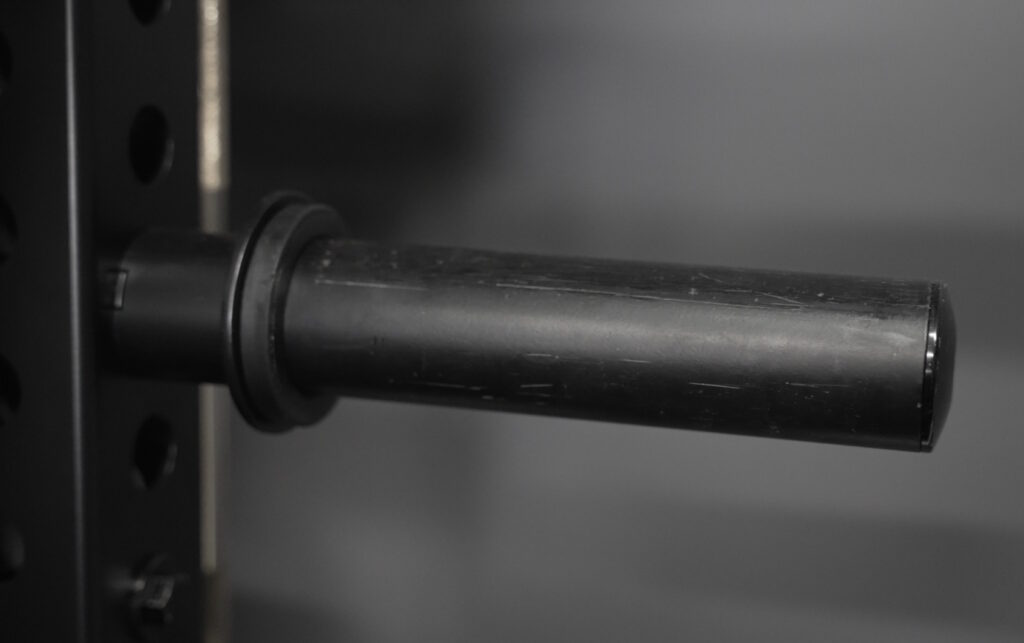
Notably, the Smith bar is not counterbalanced. It weighs about 36 pounds empty, as confirmed by my luggage scale. I prefer this to a counterbalanced bar simply because I never need to use anything lighter than that, so that means I have to add fewer plates.
The best part of the Smith machine is the range of motion, especially on the low end. Many all-in-one trainers limit how low the Smith bar can go, often because the frame base gets in the way if it has a sumo base, and/or because the Smith safety catches take up a lot of space.
The C20 does very well here. The combination of a flat foot base and compact safety catches mean the Smith bar can come all the way down to around shin level.
It is not quite low enough for a true deadlift starting position, but it gets close enough to make RDLs feel excellent.
That is very important for me because I do Smith machine RDLs every week. I can get well below the knee and achieve a full hip hinge range of motion. Most Smith machines don’t allow that, especially those on all-in-one trainers.
The range of motion on the top end is also pretty good. The Smith bar can be racked as high as about 6’4”, so most people won’t bump their head walking through the rack when it’s stored at the top.
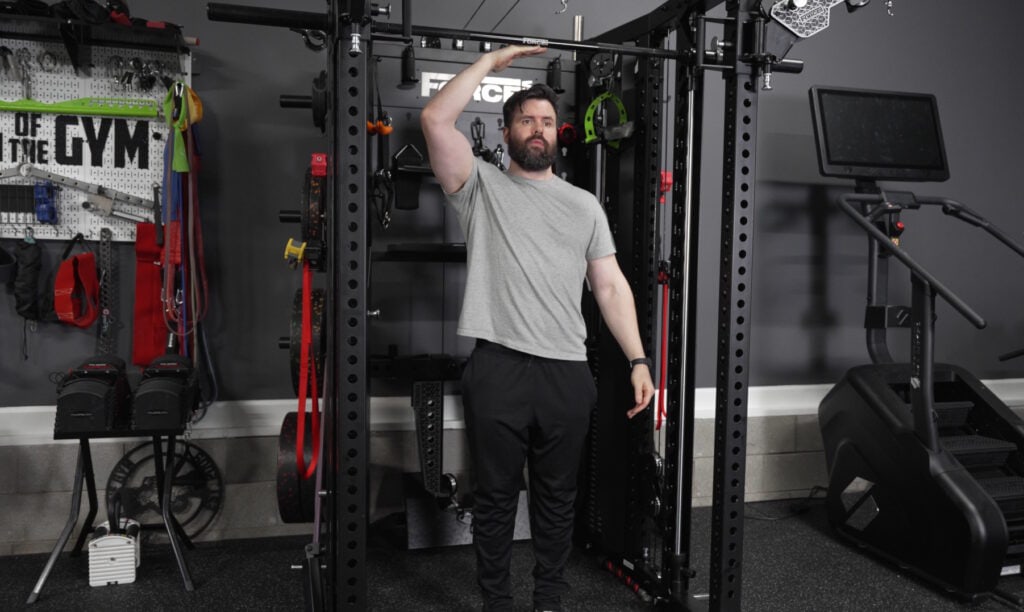
It is not high enough for standing Smith machine overhead press (unless you’re on the shorter side), but that is mostly because the Force USA C20 itself is not that tall of a rack (88” exterior height; 81” interior height).

The racking system is well-designed overall. Instead of bulky external pegs like on the Force USA G-Series models, the C20 integrates the Smith hooks into the vertical shrouds around the Smith guide rods. This looks cleaner, gives you more usable space around the bar path, and avoids the elbow-clearance issues that can happen with some of Force USA’s older all-in-one designs.
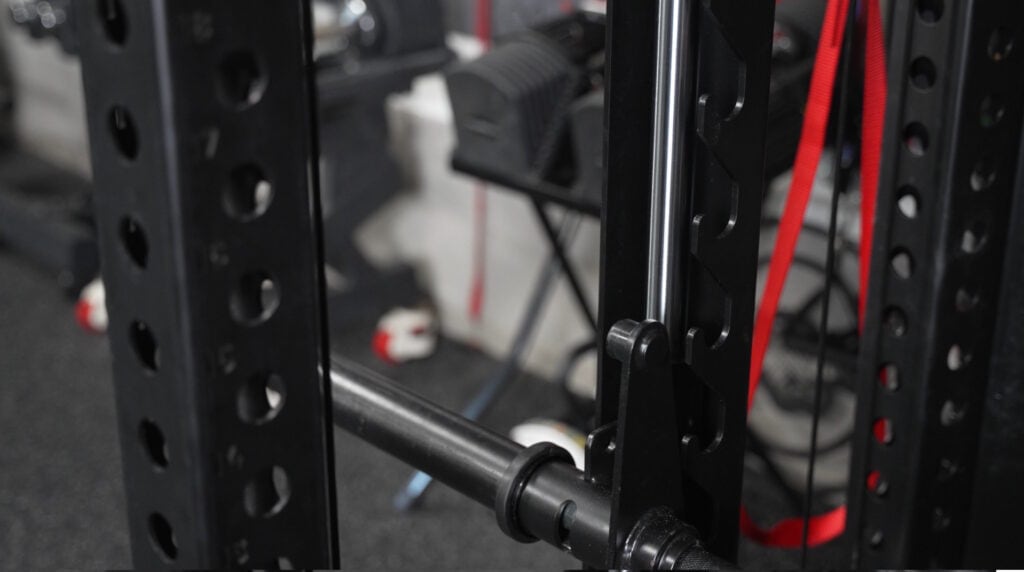
The Smith safety catches ride on bearings and feel smooth when adjusted. The safety handle is also knurled, which is a small but nice detail.
I also like that the safety system is housed within the Smith structure. If you ever have to drop the bar onto the safeties, the impact is absorbed through that integrated casing rather than a more minimal bolt-on setup.
The Smith bar itself feels good in the hands. It has dual knurl marks, which make hand placement easy. The knurling is sufficiently grippy for a Smith bar. It is not overly aggressive, but it has enough texture to feel secure. I only need a little chalk when going heavy on Smith RDLs.
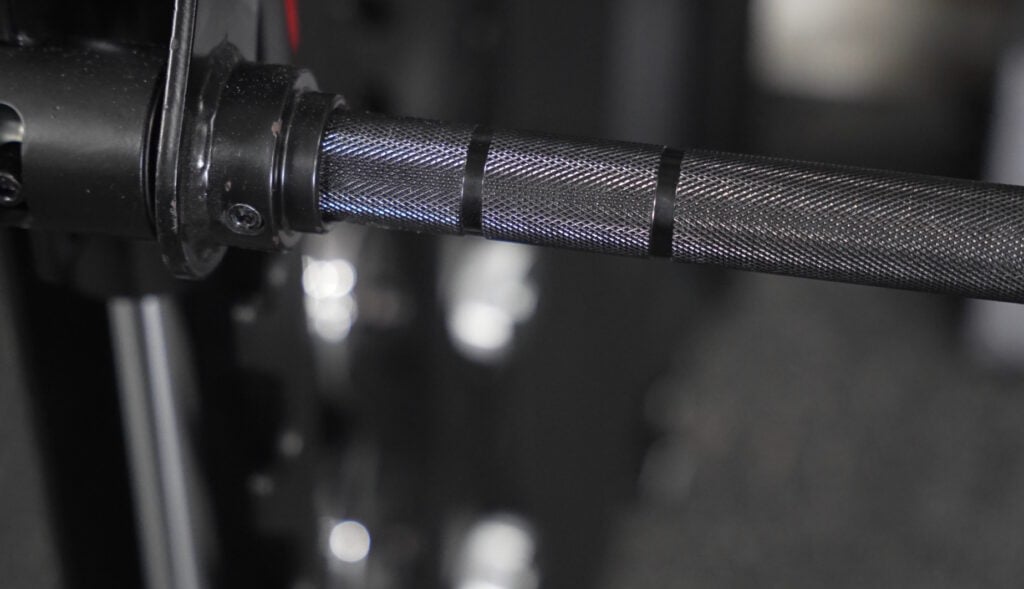
I do wish the Smith bar had a center knurl section, though. It wouldn’t need to be aggressive. Even a passive center knurl would help for Smith hack squats or any movement where the bar is on your back.
Smith Machine Issues and Improvements
The biggest usability improvement I’d like to see on the Smith machine is numbered height markings to make racking the bar or setting the safeties faster and more repeatable.
Right now, if you want to set the safeties evenly, you have to eyeball both sides, lower the bar onto the safeties, and confirm that they match. That works, but it’s slower than it needs to be.
It’s also not just a convenience issue. If the safeties are mismatched and you drop the bar, you could potentially create binding or uneven stress.
I would not want laser-cut numbers because cutting into the steel could weaken the structure. But laser-etched markings would solve the problem without compromising strength.
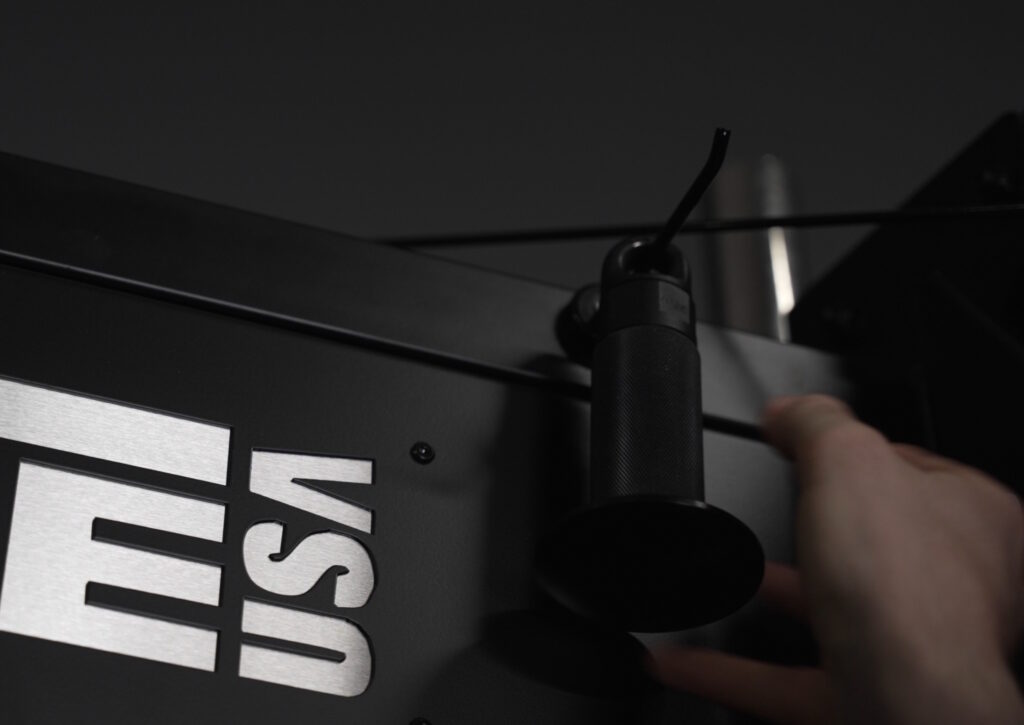
There is also one small design flaw near the base of the Smith machine. The magnetic band peg does not sit completely flush in the hole at the base of the Smith machine because the hardware gets in the way.
The peg still works and won’t fall out, but it does negate part of the magnetic benefit. This only happens in that specific Smith machine area. The other band peg locations work normally.
The biggest negative with the Smith machine is the sleeve finish. The sleeves scratch very easily. Mine started showing scratches almost immediately.
I’m generally not a fan of black sleeve finishes because they tend to show wear faster than chrome. But the finish used here scratches much quicker than I’d like.
I think Force USA should either upgrade the Smith sleeves to black Cerakote if they want to keep the black look, or switch to a classic chrome finish (true chrome; not decorative chrome). Chrome would probably be the safer choice from a durability standpoint, and it would also look good against the black frame.
The weight plate storage horns suffer from the same issue.
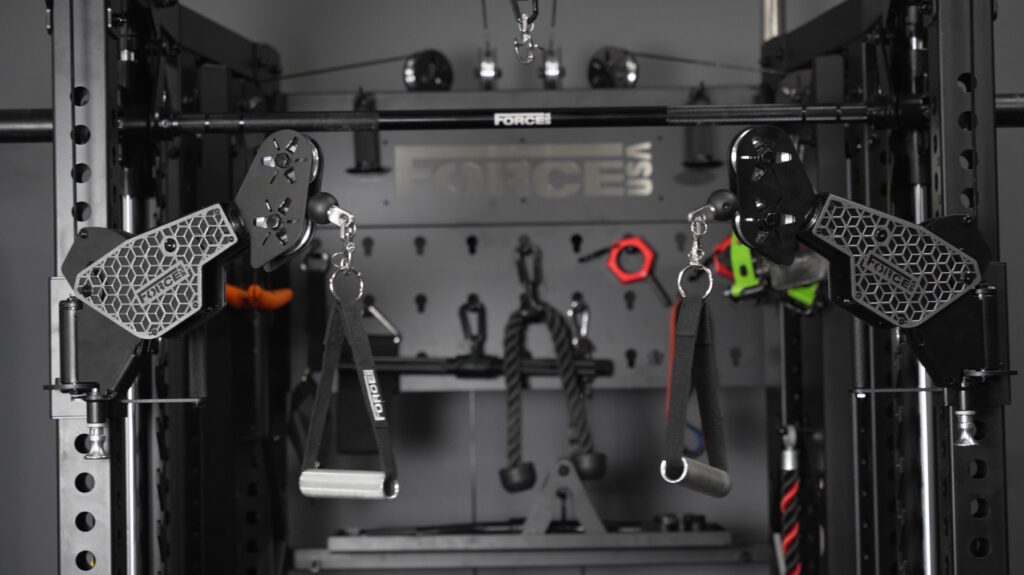
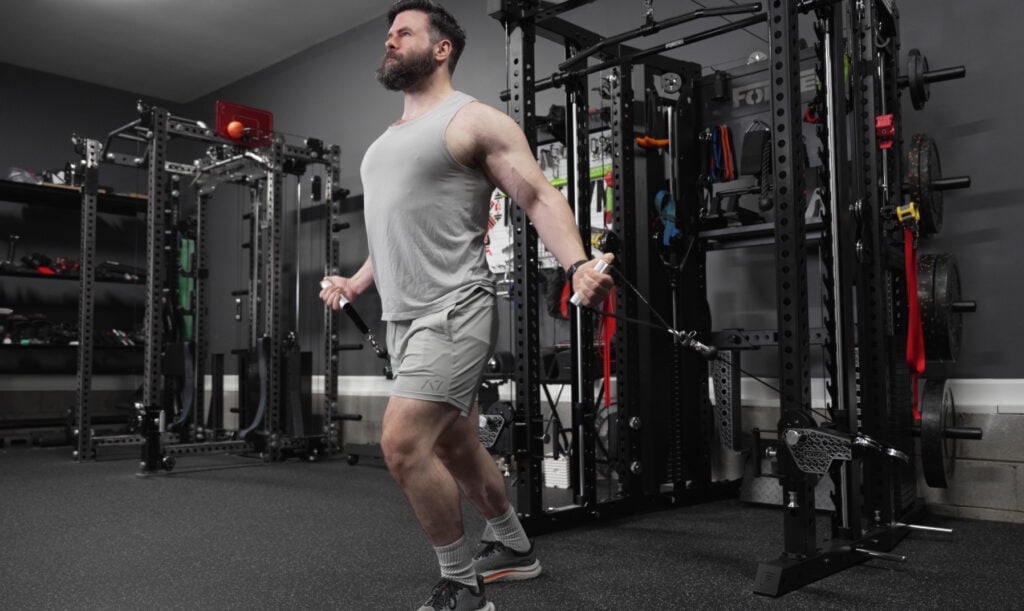
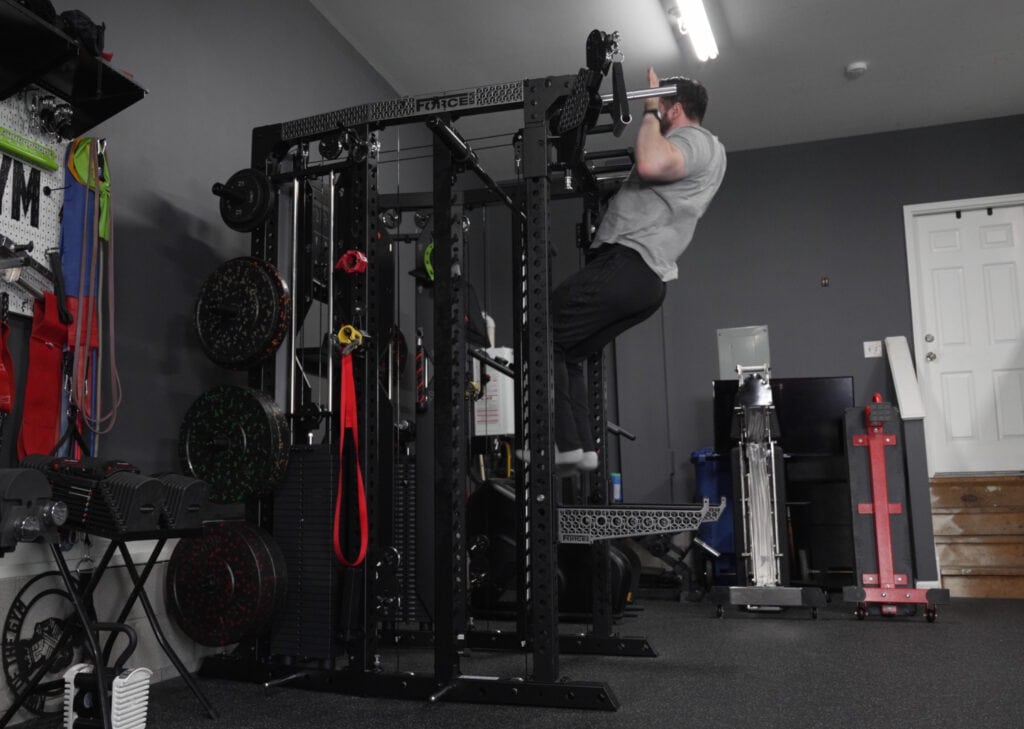
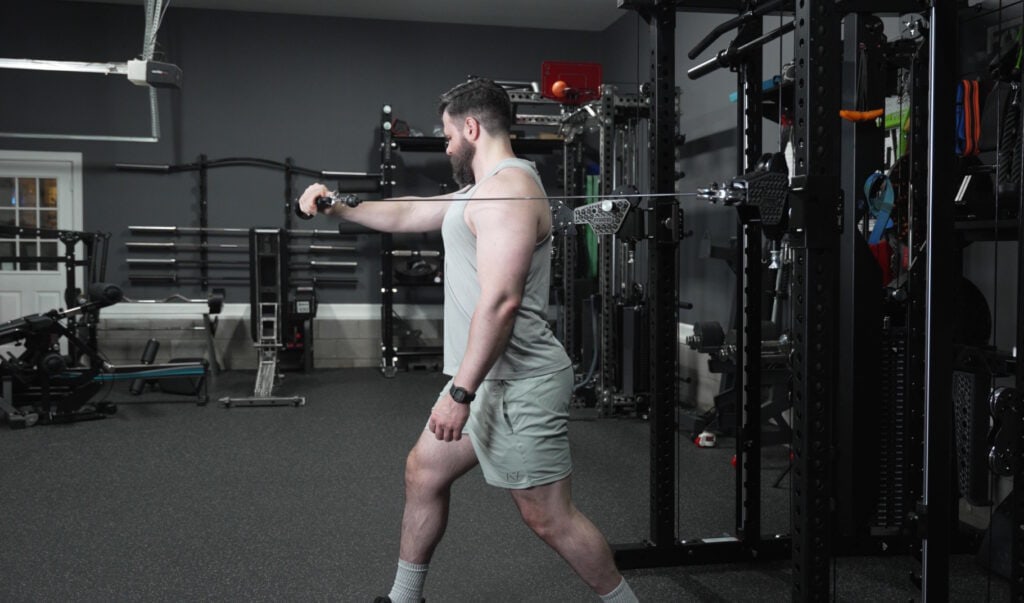
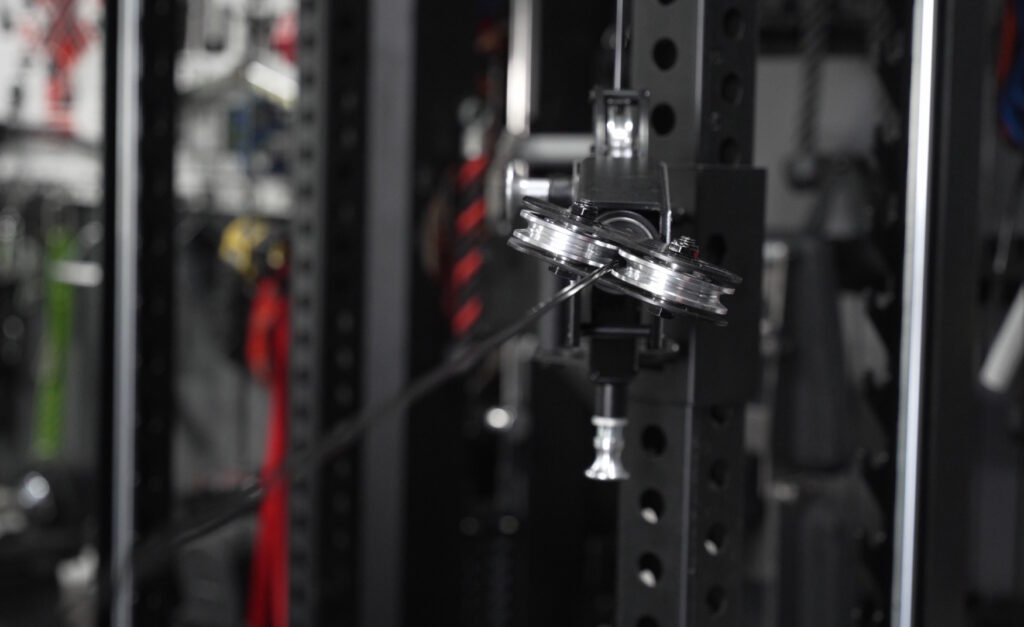
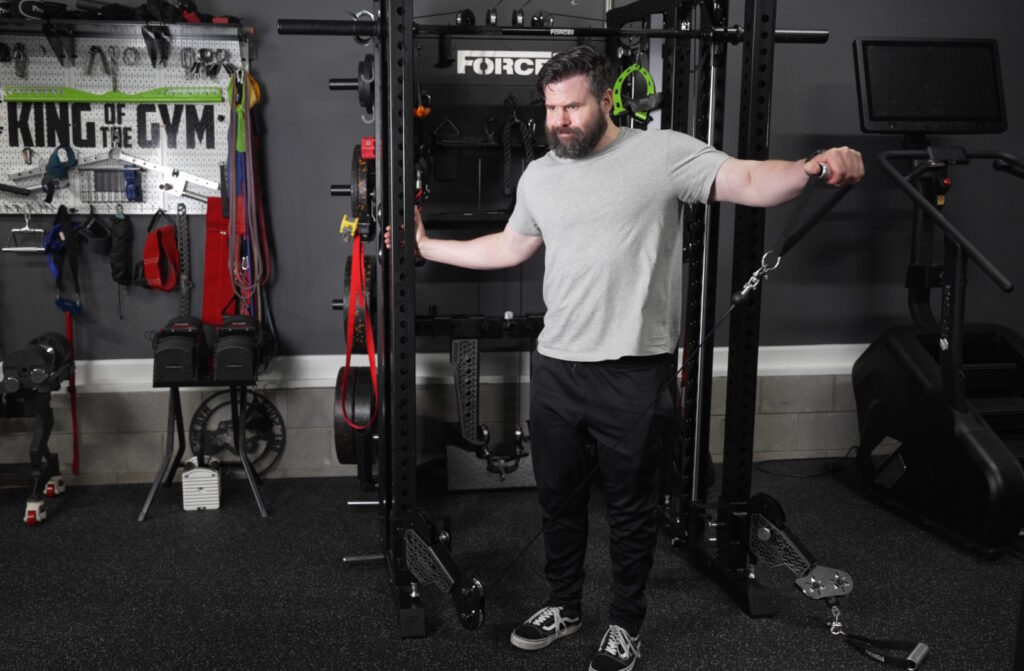
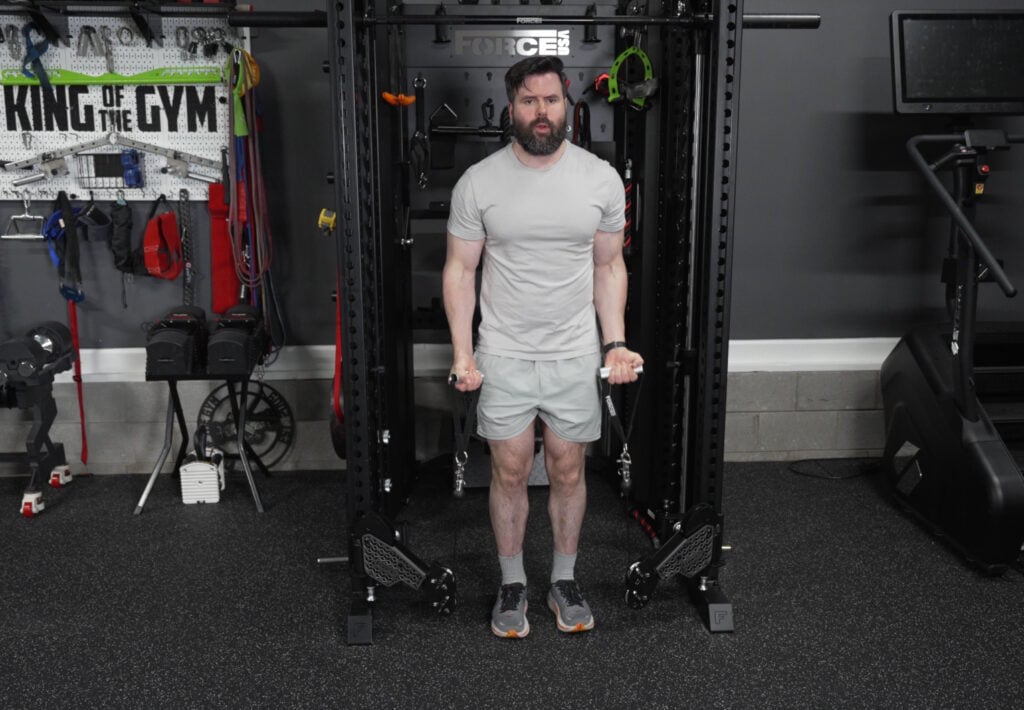
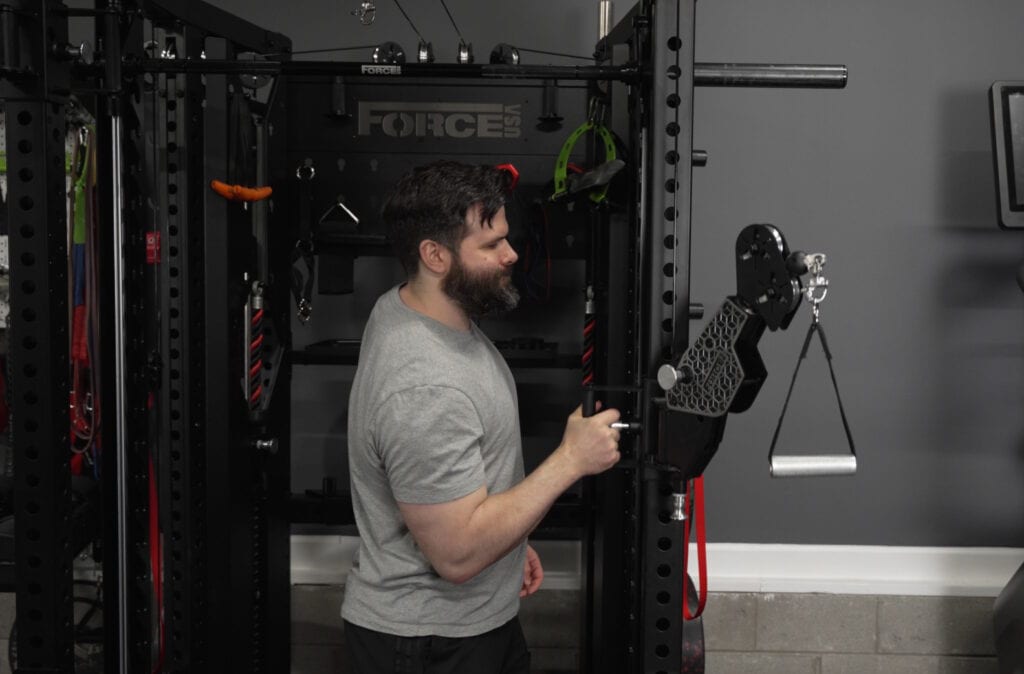
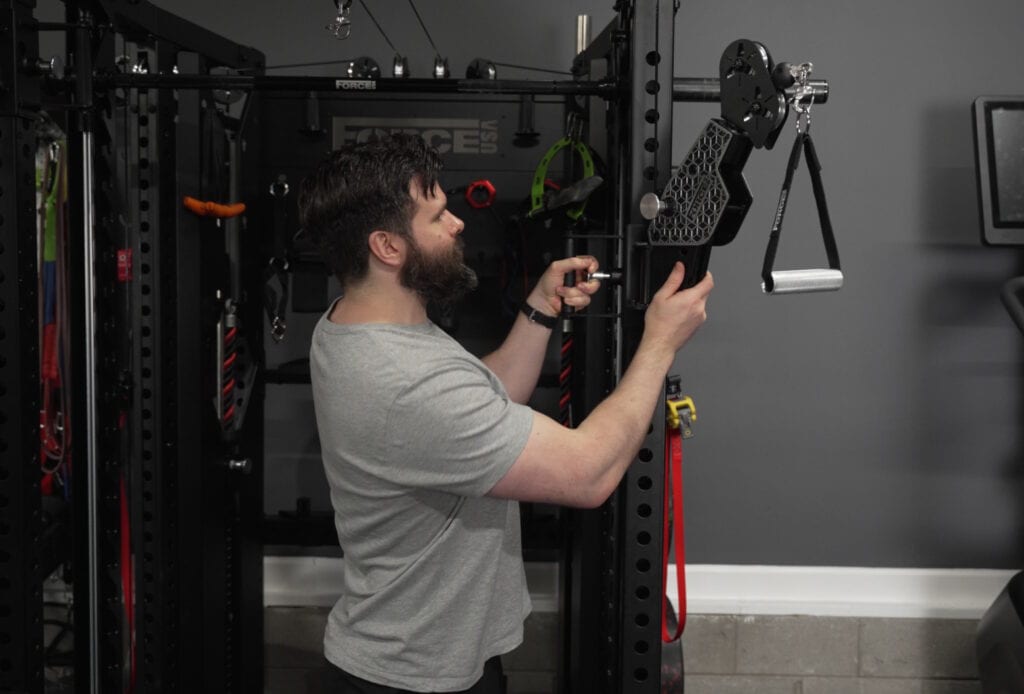
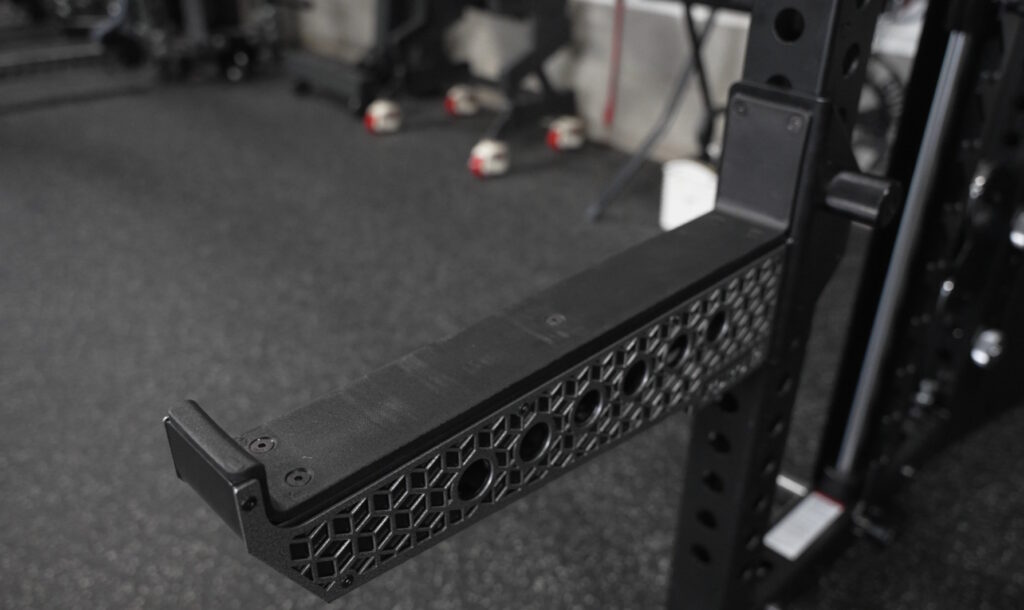
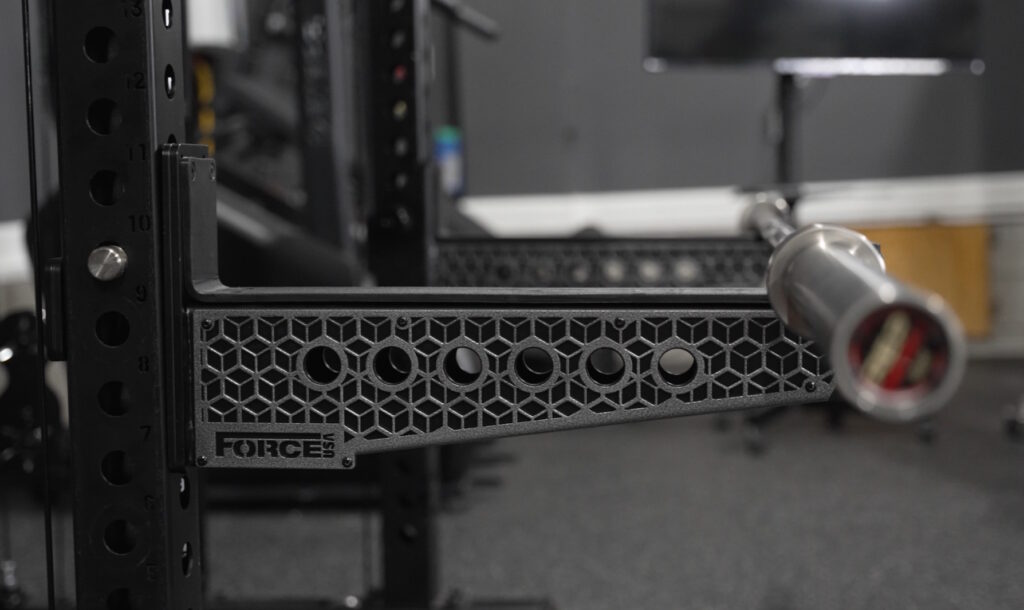
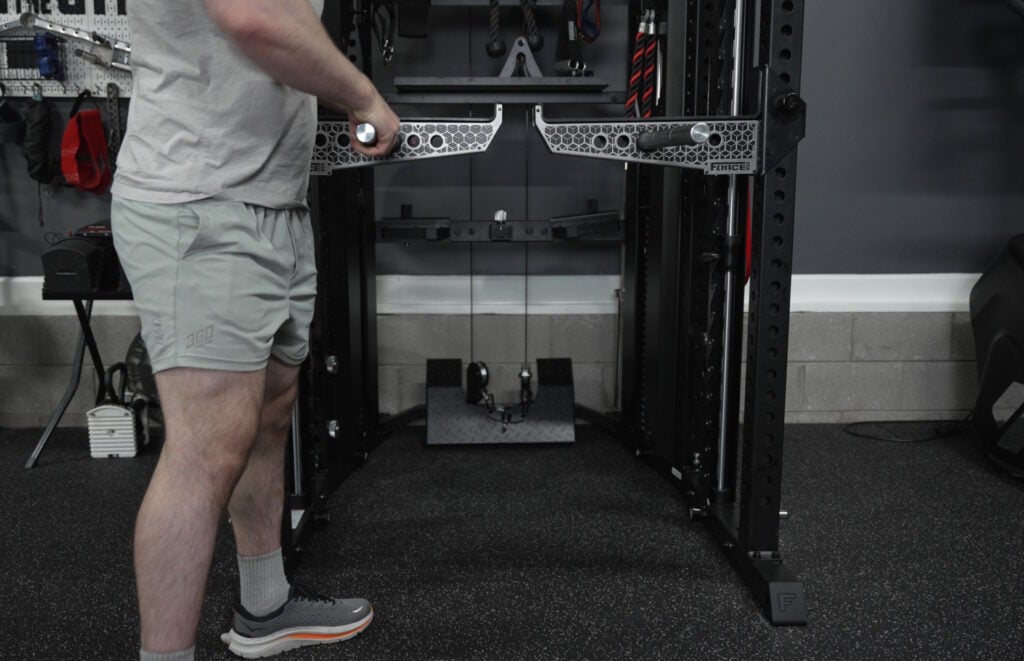
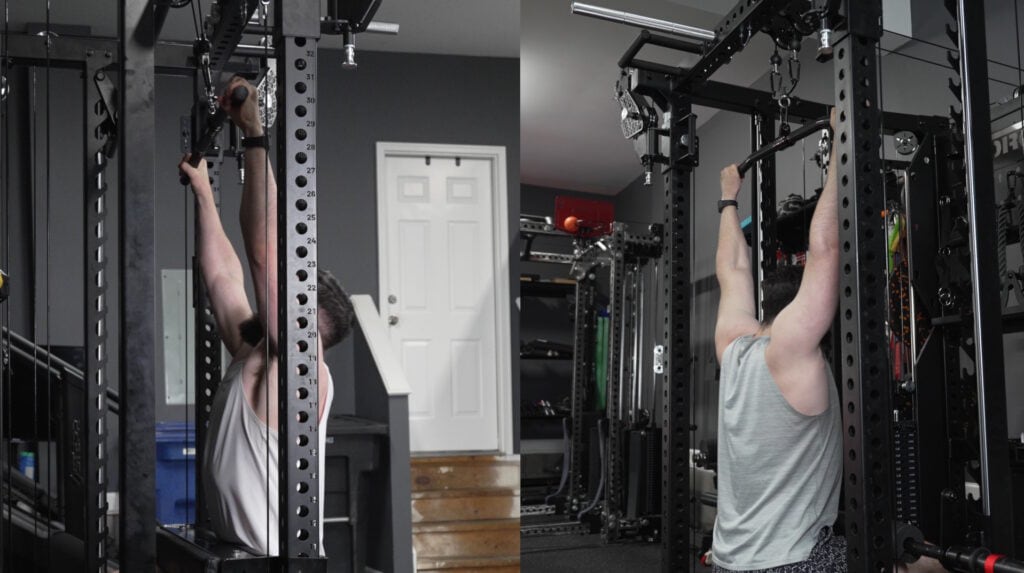
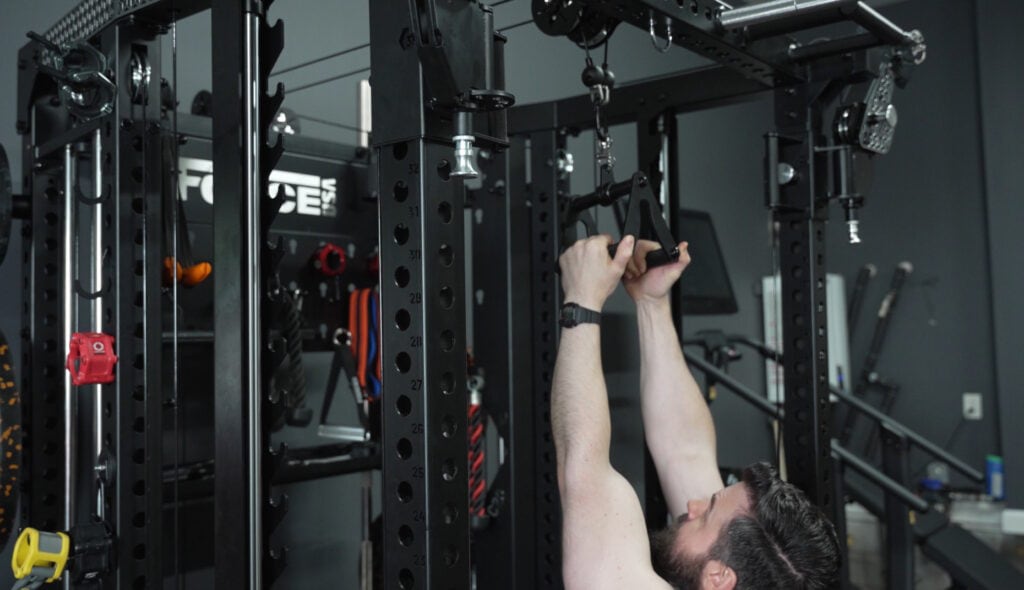
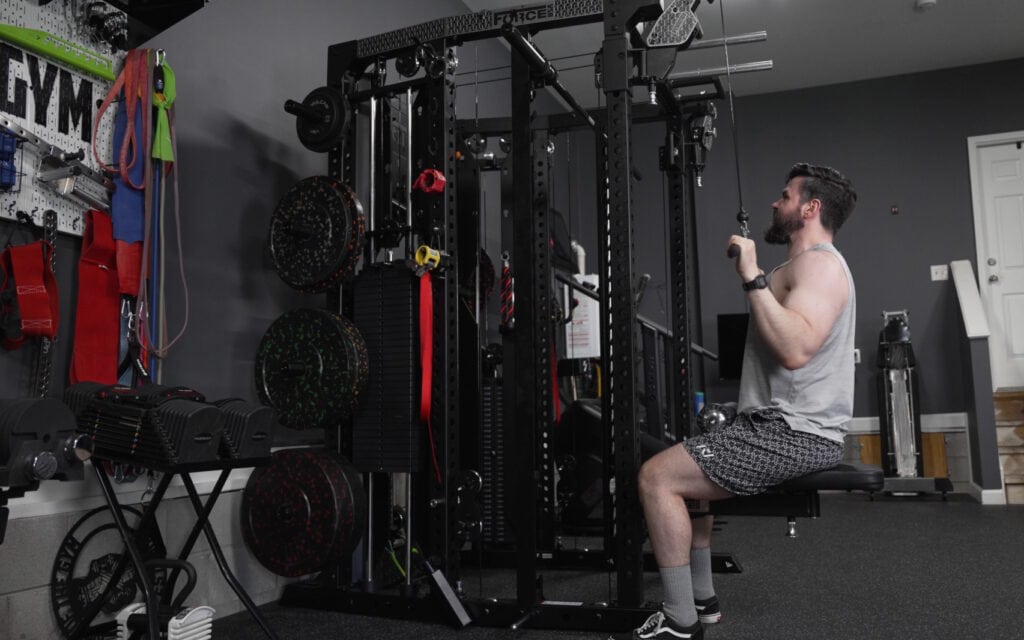
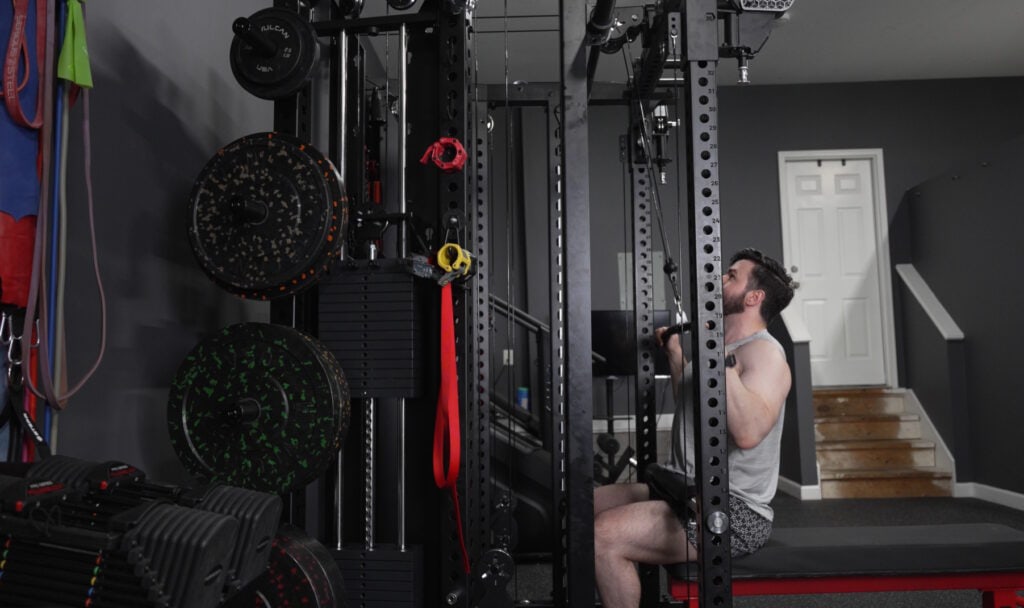
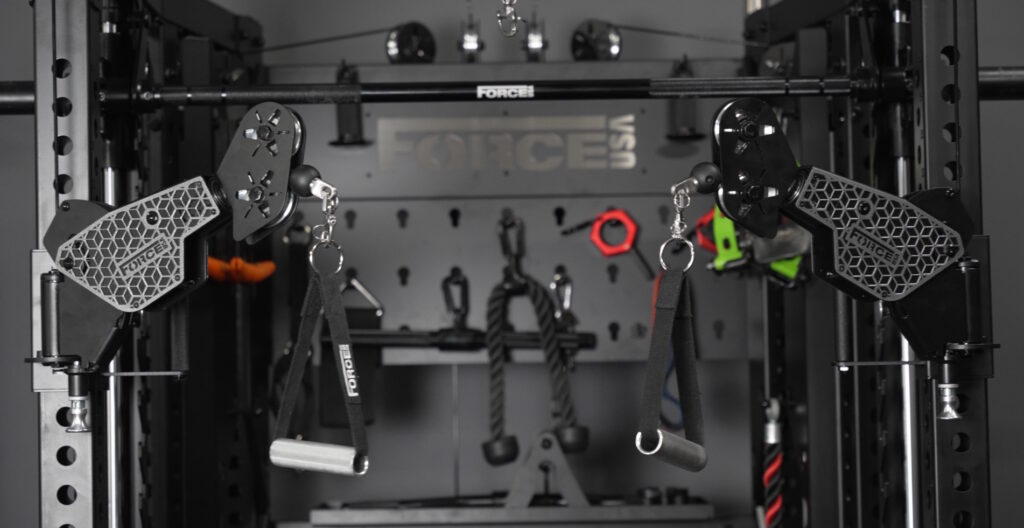
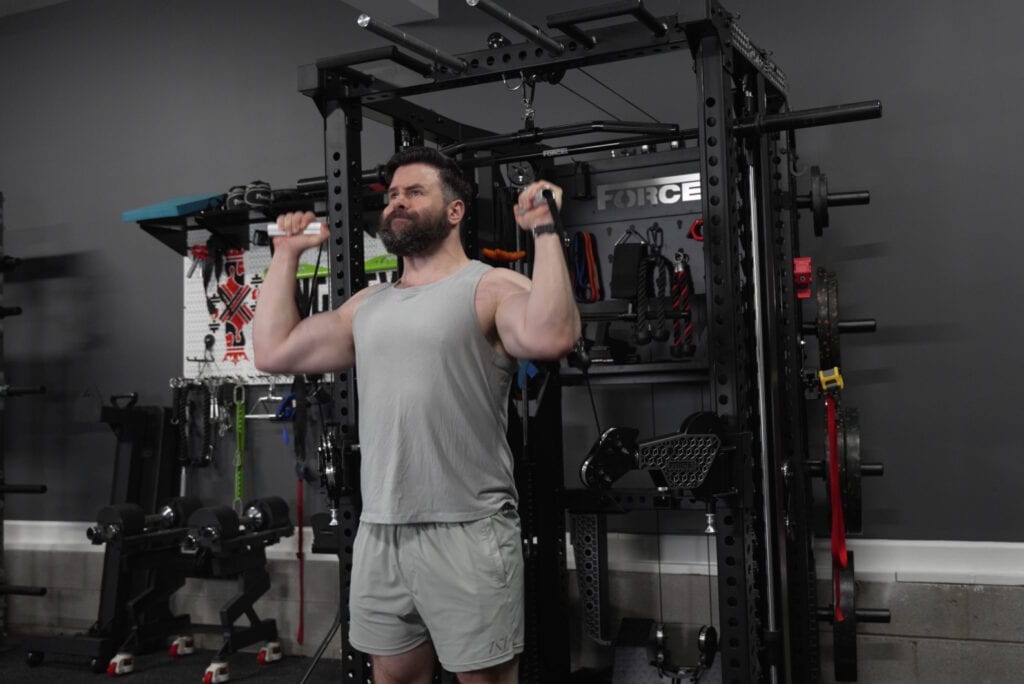
Articulating Functional Trainer Arms
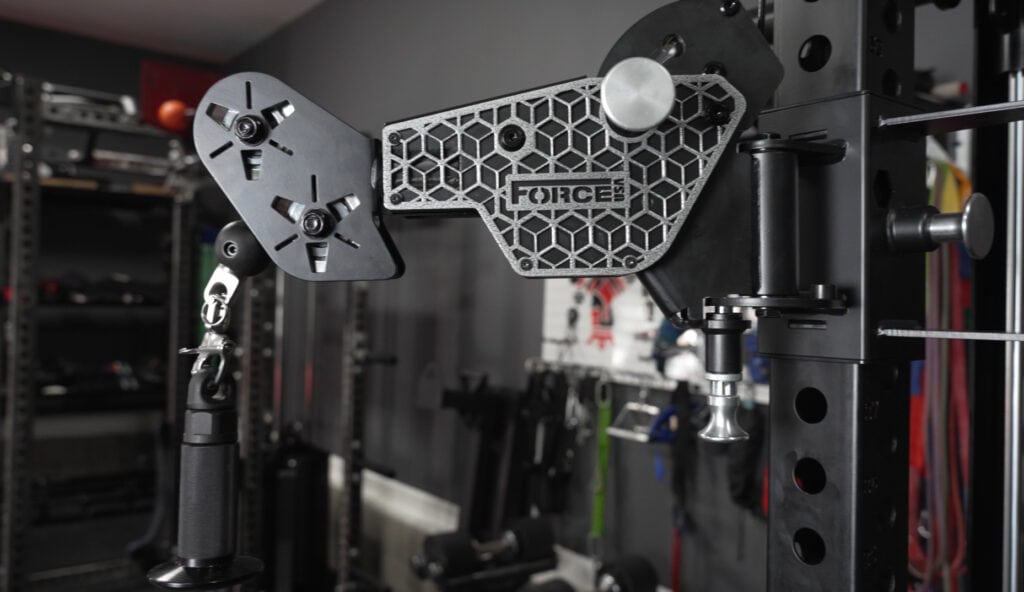
The articulating arms are my favorite part of the Force USA C20 and the feature that most clearly separates it from most other all-in-one trainers.
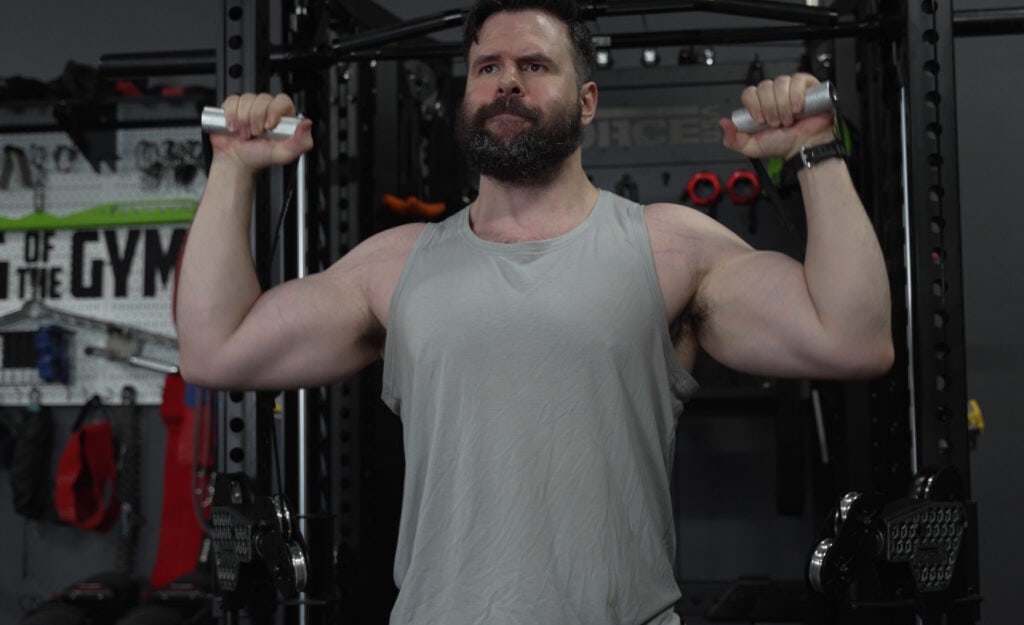
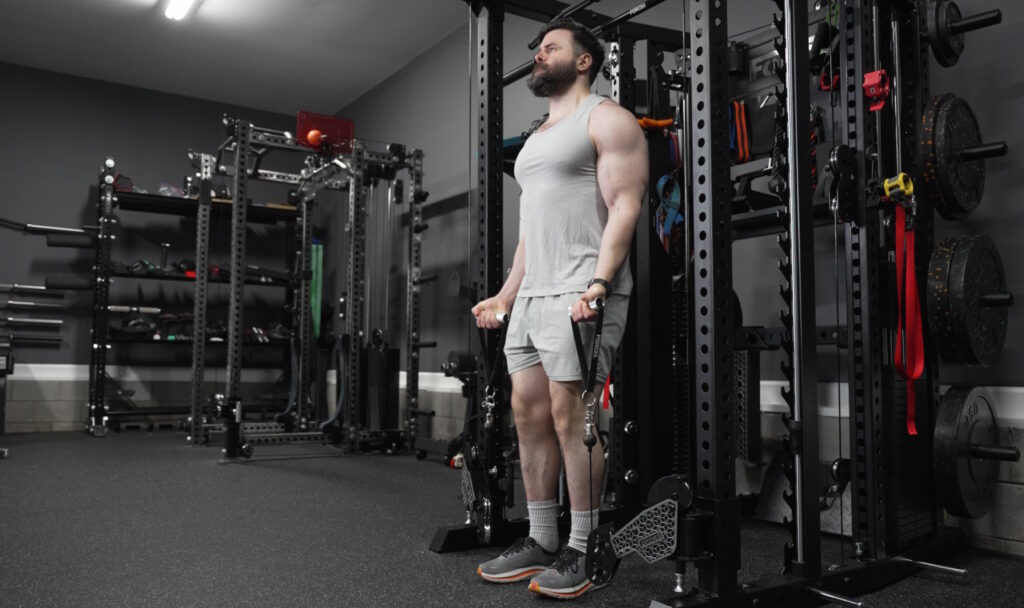
My favorite exercises on the articulating arms are shoulder press, cable crossovers, bilateral curls, and cable shrugs. But that’s just the tip of the iceberg in terms of what’s possible.
On a standard rack-integrated functional trainer, the pulleys are usually fixed close to the uprights. That works, but it limits your angles, range of motion, and setup positions. The C20’s arms let you move the pulley point outward, inward, up, down, and basically anywhere in between.
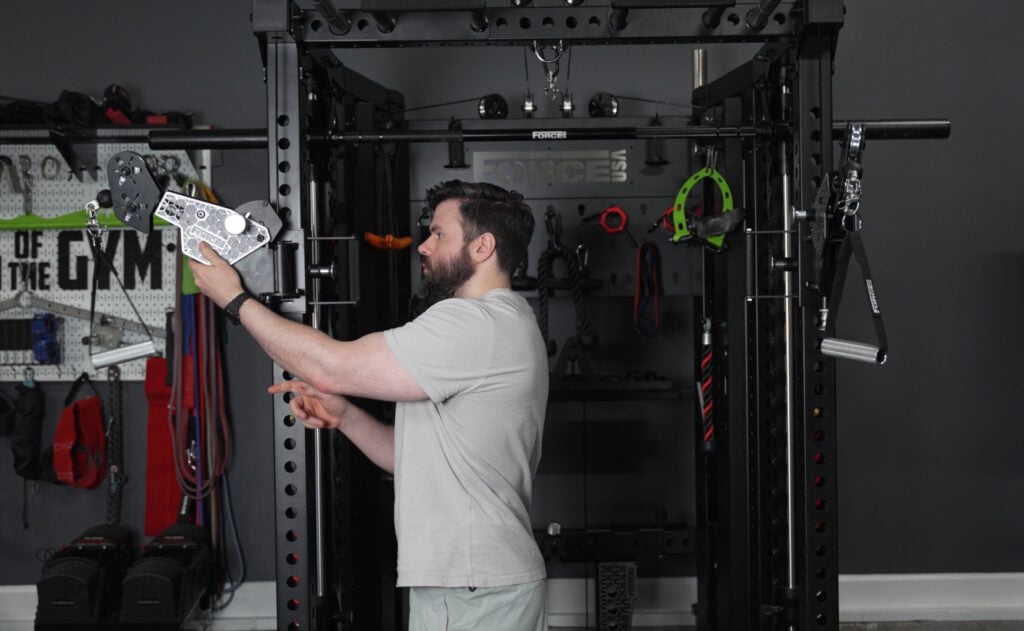
The arms are 15.5 inches long, and the pulley head at the end rotates to follow the line of pull.
Combine that with the usual rack height adjustments, and you can set up the cable position very precisely to allow for more (and more effective) exercises than would be possible on a traditional setup.
The most obvious use of the arms is cable crossovers. On a typical rack-mounted functional trainer, the pulleys are too close together to get a deep crossover stretch. With the C20, you can swing the arms outward and create a much wider cable path. It feels much more like a traditional cable crossover station with towers spaced farther apart.
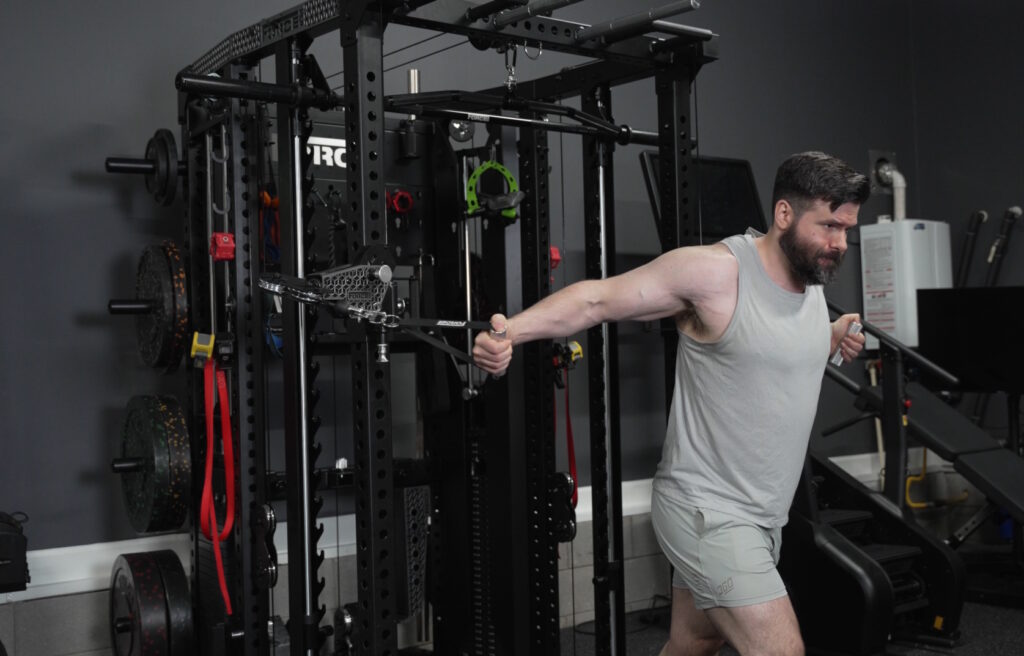
You can also move the arms inward for exercises like bilateral curls or chest-supported rows.

The high and low positions are useful too. If you’re taller, raising the arms can help you get full range of motion on triceps extensions.
If you need a lower cable start point, you can bring the arms down near the floor for curls, shrugs, or other low-pulley movements.
That positioning flexibility is what makes the Force USA C20 feel more versatile than a standard fixed-pulley all-in-one.
Most people will be fine using the center lat pulldown station. But if you’re a lot taller, you can do pulldowns off of one of the articulating arms and get extra range of motion by setting the arm at the highest rack position and flipping it all the way up. This gains a few extra inches of cable height compared to the center pulldown station.
The caveat is that the articulating arms are 2:1. Even with the 300-pound stack upgrade, you’re feeling a maximum of 150 pounds on a single arm. That’s enough for many people, but stronger lifters may still prefer the center pulldown station because it effectively uses both stacks together.
Though, you can also add band tension if you need more resistance.
Articulating Arm Setup and Adjustments
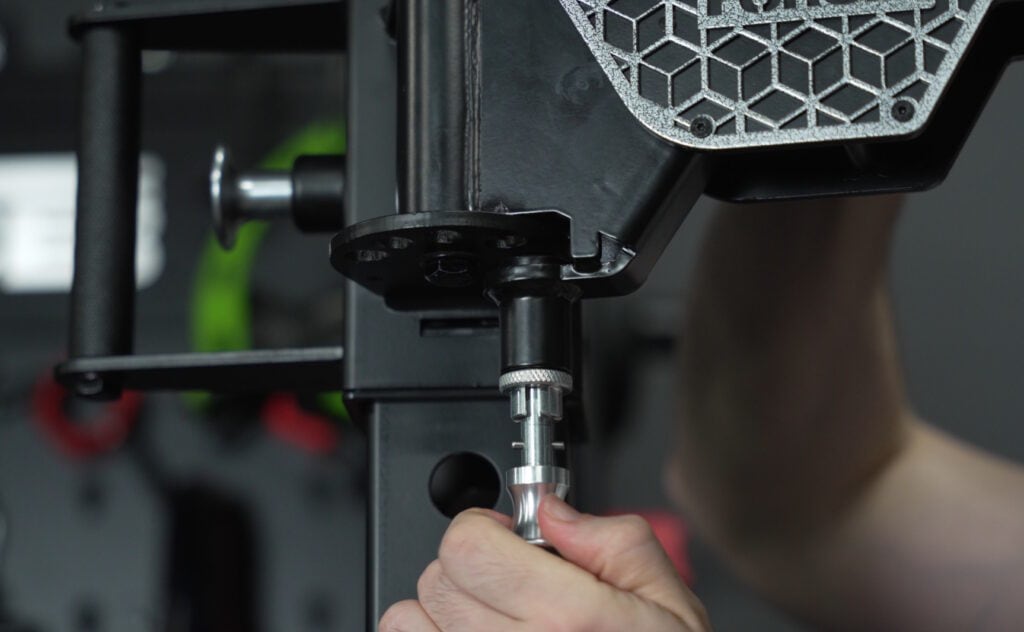
One small but useful detail is that you can install the articulating arms with the carriage handles facing either inside or outside.
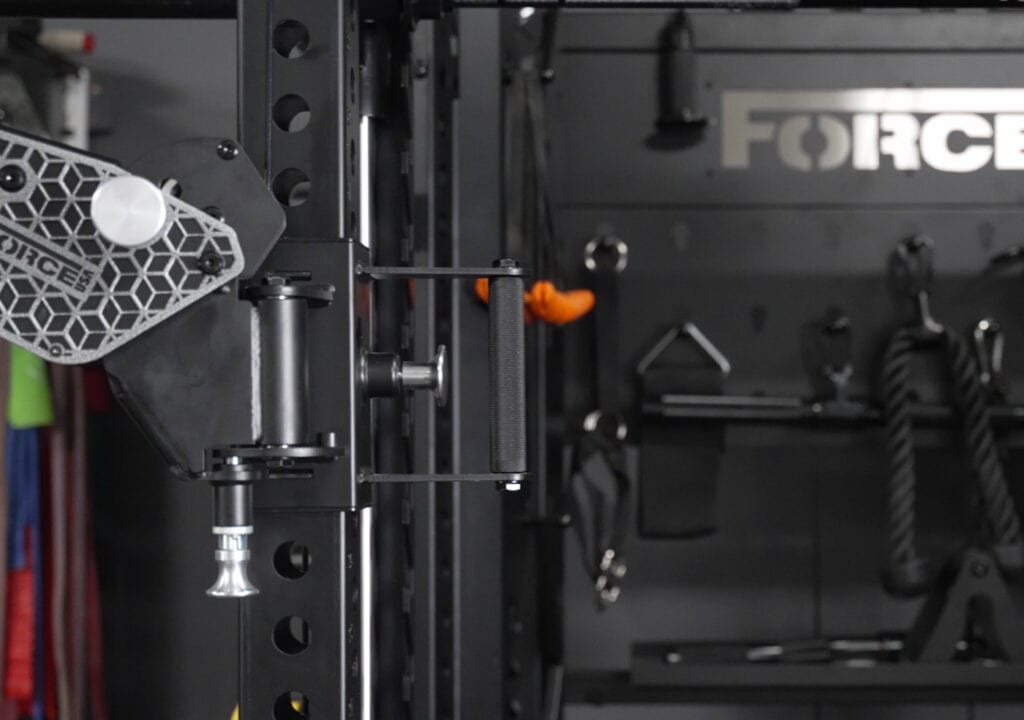
This works because the upright numbers are printed on the sides of the uprights rather than the front. That helps when installing the side-mount J-cups and spotter arms, but it also matters for the pulley carriages. Since the “number windows” can be viewed from either side of the upright, the carriage handles can face inside or outside and still show the height setting. If the numbers were on the front of the uprights, that symmetrical setup wouldn’t really work the same way.
I prefer having the handles on the inside. Most of the time, I’m adjusting the pulleys while standing inside the rack, so I can change both sides without walking around.
There is a tradeoff. With the handles on the inside, there are certain times where you might bump into them. That may be more noticeable if you’re a bigger lifter or if you’re using longer lat pulldown bars (though if you’re positioned ideally for lat pulldowns, you’ll be out of the way of the uprights).
Still, for my use, inside-facing handles are more convenient. It is best to decide this during assembly because changing it later would be a pain.
The pulley carriages slide well, but they do not use rollers. Lowering the carriage is easy with one hand. Raising it takes more effort.
Sometimes you can raise it one-handed, but in practice, it’s usually easier to use two hands.
I would like to see Force USA use a roller-style trolley in the future. That would make vertical adjustments easier.
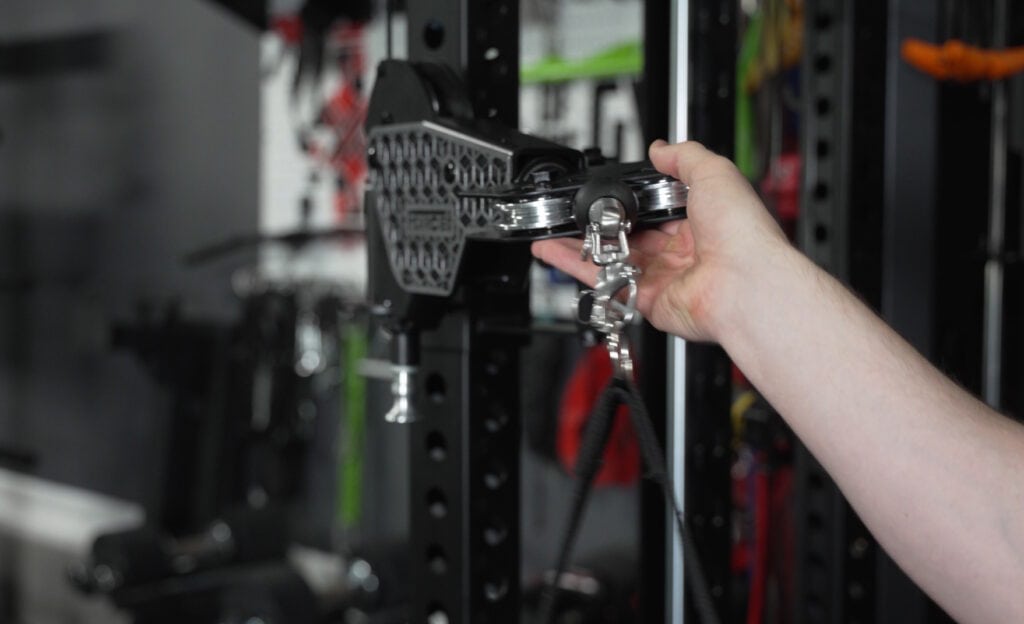
The pop-pin used to adjust the inside-to-outside arm position has a feature that lets you keep the pin retracted. You pull the pin out, rotate the tab, and it stays disengaged, allowing the arm to move freely instead of locking into one of the fixed holes.
Apparently, some people like that for core movements. Personally, I don’t use it that way. First off, I rarely do core movements on the cables. But if/when I do, I’d rather have the arm locked in place and let the rotating pulley head handle the line of pull.
The issue is that it’s easy to activate accidentally when quickly adjusting the arm position. It’s not a major problem, but I’d prefer if Force USA included two pop-pin options: one with the free-motion lockout feature and one standard pop-pin for people who don’t want it.
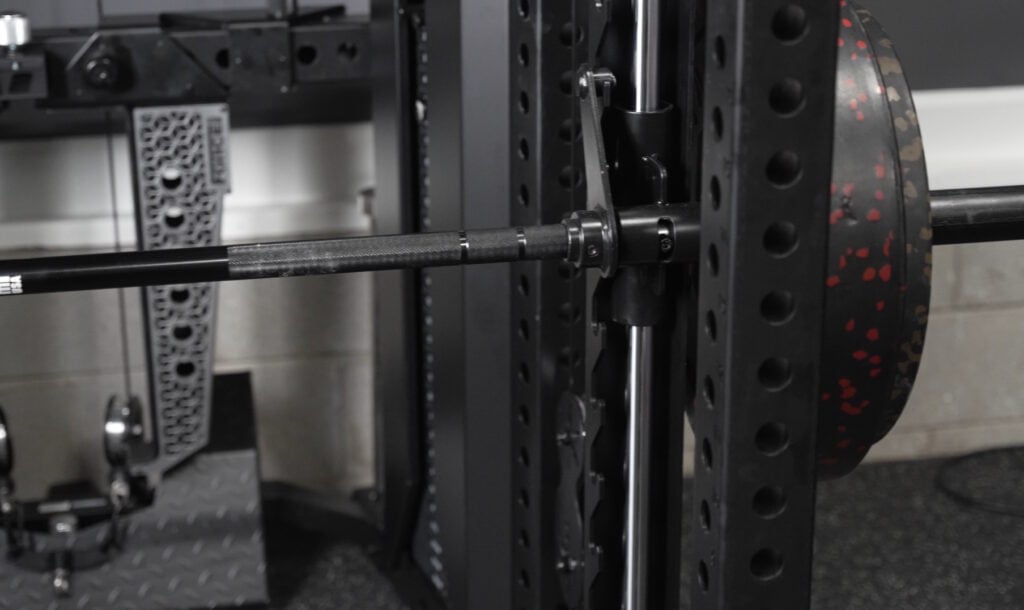
J-Cups and Spotter Arms
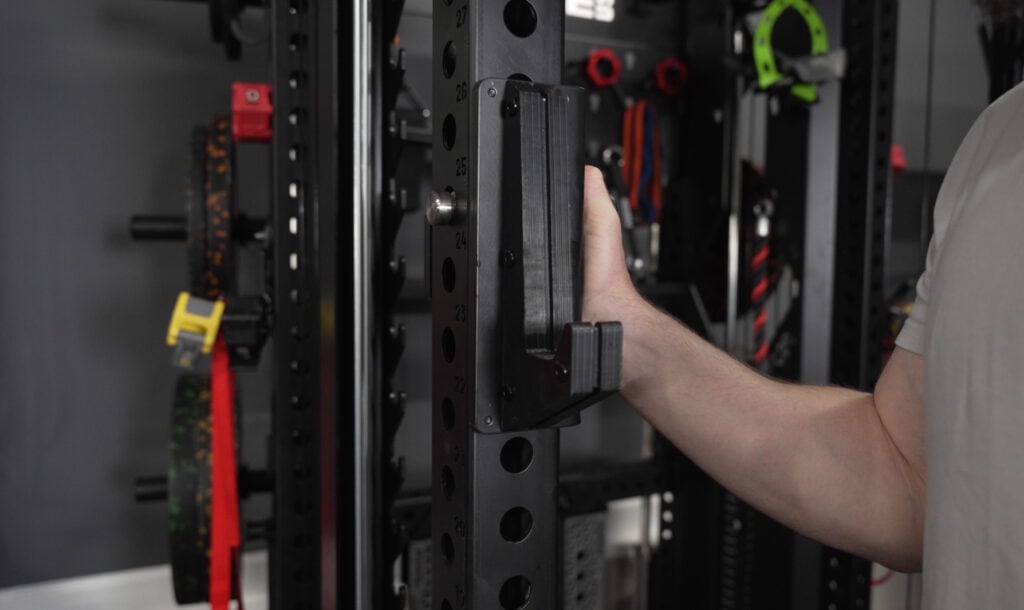
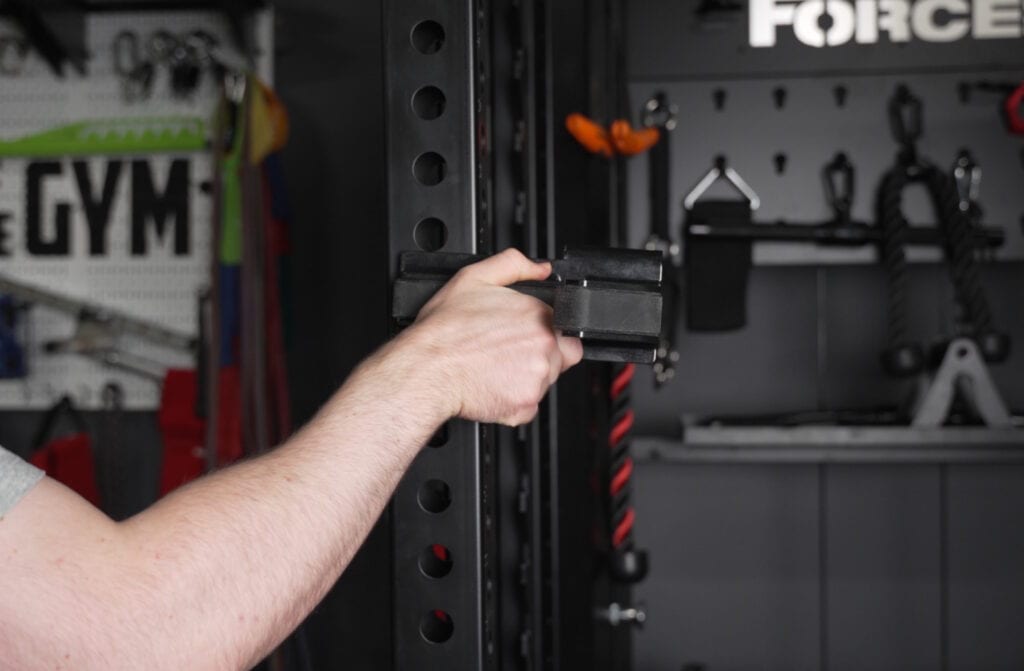
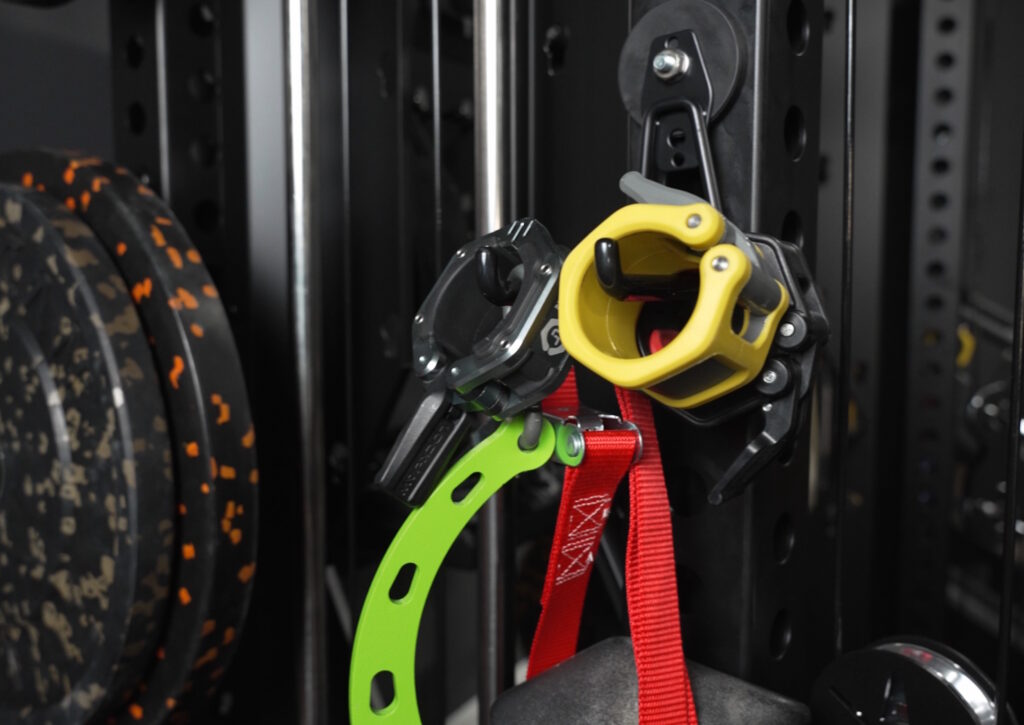
The included J-cups and spotter arms use a unique side-mount locking mechanism.
Instead of hooking over the front of the upright and swinging down into place like traditional J-cups or spotter arms, these slide in from the side and lock into the hole with a single pin.
Once installed, they feel very secure. They won’t accidentally swing out if you lean on them, shift the bar aggressively, or pull yourself up from the floor using them.
The side-mount design also allows the spotter arms to be lower profile, which is a nice bonus.
My overall take on the mechanism is neutral. I like that it’s secure, and I appreciate that Force USA tried something different. But if I had to choose, I’d still lean slightly toward traditional J-cups and spotter arms because they’re usually a bit faster to put on and take off.
The side-mount system can be quick, but it can also catch slightly during installation or removal. It’s not a major problem. It’s just not clearly better in day-to-day convenience.
One issue to be aware of involves competition-style barbells with thinner sleeve collars. Because the knurled knob on the J-cup protrudes, the weight plate can run into it. The workaround is to flip the J-cups inward.
If you use a standard non-competition bar with wider sleeve collars, you can load the bar without bumping into the knobs. And you can usually perform sets without issue, though it’s definitely possible to still bump the plates if you rack/unrack the bar unevenly. So I advise orienting the j-cups with knobs inward on heavy sets or when going to failure.
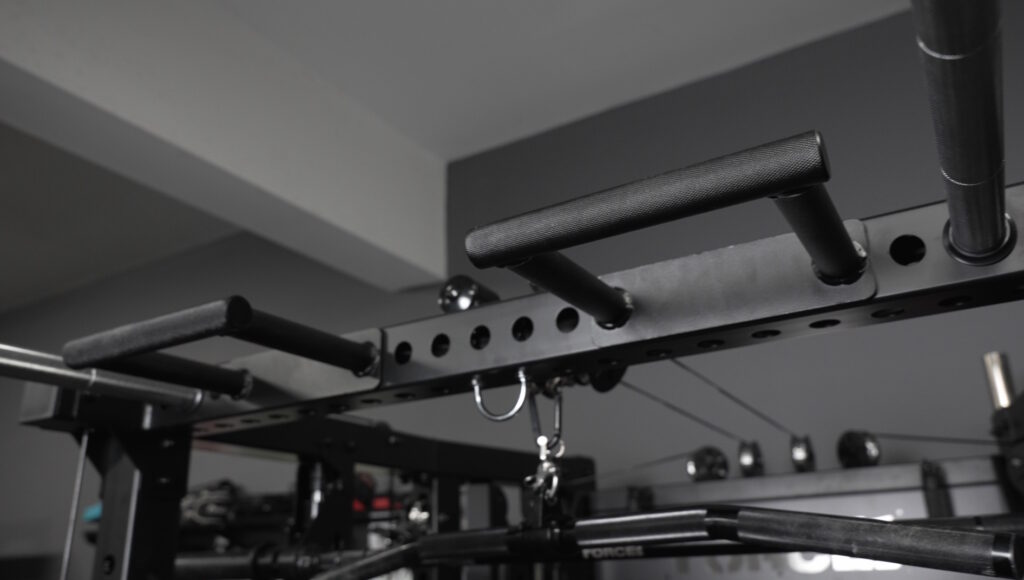
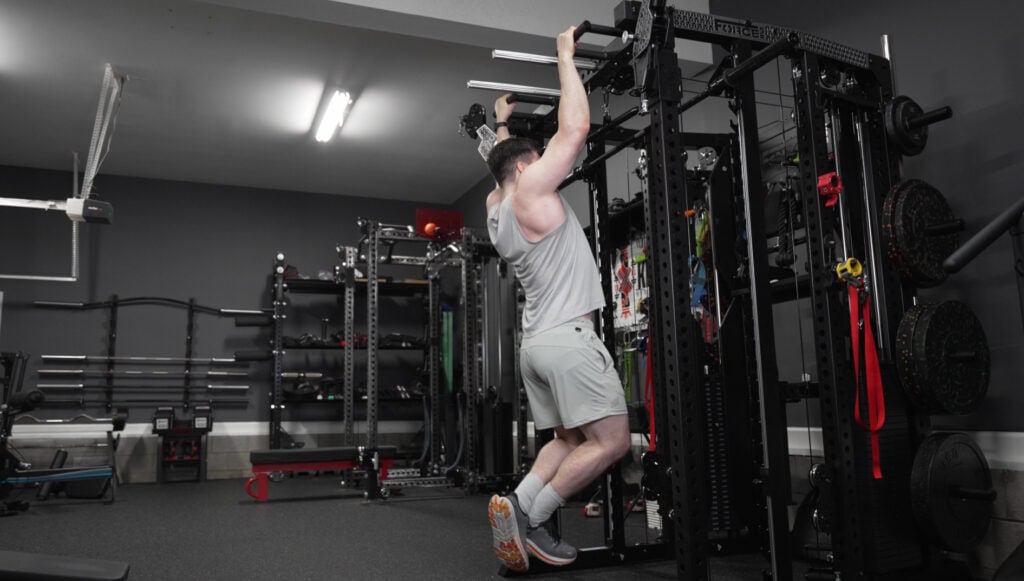
Dip Handles and Pull-Up Station
The spotter arms are also used for the dip setup.
Force USA includes knurled utility handles that mount onto the spotter arms. You install the spotter arms sideways, attach the handles at your preferred width, and use them as dip handles.
This setup is surprisingly stable. There’s no rattling, and the flex is negligible to non-existant. I tested it by exaggerating my speed and force during dips, and it still felt solid.
You can also adjust the width by choosing different holes on the spotter arms. Compared to a dedicated one-piece dip attachment, this takes longer to set up. But it saves space and the utility handles are more versatile.
The utility handles can be installed anywhere on the rack where there’s a hole. Besides dips, you can use them for neutral-grip pull-ups, inverted rows, or other creative setups. I also found a useful way to use them as a makeshift leg holder for lat pulldowns, which I’ll cover later.
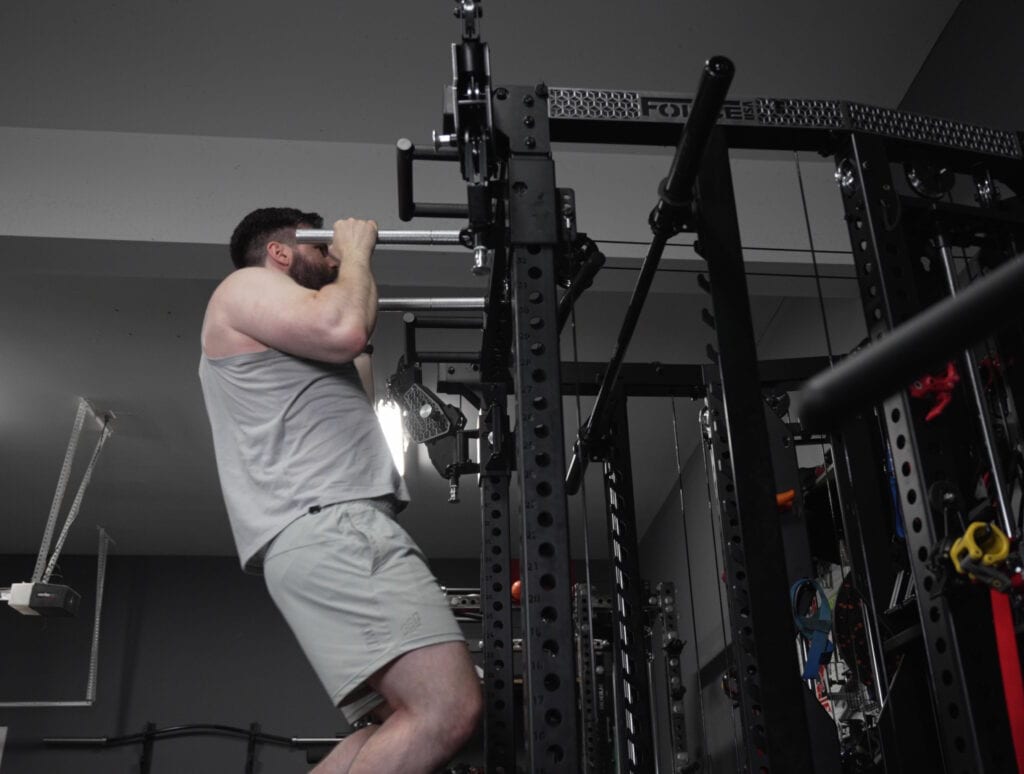
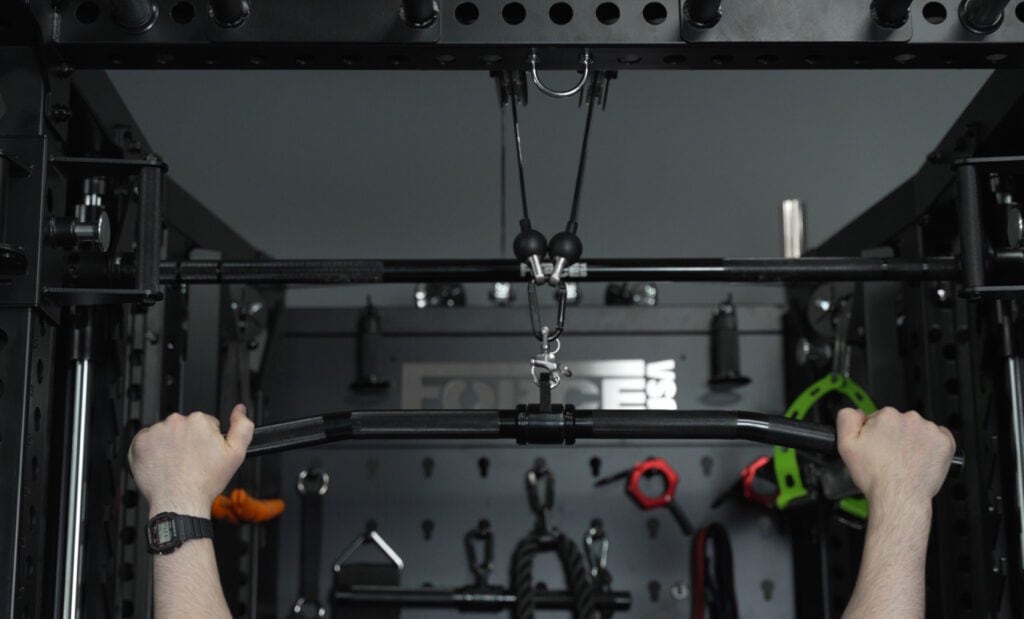
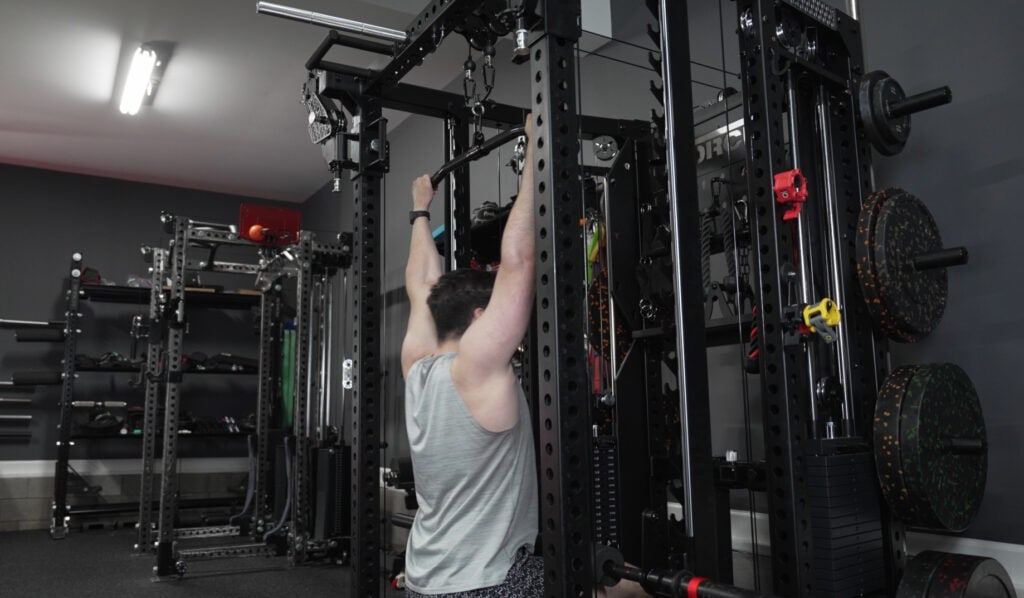
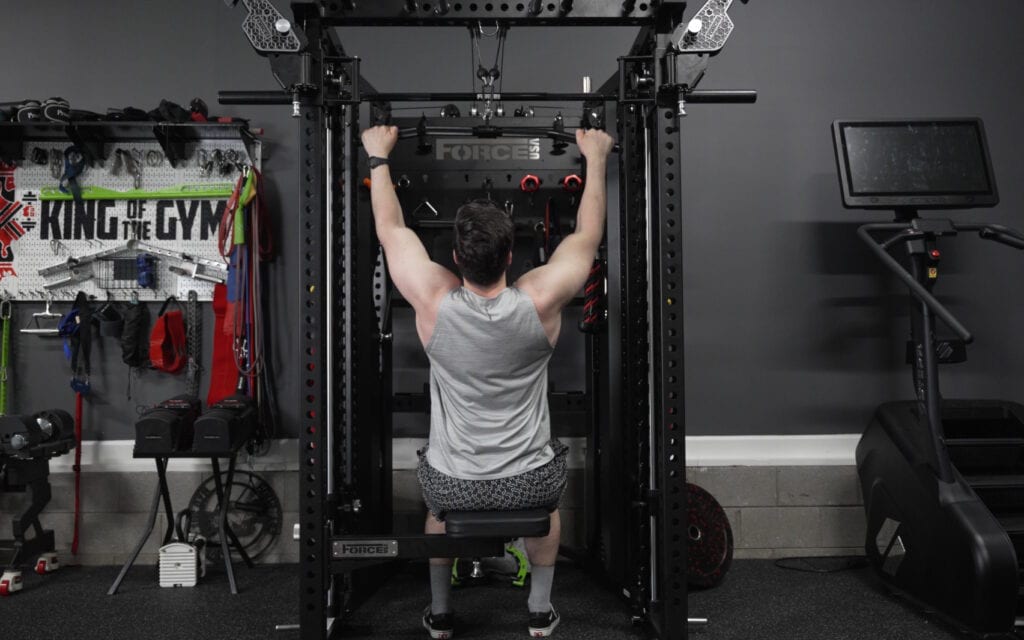
The Force USA C20 also has a dedicated pull-up area on the front of the rack.
As I just mentioned, you can use the utility handles in that area for neutral-grip pull-ups, but I usually use the regular pull-up handles, which allow for straight-grip pull-ups, close-neutral pull-ups, and wide-neutral pull-ups. You can also adjust their width by moving them to different hole positions.
The pull-up handles are stable, and the knurling is good. I do wish the finish felt just a bit tackier. My REP PR-5000 pull-up bar doesn’t have knurling, but its powder coat feels grippier in some ways. If grip is ever an issue, chalk solves it.
The main limitation is rack height. I can’t fully extend my legs during pull-ups without bottoming out. That’s a compromise of the C20’s height, but many buyers will actually appreciate that it fits in rooms with lower ceilings.
Landmine and Band Pegs
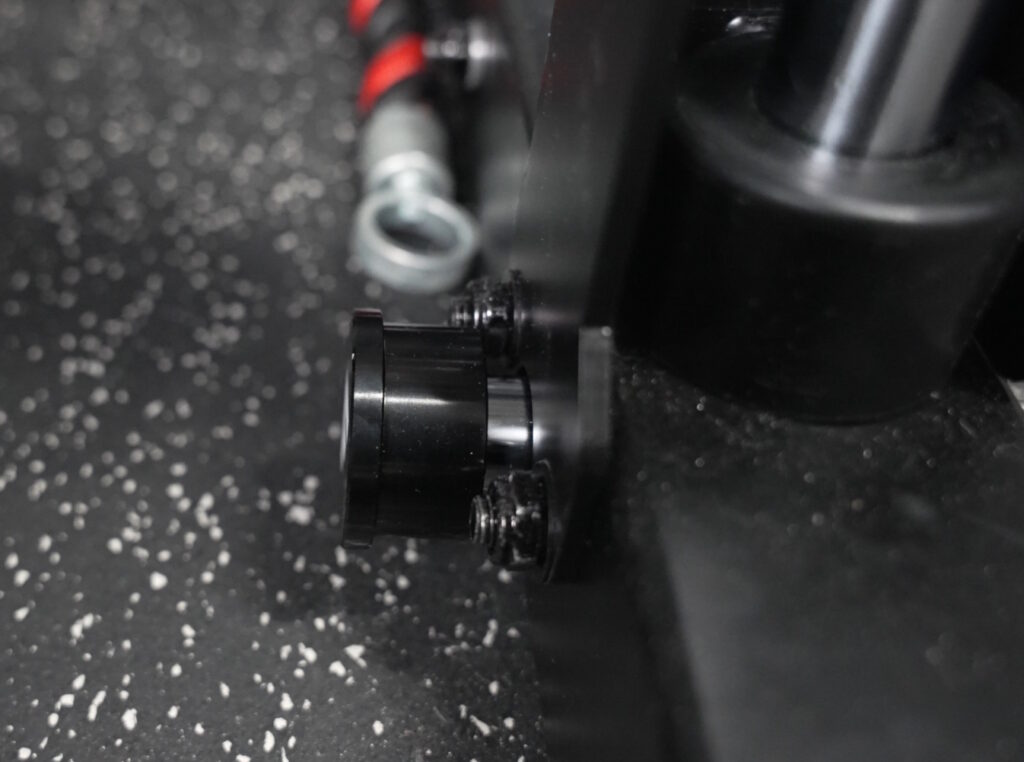
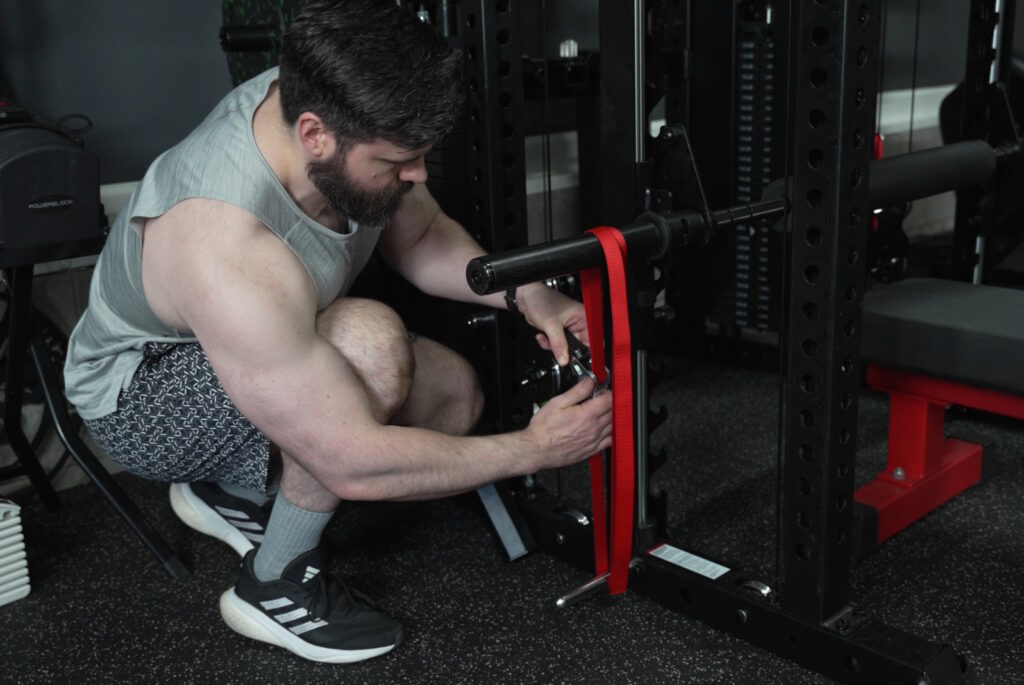
The included landmine attachment is well done.
I mounted mine on one of the middle uprights. It attaches securely with a threaded nut on the other side of the upright and has a protective plastic insert to help prevent scratches on your barbell sleeve.
When not in use, the landmine can flip upward and store magnetically against the rack. The magnet could be slightly stronger, but overall, it works and keeps the setup cleaner.

The landmine has the typical pivoting range of motion you’d expect and can be moved to other uprights if needed.
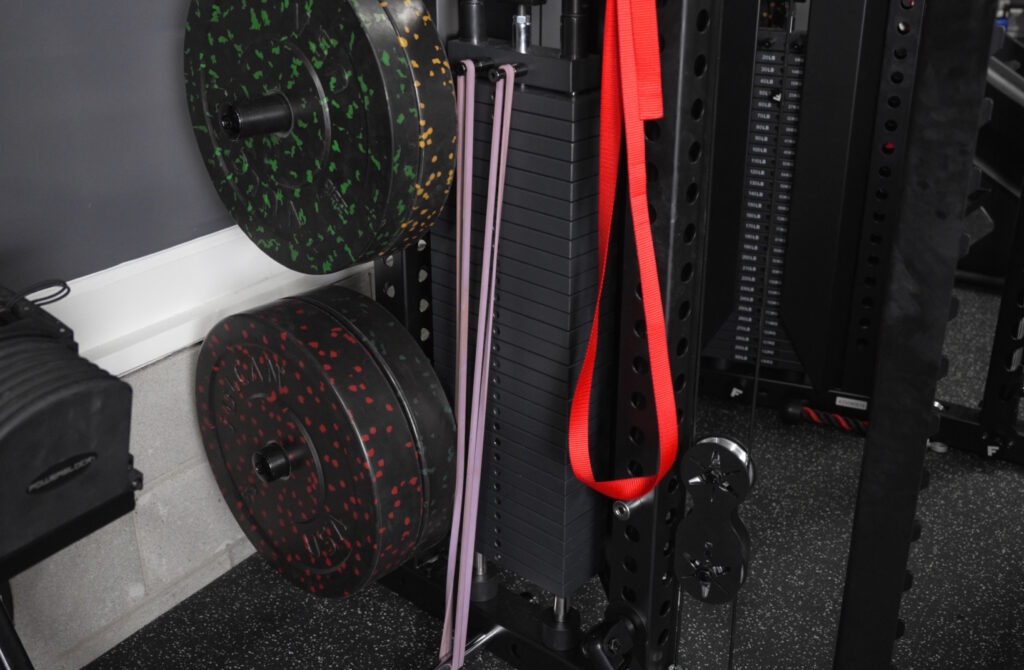
The C20 also comes with four magnetic band pegs. You can use them in the half-rack area for band-resisted barbell movements. There are also holes under the Smith machine and near the weight stacks, so you can add band resistance to Smith or cable exercises.

As mentioned earlier, one band peg location near the Smith machine does not let the peg sit fully flush because of nearby hardware. But the other band peg locations work as expected.
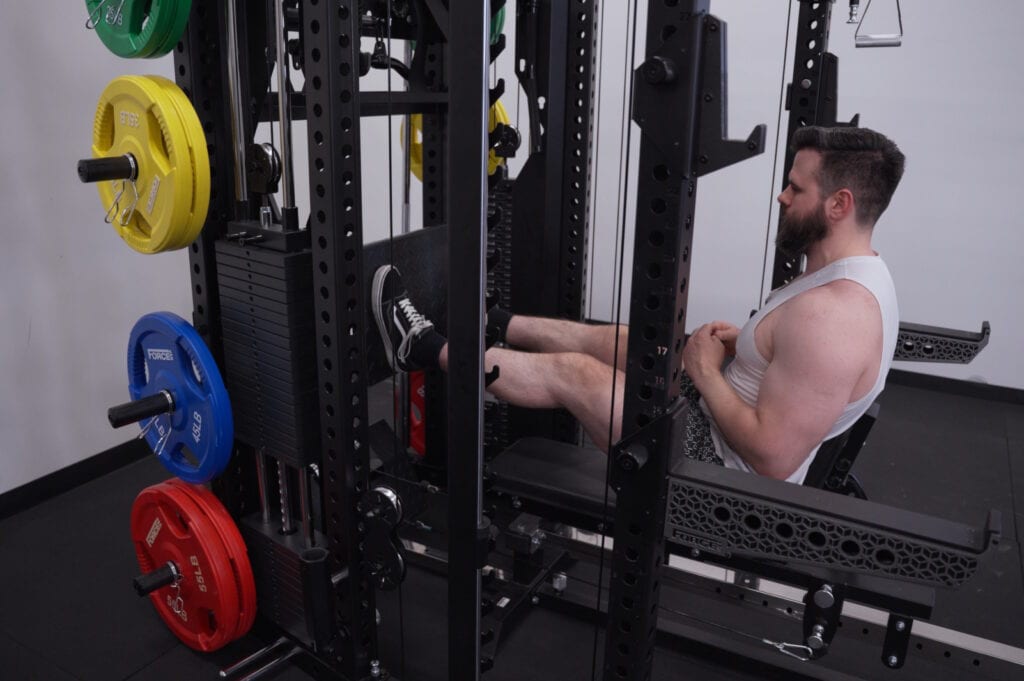
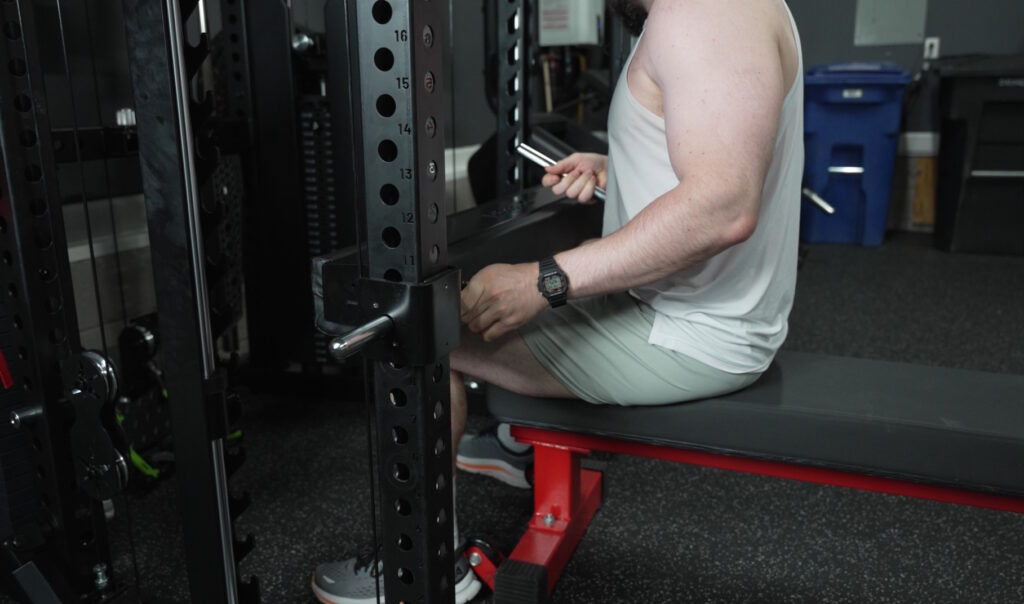
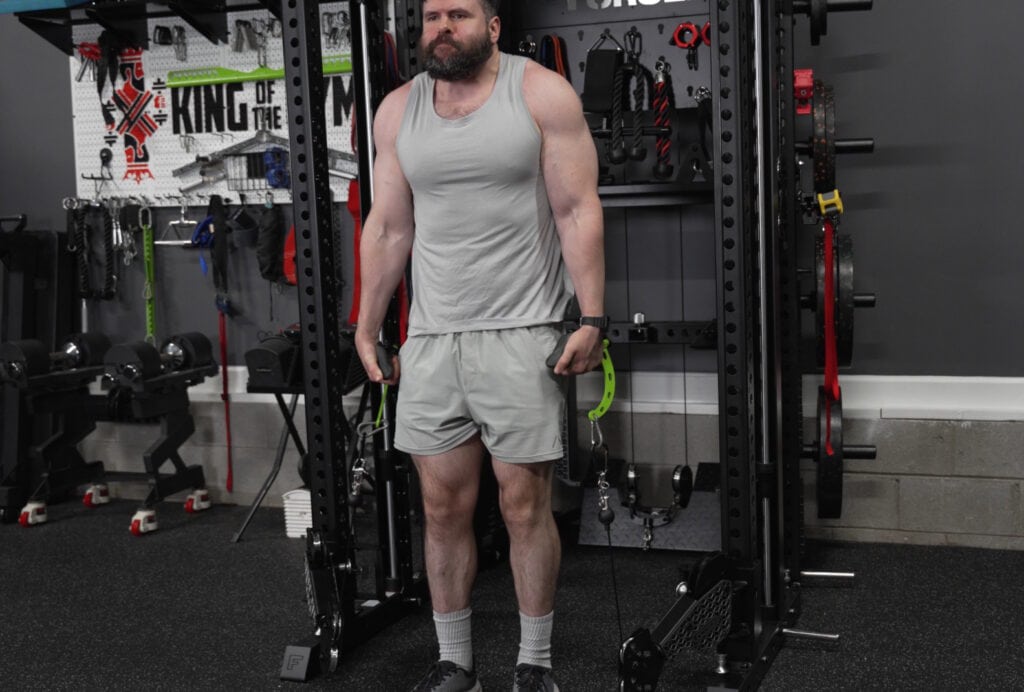
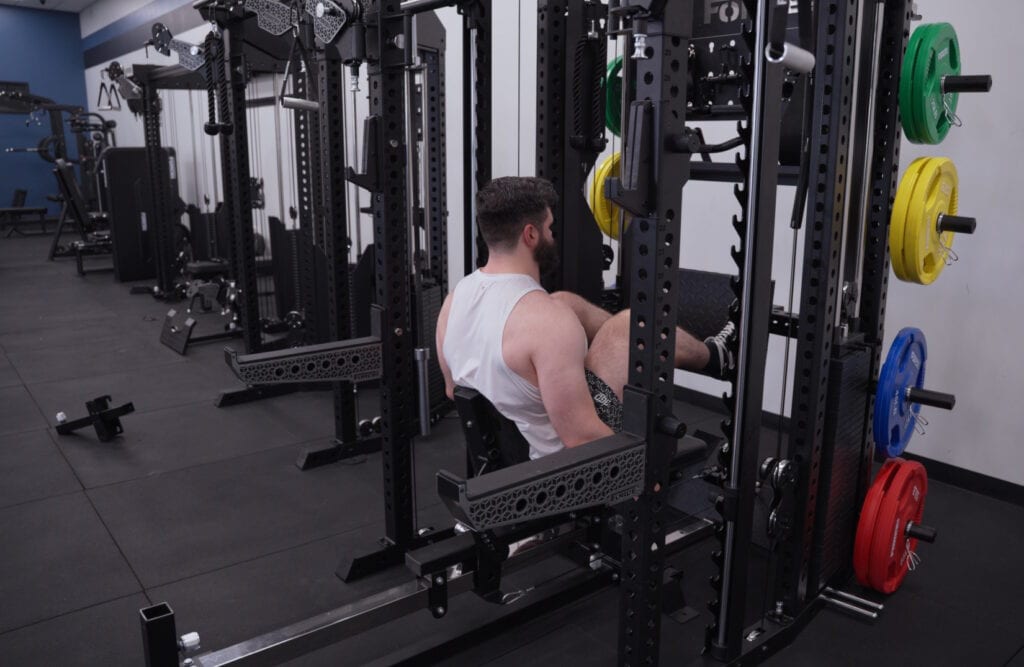
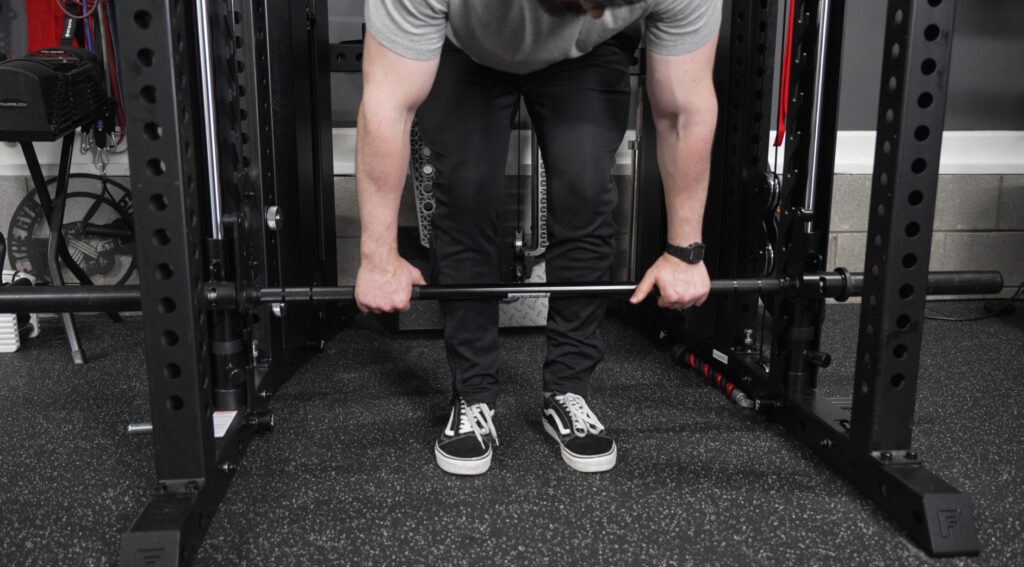
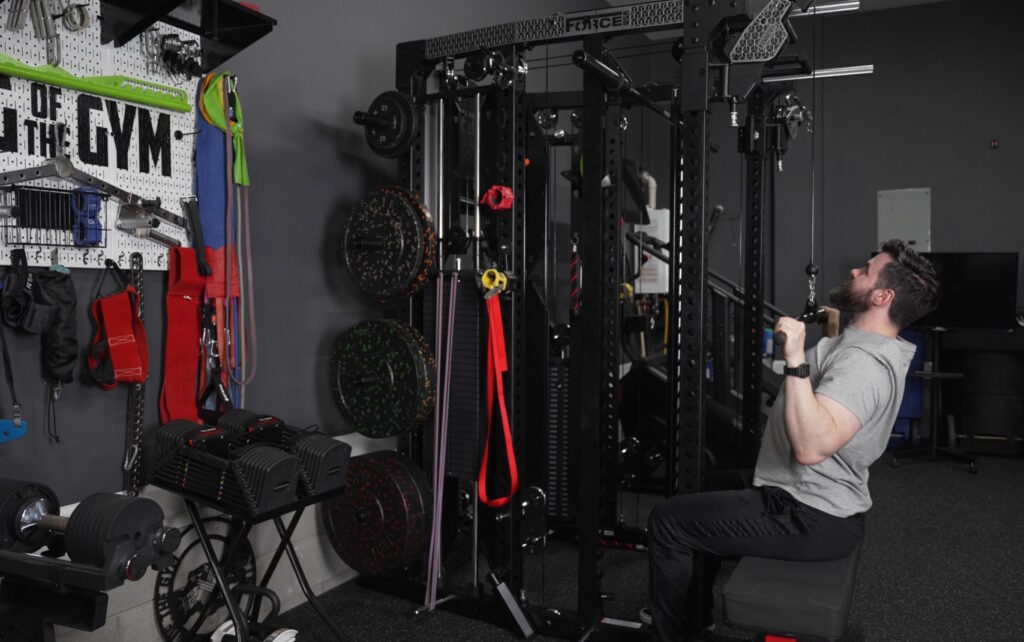
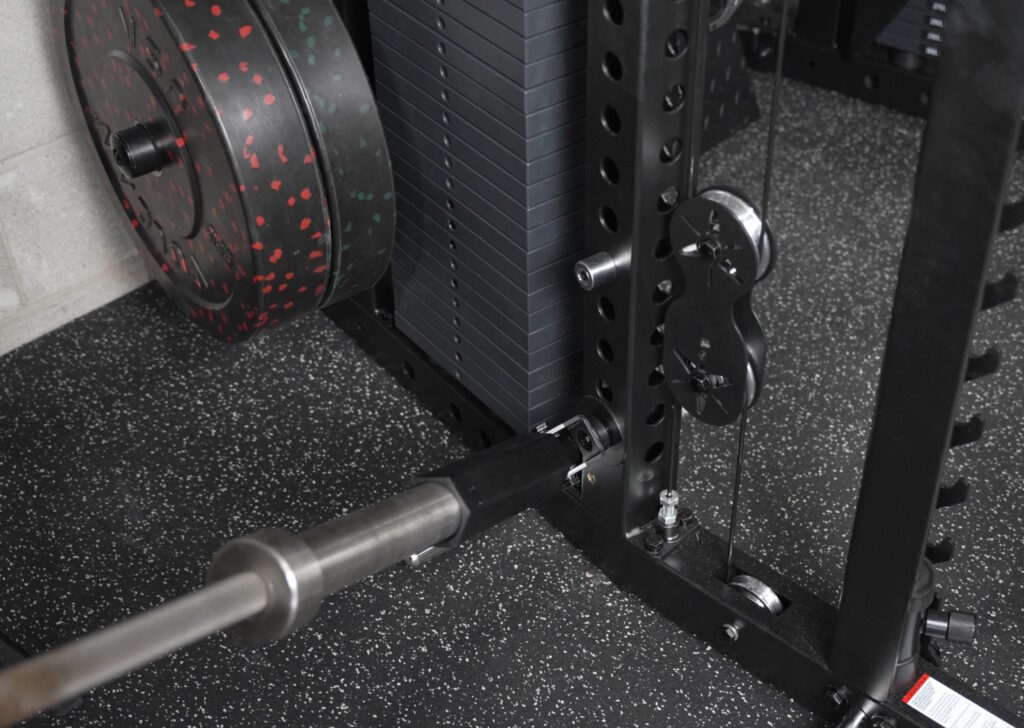
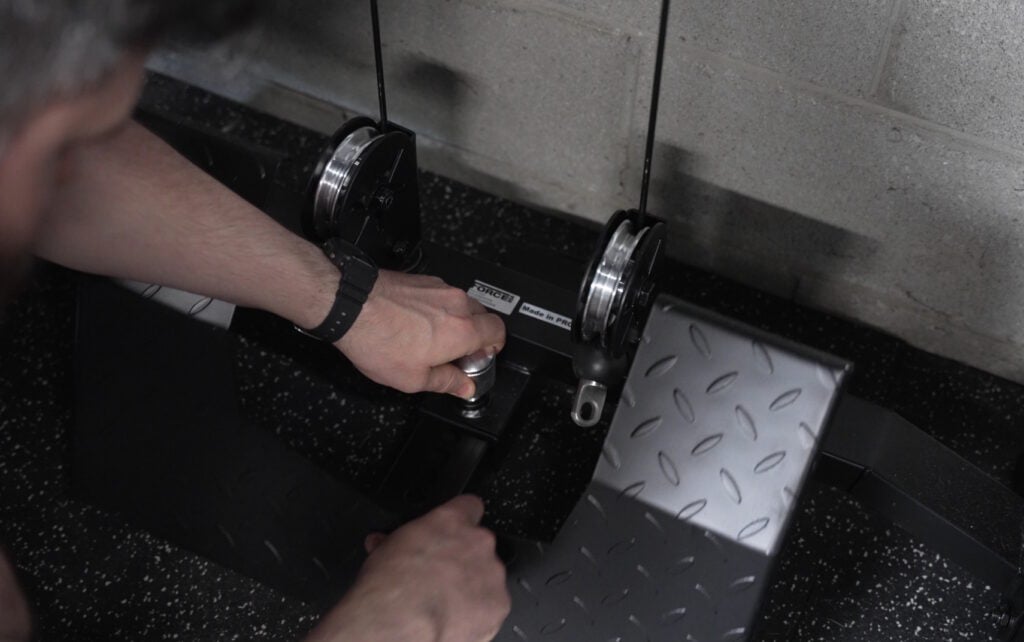
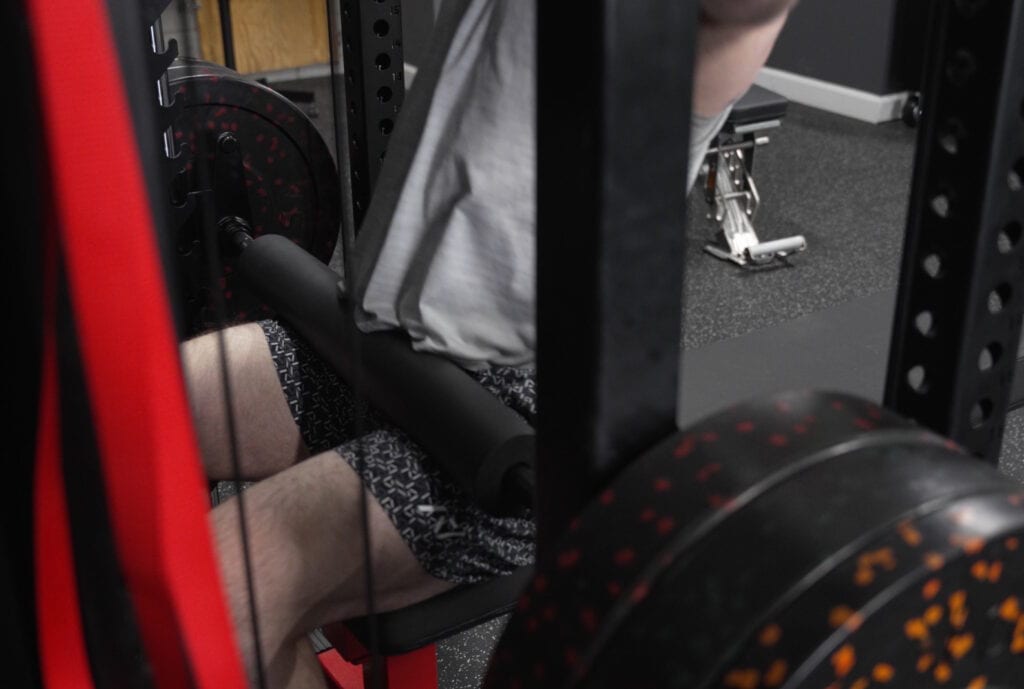
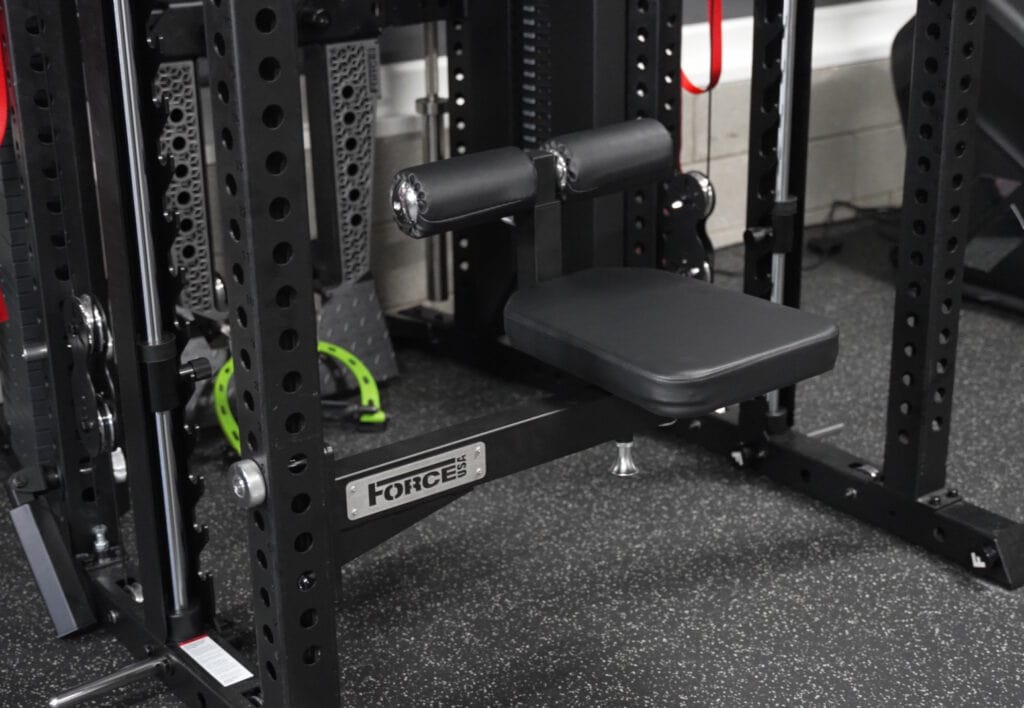
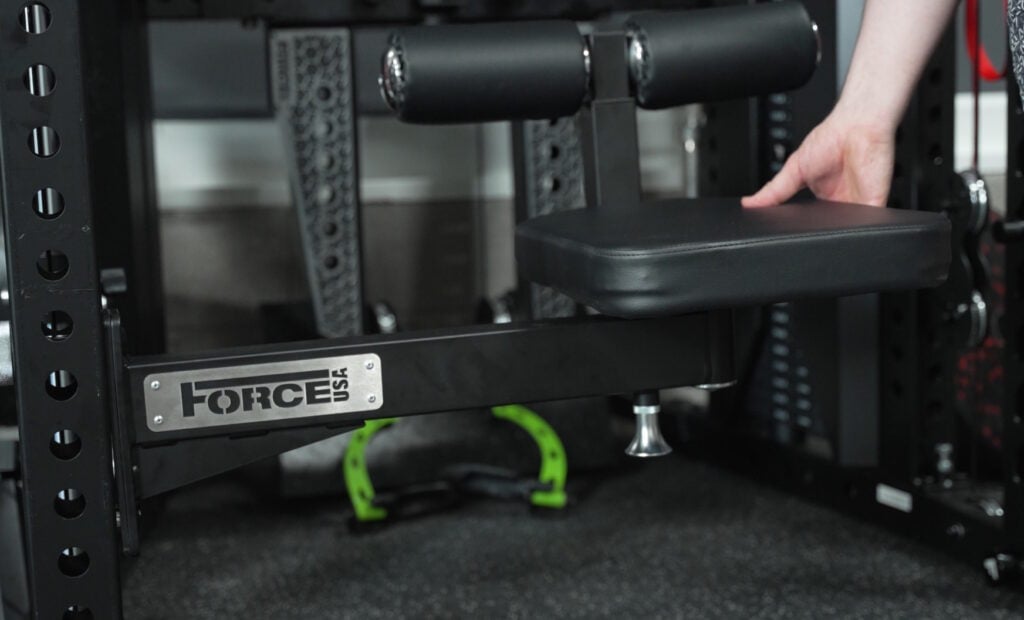
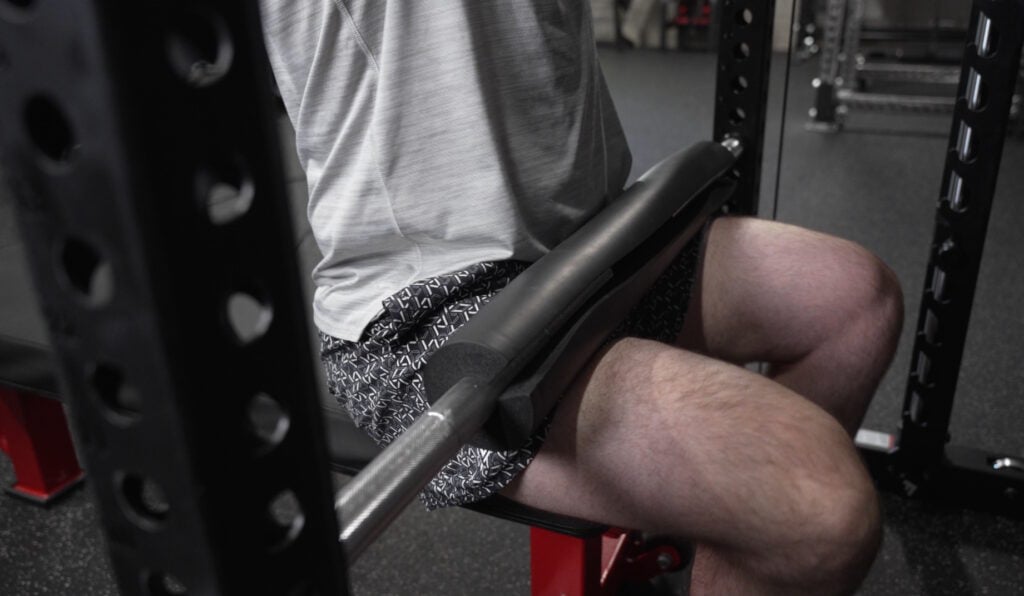
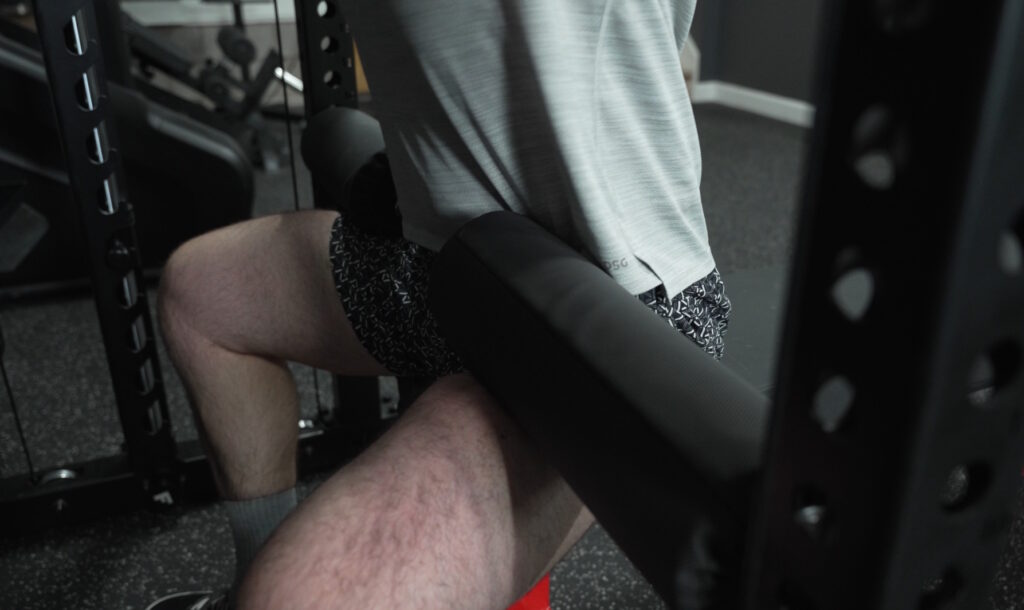
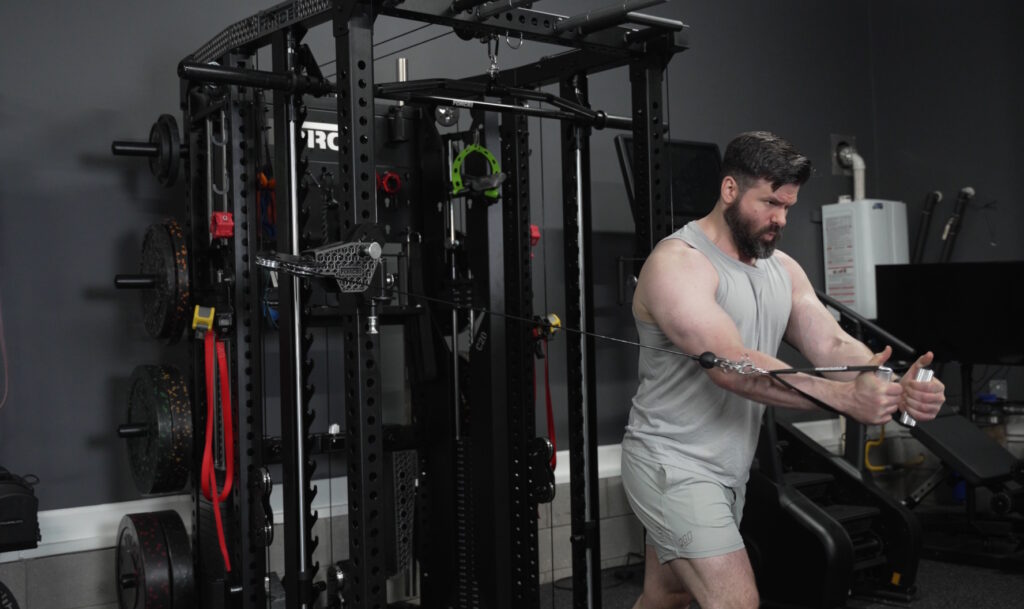
Low Row Station
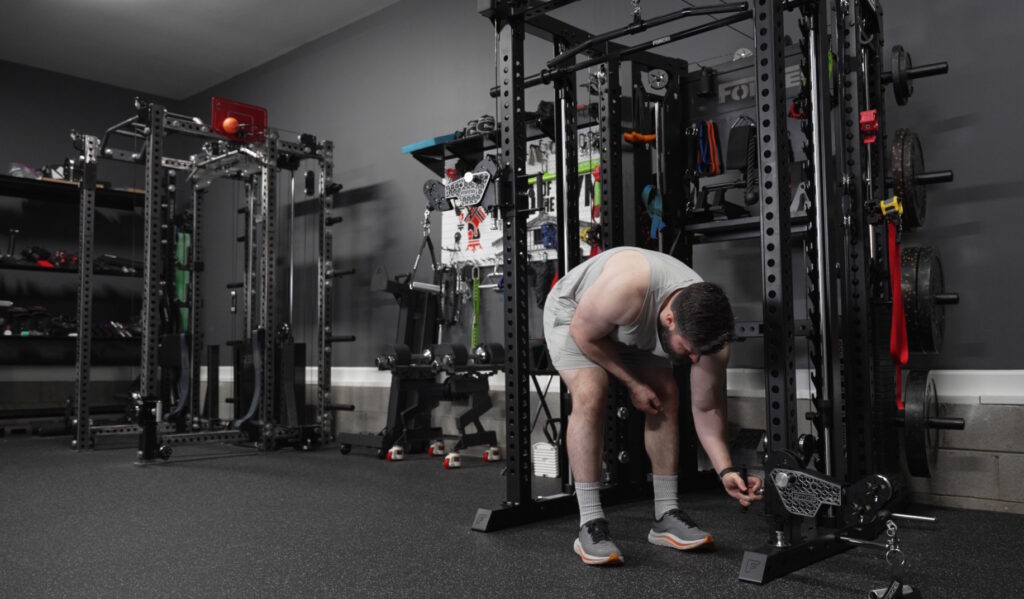
The low row station works very well from the floor, but it gets more nuanced if you want to sit on a bench or if you store your rack attachments on the rear crossmember.
The footplate has two main angles. The lower section has a more gradual angle that feels natural when you’re seated on the floor. The upper section has a steeper bend, which gives you a usable bracing surface if you’re seated higher, such as on a bench.
For floor rows, the design works well. The pulley exit point is low enough that the line of pull feels horizontal, and the range of motion is unrestricted.
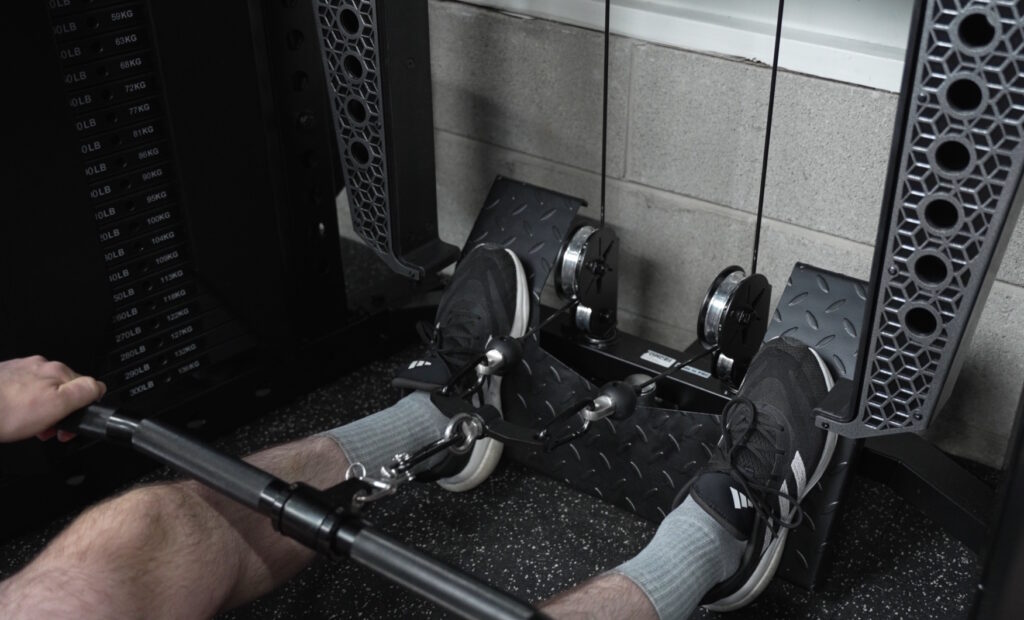
The footplate also slides in and out with a pop-pin adjustment, so you can extend or retract it depending on your body size and setup.
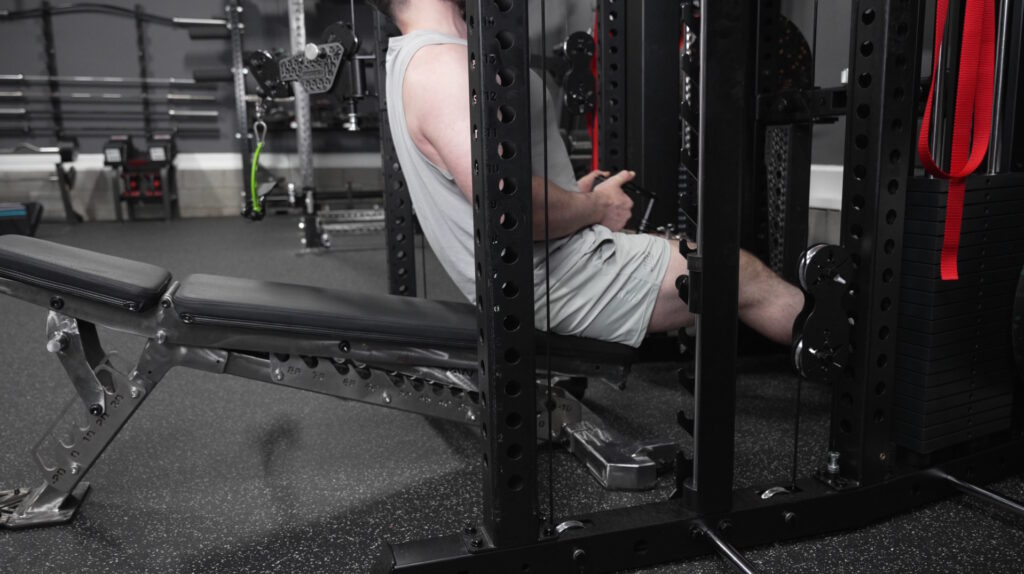
Bench rows are where the setup becomes less ideal. If you sit on a standard-height flat bench, around 17 inches high, your feet end up bracing on the upper angled portion of the footplate. That part is stable, but the line of pull becomes more inclined than I’d like.
Instead of pulling straight back, the handle path angles upward toward your upper thighs or crotch area. You lose some range of motion, and it doesn’t feel as natural.
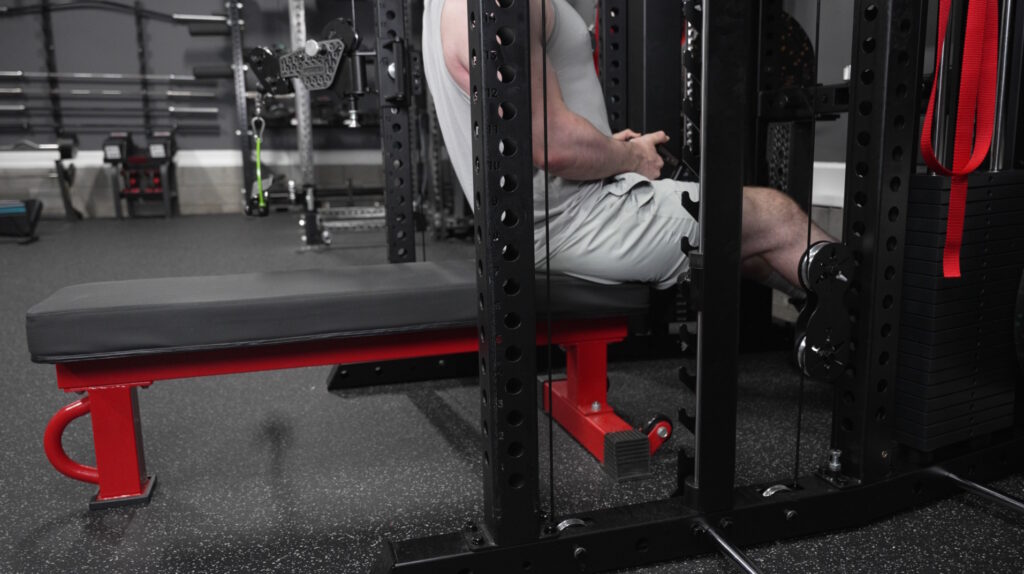
The best workaround I’ve found is to use an adjustable bench in a declined position. Lowering your hips improves the line of pull. You can still brace against the upper angled part of the footplate, but the cable path becomes less steep and the row feels better. Not perfect, but okay.
There is a design tradeoff here. If Force USA raised the low row cable exits significantly higher, bench rows would probably feel a lot better. But if they raised them too much, floor rows would start to feel like you’re pulling from too high of a point.
As it is, the C20 prioritizes floor rows, and those feel excellent. My guess is that raising the low pulleys by a couple of inches could be a good compromise, but I’m not an engineer, and there may be other design constraints involved.
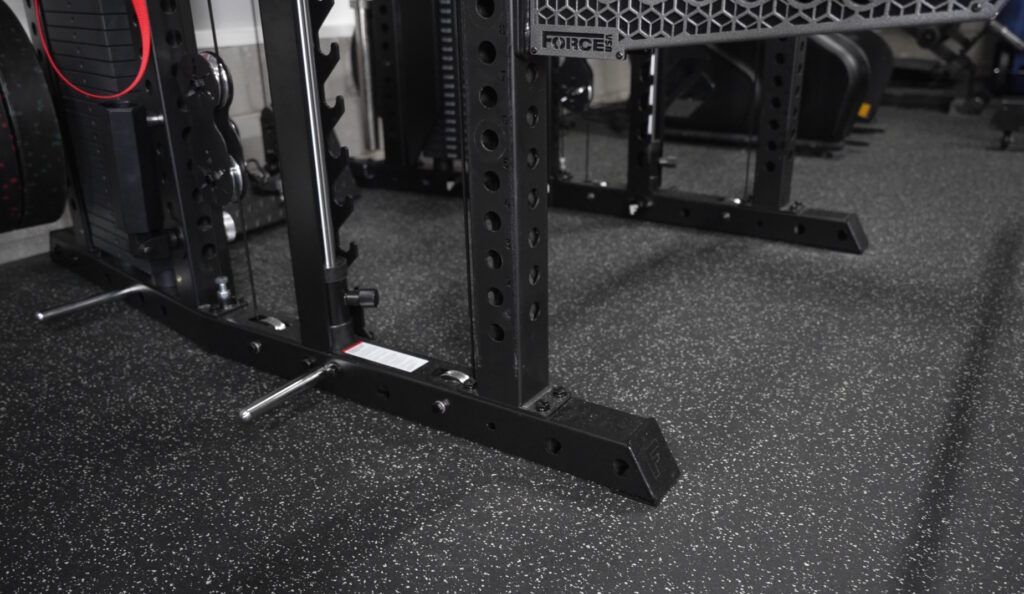
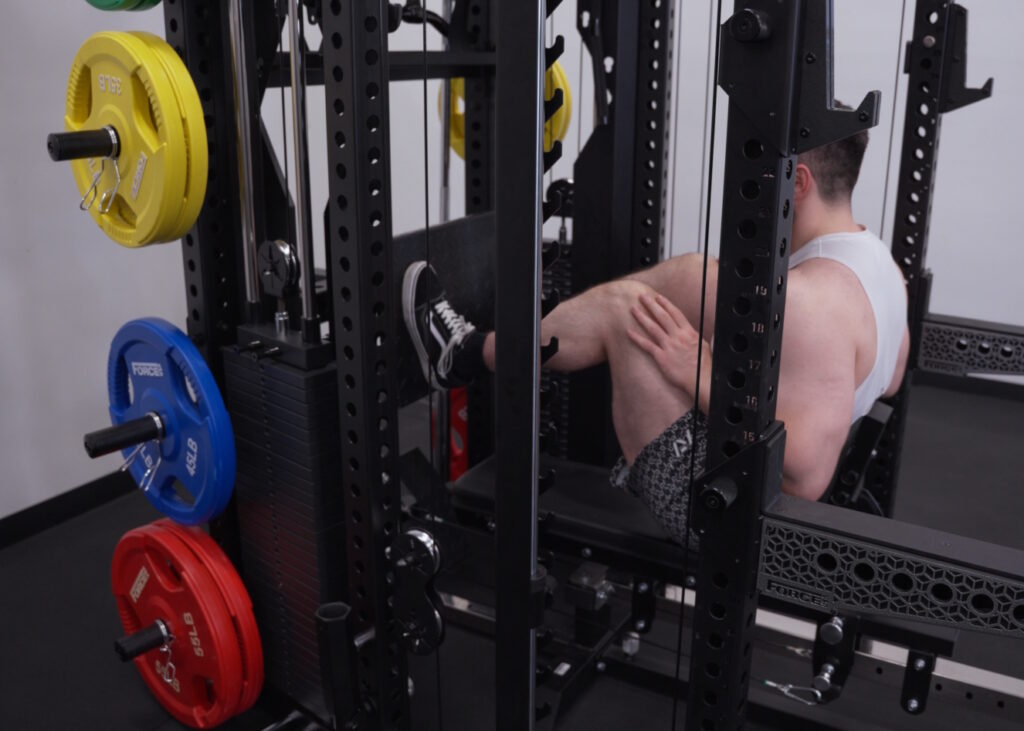
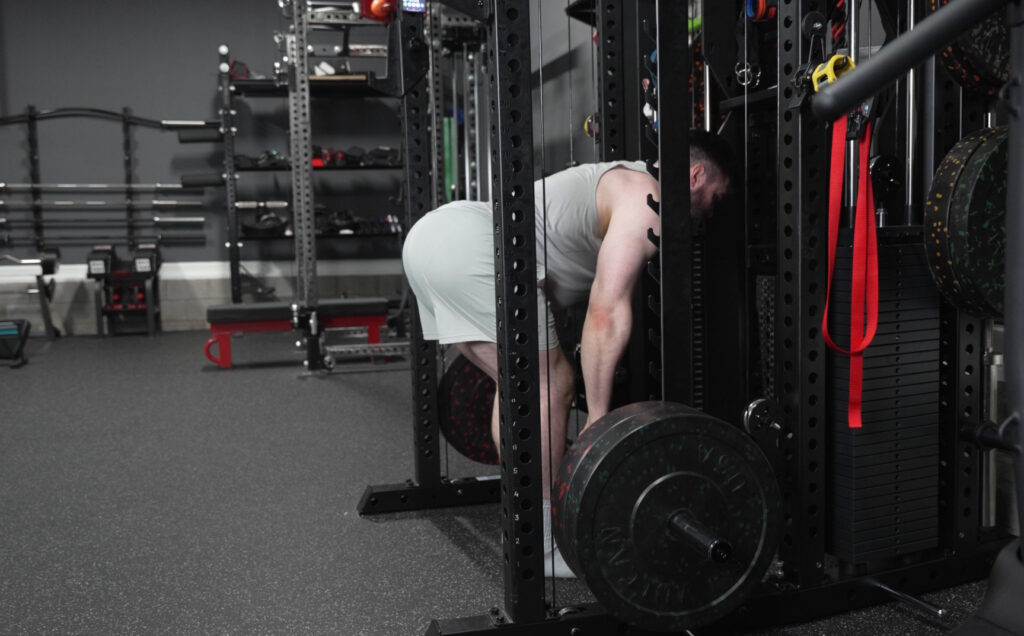
Rear Crossmember and (Potential) Footplate Interference
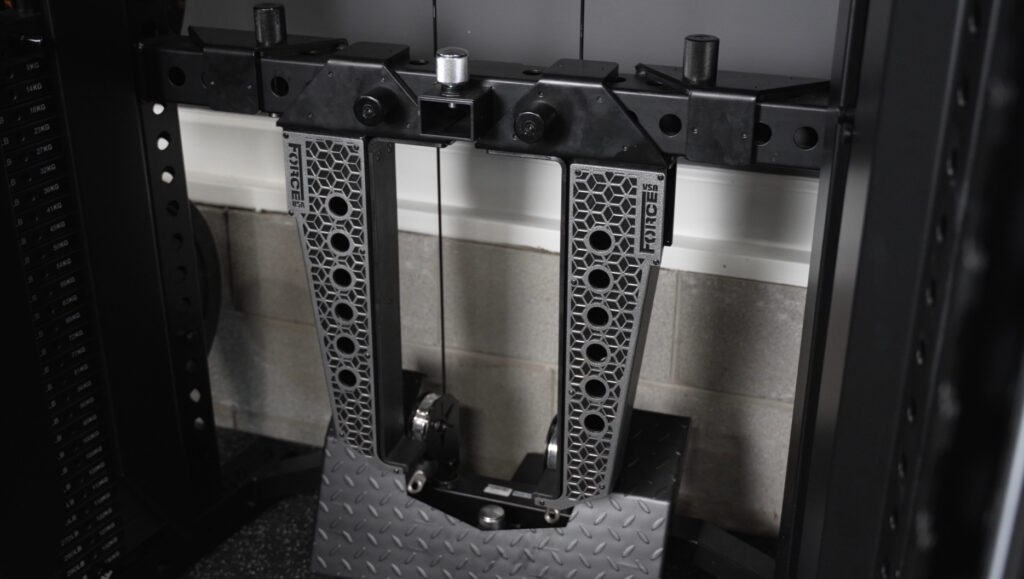
The biggest low row issue is not the pulley height, cable feel, or the footplate design. It’s the workflow around the rear horizontal crossmember.
The Force USA C20 assembly instructions tell you to install the rear horizontal crossmember/stabilizer at a specific height. That’s important if you plan to use the optional Sliding Bench because that’s the height where you’d mount the leg press plate.
At the same time, that rear crossmember is one of the best places to store the spotter arms when you’re not using them.
The problem is that if the crossmember is installed at the recommended height and you store the spotter arms there, the spotter arms hang down and block the low row footplate from sliding forward.
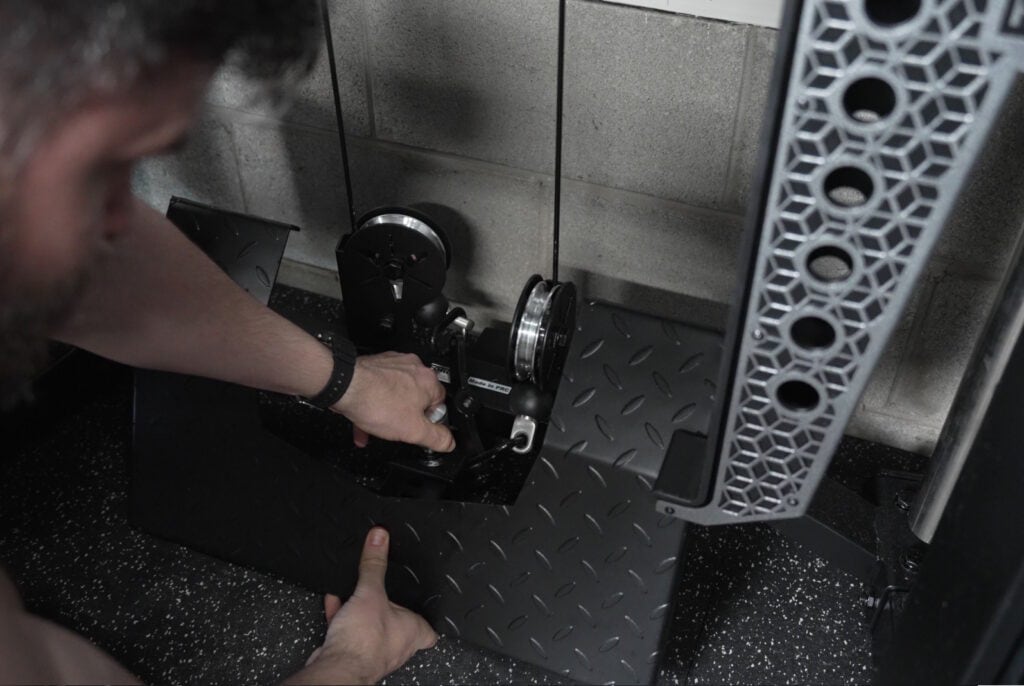
You can still use the footplate in its furthest-back position. But if you want to pull it out farther, you have to remove the spotter arms first. That’s not hard, but it definitely interrupts the flow of a workout.
If you never plan to buy the Sliding Bench, I recommend moving the rear crossmember up a few holes. That gives the footplate enough clearance to slide out even with the spotter arms stored on the crossmember.
But if you do plan to use the Sliding Bench and leg press plate, you should keep the crossmember at the intended height. In that case, the interference is something you’ll have to work around.
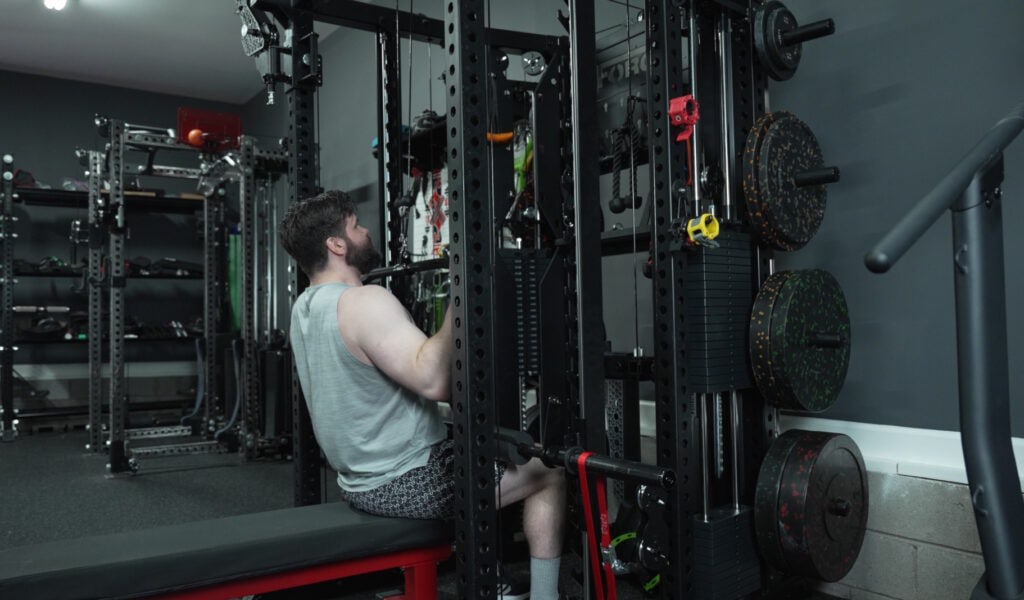
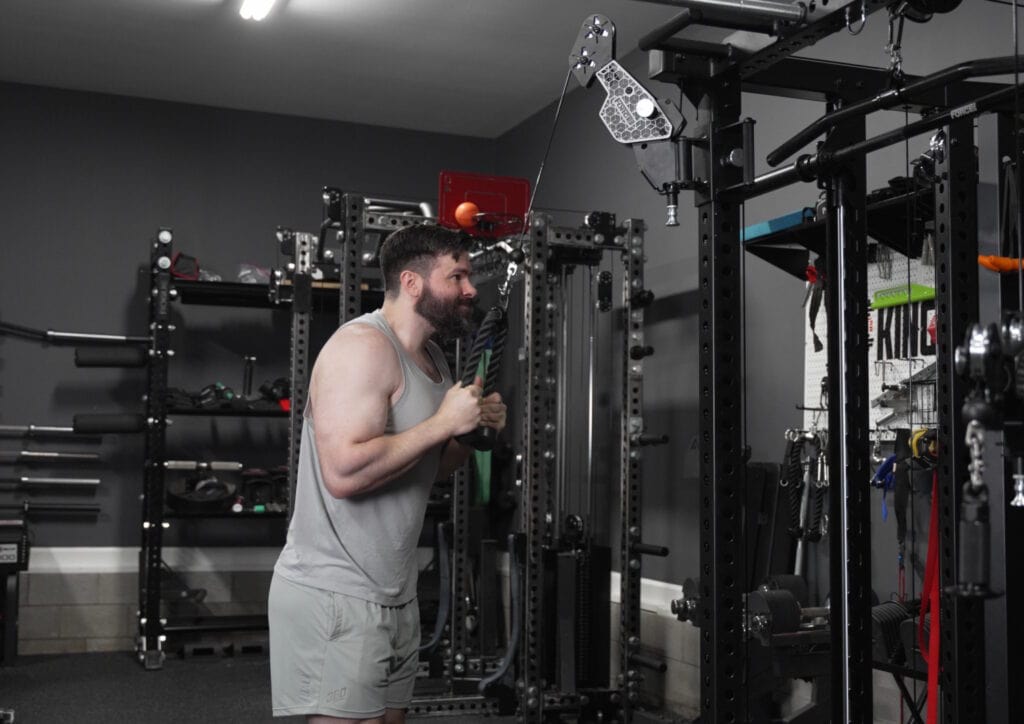
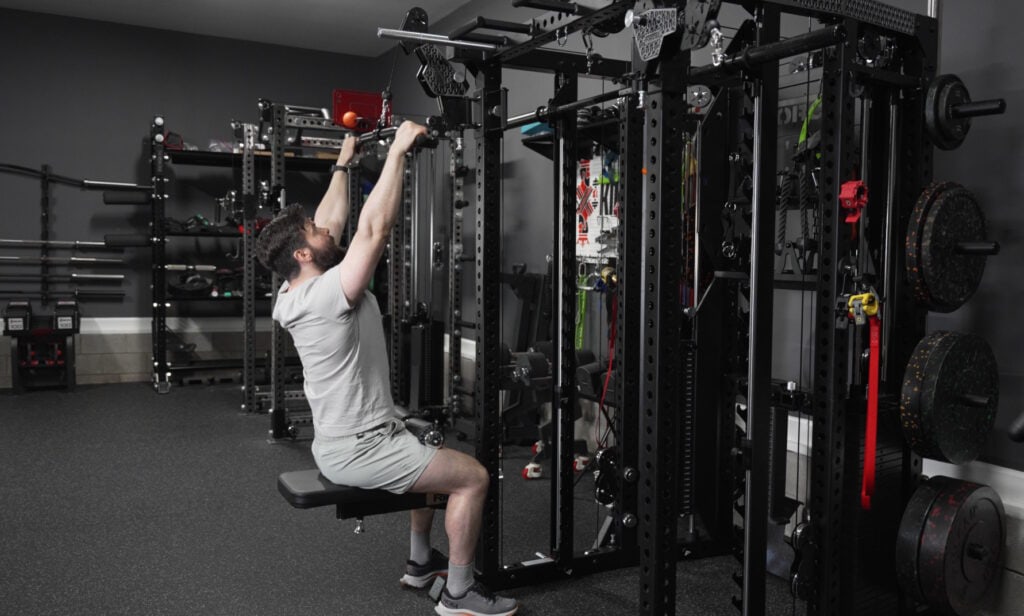
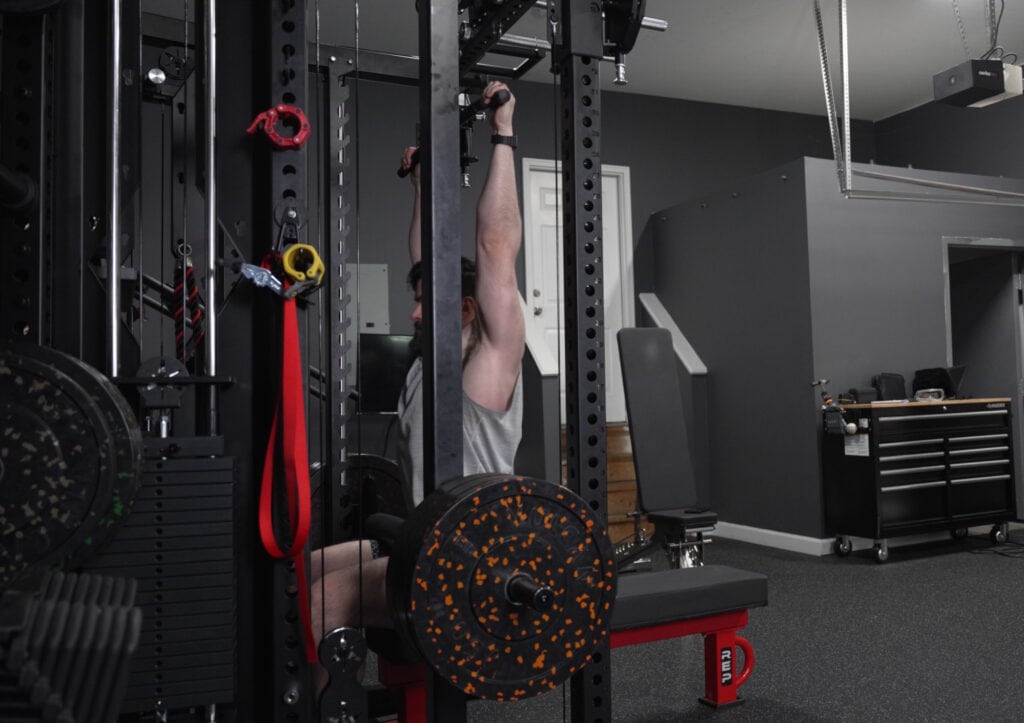
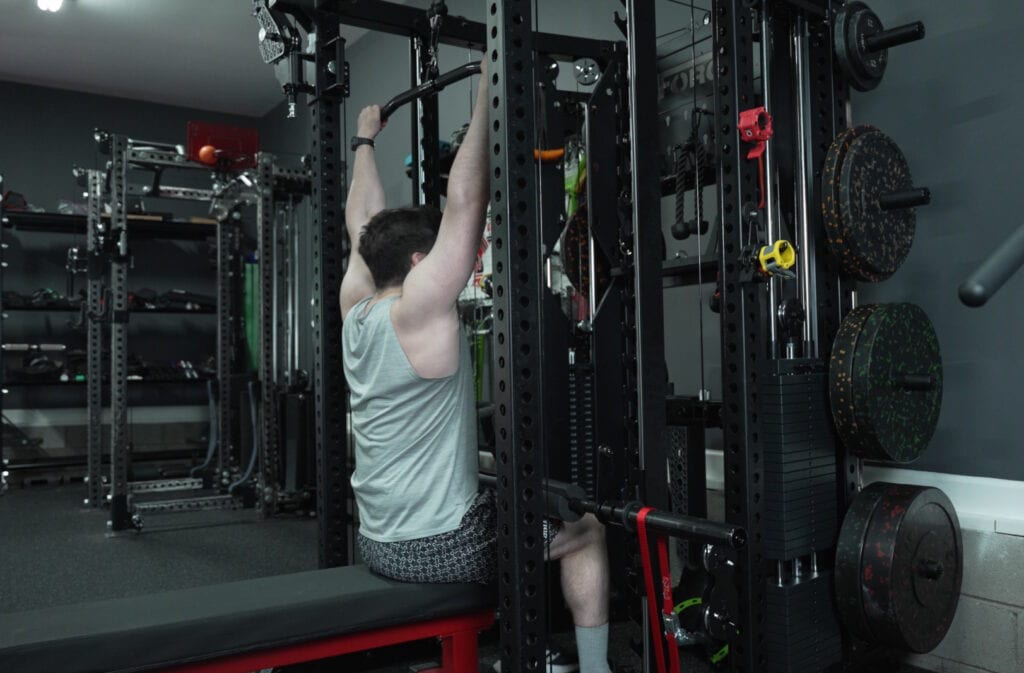
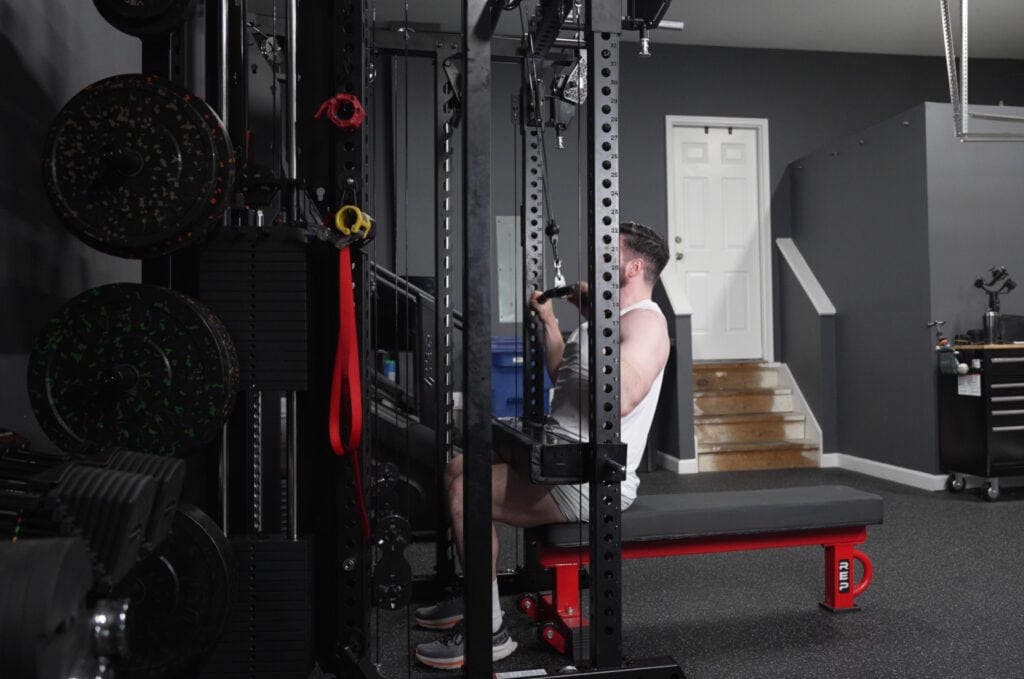
Center Lat Pulldown Station
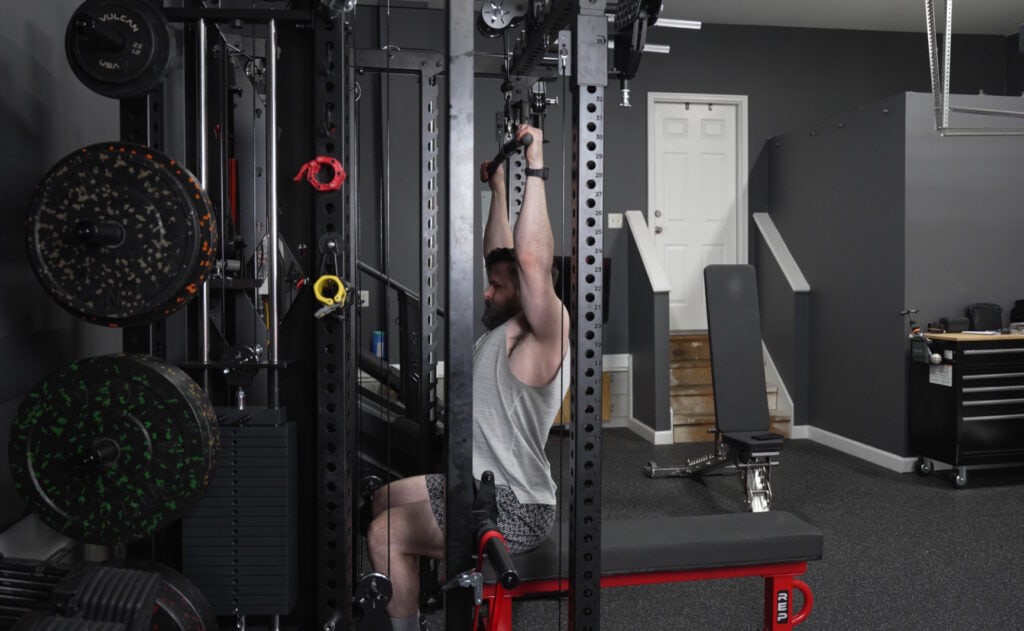
The center lat pulldown station is strong overall. The resistance is good because you’re typically using both upper pulleys together. The cable feel is smooth.
The main questions are range of motion and how to hold your legs down.
For reference, I’m 5’11”, but I have about a 6’4” wingspan and a relatively long torso. For lat pulldown purposes, I’m probably closer to an average 6’1” lifter with normal proportions.
With Force USA’s included banana clip, I can just barely get full extension at the top using a standard wide-grip lat pulldown bar while sitting on a 17” flat bench.
If you’re average height or shorter, you should have plenty of range of motion. But if you’re tall or long-armed, the banana clip setup may eat into your stretch at the top.
The best setup I’ve found is to connect both upper cables with a single carabiner, then attach a swivel snap shackle to that carabiner.
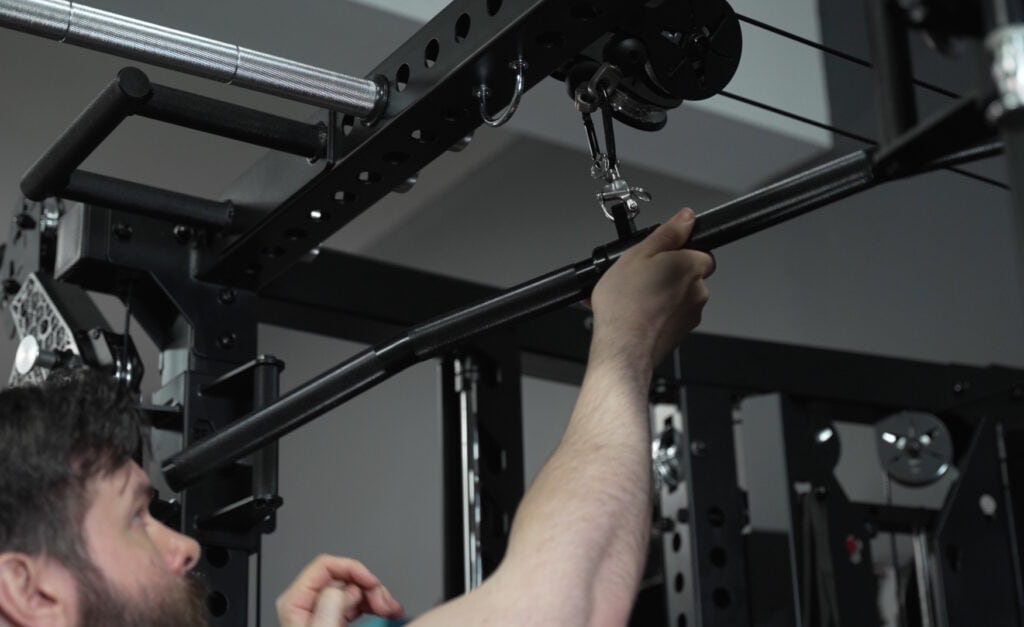
This lets the attachment orient correctly, so you don’t get weird twisting if your attachment connection point isn’t facing the perfect direction. It also reduces the length between the cable ends and the attachment.
Compared to Force USA’s included banana clip, this setup saves just over 3 inches of range of motion.
That’s a meaningful difference. With this setup, I can get a full stretch and then some with a wide lat pulldown bar on 17” flat bench. Even with a close-grip attachment, which hangs lower and reduces available ROM, I still have about 3 inches of clearance left.
If you’re tall or just want the cleanest setup, I strongly recommend the carabiner plus swivel snap shackle approach.
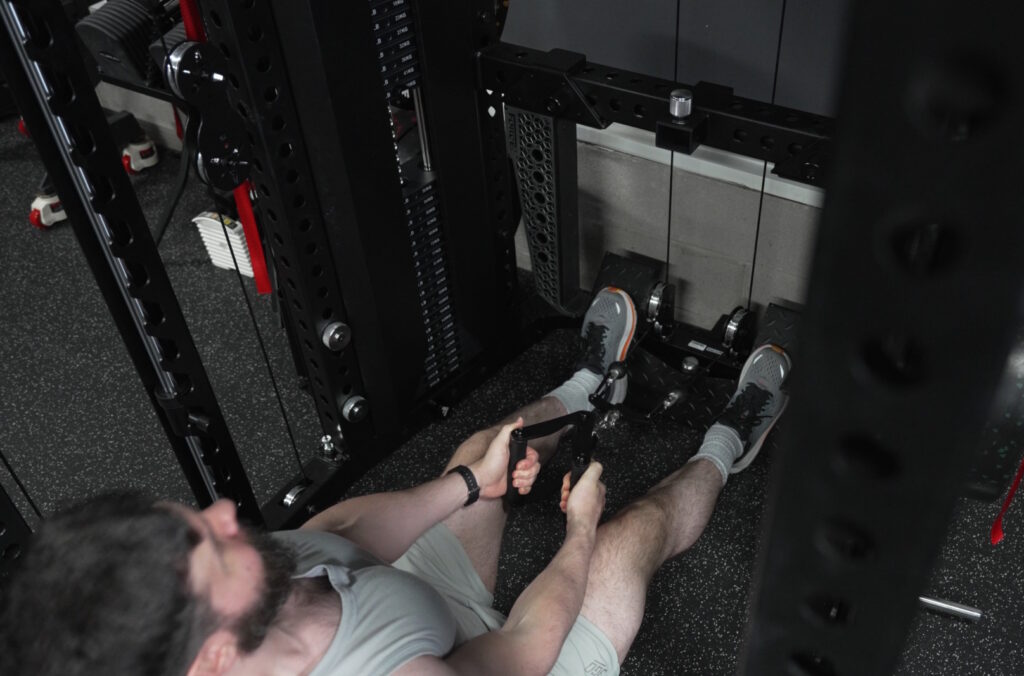
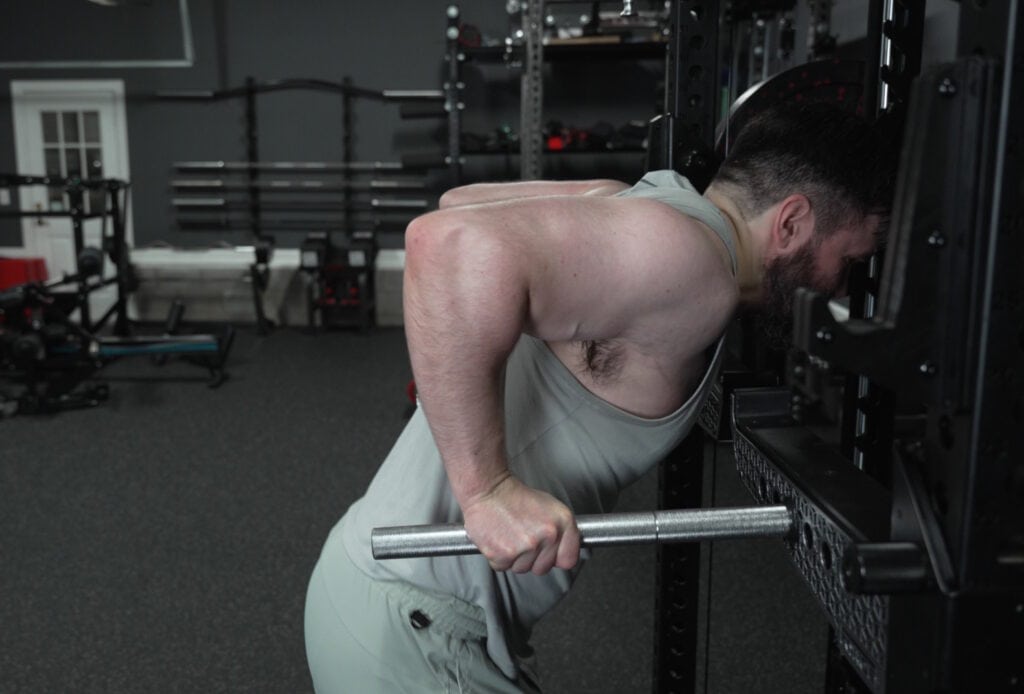
Lat Pulldown Leg Holder Setups
For most of the time I’ve owned the C20, Force USA did not have a dedicated leg hold-down solution for the center lat pulldown station.
But if you’re doing pulldowns with any real weight, you need some type of solution to keep your butt on the seat and your feet on the floor.
I tested several solutions: the Smith machine with plates, the Smith machine with ratchet straps, utility handles with the foam pad, REP leg rollers, and the Rogue hip thrust pad…
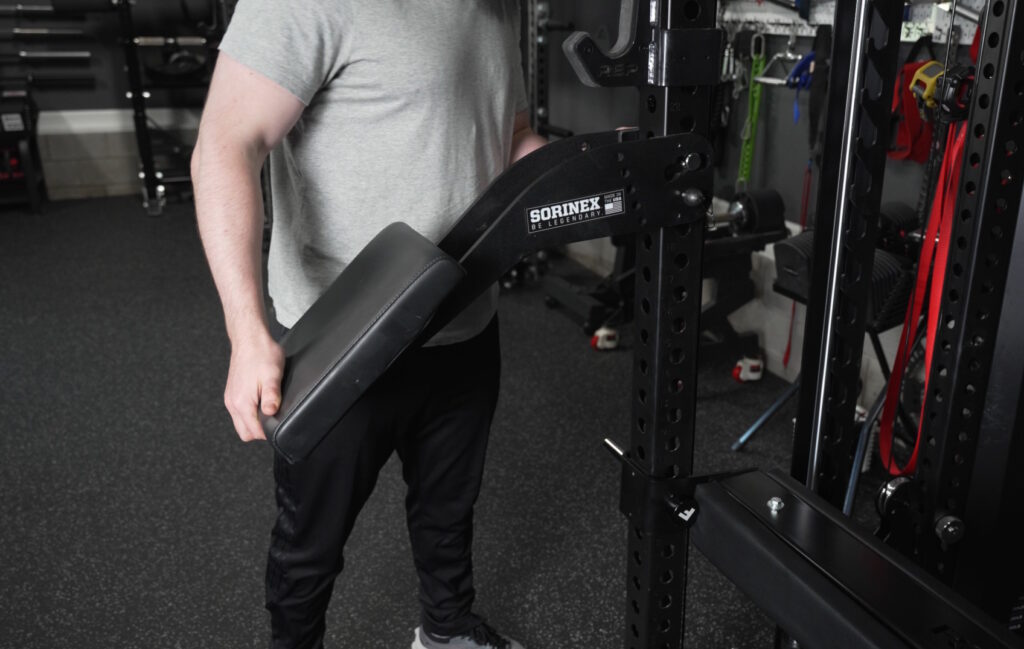
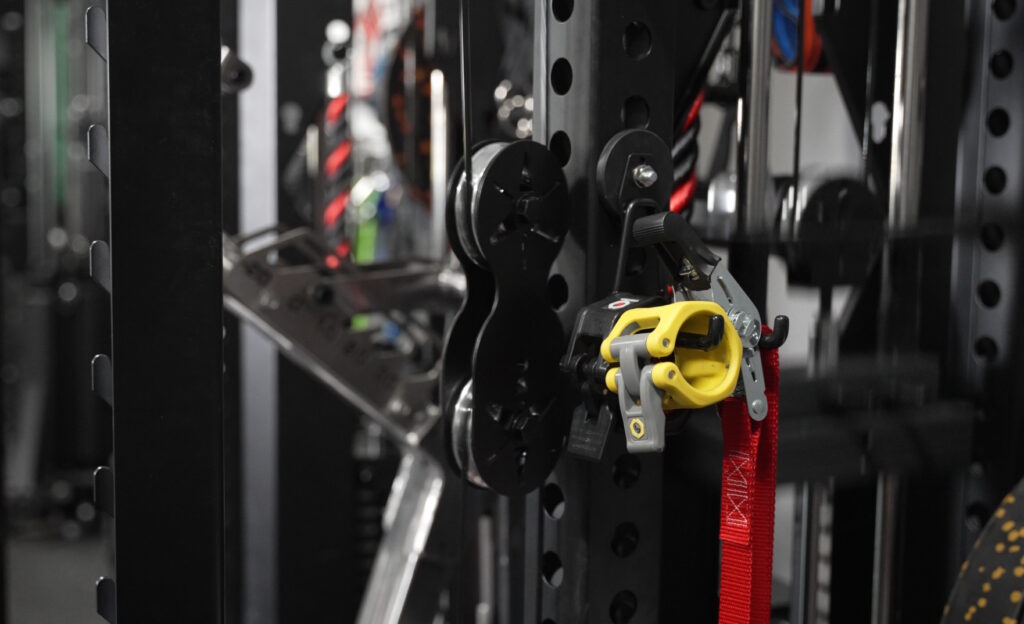
…And then after months of using the C20, Force USA finally released their swivel seat attachment. On paper, it was supposed to solve the leg hold-down issue.
It’s a seat with an integrated leg holder mounted on what is basically a spotter-arm-style attachment. You mount it to the rack at the desired height, then rotate the seat depending on whether you’re doing pulldowns from the center station or from an articulating arm.
For lighter to moderate weights, it works. But the problem shows up when the weight gets heavier, especially around bodyweight.
Under heavier upward force, the seat can lift up. It’s not moving several inches, but it certainly moves enough that you feel it. It does not feel as stable as I want a leg holder to feel during heavy pulldowns.
The issue comes down to how it mounts. The top pin goes all the way through the upright and is secured on the opposite side with an adjustable knurled nut. The lower pin is shorter and only goes partway into the upright, so it can’t be secured on the opposite side.

That lower, unsecured connection point allows slight upward movement under load. If the lower pin were designed like the top pin and went all the way through with a nut on the other side, I think this attachment would be much better.
As it is, I can’t recommend the swivel seat as the best leg hold-down solution for heavier lat pulldowns. It’s frustrating because it’s close to being a great solution.
Storage is another issue for the swivel seat. It doesn’t stand upright well on the floor, so you usually have to prop it up against the wall or lay it on the floor. There also isn’t an obvious compact way to store it on the C20 itself. You can mount it on a middle upright without interfering with Smith machine use, but it will be in the way of weight storage if you leave it there (you can still add/remove plates from the pegs, but you’d have to walk around the seat every time).
In my gym, I’m able to store it on a spare upright on my Rogue storage system, and it doubles as a place to sit between sets. But obviously, not everyone will have that option.
DIY Lat Pulldown Leg Holder Setups
The first DIY leg holder I tried was using the Smith machine bar with added plates.
Force USA includes a long foam pad that wraps around the Smith bar. You set the Smith bar at the right height, add the foam pad, load enough plates onto the Smith sleeves to keep the bar from moving, sit on a bench, and slide your legs under the padded bar.
This setup is effective once it’s ready. It holds you down securely and positions you with a very vertical line of pull.
The problem is setup effort. For me, I had to load about 130 pounds per side onto the Smith machine to keep it fully in place. That’s a lot of plate loading just to do lat pulldowns.
The better version is using ratchet straps instead of plates.
For this, I set the Smith bar at the right height, wrap the foam pad around it, loop ratchet straps around the Smith sleeves, and anchor the straps down to the lower band pegs. Then I crank the ratchet a couple times to remove slack.
This is much faster and easier than loading plates, and it holds the bar down extremely well. It’s by far my preferred leg hold-down method for the C20.
One extra benefit of using the Smith bar is that you can fine-tune the height. You can rest the bar either on the hooks or on the safety catches. Since those positions are slightly offset, you effectively get more height options than you would from one set of increments alone.
Another DIY solution is using the utility handles as leg holders. You mount them sideways on the front uprights, set them at the same height, and wrap the foam pad around them. Then you sit on a bench and scoot forward so the padded handles press near the crease of your hips.
This setup is relatively quick and uses parts that already come with the Force USA C20. It holds you down well, but the line of pull is not quite as vertical as the Smith bar method.
I also tried using my REP leg rollers in a similar setup, but they were too short. They only contacted part of my thighs and didn’t hold me down effectively.
The Rogue hip thrust pad also works as a lat pulldown leg holder. You mount it between the front uprights with the cushion side facing down. It is comfortable, extremely stable, and gets you close to a vertical line of pull.
The downsides are that it’s expensive if you don’t already own one, and you have to scoot all the way forward to get into the right position.
This setup also confirms that certain Rogue attachments that span a 49-inch rack width can work well on the C20.
Overall, my favorite leg hold-down solution is still the Smith bar with ratchet straps. It is secure, cheap, faster than loading plates, and gives the best line of pull.
The Rogue hip thrust pad is also excellent if you already own it. The utility handle setup is a good free option using included C20 parts.
If Force USA fixes their swivel seat, which they’ve told me they’re in the process of doing based on my feedback, then it should eventually be the best overall recommendation. But until then, I think you should use one of the DIY setups.
Storage
The Force USA C20 has a built-in pegboard-style accessory storage area, and overall, it works well.
You can move the included storage pegs into different slots depending on what attachments you use most. There’s enough room for the basic attachments that come with the unit, and there are also extra peg slots on the weight stack shrouds for additional storage.
The only thing I would change is the tip diameter of the storage pegs. I wish the ends were narrower so you could hang certain attachments directly on them without needing a carabiner.
Under the pegboard, there’s a storage shelf for overflow items or anything that doesn’t hang well.
I also added some cheap magnetic hooks and hangers from Amazon to increase storage density. The C20’s steel frame gives you a lot of places to add magnetic storage, especially around the shrouds and uprights.
Just be careful with the hooks you buy. I scratched part of my rack finish by dragging magnetic hooks with sharp, unprotected backs across the frame. That will mess up any rack finish and it was definitely a dumb mistake on my part. But… you live and you learn!
The Force USA C20 also includes a single barbell storage hook that mounts on either rear upright. It lets you store a barbell vertically behind the machine and has a protective plastic insert to help prevent scratches on your barbell sleeve.
Cube-Style Shrouding
One design detail I like aesthetically is the cube-style shrouding on the upper crossmembers, articulating arms, and spotter arms.
It gives the C20 a more finished, premium look compared to a plain rack frame.
The tradeoff is that those upper crossmembers don’t have the standard 1-inch holes with 2-inch spacing you get on the front uprights. That limits your ability to use those areas for hitch pins, band pegs, or other storage hacks.
It’s not a major issue, but it is a style-versus-function tradeoff. The shrouding looks good, but it removes some modular utility from the upper frame.
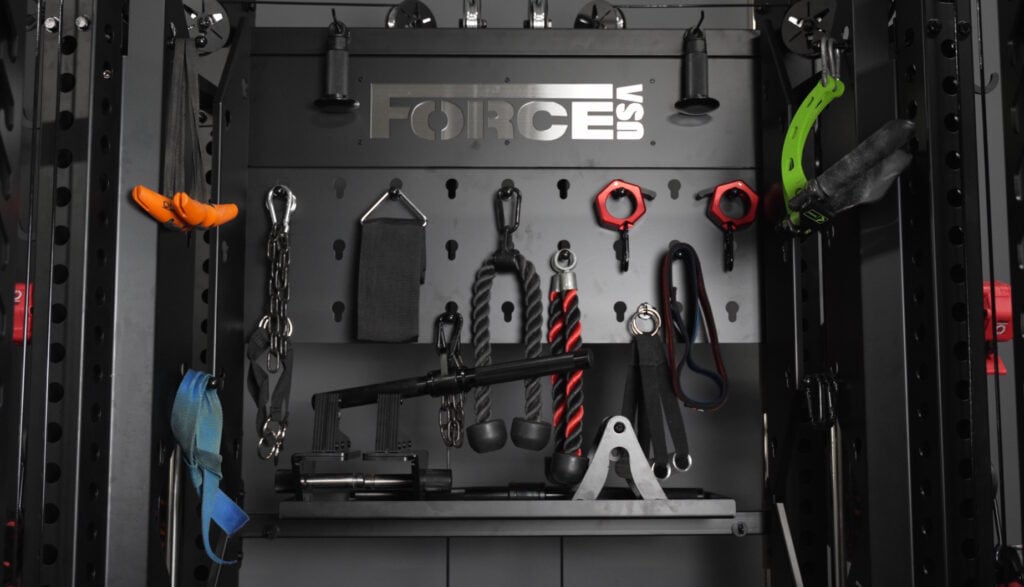
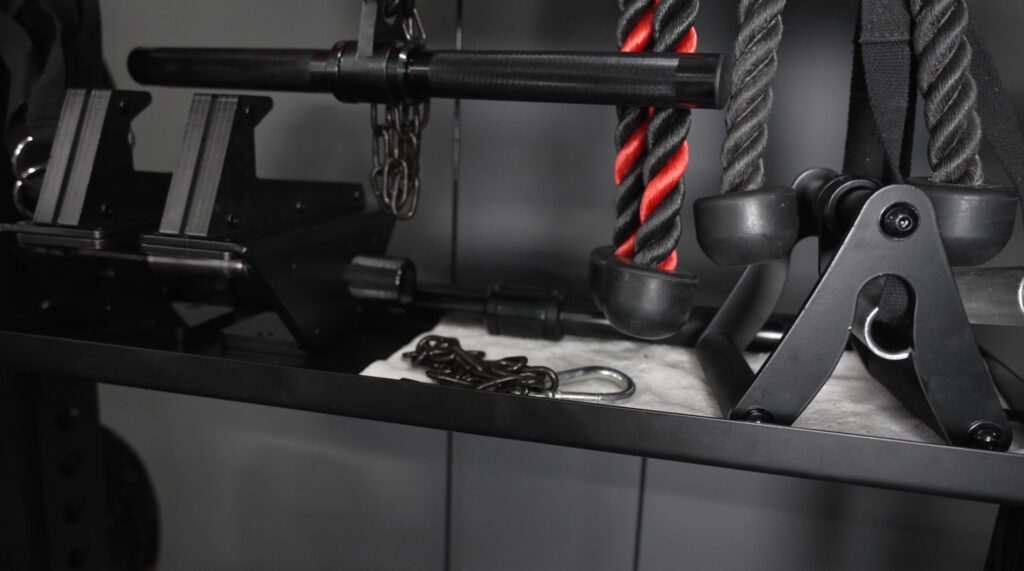
Included Cable Accessories
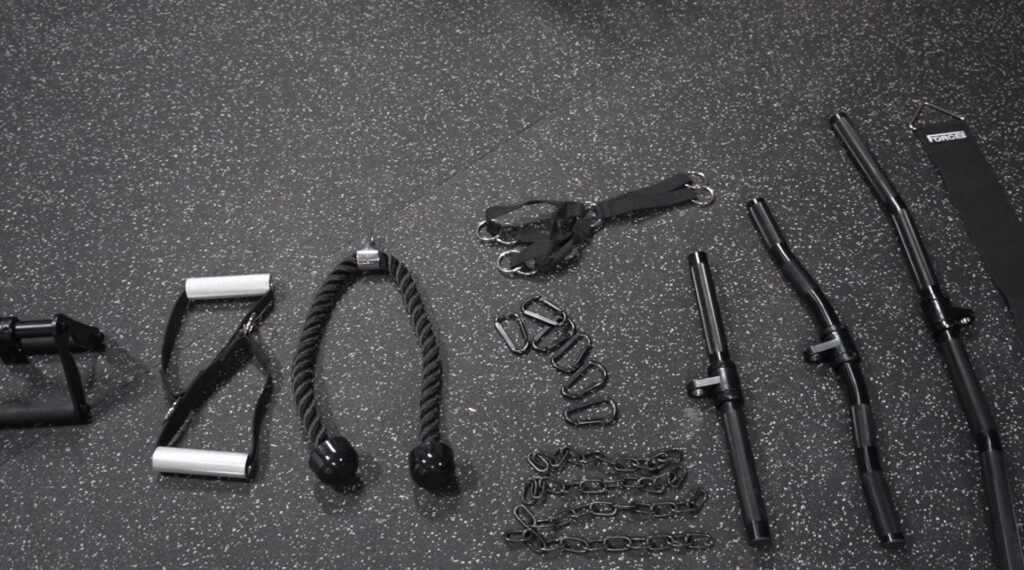
The Force USA C20 comes with enough cable attachments to get started:
- Short Straight Bar
- EZ Curl Bar
- Lat Pulldown Bar
- D-Handles
- Dual Cable Connector
- Tricep Rope
- Close-Grip Bar
- Ankle Cuffs
- Bodyweight Assisted Strap
- Extension Chains
- Oval Carabiners
These cover all the main cable movements.
In terms of quality, they’re fine, but not exceptional. They’re not the kind of attachments I’d buy individually as premium upgrades, but they are useful and good enough to start training right away.
One thing I do like is that many of them are aluminum. Normally, steel attachments can feel more premium, but aluminum has a practical advantage here because it’s lightweight.
Heavy attachments can sometimes pull slightly on the cable and raise the stack, especially when hanging from a high pulley. Lighter aluminum attachments reduce that issue and are easier to handle.
The included D-handles are lightweight, aluminum, knurled, and despite being so simple, are very enjoyable to use.
The EZ curl-style bar is usable, but I wish the knurling continued through more of the grip area. There’s a small gap where I’d prefer more texture.
The close-grip handle is heavier-duty steel. I’d mostly use it for rows, though it can also be used for pulldowns.
The triceps rope is just okay. I wish the ends were more rubberized than plastic-feeling. That would make it feel better.
The ankle straps are honestly pretty bad. Confusing to use and very cheap. Luckily, I never use any ankle attachments anyway.
One other accessory worth pointing out is the assisted dip and pull-up strap. You connect it between the pulleys and select how much weight assistance you want. It lets you use the cable system to offset part of your bodyweight. Pretty useful tool to have if your training calls for it.
All the other cable attachments don’t have much to remark on.
Weight Plate Storage
The Force USA C20 includes eight weight plate storage horns.
That gives you plenty of built-in plate storage, and you can choose where to mount the horns based on your layout and plate sizes.
Functionally, the horns are fine. My biggest issue is the finish. Like the Smith sleeves, the weight horns scratch too easily.
I’d like to see Force USA improve these with a better coating. Urethane-coated horns would feel more premium, but even a more durable powder coat would be an improvement; or chrome or cerakote as was my suggestion for the Smith sleeves.
Another small detail is that the weight horns can leave slight ring marks where they contact the uprights. Most people probably won’t move the horns around often, but if you change your plate storage layout, those marks could be visible. A protective lining on the side that contacts the upright would help.
I also had a quality control issue with the weight horns early on. Four of the eight horns could spin slightly even though the bolts were fully tightened.
The horns use a single-bolt mounting design. I like that in theory because it uses fewer holes on the upright. A two-bolt design would likely prevent rotation more effectively, but it would also take up more rack holes.
The downside of a single-bolt design is that if tolerances aren’t right, you can get rotational play.
Force USA replaced the affected horns, and the replacements are now properly secured.
Price
The C20 is expensive.
At the time of this review, it sells for $6,500 with the standard options, or just under $6,200 if you use my code (KING5).
That’s a lot of money. I would not recommend going into debt for it, and I also wouldn’t recommend buying it unless you know you’ll actually use most of the main stations.
The C20 makes the most sense if you’ll regularly use the articulating arms, Smith machine, center pulley system, low row, rack, and included attachments.
If you only care about one or two of those features, it may be hard to justify the cost.
But if you’ll use the full system, the value equation starts to make more sense because you’re getting a lot of training functionality in one footprint.
Who Should Buy the Force USA C20?
The Force USA C20 is a good fit if you want one main training system that can handle most of your resistance training.
It makes the most sense for:
- Bodybuilding-style training
- General strength training
- Home gym owners who want a lot of cable options
- Lifters who want a Smith machine and functional trainer in one system
- People who want an all-in-one setup out of the box rather than building a fully modular rack piece by piece
- Buyers who care about heavy weight stacks
It is especially strong if you train with a lot of cables. The articulating arms create angles and setups you don’t get on standard rack-mounted functional trainers, and the center pulley system gives you real resistance for heavy pulldowns and rows.
And of course, if you also want to take advantage of the innovate Sliding Bench, the C20 allows for that.
Who Should Not Buy It?
The C20 is probably not the best fit if you mostly care about traditional barbell lifts.
If you only squat, bench, deadlift, and rarely use cables or Smith machine work, you can save a lot of money with a dedicated power rack.
It’s also not ideal if you want maximum modularity across the entire rack. The front uprights are compatible with many third-party attachments, but the C20 is still a purpose-built all-in-one system. You don’t get the same full-rack customization you’d get from a more modular platform.
My Rating
Force USA C20 All-In-One Trainer

The Force USA C20 is a premium all-in-one home gym trainer built around a 3x3 flat-foot rack with 1-inch holes, dual selectorized weight stacks, articulating functional trainer arms, an integrated Smith machine, center lat pulldown and low row stations, pull-up handles, dip handles, landmine, plate storage, and built-in accessory storage. It supports heavy cable training with optional 300-lb stack upgrades, offers strong third-party attachment compatibility on the front uprights, and can be expanded with Force USA’s Sliding Bench for leg press, hack squat, leg extension, leg curl, and preacher curl functionality. Stable, highly versatile, and designed as a complete training system, it’s best suited for bodybuilding, general strength training, and home gym owners who want maximum exercise variety in one footprint.
4.7
Pros
- Extremely versatile all-in-one trainer
- Highly versatile articulating functional trainer arms
- Smooth cable feel
- Heavy 300 lb stack upgrade available
- Center cable system for heavy lat pulldowns and low rows
- Smooth Smith machine with great low-end ROM
- Stable, heavy, planted rack frame
- 3x3 uprights with 1-inch holes
- Some third-party attachment compatibility
- Convenient built-in storage
- Compatible with the innovative Sliding Bench
Cons
- Smith sleeves scratch too easily
- Weight horn finish scratches too easily
- Optional swivel seat lifts up on heavy pulldowns
- Low row footplate can interfere with stored spotter arms
- Smith safeties lack numbered height markings
- QC issue with my weight horns (fixed)
- Expensive, especially with upgrades
Final Verdict
After six months of training on the Force USA C20, I genuinely like it.
It’s now the main rack I use in my gym.
The articulating arms are the biggest highlight. They make cable training much more flexible than a standard fixed-pulley setup. The Smith machine is also excellent, especially because of its smooth travel and low-end range of motion for RDLs.
The center pulley system gives you strong lat pulldown and low row capability, and the upgraded 300-pound stacks make the machine feel much more capable for heavy training, including heavy leg work if you opt for the Sliding Bench.
The C20 also feels stable, sturdy, and generally well built. It does not feel like a flimsy all-in-one trainer.
But it needs some refinement.
The Smith sleeve and weight horn finishes should be better. The optional swivel seat is close to being great, but the lower pin design causes unacceptable lifting under heavier lat pulldowns. The low row footplate and rear crossmember setup creates a workflow issue if you store your spotter arms there. The articulating arm carriages would be better with rollers. And the Smith machine should have etched height numbers for easier safety alignment.
Those issues don’t ruin the machine, but they’re real.
Overall, the C20 is a strong choice if you want a serious all-in-one trainer for bodybuilding, cable-heavy training, and general strength work. It’s not cheap, and it’s not perfect, but if you’ll actually use the major stations regularly, it can replace a lot of separate specialty equipment and become the centerpiece of a home gym.
For me, that’s exactly what it has done.
If this review helped you decide to go ahead and buy the Force USA C20, consider using my link and coupon code below to save 5% and also support the work I do at King of the Gym, both here on site and on my YouTube channel:
Use Code KING5 for 5% OFF – Force USA C20 All-In-One Trainer »